Category: Free Crochet Patterns
Free crochet patterns for beginners. Learn to crochet garments and accessories.
Each pattern has been professionally designed, tech-edited and tested by crocheters on Ravelry!
If you’re looking for simple crochet garments to make as well as easy crochet gifts and delicate shawls, you’ll find a range of crochet patterns here. On this blog you’ll also find crochet gift guides and how-to-crochet tutorials.
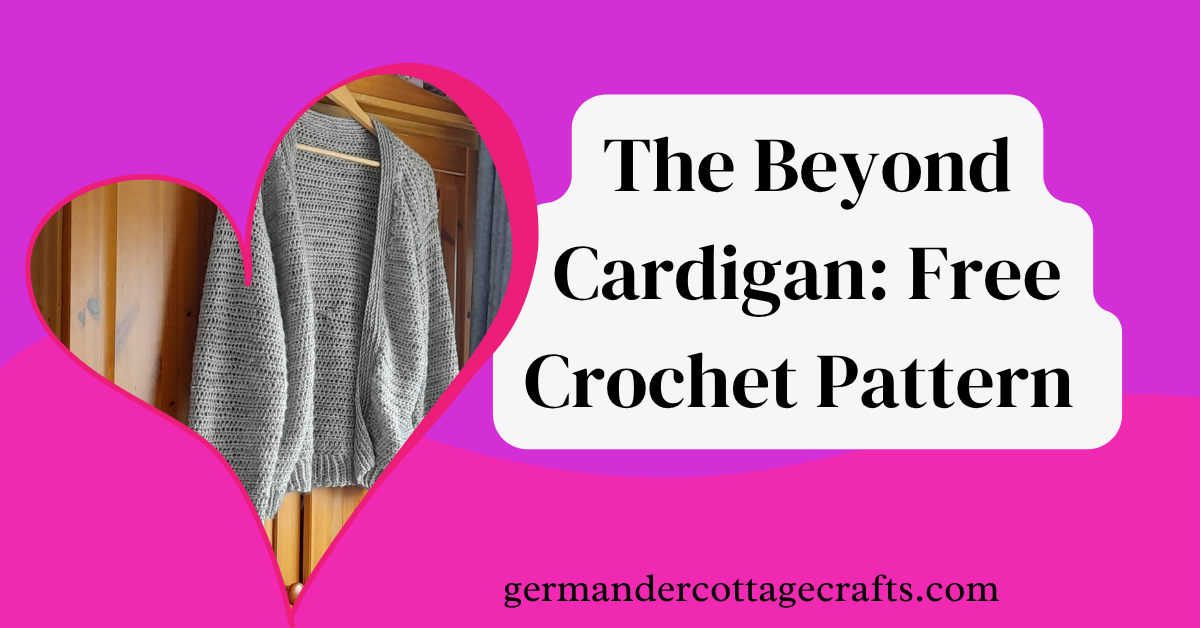
Free crochet cardigan pattern: Beyond
Crochet the Beyond cardigan, a quick and easy garment constructed with half double crochet. Free crochet pattern.
Written by
The Breeze Crochet Cardigan. Simple V stitch crochet cardigan in worsted weight yarn.
Here’s a free pattern for a worsted weight crochet cardigan. Crochet the Breeze cardigan in a few hours thanks to the breezy V stitch!
Written by

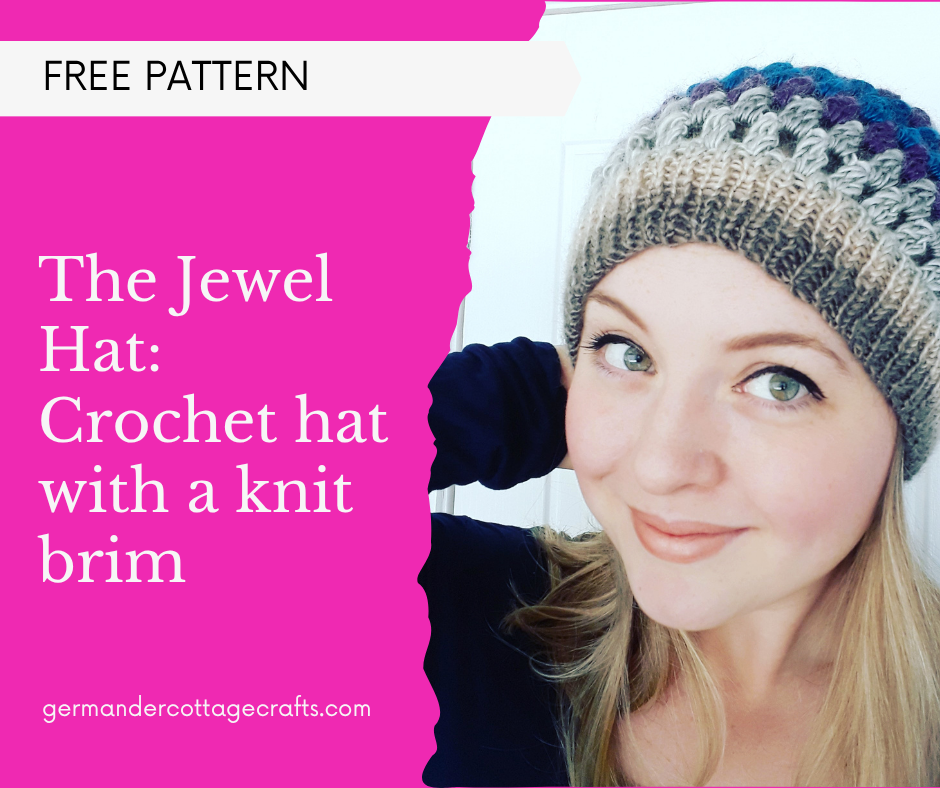
Patterns that combine knitting with crochet: the Jewel Hat Pattern
The Jewel hat falls under the categories of both knitting and crochet as it contains both techniques and it really does have the best of both worlds. You can mix crochet and knitting with the Jewel hat pattern and crochet this slouchy beanie with a crochet body and knit brim. Get the best of both…
Written by

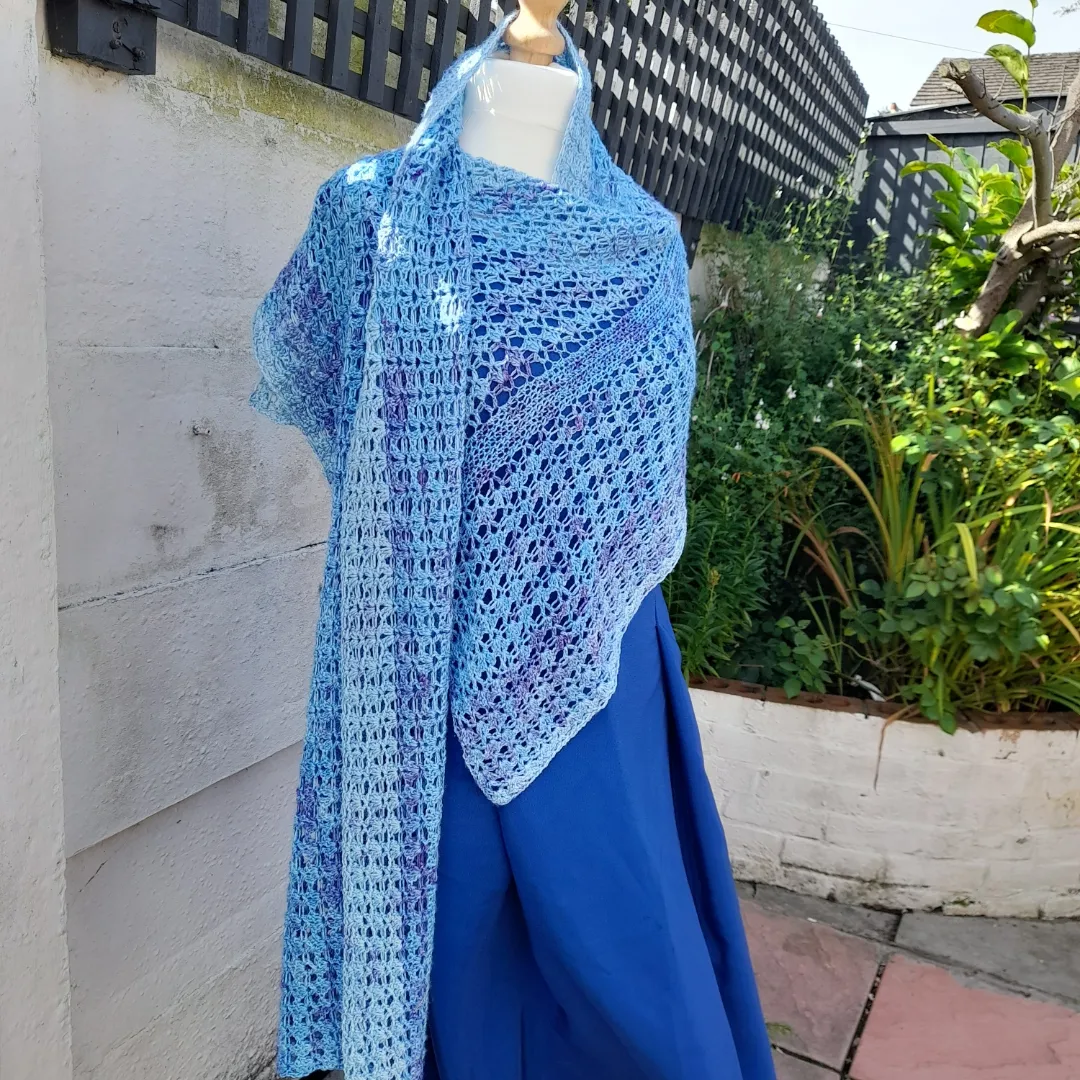
Crochet Shawl Pattern: The Daphne Shawl.
Learn how to make this elegant, openwork shawl. This is a free crochet pattern for a half-circle shawl. It’s an intermediate pattern.
Written by

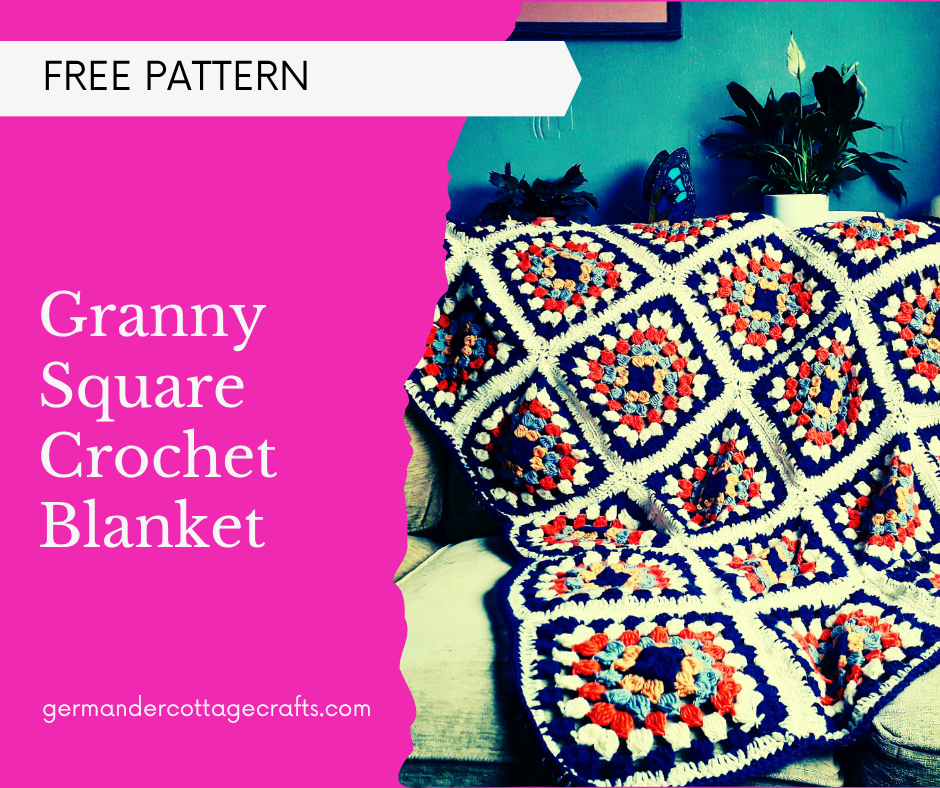
Free Beginner Granny Square Blanket Pattern
Crochet this beginner granny square blanket with a soft DK yarn for extra cosiness. I’ve used Cygnet Pure Wool Superwash DK for my granny square blanket as it is soft, durable and feels lovely in a blanket. In this article, I will guide you through making your first ever crochet blanket! Please note that I am…
Written by
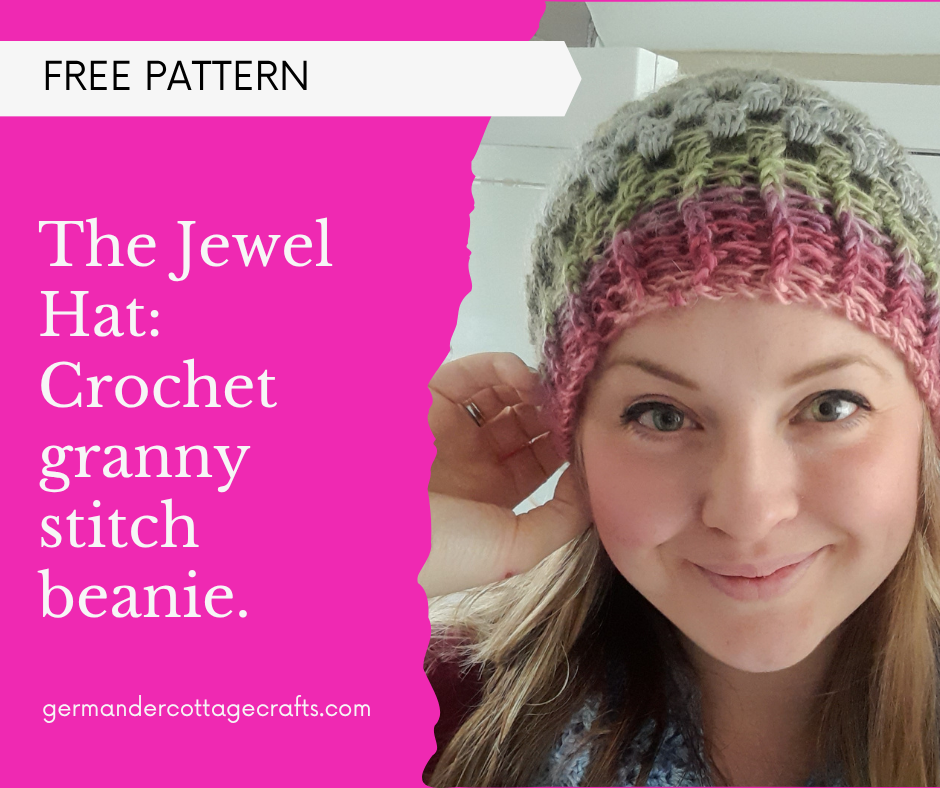
The Jewel Hat: Crochet Beanie Granny Stitch Pattern.
Jewel hat crochet beanie (100% crochet version) This is the little sister of the Jewel Hat, with the main difference being that the hat is 100% crochet construction. FpHdc and BpHdc create a ribbed brim and bobble stitches create clusters of jewel like shapes across the hat. Add a pom pom for extra enjoyment. If…
Written by
The Jewel Hat: Crochet Granny Stitch Beanie With A Knit Brim.
The Jewel hat is a crochet granny stitch beanie with a stretchy knit brim. If you don’t knit at all, there’s a crochet only version of this hat here. If you’d like to try this version, you can find the pattern below. If you’d prefer the ad-free PDF it is also available on Ravelry here.…
Written by
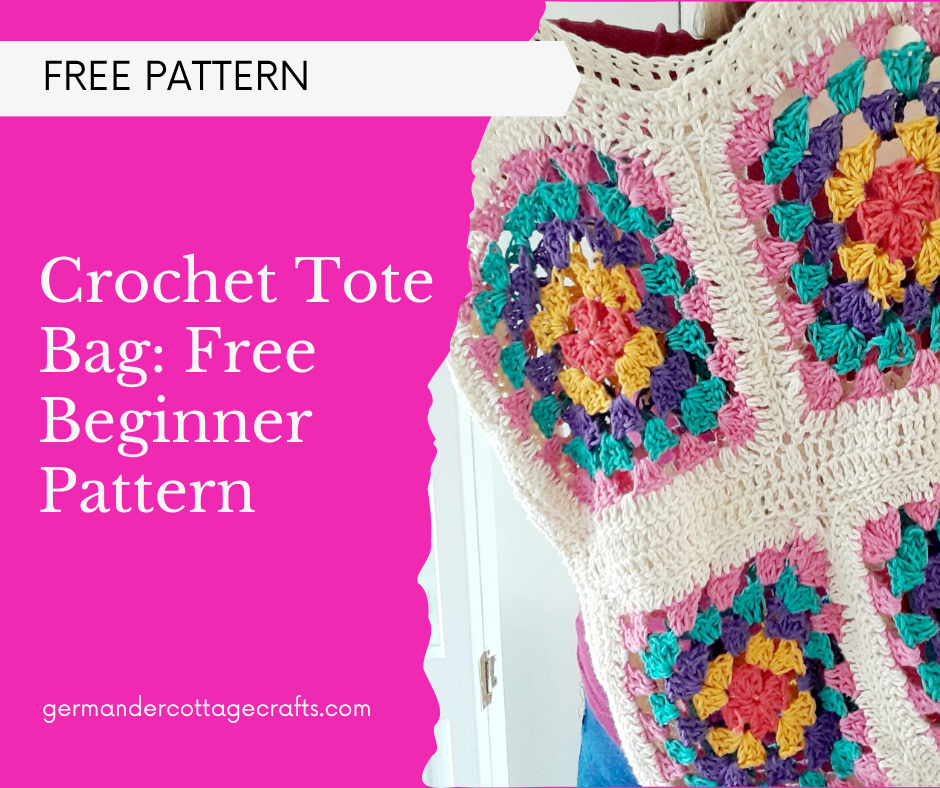
Totes Crochet Bag. Free Granny Square Tote Bag Pattern.
If you love granny squares and functional crochet, here is a pattern for a simple crochet bag that uses joined up granny squares. This is a free pattern for a crochet tote bag. Can a beginner make this crochet bag? Here’s a quick skill check: You should be able to: Totes crochet bag The Totes…
Written by
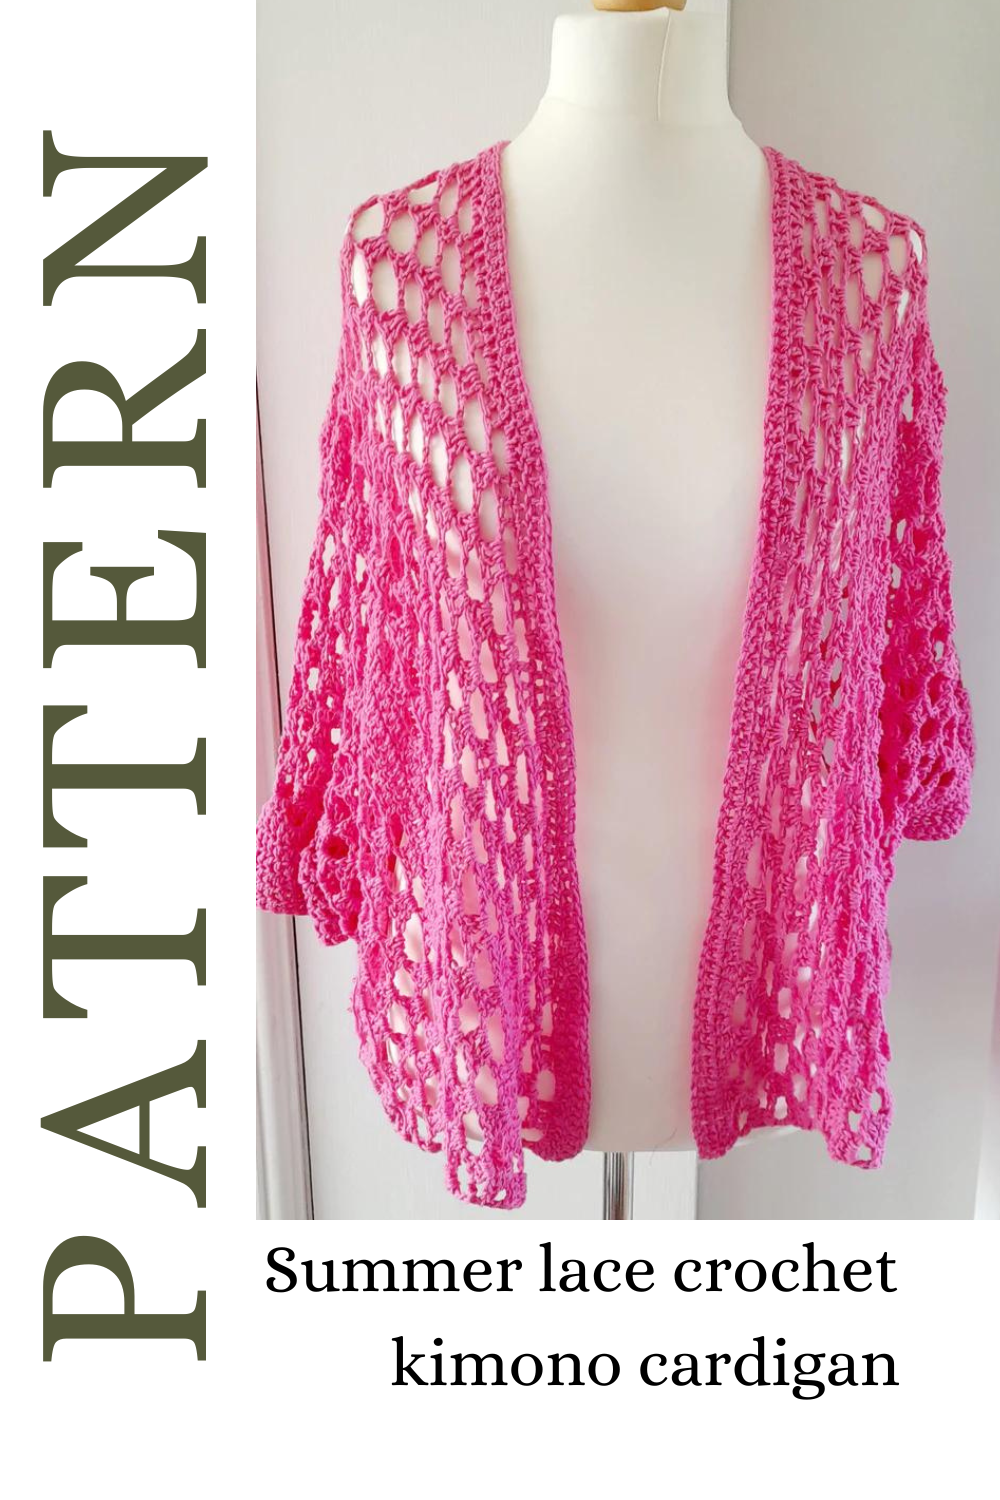
Summer crochet cardigan pattern. Mesh stitch crochet cardigan.
Here’s a simple summer crochet cardigan with lace openwork and mesh stitch detail. This simple kimono sleeve cardigan is quick to make in cotton yarn. if you’d prefer to download the ad-free pdf of this pattern, you can do so on Ravelry or Ko-Fi. This article contains affiliate links, meaning that if you choose to…
Written by
Titania crochet shawl pattern. Free crochet shawl pattern.
The Titania shawl crochet pattern is an elegant, lace wrap using 4ply yarn and V stitch to create that airy, lace fabric and elegant drape. This is a free crochet shawl pattern but if you would prefer a PDF with no ads, you can get one from Ravelry or Ko-Fi. This article contains affiliate links.…
Written by