Tag: beginner crochet

  • Totes Crochet Bag. Free Granny Square Tote Bag Pattern.

    Totes Crochet Bag. Free Granny Square Tote Bag Pattern.

    Free crochet tote bag pattern. Free corchet granny square pattern for beginners. Crochet a bag.

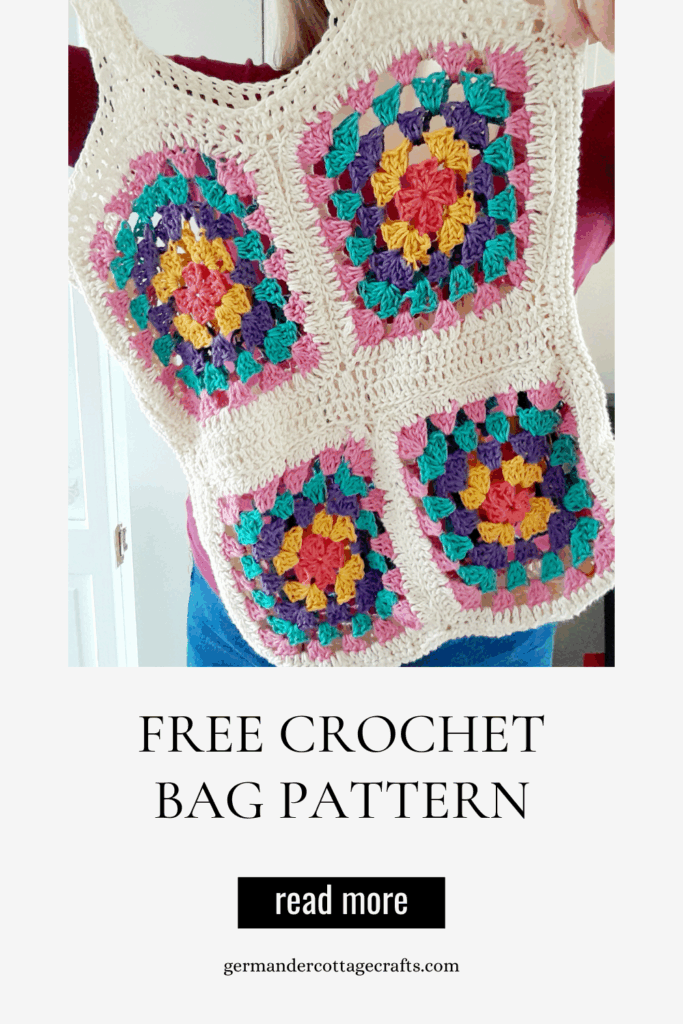
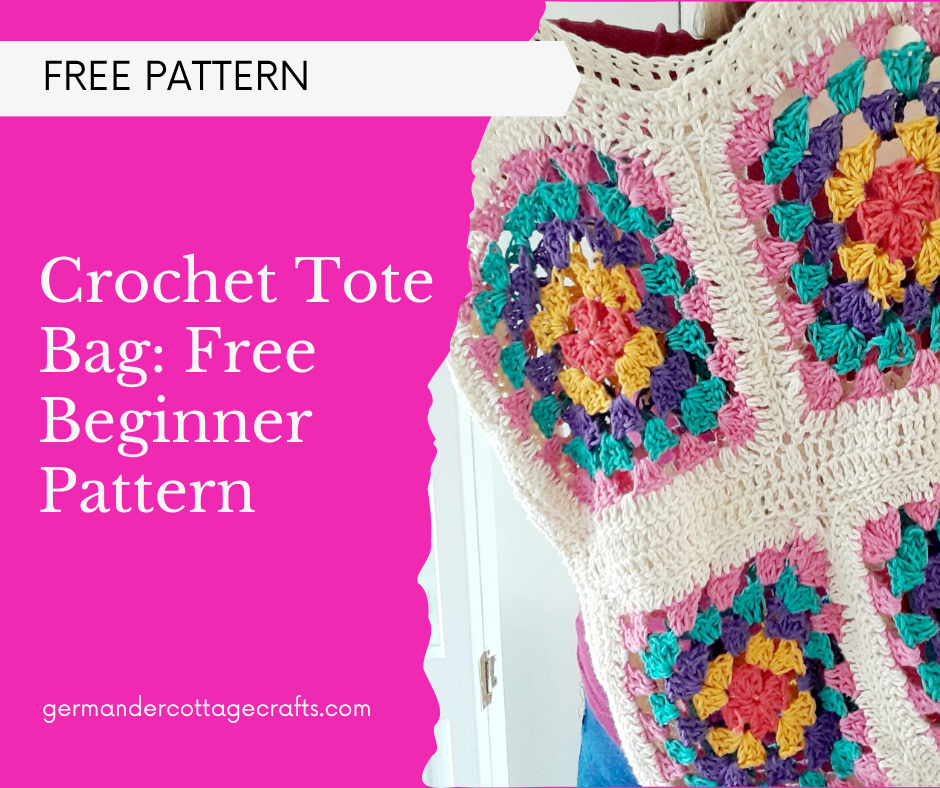
    If you love granny squares and functional crochet, here is a pattern for a simple crochet bag that uses joined up granny squares. This is a free pattern for a crochet tote bag.

    Can a beginner make this crochet bag? Here’s a quick skill check:

    You should be able to:

    • Make a chain.
    • Make the basic crochet stitches e.g. double crochet and single crochet. If you need help with your crochet terms, I have a guide here.
    • Make a granny square. Here’s a free tutorial if you’re not sure how to crochet a granny square.
    • Join granny squares. Here’s how.

    Totes crochet bag 

    The Totes crochet bag is a simple design for a crochet bag. This is a pattern for a simple cotton crochet tote bag using granny squares and a combination of slip stitch, double and single crochet. 

    Use this crochet bag for anything. The straps will be worked continuously rather than sewn on for added strength. 

    Materials: 

    • 1 4mm crochet hook
    • Cygnet 100% Cotton DK (100g per ball): 1 x Smokey Purple, 1 x Pepper, 1 x Peony Pink, 1 x Golden, 1 x Spring, 2 x Vanilla Cream. 
    • Darning needle 

    Here is the link to the video playlist. The videos do not replace the pattern instructions; they are there as support with visualising the project. It is still useful to learn to read the written instructions to develop your skills. 

    I use US crochet terms throughout. 

    Glossary: 

    ChChain. Yarn over and pull through the 1 loop on the hook. 
    Ch spThe space of gap that has been created by stitches. 
    DcDouble crochet stitch: Yarn over, insert hook, yarn over and pull through, yarn over and pull through 2 loops on hook. Yarn over and pull through 2 loops on hook. 
    ScSingle crochet stitch.Insert hook into the chain or stitch, yarn over and pull through. Yarn over and pull through 2. 
    Sl stSlip stitch. Insert hook into chain or chain space, yarn over and pull through.
    RS Right side of the work. 
    WS Wrong side of the work. 

    You can see in the square above where the corners are and how we only increase in corners. 

    Step 1: Granny squares (Make 8) 

    Round 1. 

    1. Using yarn A, ch 4. Sl st to join with the 1st chain. 
    2. Ch 2 and dc 2 times into the centre of the ring. 
    3. Chain 2 and dc 3 times into centre of the ring. (6 dcs in total.)
    4. Repeat last step 2 more times. (12 dcs in total)
    5. Sl st into top of first dc chain to join the round. 

    Round 2: 

    1. Using. yarn B, sl st across top of first 3 dcs to get to the 1st corner ch sp.  Ch 3 and dc twice into ch sp. (3 dcs in total) ch 1 and dc 3 times into same ch sp. First corner done. 
    2. Chain 2 and dc 3 times into next ch sp. Ch 1 and make 3 more dcs into same ch sp. 
    3. Repeat step 2 twice more. 
    4. Sl st with top of 1st dc to close the round. 

    Round 3

    1.  Using yarn C, sl st across top of first 3 dcs to get to the 1st corner ch sp.  Ch 3 and dc twice into ch sp. (3 dcs in total) ch 1 and dc 3 times into same ch sp. 
    2. Ch 2 and work 3 dcs into next ch sp to corner ch sp
    3. Ch 2, 3dc in next ch sp, ch 1 and make 3 more dcs into same ch sp.  
    4. Repeat step 1 and 2 to end.  
    5. Sl st with top of 1st dc to close the round.

    Round 4 and 5: 

    Changing colours (Yarn D and E) at the beginning of each round, work instructions for round 3, 2 more times until you have 5 completed rounds in total. 

    Border: 

    Using Vanilla Cream (Yarn F) join new yarn  and work 1 dc into the top of every dc stitch, and 2 dcs in every ch sp to end. Sl st to close round. 

    Assembly: 

    The squares are joined in pairs and then as fours after some distancing with dc stitch. 

    Panels (Make 4) 

     With RS together and yarn F, Sl st to join across one side from the top right corner to the top left corner.

    Dc in every dc for two rows across the top of each panel. 

    Joining panels. 

    With RS facing, lay the upper panel facing the lower panel. The lower edge of the upper panel should be in line with the upper edge of the top panel. Sl st across to join. The dc rows will now be in the centre and across the top of the bag. 

    You will now have two rectangular pieces: The front and the back of the bag. 

    Edges: 

    Vertical (side) edge: 

    With RS facing, sc across all dc sts for 4 rows. 

    Horizontal (bottom) edge: 

    With RS facing, sc across all dc sts for 4 rows. 

    Joining the bag. 

    With RS facing, starting at the top right corner, use sl st joining method to join the vertical seam, horizontal (bottom) seam and back up the left side vertical seam. 

    Straps (make 2)

    Using removable stitch markers or safety pins , mark 5 stitches at the top of the bag that sit in line with the centre of each top granny square on the front and the back of the bag. You need to mark 4 areas of the bag. 

    Using yarn E, join new yarn and dc 5 sts. Ch 2 and turn. 

    Work 39 more rows. 

    Sl st to join with the marked strap area of the opposite side. 

    Repeat for second strap. 

    Weave in ends and enjoy!
  • How to crochet a circle. Crochet circle pattern for beginners. Crochet a flat circle that doesn’t curl or frill.

    How to crochet a circle. Crochet circle pattern for beginners. Crochet a flat circle that doesn’t curl or frill.

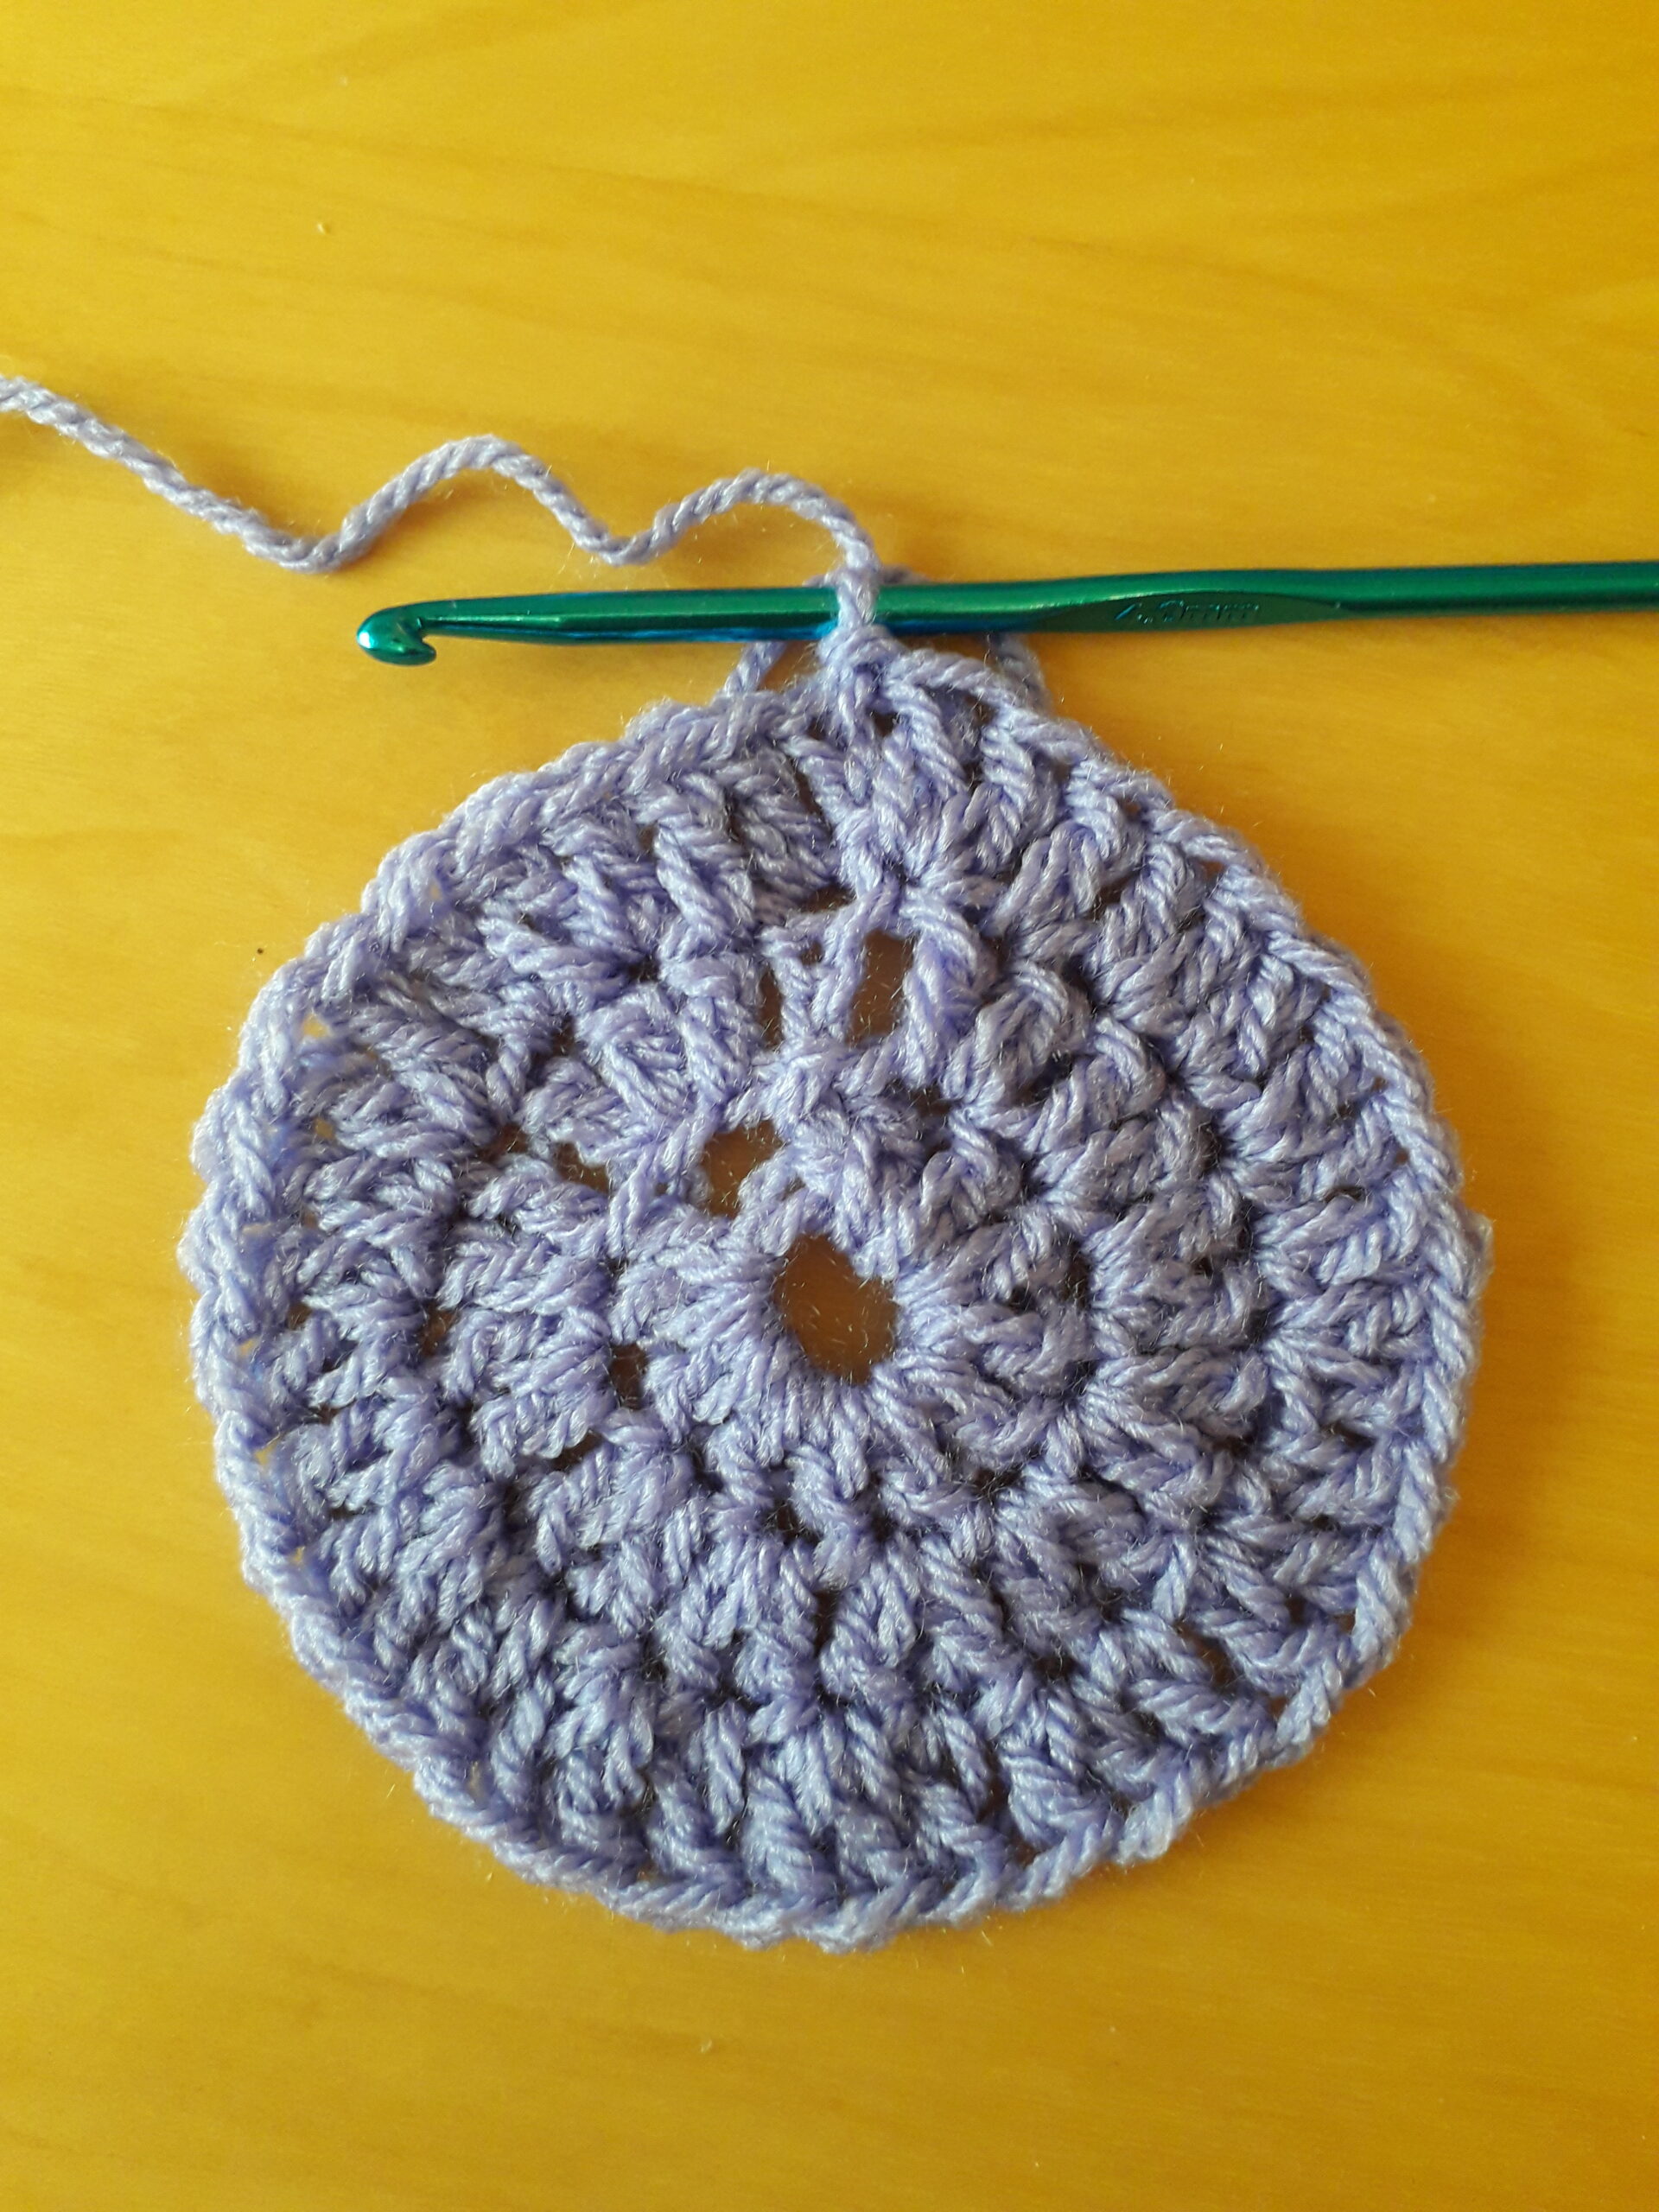
    This is a free pattern for a crochet circle. How to crochet a flat circle 

    Creating your first crochet circle is really tough, especially when you don’t know how to make it bigger or how to make it lie flat. With this pattern I can explain how to:

    1. Start the circle
    2. Increase the circle
    3. Make it lie flat

    Materials required: 

    • 50g/1.75oz of cotton DK yarn such as Cygnet cotton DK (100% cotton, 200m/219 yd per 100g/3.5oz ball) Any DK yarn will do here.
    • 3.75mm/F-5 crochet hook.
    • Scissors 
    • Darning needle

    Terms are written in US crochet terms throughout. Not sure what they are? Here’s a handy blog post explaining US and UK crochet terms.

    It’s so handy to know how to make a crochet circle. They’re not just great for granny square designs but you can also make circles big enough to be place mats, bags or cushion covers. Have fun learning how to make a crochet circle that stays flat!

    When you’re done with the tutorial, I’ve included some fun crochet kits that you can try. They will not only help you to practice the crochet circle, but they will help you learn how to make other useful crochet shapes for home decor and toys!

    Now for the tutorial with step by step photos. Here’s how I make a circle in crochet.

    Step 1: Make a slipknot and make a chain of 6 sts. 

    A crochet hook with a chain of 6 chains.

    Step 2: Slip stitch with the 1st chain (not the slipknot) to create a ring. 

    Step 4: Chain 3 (counts as 1st double crochet stitch) 

    Step 5: Make another double crochet into the centre of the ring. 

    Step 6: Make 10 more double crochet stitches into the centre of the ring. (12 sts in total).

    Step 7: Slip stitch to join the top of the chain 3 to the last dc. First round complete. (12 sts)

    A crochet circle in the first round.

    Next round: 

    A ch3 after the first round of crochet. Crochet a flat circle. This is a demonstration photo.

    Step 1: Chain 3 (counts as 1st double crochet) 

    Step 2: Make a double crochet stitch into the base of the chain 3. (1st increase done)

    The second stitch of the second crochet round when making a flat circle.

    Step 3: Make 2 double crochet stitches into the next stitch.

    Four stitches made for the second round of the crochet circle. Crochet circle tutorial in the round.

    Step 4: Make 2 double crochet stitches in every stitch around. (24 sts) 

    Step 5: Slip stitch with first chain 3 to close the round. 

    Two rounds done of a flat crochet circle. Crochet tutorial for beginners.

    Next round and all subsequent rounds: 

    Every round needs to increase by 12 stitches in order to retain shape and lie flat. 

    Round 3: 

    Start the round in the same way as the previous round but this time, make an increase every other stitch not every stitch. (36 sts)

    Round 4: Start the round in the same way as the previous round but this time, make an increase every 3rd stitch. That means there’s an increase in every 4th stitch. 

    Round 5 and all other rounds: Increase every 4th, 5th and 6th stitch per round. Make sure that the amount of stitches per round has increased by no more or less than 12 stitches

    Why not use your finished circle as a cute mat for plants or a placemat? 

    Crochet circles don’t always sit flat the first time around. here are some possible issues that will arise and how you can fix them:

    Circle starting to resemble an Elizabethan ruff?

    You have too many increases. Check to see whether you have made the appropriate amount of increases. If there are too many, start the round again.

    Circle starting to turn in like a bowl?

    You haven’t made enough increases. 

    Neither of the above solutions working?

    Change yarn and/or hook. It could be a tension issue. Always go up or down by 0.5mm until you reach your desired flatness.

    Email info@germandercottagecrafts.co.uk or visit my Youtube channel for further pattern help. 

    Patterns featuring crochet circles to inspire you:

    Please note, there are affiliate links here. This means that if you choose to purchase, I do receive a small commission at no further cost to you.

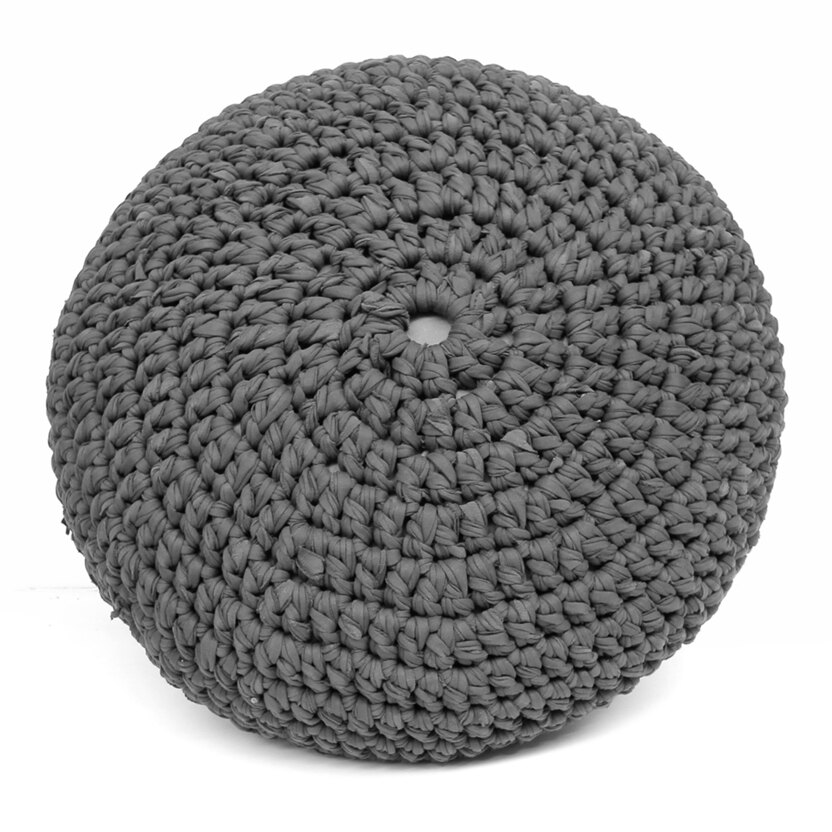
    Hoooked DIY Crochet Zpagetti Pouf Kit. Practice your crochet in-the-round with this quick and comfy Zpagettii pouf. They’ve been around for a while but we’re still loving the look of a knitted  and crochet poufs. Its soft textural shape of Zpagetti t-shirt yarns is both simple and complicated. With this DIY complete kit you can make your own affordable pouf. We have included a pair of jumbo knitting needles and also a crochet hook and both patterns so you can pick your favourite craft technique. This Hoooked knit & crochet set is also great as a creative DIY gift for a special someone. With this complete Hoooked kit you can cover a pouf with a cross section of 65-70 centimeters and a height of 30-40 centimeters.

    Paintbox yarns cotton Aran Daisy The Chick Crochet Kit. Practice your amigurumi skills with this adorable crochet chick kit. If you know how to crochet a circle, you can make cute little stuffed items like this!

    DMC Mindful Making The Peaceful Plant Pot Holders Crochet Kit. This kit will help you crochet a flat circle and also learn how to make it curl up on purpose to create the cylindrical shape perfect for pots, vases and bowls! Give your desk a mindful makeover with these gorgeous crochet plant pot holders.

  • Where to put your hook in crochet. How to crochet for complete beginners.

    Where to put your hook in crochet. How to crochet for complete beginners.

    Have you started reading crochet patterns but you’re not sure where to put your crochet hook? Here I’ll show you where to put your hook in crochet.

    Disclosure: This post may contain affiliate links, meaning I get a commission if you decide to make a purchase through my links, at no cost to you.

    Stitch tutorials on Youtube tend to be standalone videos, meaning they are not about a specific pattern. They show you how to do the stitch at the basic level but if you are looking at a pattern, you’ll find variations of that same stitch. For example, if I am showing you how to do the V stitch, I might do it using double crochet (UK treble) but in a pattern, I may say that the v stitch is made using half double crochet (UK half treble). This changes from pattern to pattern and the designer should always explain how to make the desired stitch if it varies from one of the basic stitches. This is the same for where you are supposed to put your hook. Not all patterns will want you to put your hook under both loops. Some will specify back loop or front loop. 

    I’ll show you where to put your hook when you’re doing crochet. 

    This example is using a half double crochet (UK half treble) piece. This example can be used for any pattern that uses any of these basic stitches: 

     US term UK term 
    Single crochet (Sc)Double crochet (Dc)
    Half double crochet (Hdc)Half treble crochet (Htr)
    Double crochet (Dc)Treble crochet (Tr)
    Triple crochet (Tr)Double treble crochet (Dtr)

    Don’t know what any of these are? Try my basic stitch guide here. 

    Example 1: Hdc stitch not specified. 

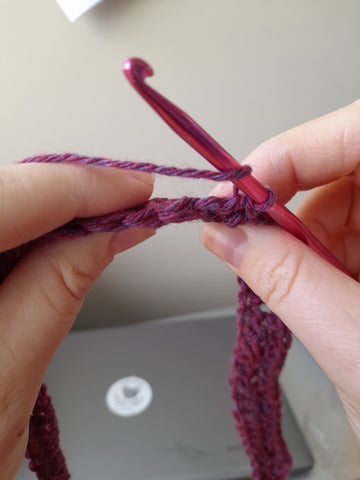
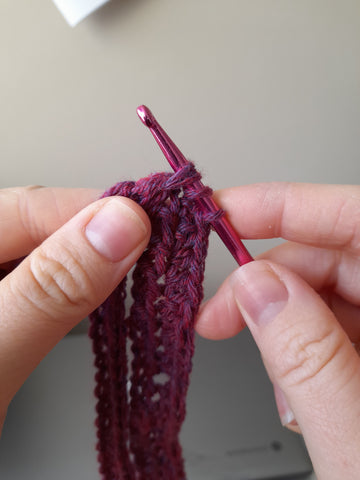
    In this scenario the pattern will just say something along the lines of “Yarn over, insert hook, yarn over and pull up a loop” and if you’re a beginner you might think “insert where?”. In this scenario, if the designer has not specified, it means under both loops. 

    Insert hook under both loops.

    If you look at the top of your stitches, you’ll see that they form a “v” shape. It’s similar to how a knitted stitch looks in stockinette. Imagine that the v has two legs. You need to put your hook under both of those legs. 

    Both loops on hook

    See how there are two legs on the hook? This still only counts as 3 loops on the hook but I’ve made sure that I’ve gone under both legs of the stitch.

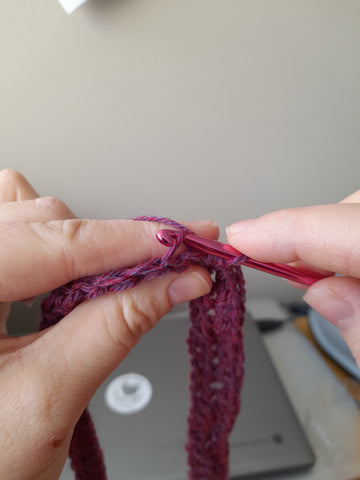
    Example 2: The pattern specifies back loop only. 

    Back loop only is where you insert your hook into the back leg of the v. This is clearly explained in the pattern and the designer wants you to do this to achieve a particular texture. 

    back loop hdc

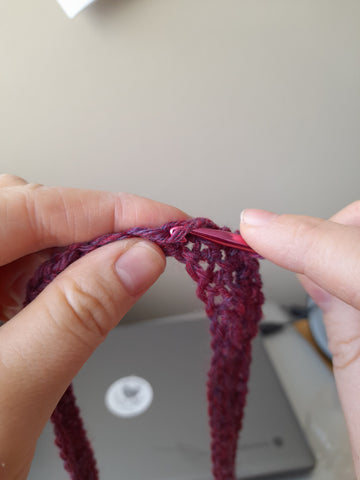
    Example 3: The pattern specifies front loop only. 

    In this case you need to insert your hook into the front leg of the v. The designer will have specified because it’s crucial to the design. There will be a certain texture that needs to be achieved. 

    front loop hdc

    The front loop is the leg of the v that is nearest you. This will also be referred to as the chain or the stitch. 

    Still not clear on where you need to put your hook? 

    If the pattern is confusing you, try to get in touch with the designer. Sometimes it could just need spelling out, or there may be a mistake they don’t know about yet. 

     Want to get started with crochet? 

    Head to Minerva Crafts to find a range of crochet hooks to help you get started. 

  • Starburst Cardigan. Chunky crochet cardigan pattern.

    Starburst Cardigan. Chunky crochet cardigan pattern.

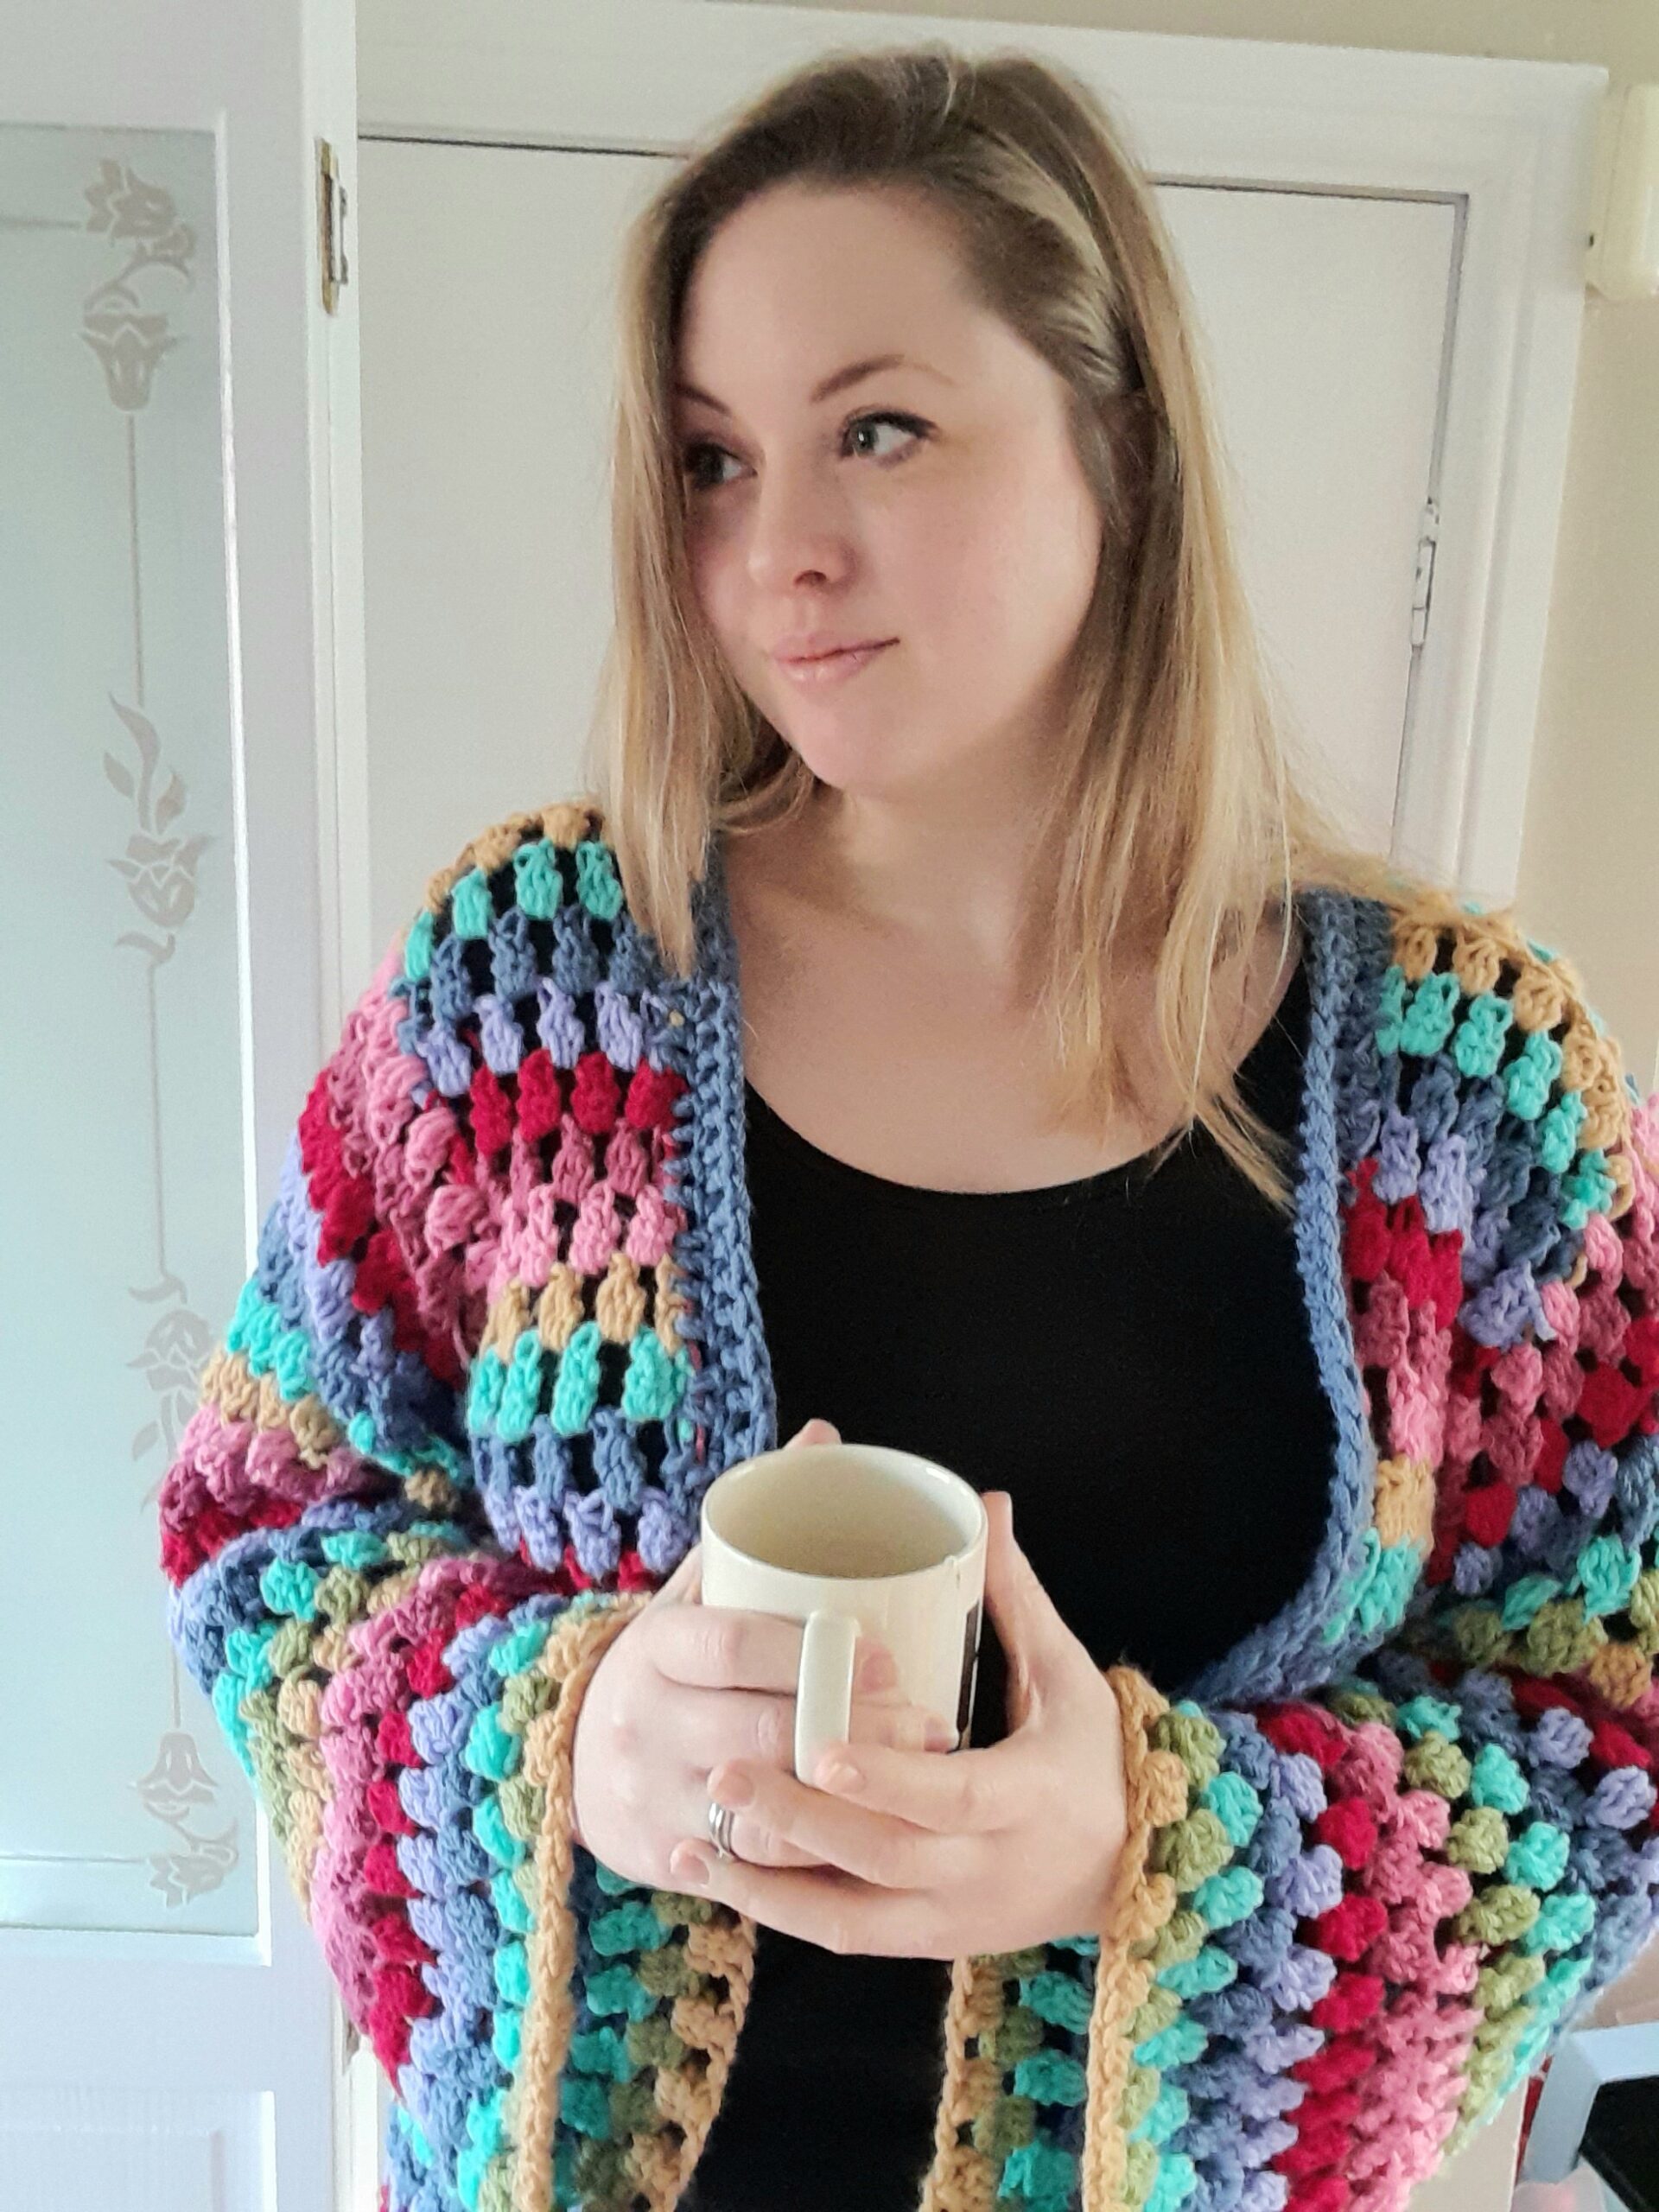
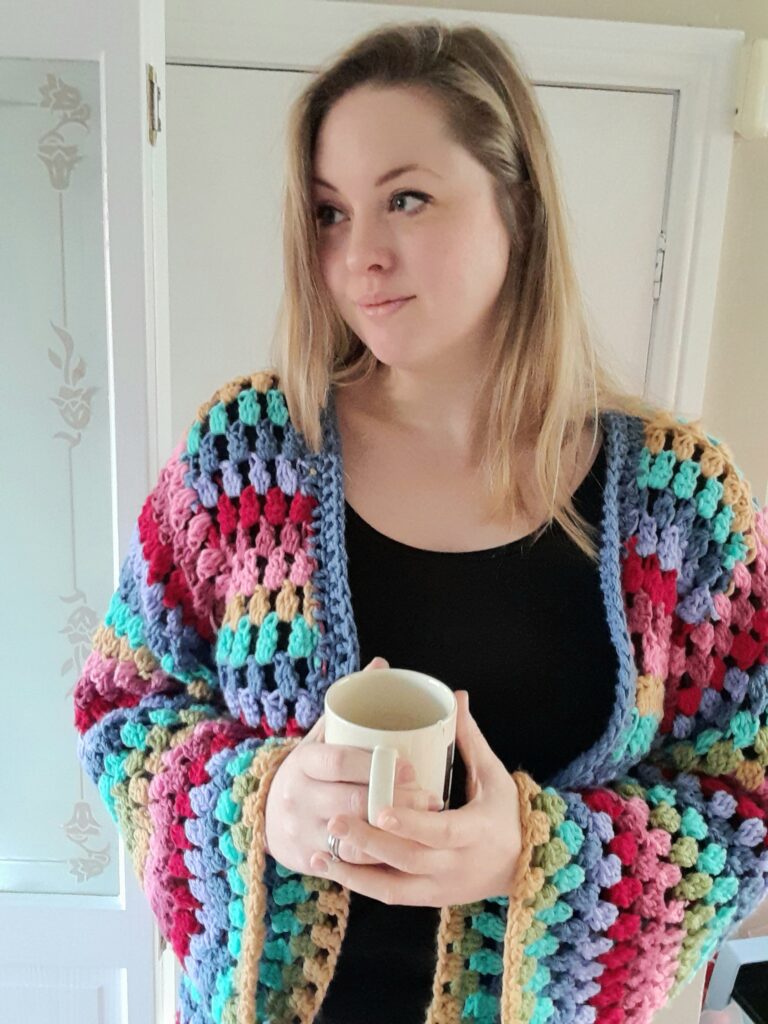
    This is a free crochet pattern for a chunky, multi-coloured cardigan. You can either use this free version with ads, or the pattern is also available here with no ads.

    The main feature of this crochet cardigan pattern is the bobble stitch. This is a fun stitch that will be a breeze to make as once you’ve done the first row, you crochet into the spaces, not the stitches! Here’s how to do the bobble stitch:

    Bobble stitch- 

    Step 1: Yarn over, insert hook, Yarn over and pull through, Yarn over and pull through 2 loops. Leave remaining 2 loops on hook. 

    Step 2: Yarn over, insert hook, yarn over and pull through, yarn over and pull through 2 loops. Leave remaining 3 loops on hook. 

    Step 3: Yarn over, insert hook, yarn over and pull through. Yarn over and pull through 2 loops on hook. Yarn over and pull through all 4 remaining loops on hook.

    When worked flat: each end of the row will have an individual, double crochet stitch. Ch3 at the end of every row, yarn over and work into the chain spaces in the next row. 

    Simple crochet cardigan pattern free. Free crochet cardigan pattern for women. Cardigans for chunky yarn. Stylecraft special chunky. Ravelry cardigan patterns free. Rainbow cardigan pattern. Easy crochet sweaters and cardigans. The Starburst cardigan pattern pdf. Free crochet for women. Bulky yarn patterns.

    Starburst Cardigan: a chunky crochet cardigan pattern.

    Named after the much loved 90s fruit chews, this cardigan promises a burst of colour and a quick turnaround. The funnel sleeves give it a retro feel and the bobbles scream retro charm. 

    This article does use affiliate links. This means that if you do choose to purchase anything with the links I’ve used, I do earn a small commission from that purchase at no cost to you. Thank you!

    Wear it as an oversized addition to your wardrobe all year round!

    Materials needed: 

    Stylecraft special Chunky. 100% Acrylic; 144 metres / 157 yards per 100g / 3.5oz 1 (1,1*,2,2) balls of each colour. *Size M needs 2 balls of Denim in total for the border, but 1 of every other colour. They also do a value pack if you wanted to simply do it in one colour.

    • Raspberry (1023)
    • Meadow (1065)
    • Lavender (1188)
    • Fondant (1241)
    • Lipstick (1246)
    • Denim (1302)
    • Camel (1420)
    • Aspen (1422)
    • 6mm / USJ/10 crochet hook, or size needed to obtain gauge. 
    • 4 removable stitch markers. 
    • Darning needle for weaving in ends. 

    Instructions to make this simple crochet cardigan pattern:

    Gauge: 

    3 bobble stitches and 3 ch spaces/ 4 rows to 10cm/4” using a 6mm / USJ/10 crochet hook and Stylecraft Special Chunky.

    Bobble stitch- 

    Step 1: Yarn over, insert hook, Yarn over and pull through, Yarn over and pull through 2 loops. Leave remaining 2 loops on hook. 

    Step 2: Yarn over, insert hook, yarn over and pull through, yarn over and pull through 2 loops. Leave remaining 3 loops on hook. 

    Step 3: Yarn over, insert hook, yarn over and pull through. Yarn over and pull through 2 loops on hook. Yarn over and pull through all 4 remaining loops on hook.

    Things to be aware of before you make the Starburst crochet cardigan.

    When worked flat: each end of the row will have an individual, double crochet stitch. Ch3 at the end of every row, yarn over and work into the chain spaces in the next row. 

    US terms are used throughout. Please ensure that you are using the correct terms as this will significantly alter the finished result. 

    If you need a quick reminder of the US/UK terms, there’s a handy blog post here.

    When working in the round, you will need to sl st to join the round at the end. Start your next round by slipping across the top of the first cluster, rejoining your yarn when you get to the chain space. 

    When you are starting in the round, make 2 chains into the first ch sp. This counts as the first leg of the bobble. Complete step 2-4 to finish the bobble. 

    Information about sizing and yarn requirement.

    Sample shown is M. 

    The colours on the pattern sample M are worked from the bottom up in the following order: 

    1. Fondant 
    2. Raspberry
    3. Lipstick
    4. Lavender 
    5. Denim 
    6. Aspen
    7. Meadow 
    8. Camel 

    Note: At the end of every other row there will be an individual double crochet stitch. This makes the edging process easier. Check out the blog for more tips and videos on the Starburst cardigan. 

    Body measurement chart: 

    Size ChestSleeves Back
    XS26-30” (66-76cm )18” (46cm)28” (71cm)
    S32-36” (81-91cm)20” (51cm)28” (71cm)
    M40-44” (102-107cm)20” (51cm)30” (76cm)
    L46-48” (117-122cm22” (56cm)32” (81cm)
    XL50-52” (127-132cm)22” (56cm)32” (81cm)

    Glossary: 

    BobbleSee description on page 2
    Ch / Ch sp Chain(s)/ Chain space 
    DcDouble crochet (US terms) 
    Sk Skip stitches
    Sl Slip stitch

    Bobble table 

    See example of separating in this Youtube link here 

    SizeChainsBobblesFront SleeveBack
    XS69 ch  22 3310
    S78 ch 25 3411
    M102 ch33 5511
    L114 ch36 5614
    XL14446 7816

    Instructions for the cardigan:

    Row 1: Chain 69 (78/102/114/144) 

    (3 ch count as 1st dc) sk 2 ch, bobble in next ch, *ch 2, sk 2, bobble*  repeat from * to last ch OR bobble* Make a dc in last ch. 22 (25/33/36/46) bobbles. Ch 3 and turn. 

    Row 2 and every following row:

     *bobble in next ch sp, ch 2* repeat * to final dc. Make 1 dc, ch 3 and turn. 

    Changing colours every row, repeat row 2 for 20 (22/22/24/24) more rows 

    Separate for sleeves

    Isolate sections of the cardigan. Using the bobble chart, mark the beginning and end of the back stitches and mark the armholes. There should be 4 markers in total.  

    Front left/Front right

    Work only 3 (3/5/5/7) bobble stitches for the next row. 

    Work 5 (5/6/6/7) more rows. Fasten off. 

    Rejoin yarn and repeat on other side for front right 

    Back 

    Working with the bobble stitches on either side of the 2nd sleeve marker, work 5 (5/6/6/7) rows. Fasten off. 

    Join shoulder seams using sl st or seam with a darning needle. 

    Sleeves (work 2): 

    Joining new yarn, work 18 (20/22/22/24) bobble stitches evenly across armhole. Where there are bobble stitches under the armhole, you can work one bobble st into each ch sp as normal. Where you are working with the sides of stitches, work into the side of the posts/clusters. 

    To join each round, sl st into the top of the first bobble and sl across to next ch sp. Change colours here and start the next round with 2 ch and 2 more dcs in the bobble. 

    Work 20 (20/22/24/24) rounds in total. Fasten off. 

    Edges (including collar and front edges)

    Row 1: Starting at bottom left corner, insert hook into the ch sp and chain 3. 2 dc in the side of every stitch post and 2 dc in every ch sp along. Continue all the way around the left front, collar, right front and waistband. 

    Row 2: Dc in every stitch to end. Fasten off. 

    Weave in all ends and enjoy!

    Notes: This pattern uses bobble stitch clusters consisting of 3dc stitches joined together. The edging is worked using dc stitches. The cardigan is designed to be oversized. If you feel that the body is too long, please feel free to start your underarm marking 1 or 2 rows before the instructions state. 

    Love your project?

    chunky crochet cardigan pattern. Ladies crochet patterns. Free crochet sweater patterns. Free crochet cardigan pattern for beginners. Bulky crochet cardigans.

    Need to brush up on your crochet skills? Why not have a look at the other resources on the blog.

  • Free crochet stitch guide for beginners.

    Free crochet stitch guide for beginners.

    Want to learn to crochet but you’re not sure what the stitches are? Or maybe you’re not sure what stitch you should start with as a beginner. In this post I’ve shared my crochet stitch guide for absolute beginners. My students swear by this pattern. I hope it’ll be handy for you, too!

    If you’d prefer a handy PDF of this guide, it is available here.

    Think of this crochet stitch guide as the official quick reference companion for learning crochet. This works as a way to remind yourself of what stitches mean when you are working on a project. I also include the UK variations for the terms. 

    Inside: 

    • Single crochet 
    • Half double crochet 
    • Double crochet 
    • Triple crochet 
    • V stitch crochet
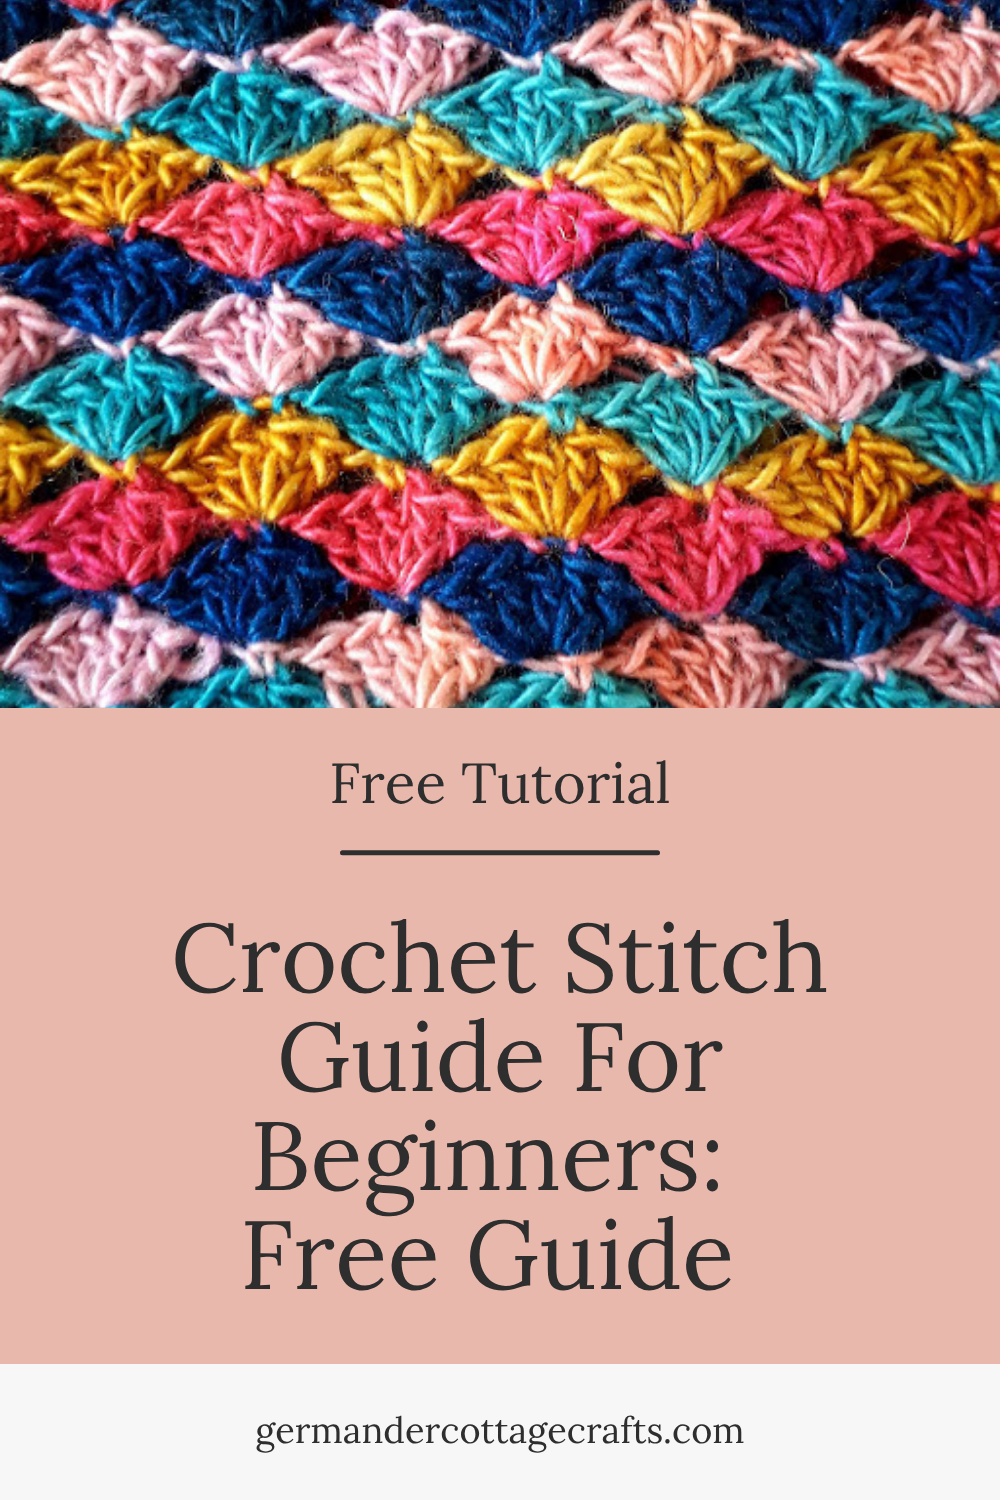
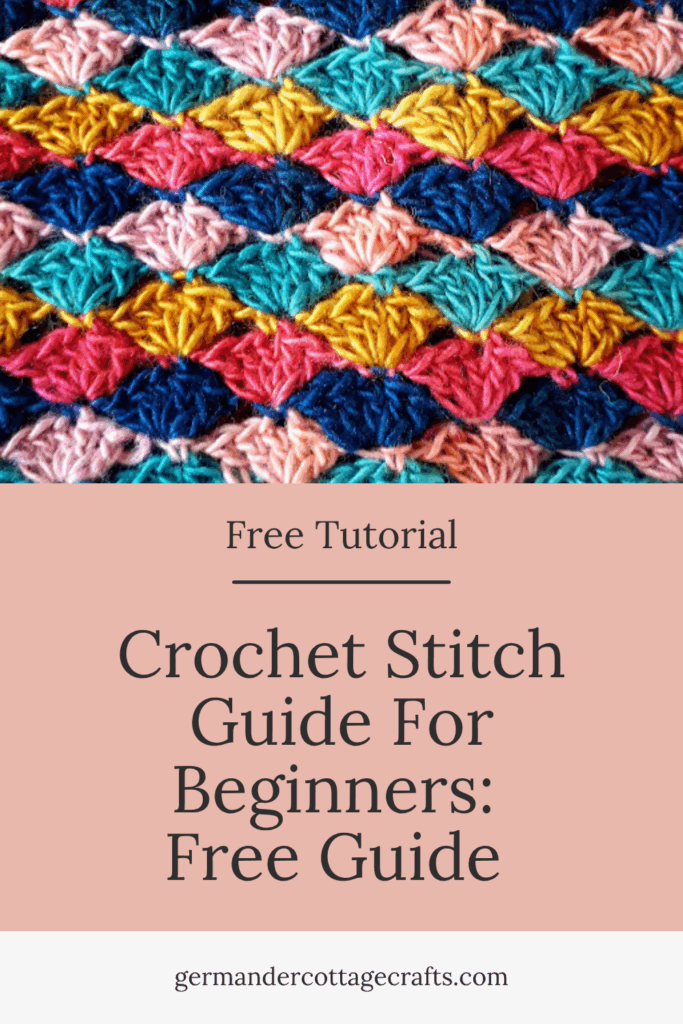
    • Shell stitch crochet. 

    In this guide with clear colour photographs I explain how many chains you need as well as how to do each stitch. Please make sure you have a look at the photographs, or visit my youtube channel for more help.


    Crochet stitches for beginners

    The basics 

    This is an introductory guide to the main basic crochet stitches. If you’d like to see demonstrations, please subscribe to my youtube channel by clicking here. 

    Single crochet (UK Double Crochet)

    Abbreviations:  sc (US) dc (UK). 

    Single crochet is the smallest stitch you can do in crochet. It is commonly used in dishcloths, face scrubbies and amigurumi. The dense, short stitches are great for toys as the stuffing is less likely to leak out! Single crochet also works great for baskets as it provides a dense, sturdy fabric. 

    Directions:

    Insert hook, yarn over and pull through a loop, yarn over and pull through 2 loops. 

    When making a turning chain, always chain 1. 

    Half double crochet (UK Half Treble)

    Abbreviations: Hdc (US) Htr (UK)

    I really like half double crochet as it starts off as a double but ends as a single. It’s a tall enough stitch without all of the work. 

    Yarn over hook, insert hook, yarn over and pull through a loop. Yarn over and pull through the 3 loops on the hook. Do this in every chain. 

    When you get to the end, chain 2 and turn.

    Double crochet (UK Treble)

    Abbreviations: Dc (US) Tr (UK)

    The Dc is one of the most common crochet stitches you will come across. It’s speedy and tall. Your work will grow quickly. 

    Chain 3 and turn. Yarn over hook, insert hook, yarn over and pull through a loop. Yarn over and pull through 2 loops. Yarn over and pull through 2 loops. 

    When making a turning chain, always chain 3

    This is a close up of the double treble (Dtr) or Triple crochet as it is known in the US. This stitch features in the crochet stitch guide for beginners.

    Triple crochet (Double Treble (UK) 

    Abbreviations: Tr (US) (Dtr UK)

    This is a very tall stitch (but not the tallest!) requiring a turning chain of 4 stitches. 

    Yarn over twice, insert hook. Yarn over and pull through a loop. *Yarn over and pull through 2 loops. Repeat * 2 more times.

    When turning, always chain 4. 

    V stitch 

    Abbreviations: V st

    V stitch is a crochet lace stitch. We create the vs by using double crochet and chains. 

    V stitch is made by working a multiple of 3 chains plus an additional 4 chains. 

    First row (after chaining)  

    Make a dc (UK Tr) into the 5th chain from hook. Chain 1 and make a second Dc (UK tr) into the same stitch. Skip the next 2 chains and and make another V into the next stitch. Continue until you only have 2 chains left. Skip one chain and make a single dc into the next chain. 

    Second row: Make a 3 ch turning chain, make a V into the centre of the last V you made. This is called the chain space. Chain 1 and do the same again in every V across. When you get to the end, make a single Dc (UK Tr) into the last chain. Repeat for every following row. 

    Shell stitch

    Shell stitch chains are always a multiple of 6 plus 2 additional chains. 

    Row 1: Single crochet (UK double) into the 2nd chain from the hook, skip the next 2 chains, and dc (UK tr) 5 times into the next chain, sk next 2 chains, sc into the next chain, sk 2, dc 5 times into the next chain. Repeat to end, where you should end with one sc. 

    Row 2: Chain 3 and turn. Dc 2 more times into the last sc of the previous row. *Make a sc into the top centre stitch of the next shell, then make 5 dc into the next sc*. Repeat * to end and make 3dc into the last sc. 

    Row 3: Ch 1 and sc into the first dc of the previous row, *dc 5 times into the next sc, sc into the top centre stitch of the next shell* repeat to end, ending with a sc. 

    Repeat rows 2 and 3 to end. 

    This guide is free. If you would like to support the website, please consider leaving a tip or share this post!

    cards
    Powered by paypal
    Free Crochet Guide For Beginners.

    Thank you for using my crochet stitch guide.

  • How to get started with crochet: A beginner’s guide.

    Here’s some beginner crochet patterns and guides to help you get started with crochet.

    Where do you start when you want to learn to crochet but you’re a beginner? Here!

    Something that comes up often is the question “where do I start with crochet?” and that depends on you, the individual. Some beginners are as bold as brass and practically say “hit me with it” , determined to conquer any challenge that arises, whereas others want small steps, simplicity and progress that they can record slowly and observantly. 

    What type of crochet beginner are you? 

    It’s easy enough to work out based on what your appetite is and what you are working towards. If you can scroll through a few Youtube videos and think “I’ve got the hang of this” then good for you! The amount of content out there aimed at crochet beginners is pretty extreme. It can be very hard to navigate across really busy waters of the internet. Some of us can navigate without any particular help, while others need someone to steer the ship at first. 

    If you want slow and steady, or find that you switch off easily, maybe written instructions are better suited for you. You can read them quietly, in your own time without the distraction of adverts, different accents or unfamiliar terms. You can then look at videos to support what you have already learned. 

    I’m going to show you a range of beginner friendly patterns and guides that will help you to start your crochet journey. 

    Starting small

    Learning to crochet is a journey that will take weeks, months and years to get the hang of. Please don’t let that put you off. Here are some small but satisfying projects for a crochet beginner. 

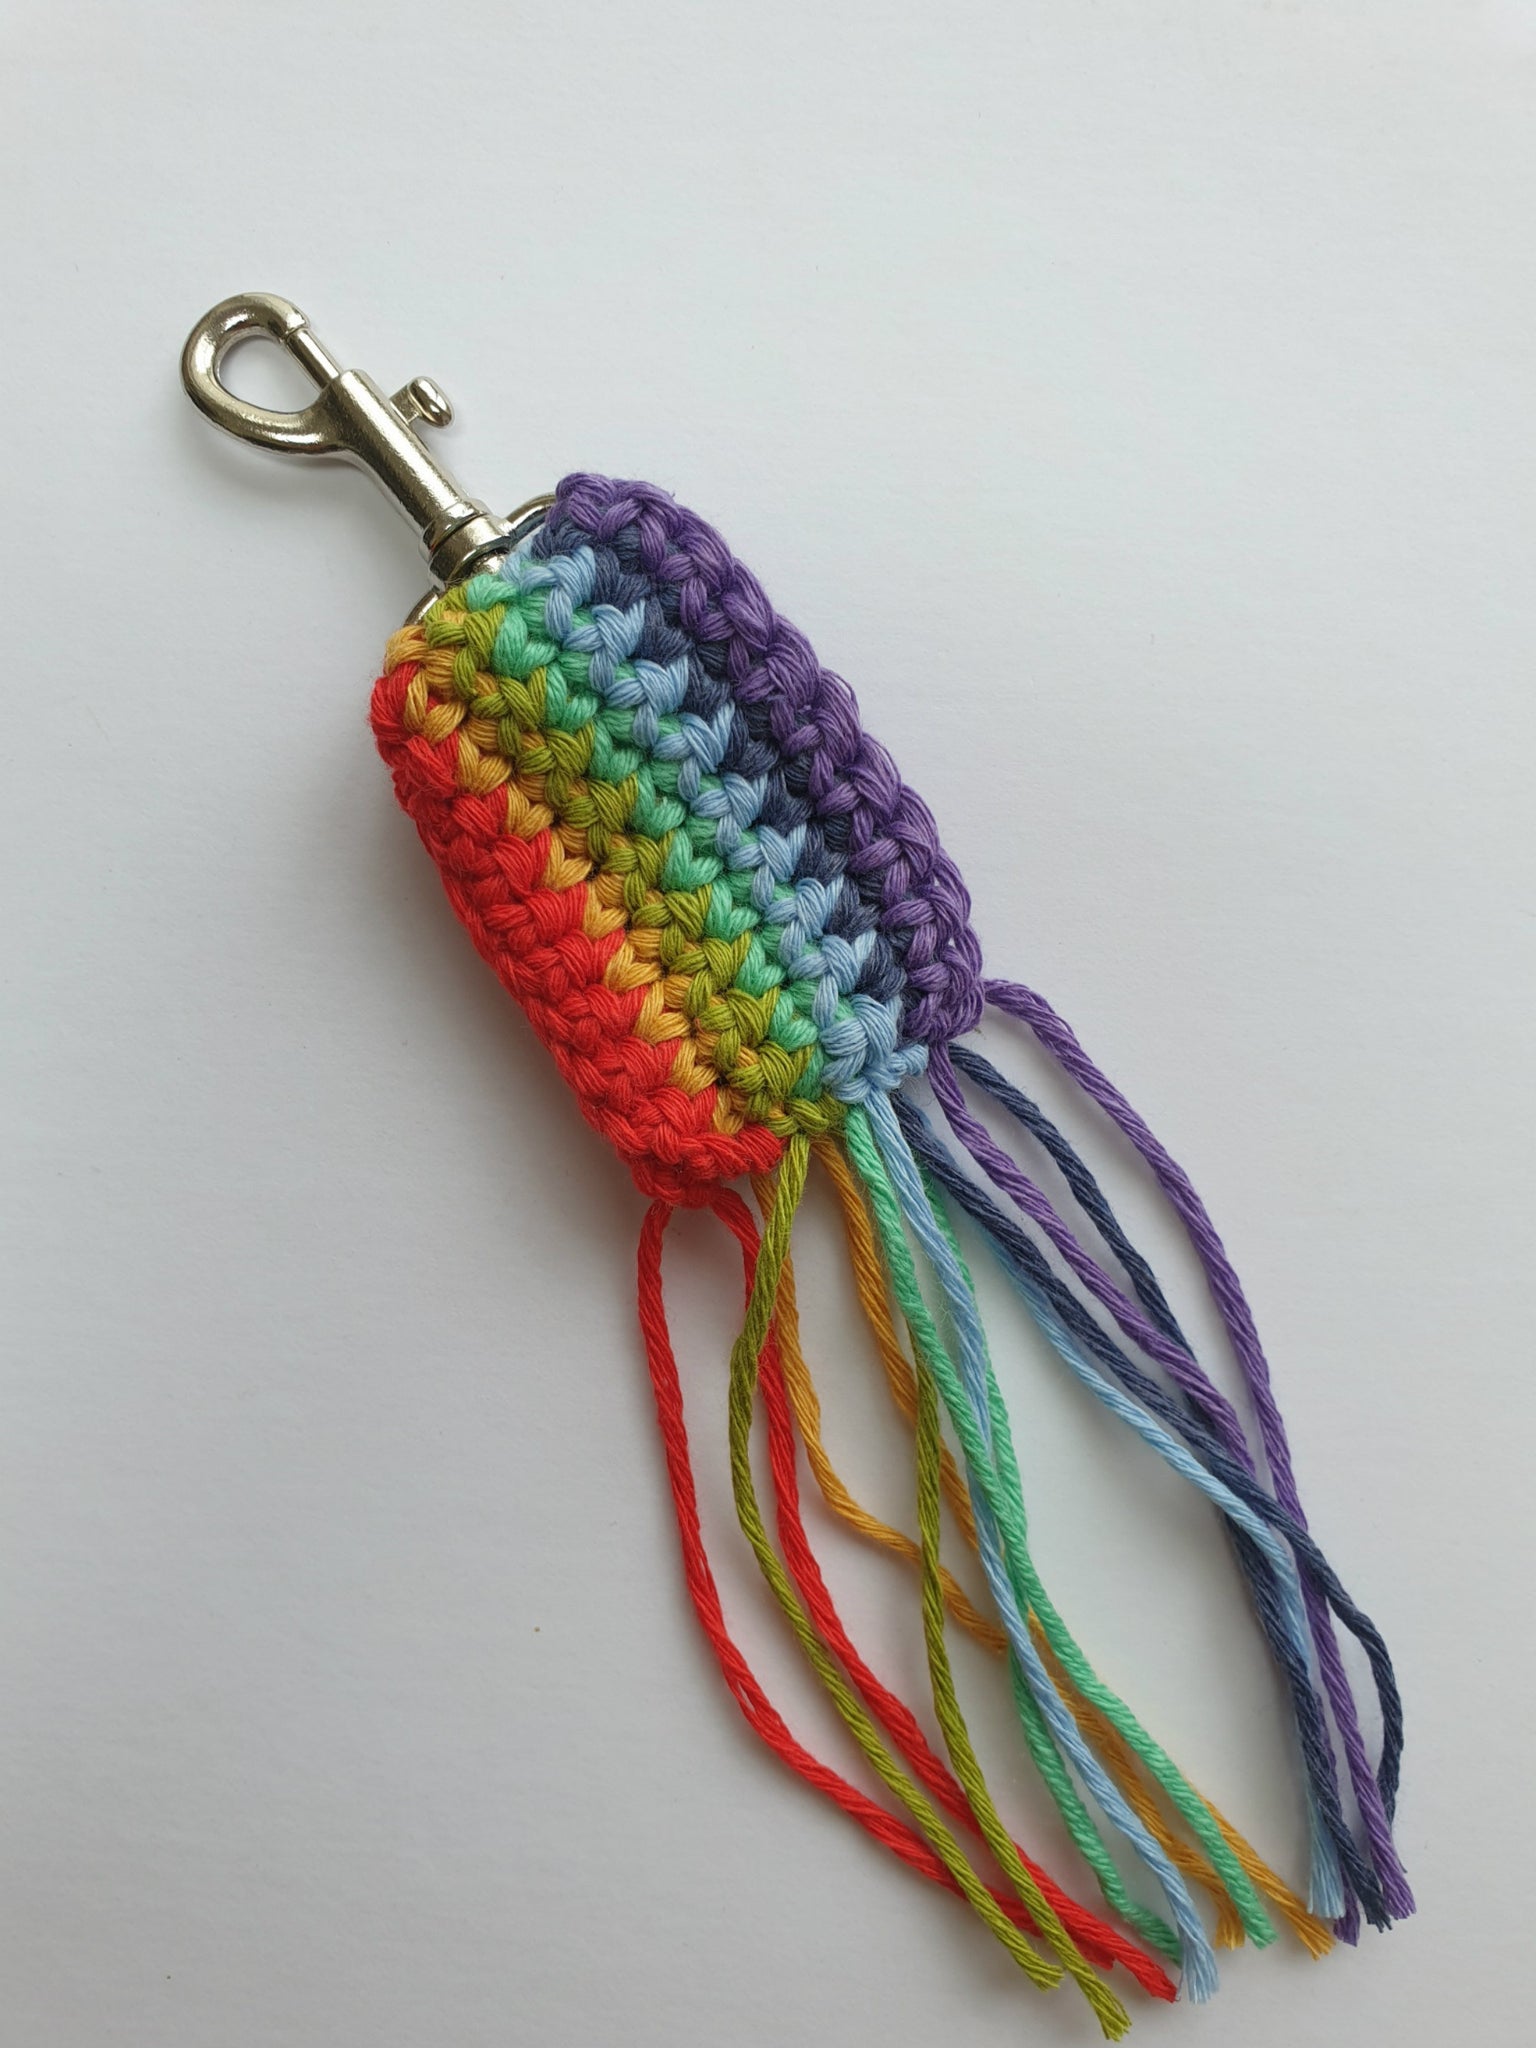
    Crochet rainbow keyring kit. 

    In this kit by One Creative Cat, you get the yarn and the pattern together. This takes the headache out of knowing which yarn to choose. You will need to provide your own 4mm crochet hook and a pair of scissors but other than that, this is a satisfying beginner project for you to try! You can find more about the kit here. 

    Rainbow keyring crochet kit by One Creative Cat. Easy pattern

    Crochet pot holder beginner pattern

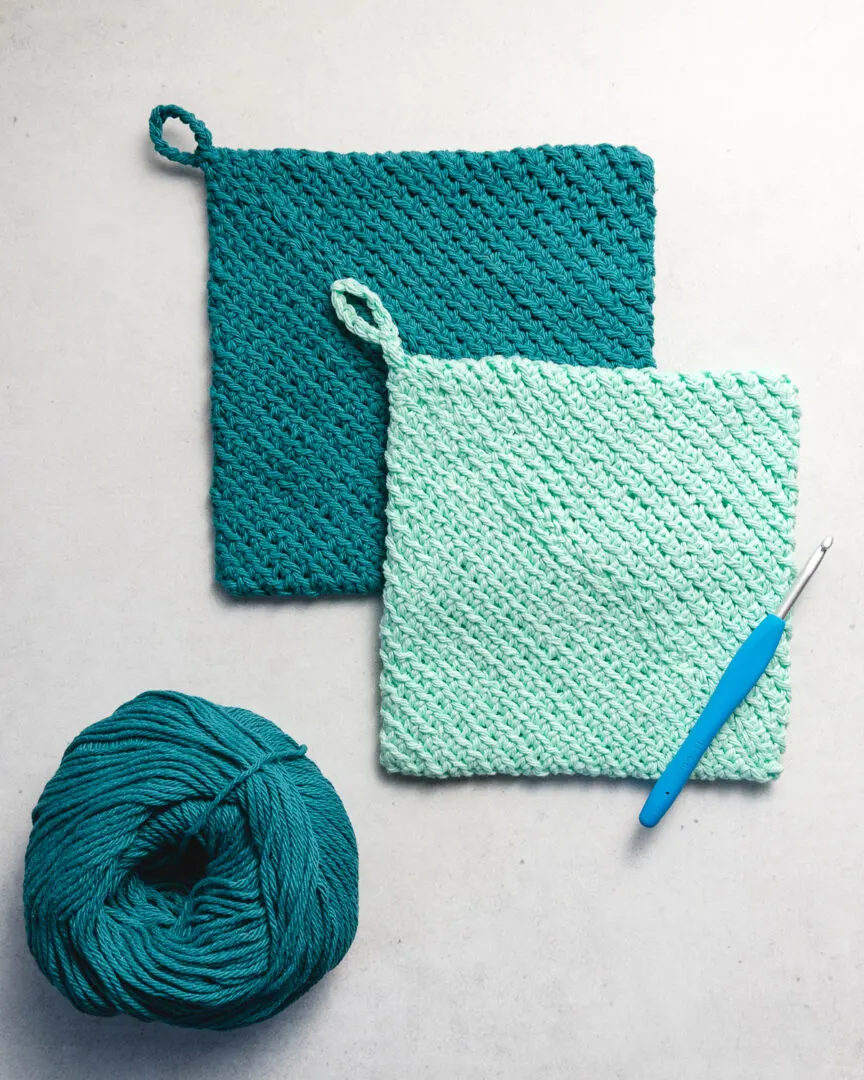
    Here’s a pattern that allows you to practice one stitch and make a square shape. It’s a free pattern from Sarah Maker and is really simple, functional and great to practice with. Use some cotton DK yarn as acrylic is not heat proof! Find the pattern here.  As you’ll see from the pattern it recommends a cotton yarn. I recommend Cygnet 100% cotton DK which you can find here

    Pattern for a double thickness crochet pot holder suitable for crochet beginners

    The above patterns are perfect for beginners as they have step by step instructions and require only one basic crochet stitch. 

    What are the basic crochet stitches? 

    If you have trouble remembering the basic crochet stitches or don’t even know where to start, here’s my guide on the 6 basic stitches to get you started. It’s a downloadable PDF that I wrote to compliment my Youtube tutorials. You can subscribe to the beginners playlist here. 

    Here’s an example of one of the tutorials. This is the single crochet stitch and is featured in most beginner patterns: 

    Ready for something bigger? Here are some patterns for the more adventurous beginner. 

    Below you’ll find some crochet patterns that are great for refreshers as well as beginners. They also have supporting video tutorials provided within the pattern. 

    Basic granny square beginner pattern 

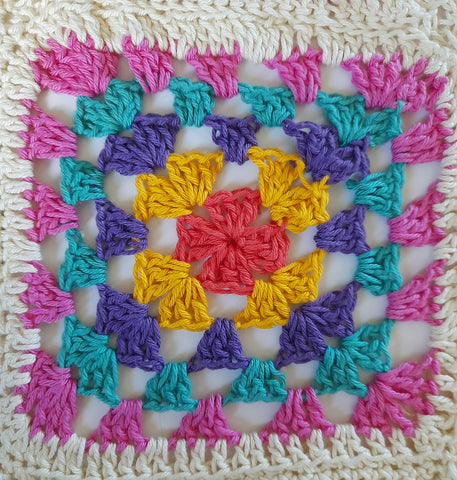
    Try this pattern if you want to learn how to read crochet patterns. This is a skill worth investing your time in as it will help you to understand a range of instructions. As you come across abbreviations you will also be able to tackle more challenging patterns! Click here to see the beginner granny square pattern. Every new crocheter should at least try the granny square! 

    Close up of a multi colour granny square

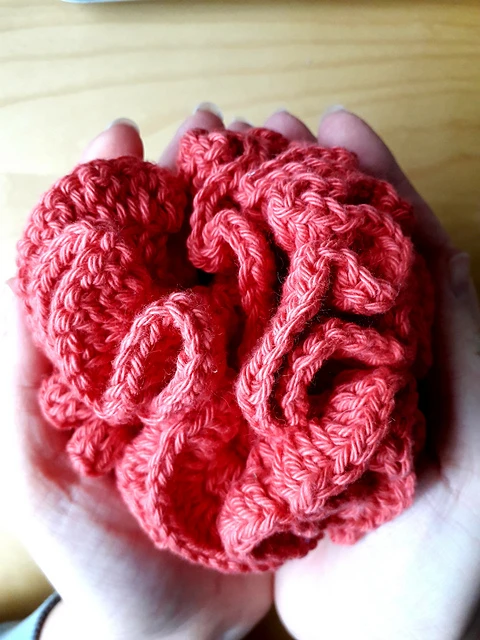
    Plastic free shower puff crochet pattern. 

    This is a great beginner pattern for those who want to learn to crochet in the round. It’s very similar to how you would crochet a granny square. You can either use the free pattern with ads, or there’s an option to download it from Ravelry too!

    Free pattern. Crochet shower puff made with cotton DK yarn.

    Beginner friendly yarns 

    I think as a beginner you can’t go wrong with DK yarn or Worsted weight/Aran yarn and a 4 or 5mm hook. This is what you’ll find at most craft classes or crochet workshops. All of the above patterns ask for yarn and hooks within this range. 

    Remember about fibre types and purposes though and please, please, please don’t make oven gloves, pot holders or tea towels out of acrylic as this is not heat proof. It will melt into the user’s hands. Cotton is perfect for functional items such as the aforementioned but also for accessories such as bags and wash cloths. Save wool and acrylic for cowls, scarves, garments and toys. 

    cards
    Powered by paypal