Tag: crochet

  • Where to put your hook in crochet. How to crochet for complete beginners.

    Where to put your hook in crochet. How to crochet for complete beginners.

    Have you started reading crochet patterns but you’re not sure where to put your crochet hook? Here I’ll show you where to put your hook in crochet.

    Disclosure: This post may contain affiliate links, meaning I get a commission if you decide to make a purchase through my links, at no cost to you.

    Stitch tutorials on Youtube tend to be standalone videos, meaning they are not about a specific pattern. They show you how to do the stitch at the basic level but if you are looking at a pattern, you’ll find variations of that same stitch. For example, if I am showing you how to do the V stitch, I might do it using double crochet (UK treble) but in a pattern, I may say that the v stitch is made using half double crochet (UK half treble). This changes from pattern to pattern and the designer should always explain how to make the desired stitch if it varies from one of the basic stitches. This is the same for where you are supposed to put your hook. Not all patterns will want you to put your hook under both loops. Some will specify back loop or front loop. 

    I’ll show you where to put your hook when you’re doing crochet. 

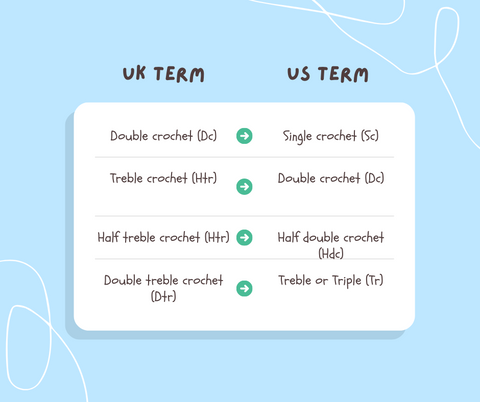
    This example is using a half double crochet (UK half treble) piece. This example can be used for any pattern that uses any of these basic stitches: 

     US term UK term 
    Single crochet (Sc)Double crochet (Dc)
    Half double crochet (Hdc)Half treble crochet (Htr)
    Double crochet (Dc)Treble crochet (Tr)
    Triple crochet (Tr)Double treble crochet (Dtr)

    Don’t know what any of these are? Try my basic stitch guide here. 

    Example 1: Hdc stitch not specified. 

    In this scenario the pattern will just say something along the lines of “Yarn over, insert hook, yarn over and pull up a loop” and if you’re a beginner you might think “insert where?”. In this scenario, if the designer has not specified, it means under both loops. 

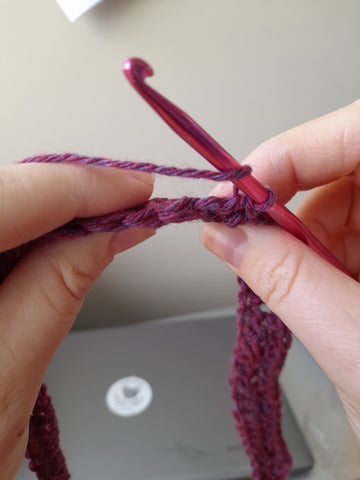
    Insert hook under both loops.

    If you look at the top of your stitches, you’ll see that they form a “v” shape. It’s similar to how a knitted stitch looks in stockinette. Imagine that the v has two legs. You need to put your hook under both of those legs. 

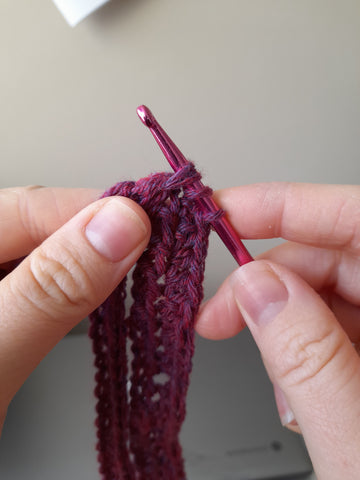
    Both loops on hook

    See how there are two legs on the hook? This still only counts as 3 loops on the hook but I’ve made sure that I’ve gone under both legs of the stitch.

    Example 2: The pattern specifies back loop only. 

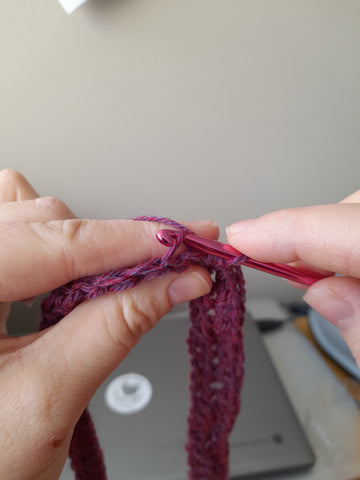
    Back loop only is where you insert your hook into the back leg of the v. This is clearly explained in the pattern and the designer wants you to do this to achieve a particular texture. 

    back loop hdc

    Example 3: The pattern specifies front loop only. 

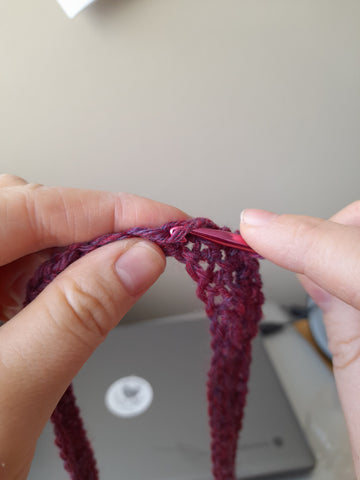
    In this case you need to insert your hook into the front leg of the v. The designer will have specified because it’s crucial to the design. There will be a certain texture that needs to be achieved. 

    front loop hdc

    The front loop is the leg of the v that is nearest you. This will also be referred to as the chain or the stitch. 

    Still not clear on where you need to put your hook? 

    If the pattern is confusing you, try to get in touch with the designer. Sometimes it could just need spelling out, or there may be a mistake they don’t know about yet. 

     Want to get started with crochet? 

    Head to Minerva Crafts to find a range of crochet hooks to help you get started. 

  • Free crochet stitch guide for beginners.

    Free crochet stitch guide for beginners.

    Want to learn to crochet but you’re not sure what the stitches are? Or maybe you’re not sure what stitch you should start with as a beginner. In this post I’ve shared my crochet stitch guide for absolute beginners. My students swear by this pattern. I hope it’ll be handy for you, too!

    If you’d prefer a handy PDF of this guide, it is available here.

    Think of this crochet stitch guide as the official quick reference companion for learning crochet. This works as a way to remind yourself of what stitches mean when you are working on a project. I also include the UK variations for the terms. 

    Inside: 

    • Single crochet 
    • Half double crochet 
    • Double crochet 
    • Triple crochet 
    • V stitch crochet
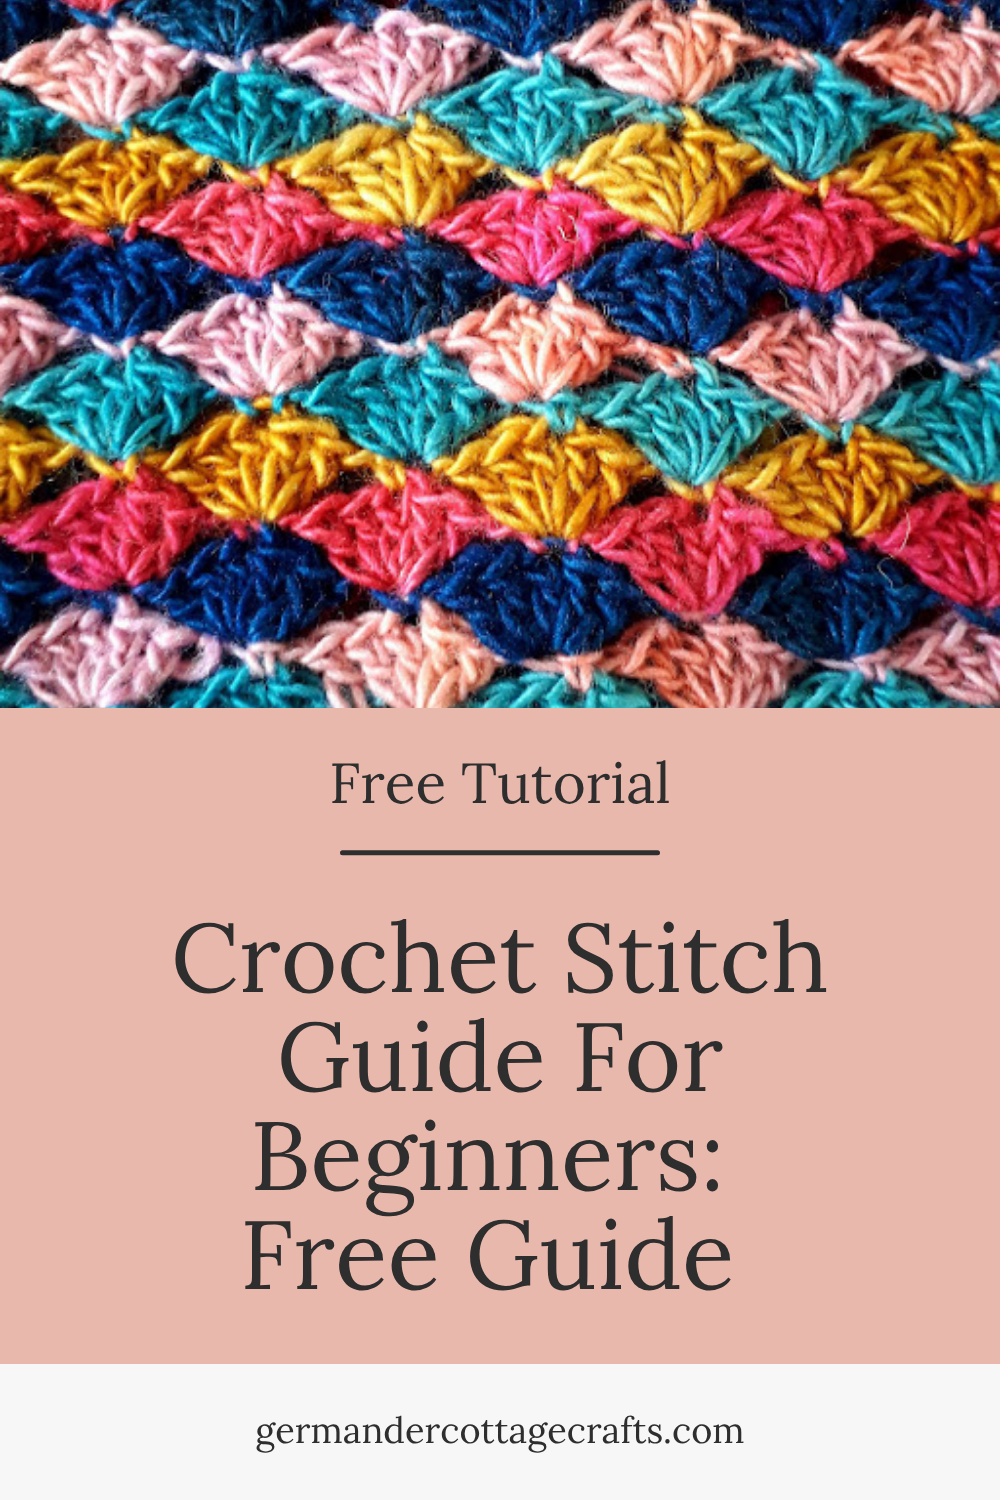
    • Shell stitch crochet. 

    In this guide with clear colour photographs I explain how many chains you need as well as how to do each stitch. Please make sure you have a look at the photographs, or visit my youtube channel for more help.


    Crochet stitches for beginners

    The basics 

    This is an introductory guide to the main basic crochet stitches. If you’d like to see demonstrations, please subscribe to my youtube channel by clicking here. 

    Single crochet (UK Double Crochet)

    Abbreviations:  sc (US) dc (UK). 

    Single crochet is the smallest stitch you can do in crochet. It is commonly used in dishcloths, face scrubbies and amigurumi. The dense, short stitches are great for toys as the stuffing is less likely to leak out! Single crochet also works great for baskets as it provides a dense, sturdy fabric. 

    Directions:

    Insert hook, yarn over and pull through a loop, yarn over and pull through 2 loops. 

    When making a turning chain, always chain 1. 

    Half double crochet (UK Half Treble)

    Abbreviations: Hdc (US) Htr (UK)

    I really like half double crochet as it starts off as a double but ends as a single. It’s a tall enough stitch without all of the work. 

    Yarn over hook, insert hook, yarn over and pull through a loop. Yarn over and pull through the 3 loops on the hook. Do this in every chain. 

    When you get to the end, chain 2 and turn.

    Double crochet (UK Treble)

    Abbreviations: Dc (US) Tr (UK)

    The Dc is one of the most common crochet stitches you will come across. It’s speedy and tall. Your work will grow quickly. 

    Chain 3 and turn. Yarn over hook, insert hook, yarn over and pull through a loop. Yarn over and pull through 2 loops. Yarn over and pull through 2 loops. 

    When making a turning chain, always chain 3

    This is a close up of the double treble (Dtr) or Triple crochet as it is known in the US. This stitch features in the crochet stitch guide for beginners.

    Triple crochet (Double Treble (UK) 

    Abbreviations: Tr (US) (Dtr UK)

    This is a very tall stitch (but not the tallest!) requiring a turning chain of 4 stitches. 

    Yarn over twice, insert hook. Yarn over and pull through a loop. *Yarn over and pull through 2 loops. Repeat * 2 more times.

    When turning, always chain 4. 

    V stitch 

    Abbreviations: V st

    V stitch is a crochet lace stitch. We create the vs by using double crochet and chains. 

    V stitch is made by working a multiple of 3 chains plus an additional 4 chains. 

    First row (after chaining)  

    Make a dc (UK Tr) into the 5th chain from hook. Chain 1 and make a second Dc (UK tr) into the same stitch. Skip the next 2 chains and and make another V into the next stitch. Continue until you only have 2 chains left. Skip one chain and make a single dc into the next chain. 

    Second row: Make a 3 ch turning chain, make a V into the centre of the last V you made. This is called the chain space. Chain 1 and do the same again in every V across. When you get to the end, make a single Dc (UK Tr) into the last chain. Repeat for every following row. 

    Shell stitch

    Shell stitch chains are always a multiple of 6 plus 2 additional chains. 

    Row 1: Single crochet (UK double) into the 2nd chain from the hook, skip the next 2 chains, and dc (UK tr) 5 times into the next chain, sk next 2 chains, sc into the next chain, sk 2, dc 5 times into the next chain. Repeat to end, where you should end with one sc. 

    Row 2: Chain 3 and turn. Dc 2 more times into the last sc of the previous row. *Make a sc into the top centre stitch of the next shell, then make 5 dc into the next sc*. Repeat * to end and make 3dc into the last sc. 

    Row 3: Ch 1 and sc into the first dc of the previous row, *dc 5 times into the next sc, sc into the top centre stitch of the next shell* repeat to end, ending with a sc. 

    Repeat rows 2 and 3 to end. 

    This guide is free. If you would like to support the website, please consider leaving a tip or share this post!

    cards
    Powered by paypal
    Free Crochet Guide For Beginners.

    Thank you for using my crochet stitch guide.

  • How to get started with crochet: A beginner’s guide.

    Here’s some beginner crochet patterns and guides to help you get started with crochet.

    Where do you start when you want to learn to crochet but you’re a beginner? Here!

    Something that comes up often is the question “where do I start with crochet?” and that depends on you, the individual. Some beginners are as bold as brass and practically say “hit me with it” , determined to conquer any challenge that arises, whereas others want small steps, simplicity and progress that they can record slowly and observantly. 

    What type of crochet beginner are you? 

    It’s easy enough to work out based on what your appetite is and what you are working towards. If you can scroll through a few Youtube videos and think “I’ve got the hang of this” then good for you! The amount of content out there aimed at crochet beginners is pretty extreme. It can be very hard to navigate across really busy waters of the internet. Some of us can navigate without any particular help, while others need someone to steer the ship at first. 

    If you want slow and steady, or find that you switch off easily, maybe written instructions are better suited for you. You can read them quietly, in your own time without the distraction of adverts, different accents or unfamiliar terms. You can then look at videos to support what you have already learned. 

    I’m going to show you a range of beginner friendly patterns and guides that will help you to start your crochet journey. 

    Starting small

    Learning to crochet is a journey that will take weeks, months and years to get the hang of. Please don’t let that put you off. Here are some small but satisfying projects for a crochet beginner. 

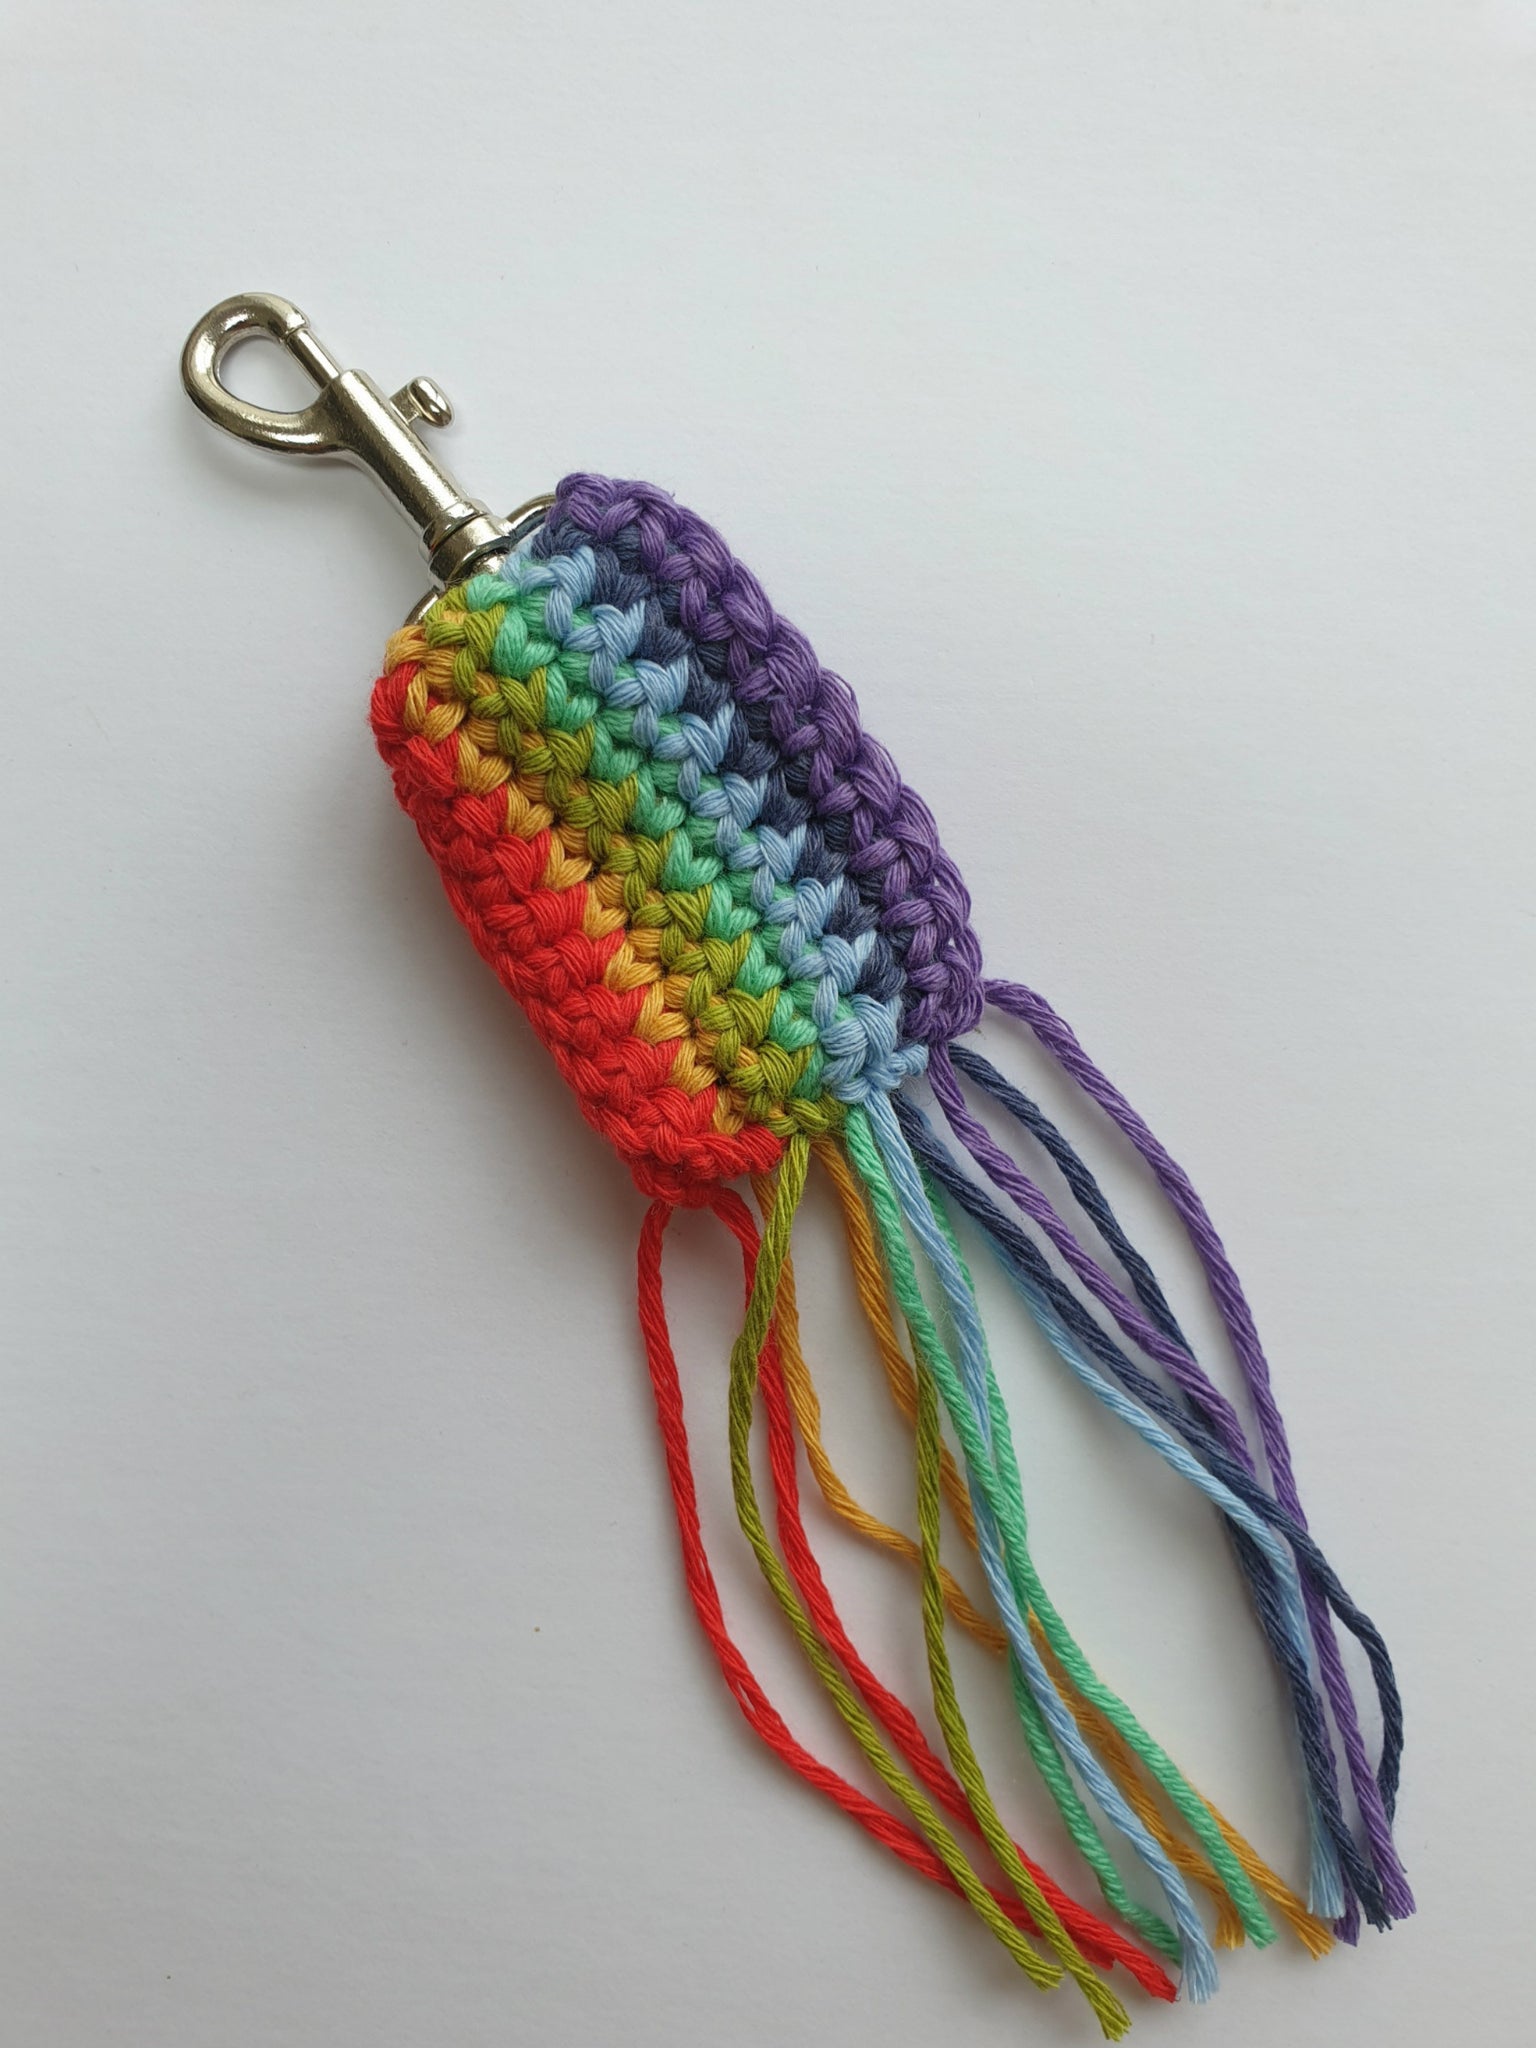
    Crochet rainbow keyring kit. 

    In this kit by One Creative Cat, you get the yarn and the pattern together. This takes the headache out of knowing which yarn to choose. You will need to provide your own 4mm crochet hook and a pair of scissors but other than that, this is a satisfying beginner project for you to try! You can find more about the kit here. 

    Rainbow keyring crochet kit by One Creative Cat. Easy pattern

    Crochet pot holder beginner pattern

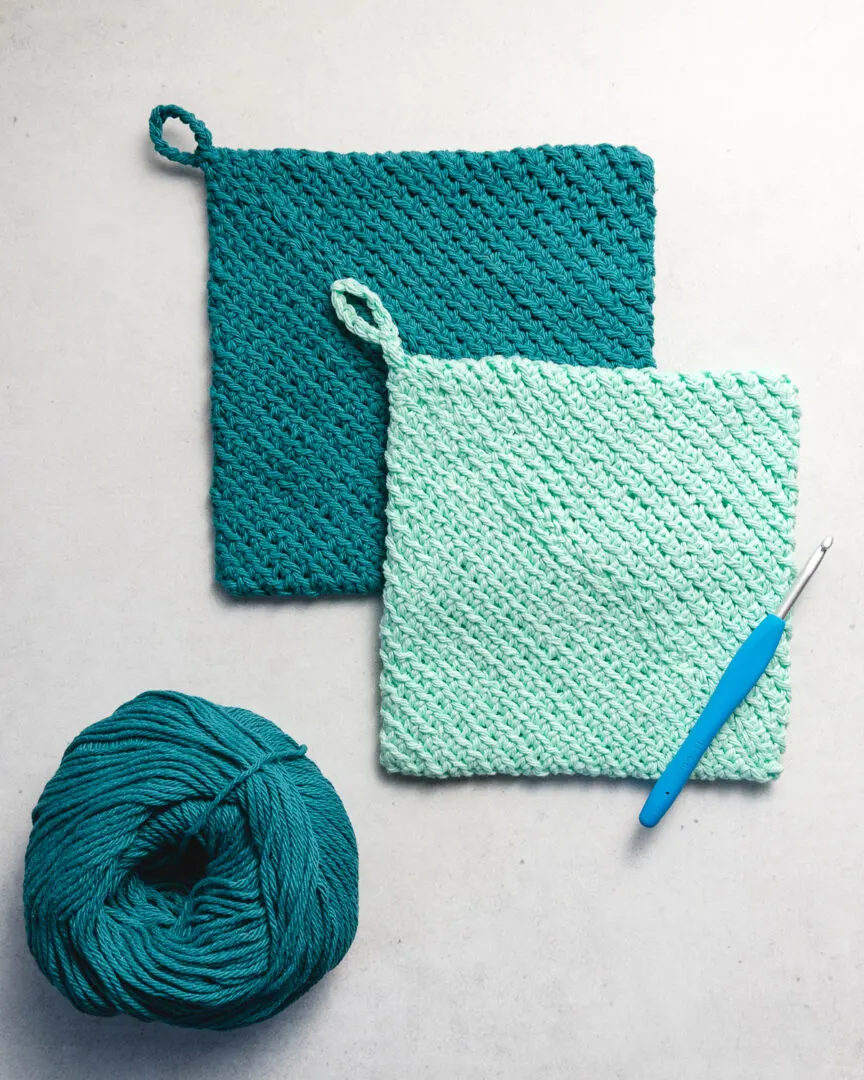
    Here’s a pattern that allows you to practice one stitch and make a square shape. It’s a free pattern from Sarah Maker and is really simple, functional and great to practice with. Use some cotton DK yarn as acrylic is not heat proof! Find the pattern here.  As you’ll see from the pattern it recommends a cotton yarn. I recommend Cygnet 100% cotton DK which you can find here

    Pattern for a double thickness crochet pot holder suitable for crochet beginners

    The above patterns are perfect for beginners as they have step by step instructions and require only one basic crochet stitch. 

    What are the basic crochet stitches? 

    If you have trouble remembering the basic crochet stitches or don’t even know where to start, here’s my guide on the 6 basic stitches to get you started. It’s a downloadable PDF that I wrote to compliment my Youtube tutorials. You can subscribe to the beginners playlist here. 

    Here’s an example of one of the tutorials. This is the single crochet stitch and is featured in most beginner patterns: 

    Ready for something bigger? Here are some patterns for the more adventurous beginner. 

    Below you’ll find some crochet patterns that are great for refreshers as well as beginners. They also have supporting video tutorials provided within the pattern. 

    Basic granny square beginner pattern 

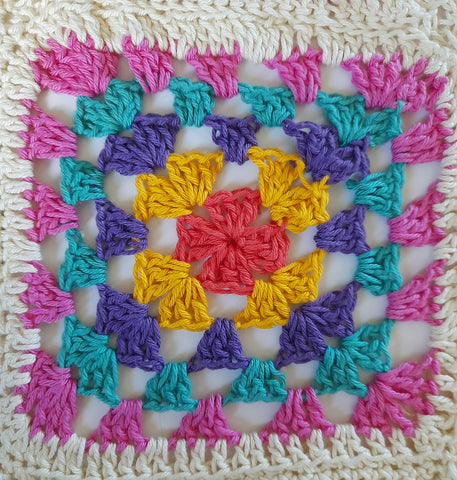
    Try this pattern if you want to learn how to read crochet patterns. This is a skill worth investing your time in as it will help you to understand a range of instructions. As you come across abbreviations you will also be able to tackle more challenging patterns! Click here to see the beginner granny square pattern. Every new crocheter should at least try the granny square! 

    Close up of a multi colour granny square

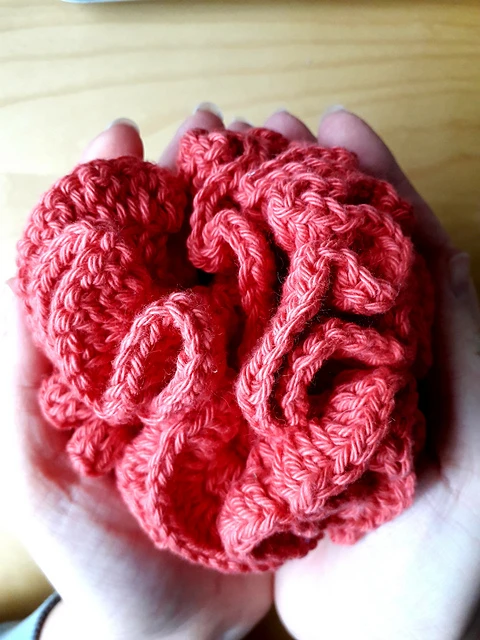
    Plastic free shower puff crochet pattern. 

    This is a great beginner pattern for those who want to learn to crochet in the round. It’s very similar to how you would crochet a granny square. You can either use the free pattern with ads, or there’s an option to download it from Ravelry too!

    Free pattern. Crochet shower puff made with cotton DK yarn.

    Beginner friendly yarns 

    I think as a beginner you can’t go wrong with DK yarn or Worsted weight/Aran yarn and a 4 or 5mm hook. This is what you’ll find at most craft classes or crochet workshops. All of the above patterns ask for yarn and hooks within this range. 

    Remember about fibre types and purposes though and please, please, please don’t make oven gloves, pot holders or tea towels out of acrylic as this is not heat proof. It will melt into the user’s hands. Cotton is perfect for functional items such as the aforementioned but also for accessories such as bags and wash cloths. Save wool and acrylic for cowls, scarves, garments and toys. 

    cards
    Powered by paypal
  • How To Join Granny Squares

    How To Join Granny Squares

    How to join your granny squares and turn that pile into something that screams “cottage core style” 

    So you’ve mastered the granny square (amazing!) but now you have mountains of squares and don’t know what’s next. Here I will show you how to join your granny squares (or any other squares) using my two favourite methods. This can be a fun experience as you can use your newly discovered methods to seam crochet garments, knit garments and other accessories. 

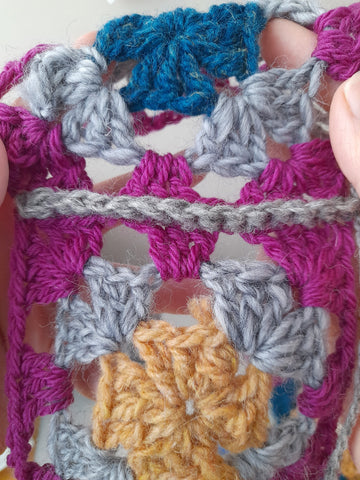
    For the sake of demonstration, I’ve used different coloured squares and a contrasting yarn colour for the seam. This is just so I can show you how to do it clearly. You can use any squares you like. You can also use the tail end yarns from your squares. It saves weaving them in!

    2 types of join you could try for your granny squares or knitted squares. 

    For both methods I am about to show you: identify the corner. That is where you will start. If the corner isn’t aligned, you won’t match the sides. Try using a removable stitch marker such as a bulb pin to hold the corners together. There’s no escape then!

    These two methods can be used for both crochet squares and knit squares. They are a pleasant alternative to seaming with a darning needle as you only need a hook. Remember to fasten off and knot the yarn when you’ve finished, otherwise it will come apart. 

    The Slip Stitch Join Method 

    Joining granny squares

    This is a method where you hold right sides together and slip stitch across the edges. One side will have a ridge (wrong side) and the other will have an almost invisible join. This is a popular method for those of us who love the right side to be completely flat. It’s a brilliant alternative to blanket mattress stitch as it looks the same without the sewing. 

    The ridge is pretty but it will be on the wrong side of the work. If you want a ridge on the right side of your work, join wrong sides together. 

    How to start the slip stitch join

    Step 1: 

    To do the slip stitch join, first lay your pieces right sides together. Match the squares up as best you can. You can use removable stitch markers to help keep the stitches together, if it helps. 

    If you lay them flat you will see a bottom row of ‘vs’ and a top row of ‘vs’. these are the tops of the stitches, also referred to as chains in some patterns. Here I’m demonstrating with a classic granny square duo. 

    Step 2: 

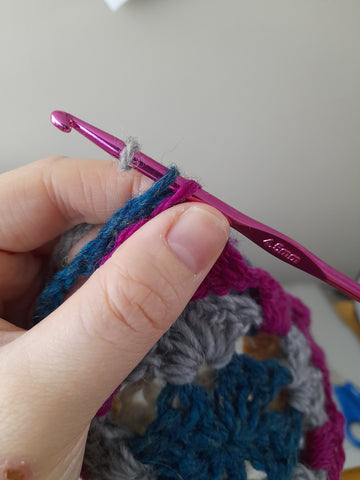
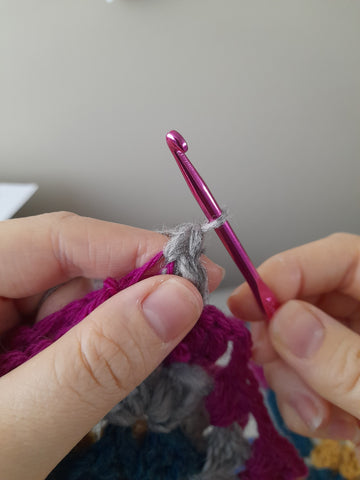
    Slip your hook into the first pair of loops. These consist of the outer loop of the bottom square (pink) and the top square (blue).

    Are you left or right handed? Note here that I have started with the right corner of the joined piece. I’m working right to left here because I am demonstrating right handed. 

    If you are left handed, you would be starting at the opposite corner on the left, working left to right. You will still be working with the same loops in the same order. 

    Step 3:

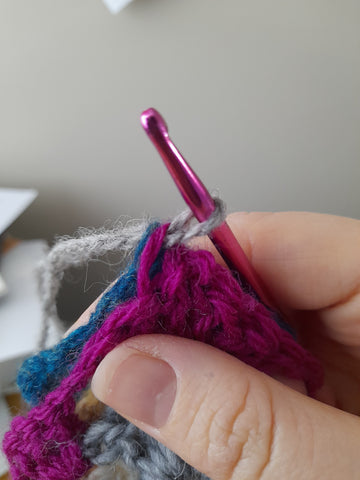
    Yarn over and pull your hook hook through both of these loops. Make sure they are the outer loops, not the inner loops. If you slip through the inner loops, you’ll see the contrasting yarn on the other side. There’s no point in stressing here as you can just pull it back and try again if you make a mistake. 

    First slip stitch done! 

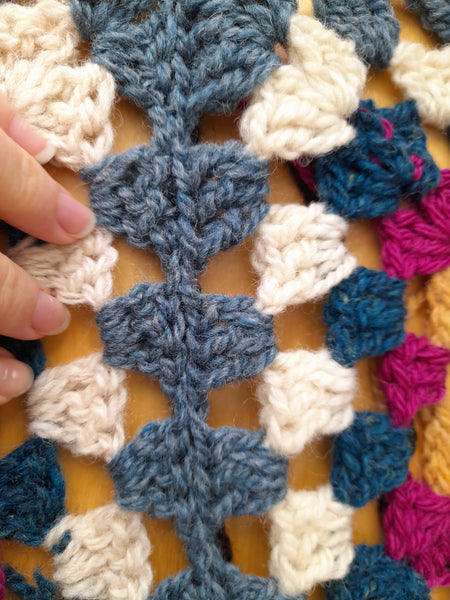
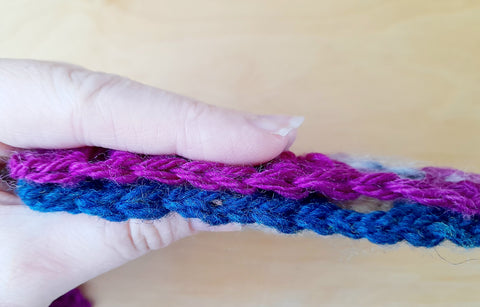
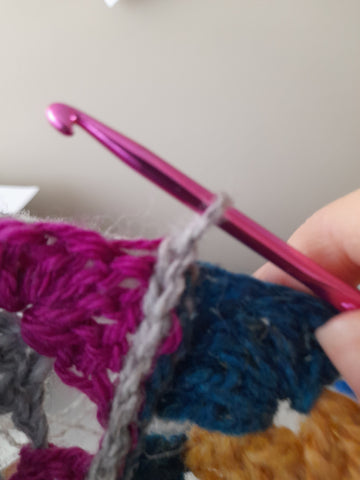
    Repeat this method to the end of the top of these squares. As you work across, you’ll see the slipped stitches making this pretty chain stitch. This will be the wrong side of the work. 

    When you turn the piece over to see the right side, you should barely be able to see the contrasting yarn. 

    There is a black contrasting yarn under these stitches. You can barely see it! 

    How to do the single crochet join: 

    This join starts out as though it will become a slip stitch join, but before you do the slip, you make a single crochet (UK treble). The other main difference is that the wrong sides are together. The single crochet adds a pretty ridge to the right side. We want people to see it. 

    Here’s how it’s done: 

    Work as instructed for step 1-2 of the slip stitch join above but this time, join wrong sides together. When you pull through after the yarn over, only pull through 1 loop. 

    Yarn over and pull through 2 loops on hook. That’s it. That’s the single crochet join. If your join looks like the seam above, then you’ve missed one of these steps. 

    As the single crochet join adds a ridge to the right side of the blanket, you may want to use a matching colour or a contrasting colour. 

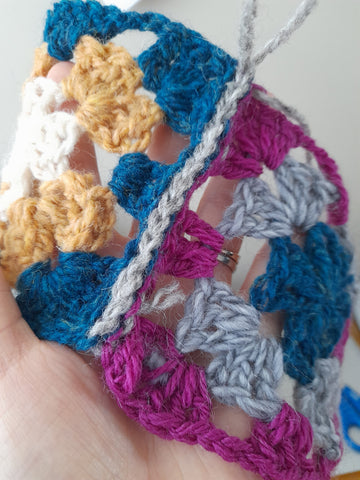
    The single crochet join should look obvious. It should be raised. 

    ridge on the wrong side of the joined blanket

    Single crochet join (pictured). 

    If you want to see a quick video demonstration of the slip stitch join, head over to my Youtube to see it. Really appreciate the help? Why not like and subscribe?

  • Beginner guide to yarn substitution.

    Yarn substitution is something that can seem complicated, but once you know what to look out for, you can use up your stash! Yarn substitution is a really handy skill that every yarn wielder needs to know, as not all yarn will be available forever.

    Ever downloaded a pattern and find that the yarn used in the sample photos isn’t even available in your country? Or that it is but it is way out of your budget? Would you prefer to use up your stash and stick with something you have?

    This is all easy to sort out with some simple yarn substitution. 

    Substituting based on the label: 

    Meterage/yardage. 

    Don’t just go with the same weight- how many balls of your sub yarn do you need? 

    Say for example the yarn in the pattern asks for a brand of DK yarn that is 100m per 100g ball and the yarn that you’re using is 200m per ball, you’ll need 50% fewer balls of yarn. Some patterns will tell you the exact meterage/yardage and this makes it really easy to substitute. 

    How thick is it? 

    Don’t be fooled by the label saying “DK”. For a long time, Cygnet Boho Spirit was labellled as a DK even though it works up as a worsted. Their Truly wool rich DK is also on the thick side, so it’s worth finding out for yourself before you jump into a pattern. 

    If you’re trying to use up stash yarn and some balls are missing labels, you can also measure wpi (wraps per inch). 

    Yarn weights and wraps per inch. Yarn thickness chart.Yarn sub

    How do I measure wraps per inch? 

    Take a pencil or a standard pen and wrap your yarn around it several times. You need to wrap until you’ve done at least 2.5cm (1 inch). Take a measuring tape or a ruler and measure how many wraps you can fit in an inch. 

    I can fit 23 wraps to an inch on this pen. I can now look at the yarn chart above and see that my yarn belongs in the #1 category for “light fingering, 4ply”. This is a great way to see how thick your yarn is if you’ve lost the label. I would therefore be able to use this yarn in a pattern that calls for light fingering or 4ply. 

    How to measure your yarn without a label. Wraps per inch tutorial. How do I know how thick my yarn is. Yarn substitution.

    Swatching 

    Whilst I do not expect anybody to go out and buy a ball of every potential yarn to swatch with, I do suggest that you do this if the yarn is all to hand i.e in your stash already. Not only will you get to see how it works up but you will also be able to see if you like it and if you think it will work with the project. 

    Always use the gauge/tension as your guide and you will not go wrong. People sometimes ask me “what yarn do you recommend?” for my patterns if they are in a country where the yarn is not available or if the recommended yarn is out of budget. My answer is always: 

    Whatever yarn gives the correct meterage. 

    Whatever yarn meets the gauge required. 

    If you are looking to buy new yarn for a project and don’t know what would be a good substitute, you can always use yarnsub.com for extra help choosing.

    cards
    Powered by paypal
×