Tag: crochet cardigan

  • Summer crochet cardigan pattern. Mesh stitch crochet cardigan.

    Summer crochet cardigan pattern. Mesh stitch crochet cardigan.

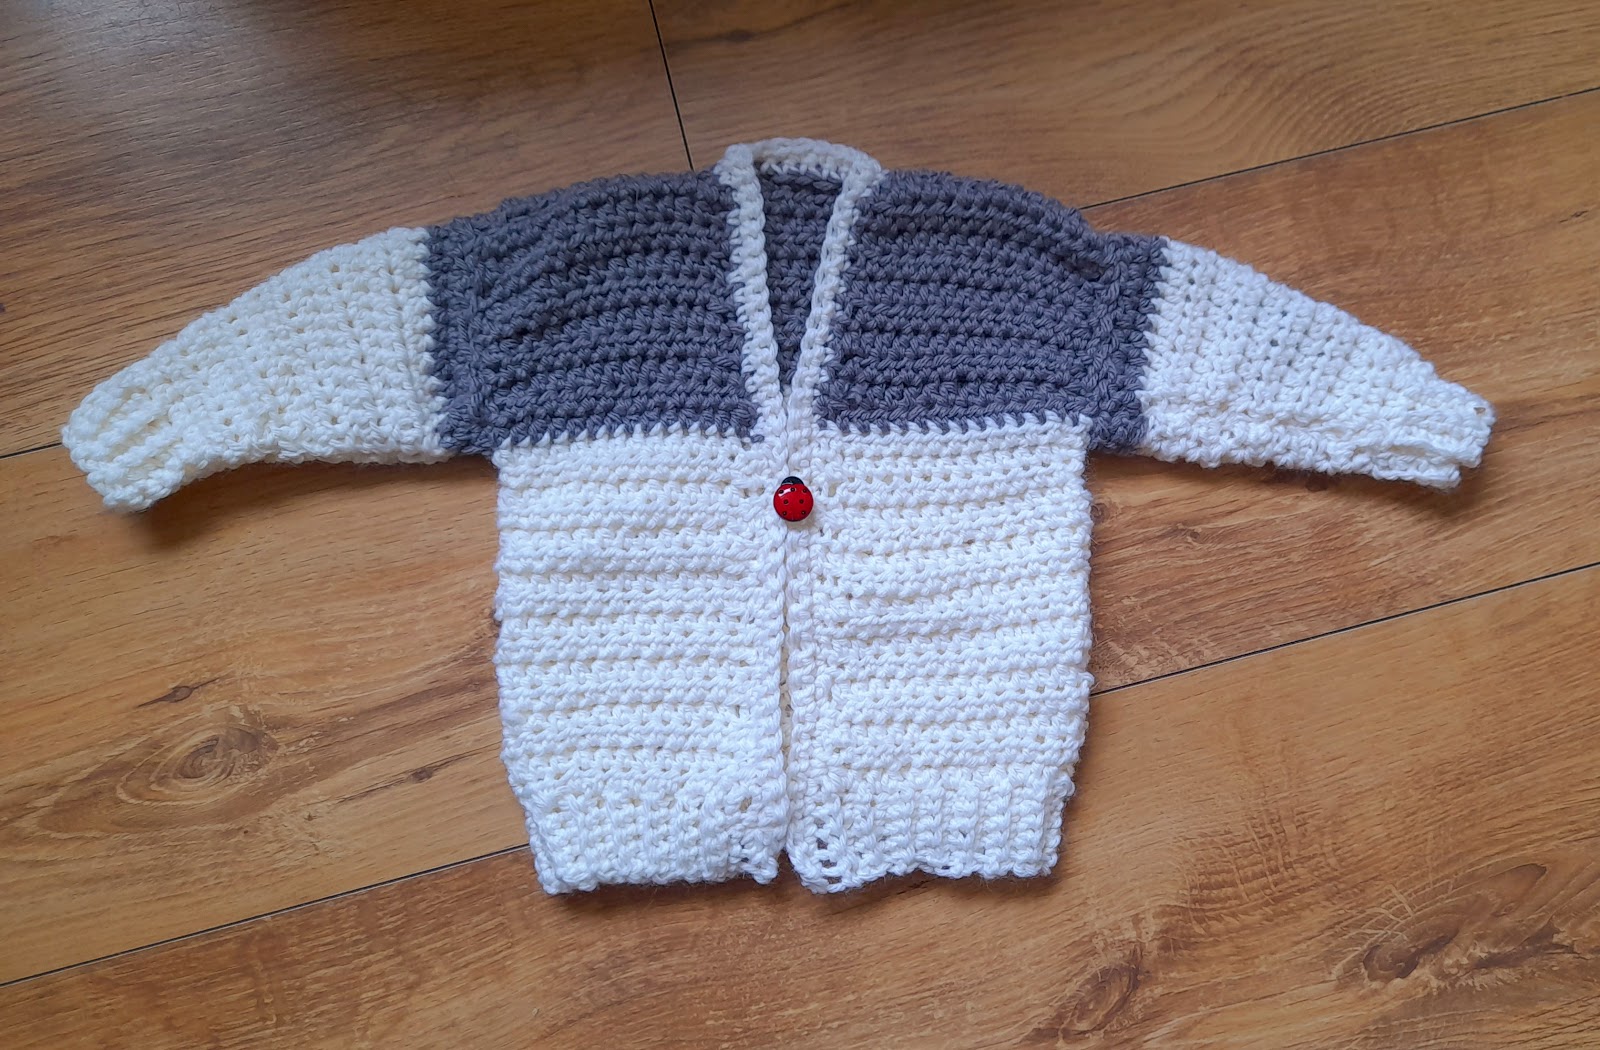
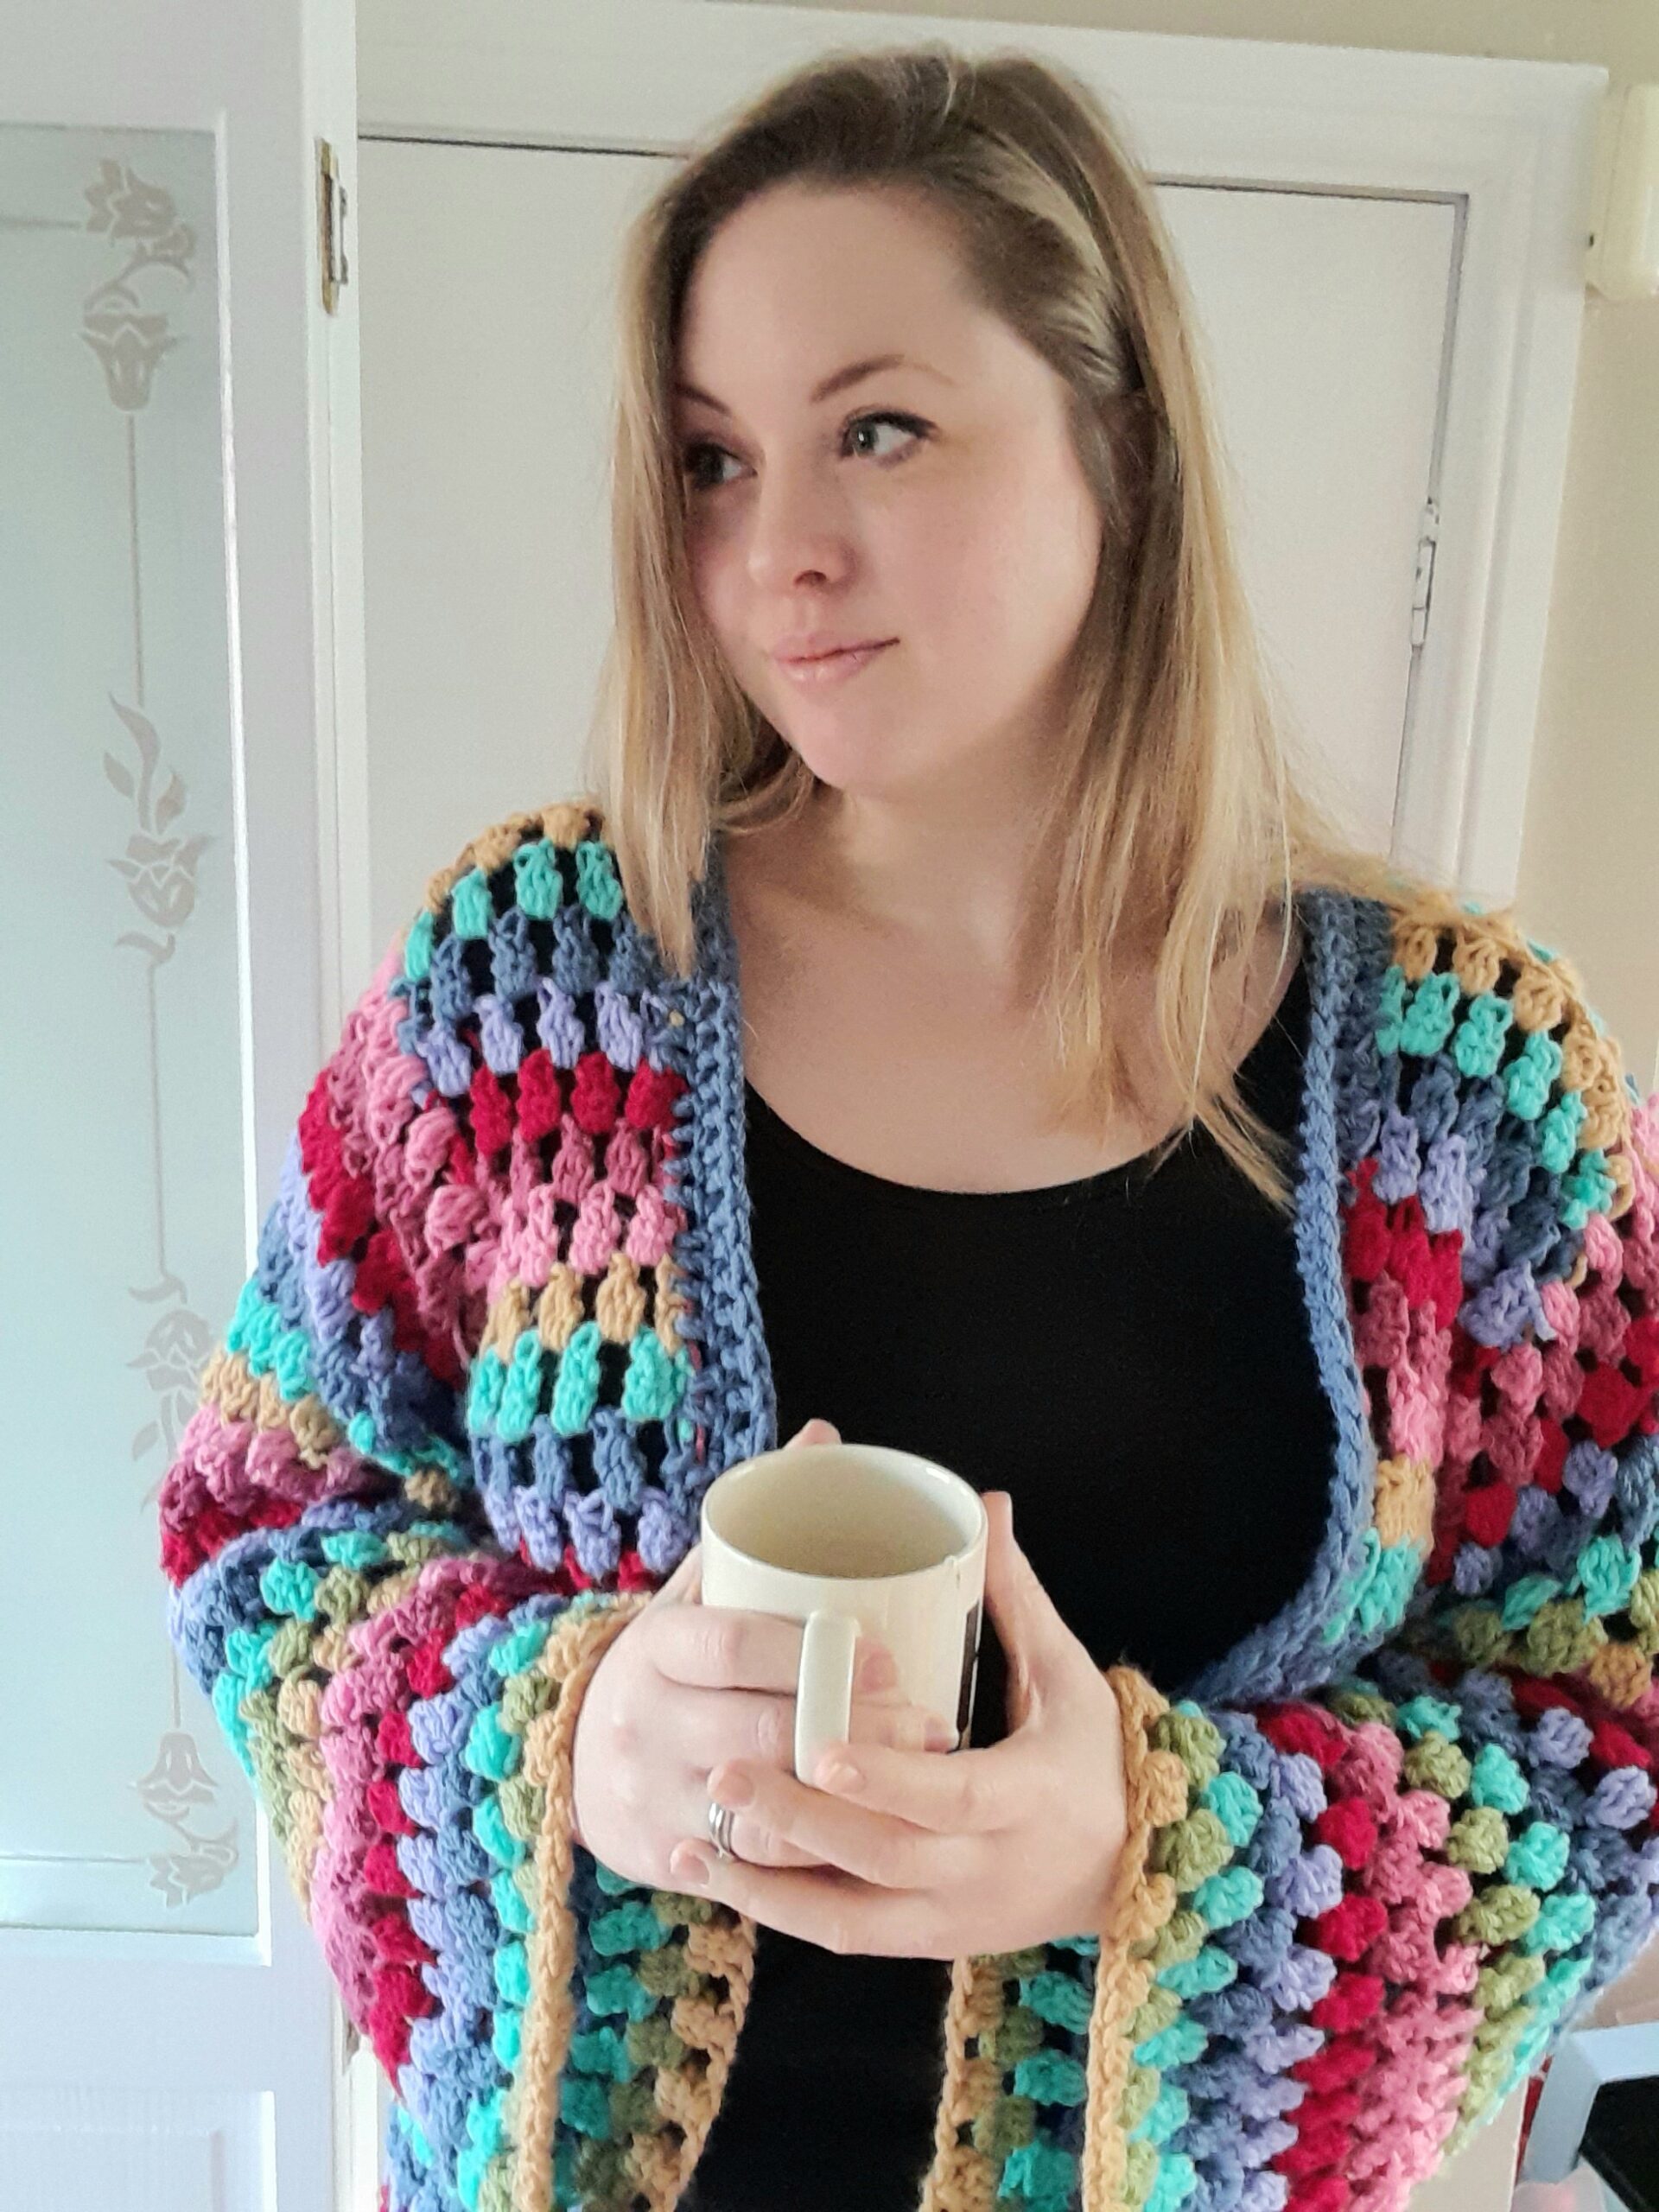
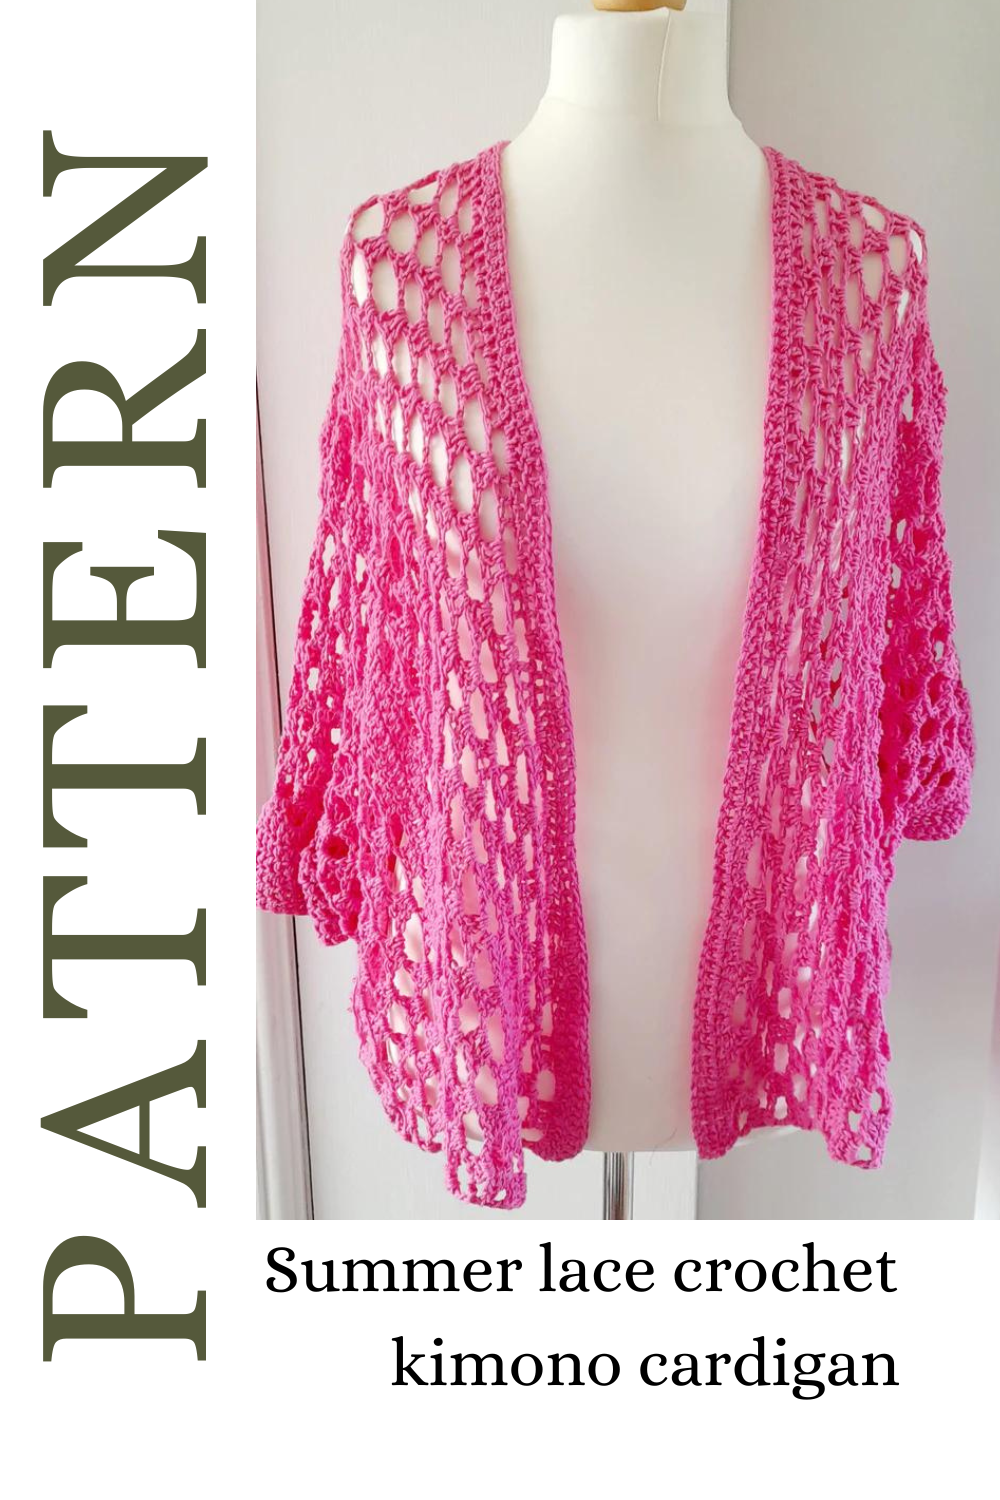
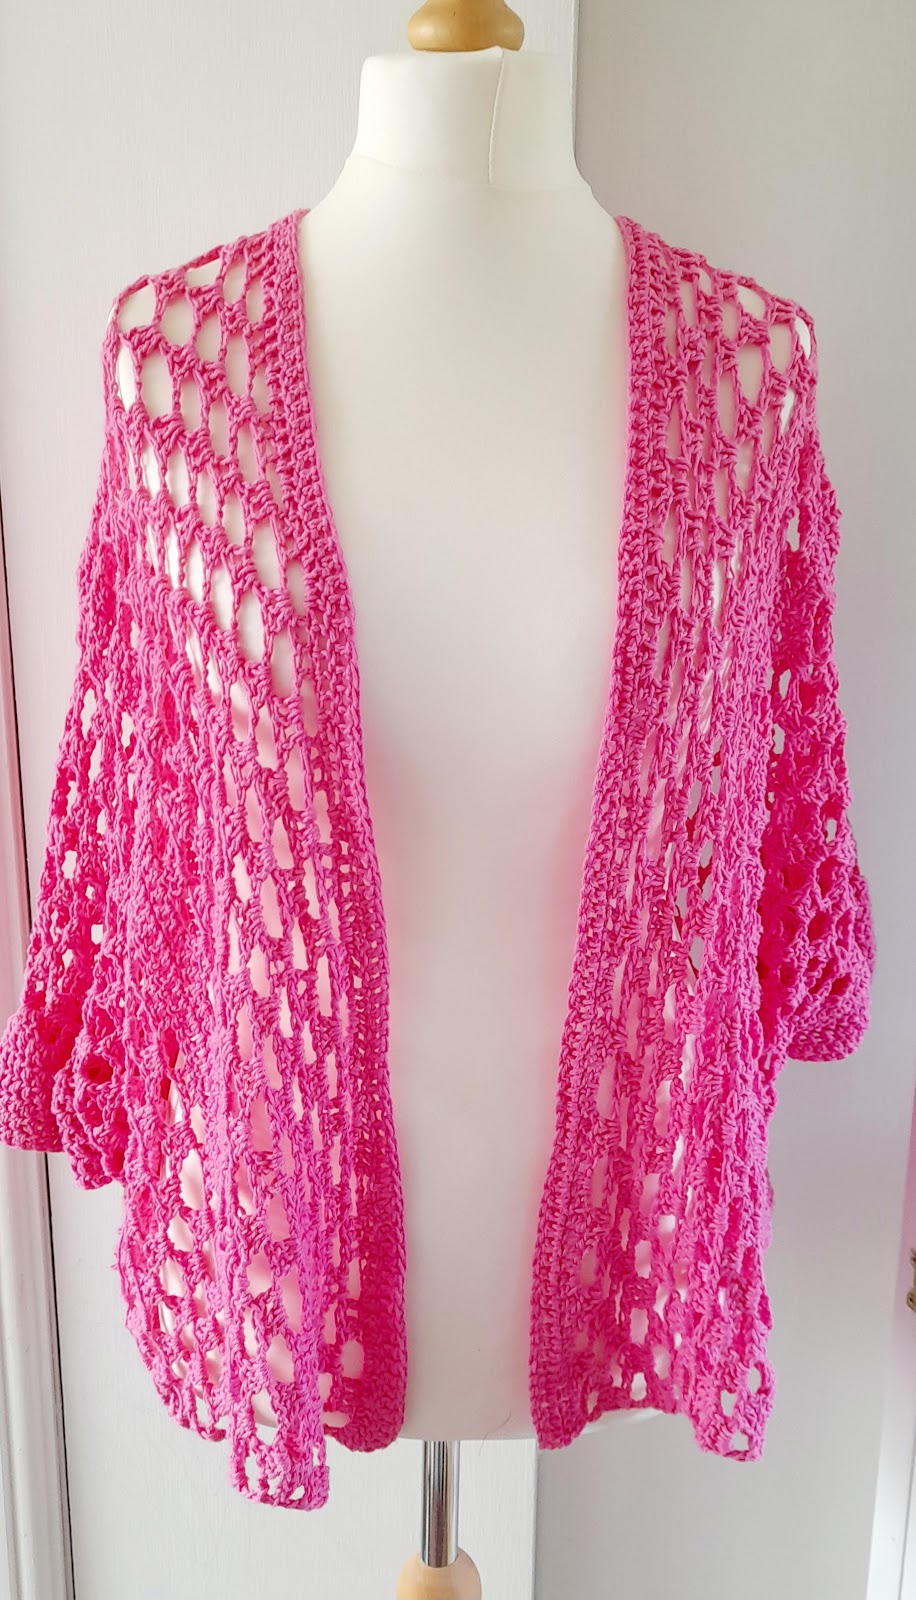
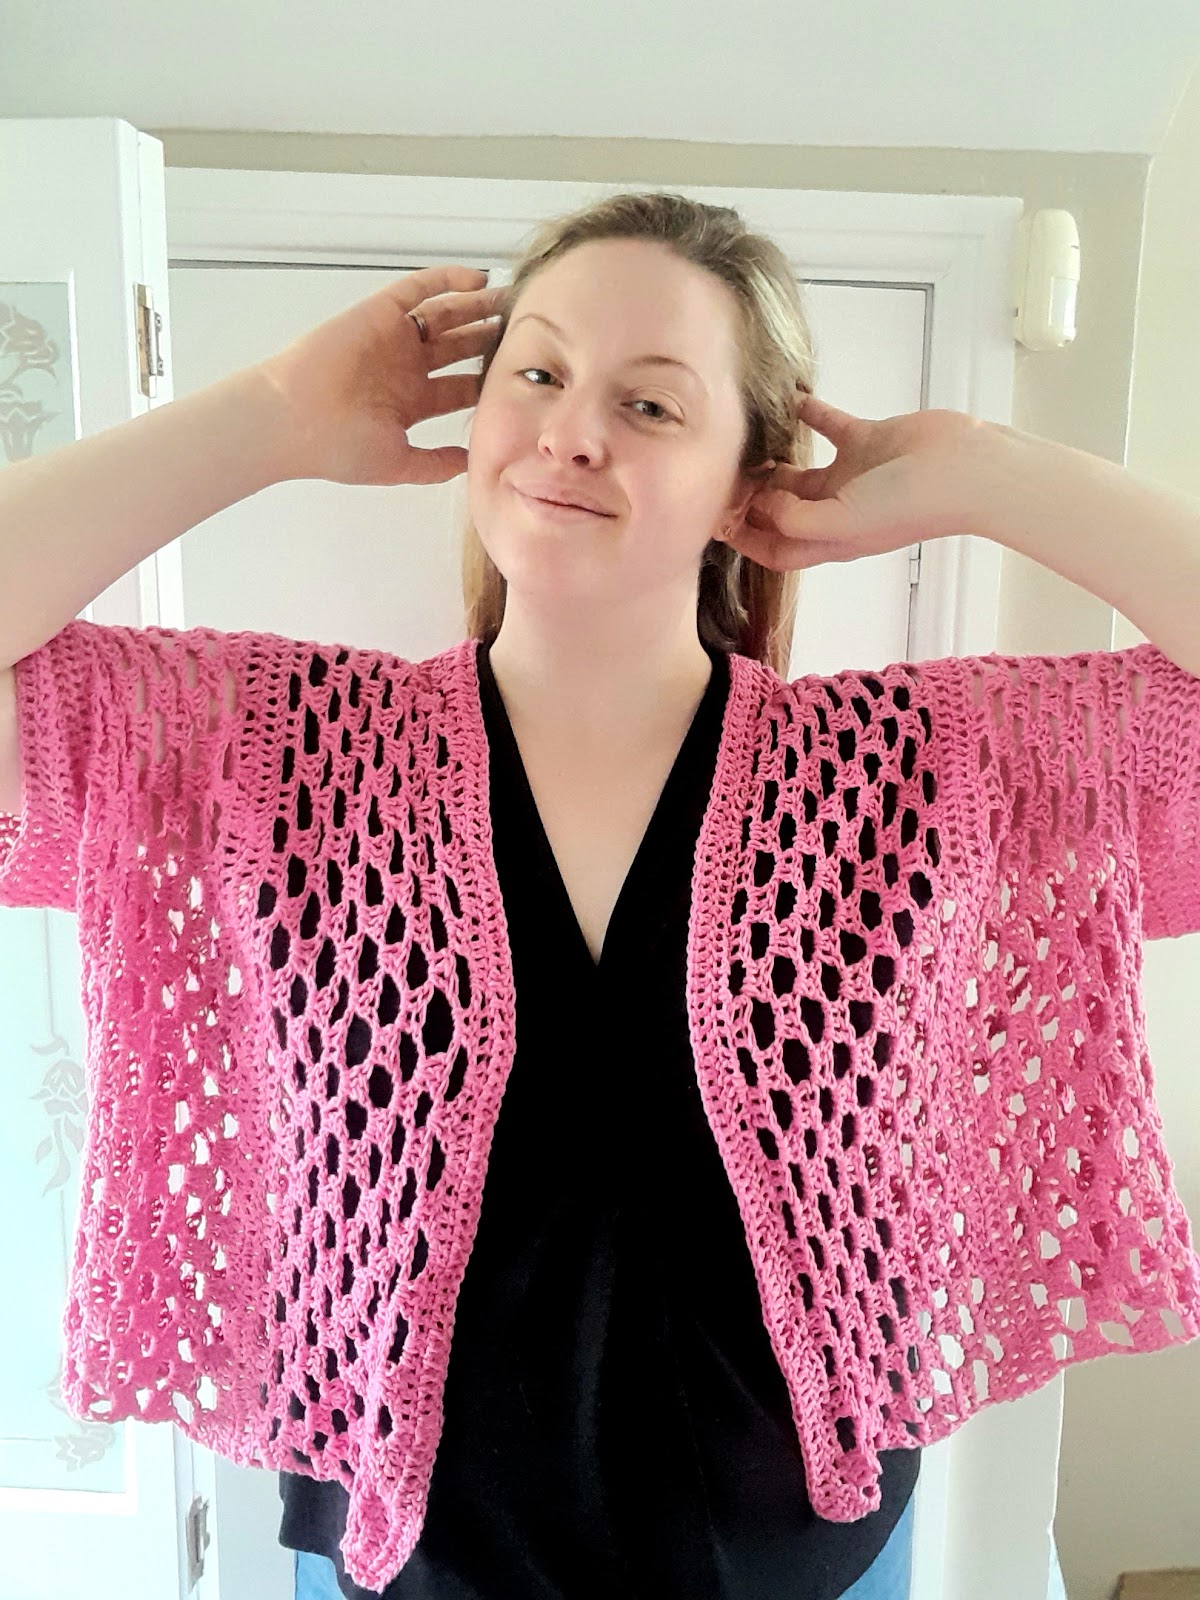
    Here’s a simple summer crochet cardigan with lace openwork and mesh stitch detail. This simple kimono sleeve cardigan is quick to make in cotton yarn.

    if you’d prefer to download the ad-free pdf of this pattern, you can do so on Ravelry or Ko-Fi.

    This article contains affiliate links, meaning that if you choose to buy from the links, I receive a small commission at no extra cost to you.

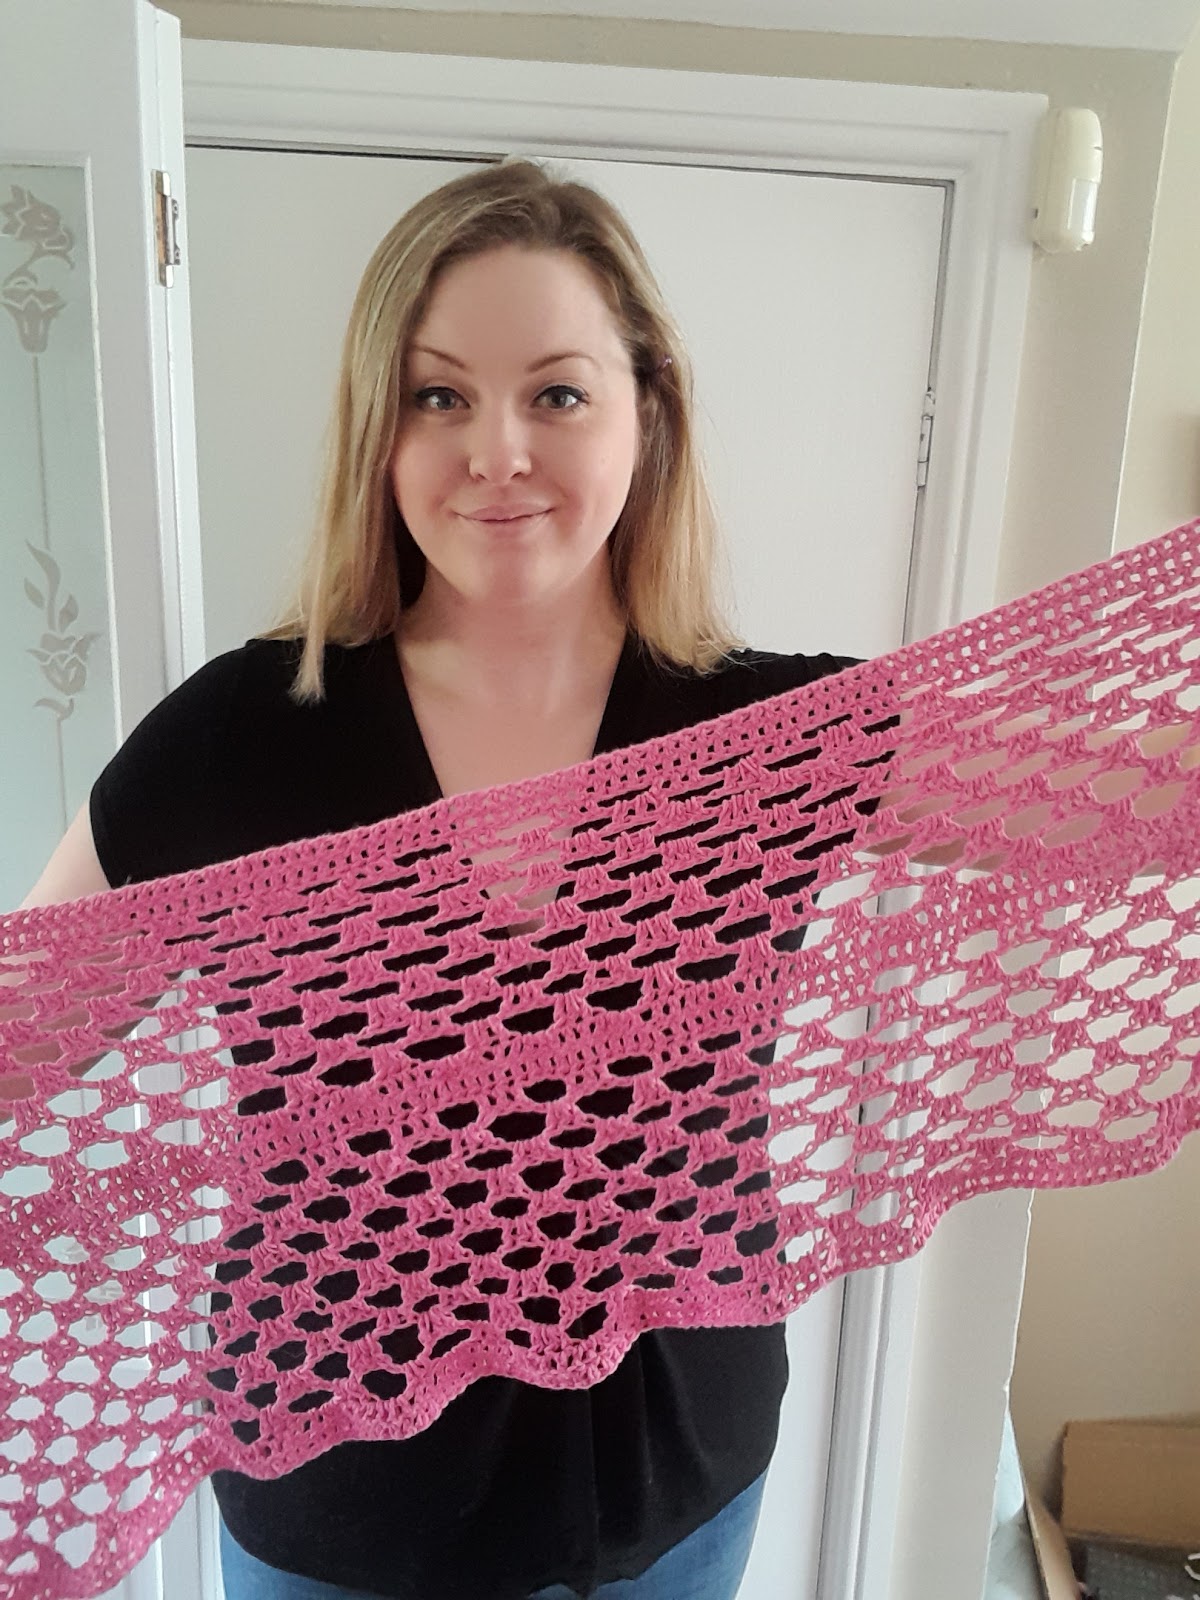
    This kimono lace cardigan is a summer must have. It’s lacy, light and goes with anything. Make sure you have one in several colours so that no outfit is off limits! The beauty of the kimono cut is the way it can flatter any shape. With the wide sleeves and open front, it has drape and moves beautifully on the wearer.

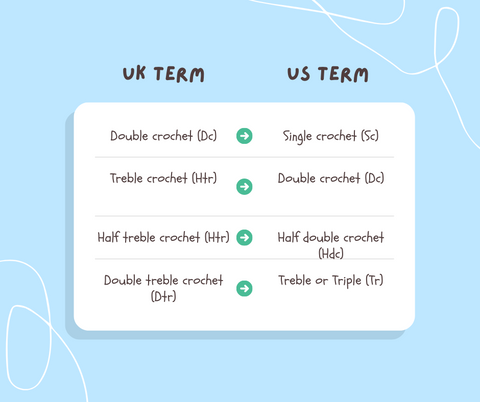
    All you need to know for this pattern is the double crochet stitch (US terms), chain and slip stitch join. 

    If you need to refresh your knowledge of crochet terms, I have a handy blog post here.

    This kimono style cardigan is worked sideways. 

    It is constructed by making two horizontal panels. The two panels are then folded lengthwise and the sleeves are worked in the round. 

    The left half is then seamed to the right half at the back and it is ready to wear! 

    Skills required to make this simple crochet cardigan:

    • Making a chain. This is essential to every beginner crochet pattern.
    • Double crochet (UK treble crochet). If you don’t know what that is, please check my handy stitch guide for crochet beginners.
    • Slip stitch join. If you don’t know what that even means, look at my post about joining granny squares. It’s the same join!

    Yarn required to make this simple, lightweight crochet cardigan with mesh stitch.

    I used Cygnet 100% cotton DK, which is a firm favourite at Germander Cottage Crafts but sadly, this yarn is discontinued. I have suggested some alternatives. This particular shade is called Peony pink! 

    If you can’t get your hands on this particular yarn, here are some great alternatives to consider:

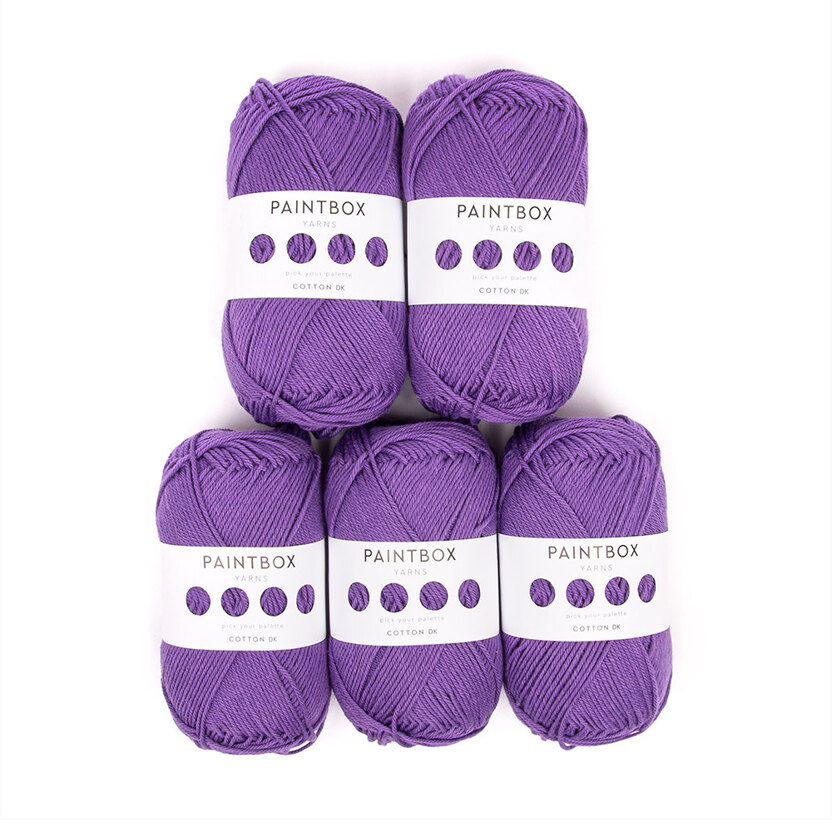
    Paintbox yarns cotton DK: £2.75 per 50g ball and it comes in a great range of vibrant or pastel colours, as well as neutrals. It’s 125m per 50g ball so you will need another ball or two depending on the size you’re making. It also comes in value packs.

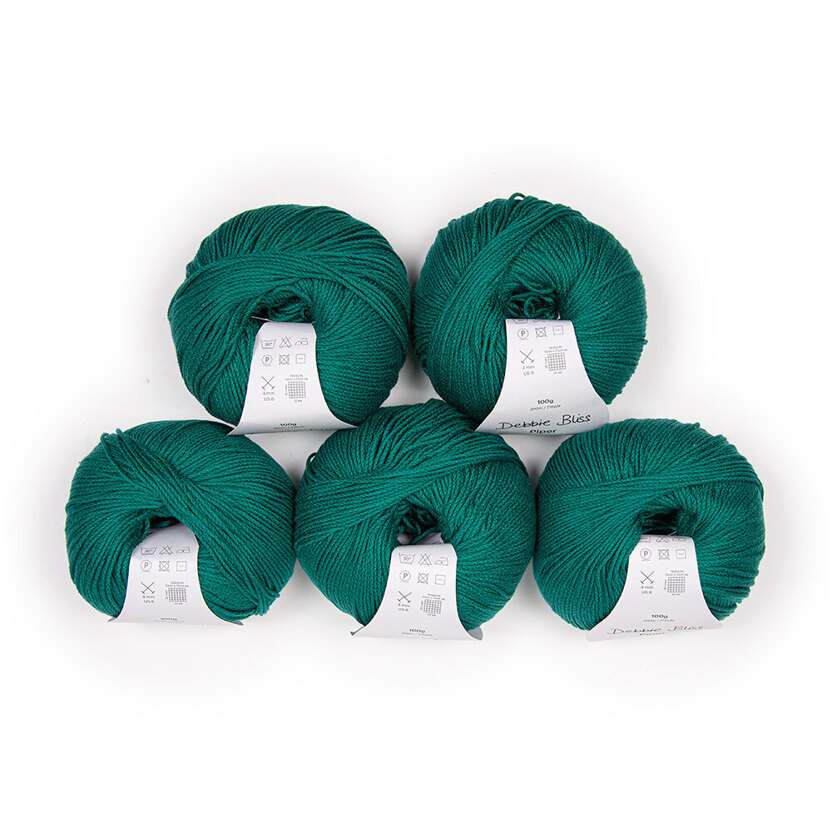
    Debbie Bliss Piper DK 5 ball value pack: £40 for 5 balls of this 50% cotton 50% viscose yarn from Debbie Bliss. It’s 200m per 100g ball so matches the Cygnet cotton requirement perfectly. Warm, yet lightweight, Debbie Bliss’ Piper is a versatile DK weight yarn with a crepe texture that drapes beautifully. Piper produces fantastic stitch definition and it’s gloriously silky and smooth to knit. The colour palette is made up of 16 fresh and contemporary shades, which are perfect for seeing you through the changing seasons.

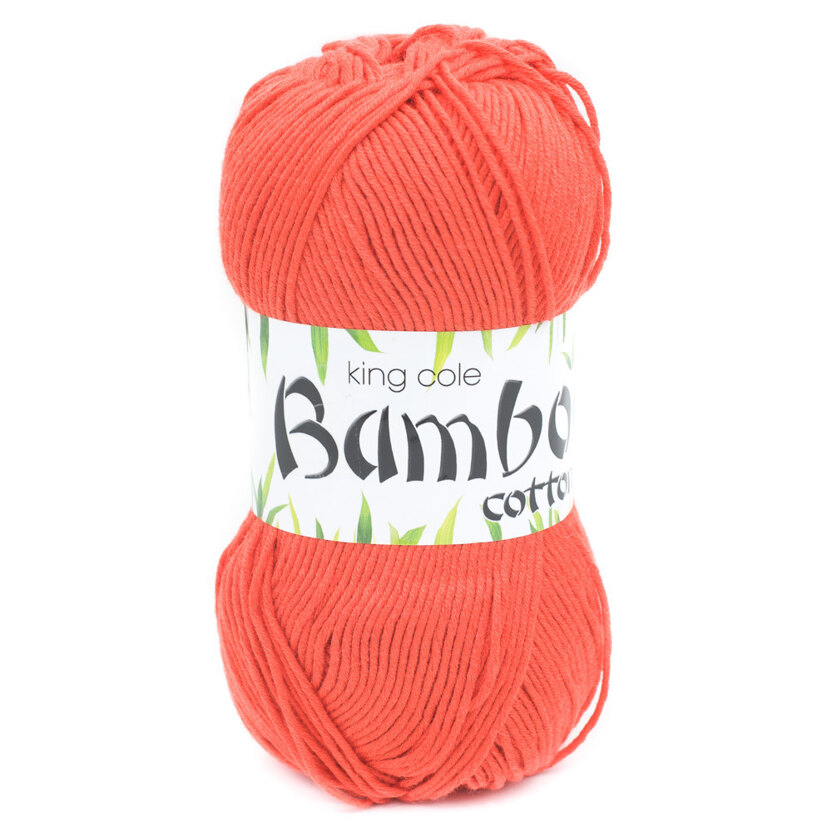
    King Cole Bamboo Cotton DK: King Cole Bamboo Cotton DK is a fabulous yarn choice for summer knits and baby clothes! Bamboo yarns are famous for their non-allergic properties, and Bamboo Cotton DK is deliciously smooth on the skin, thanks to its 50/50 mix of bamboo and cotton. Ideal for a cotton summer cardi and robust enough for baby clothes that need to be in and out of the wash, Bamboo Cotton DK comes in a gorgeous range of pastels, deliciously muted berry shades and some deep accent colours. It’s £5.69 per ball and you get 230m per 100g ball!

    The Pattern: Crochet Summer Lace Cardigan Pattern.

    US crochet terms used throughout.

    Crochet cardigan patterns for summer. Easy crochet kimono to make. Crochet kimono cardigan patterns free. Beginner crochet patterns free.

    Sample shown in size M on a 44” bust. 

    Glossary

    ChChain. Insert hook, yarn over pull through loop. 
    Ch spThe chain space or gap created by the chains of the previous row. Work into the space rather than the chain or stitch. 
    DcDouble crochet. Yarn over, insert hook, yarn over and pull through. Yarn over and pull through 2. Yarn over and pull through 2. 
    RepRepeat
    Sl stSlip stitch. Insert hook into loop, yarn over and pull through both loops. 
    SkSkip a chain. 
    St(s)Stitch(es)

    Gauge:  12 sts and 10 rows per 10cm/4in in dc using 4mm hook and DK yarn.

    1 3Dc cluster measures 2cm tall. Cluster gauge is approximate because of the loose stitch. 

    Materials: 

    • 350g/400g/450g of Cygnet 100% cotton DK in Peony PInk. (200m/219yd per 100g/3.5oz). 
    • 4mm/US 6 crochet hook or size needed to meet gauge. 
    • Tapestry needle 
    • 4 removable stitch markers. 

    Sizes: 

    S can fit chest sizes 32-40″

    M can fit chest sizes 42-48″ 

    L can fit chest sizes 50- 56″ 

    Lace pattern: 

    Row 1: Ch3 (counts as 1st Dc) dc in each of next 3 ch *ch 3 sk next 3ch, Dc in each of next 3 ch* rep from * to last st. Dc in last ch. Turn.  

    Row 2: Ch 3 (counts as 1st dc). *3Dc in next ch- 3 loop, ch3*; rep from * to last Dc. Dc in last ch. Turn 

    Row 3: Ch3 (counts as 1st dc) *3Dc in first ch 3 sp, ch 3* repeat * to last ch 3 sp. Dc in top of turning ch. Turn. 

    Repeat rows 2 and 3 for pattern. 

    Panel measurements: 

    S: 156cm (61in) long and 42cm (16.5in)  wide 

    M: 162cm (64in) long and 46cm (18in) wide. 

    L: 174cm (68.5 in) long and 50cm (19.5in) wide. 

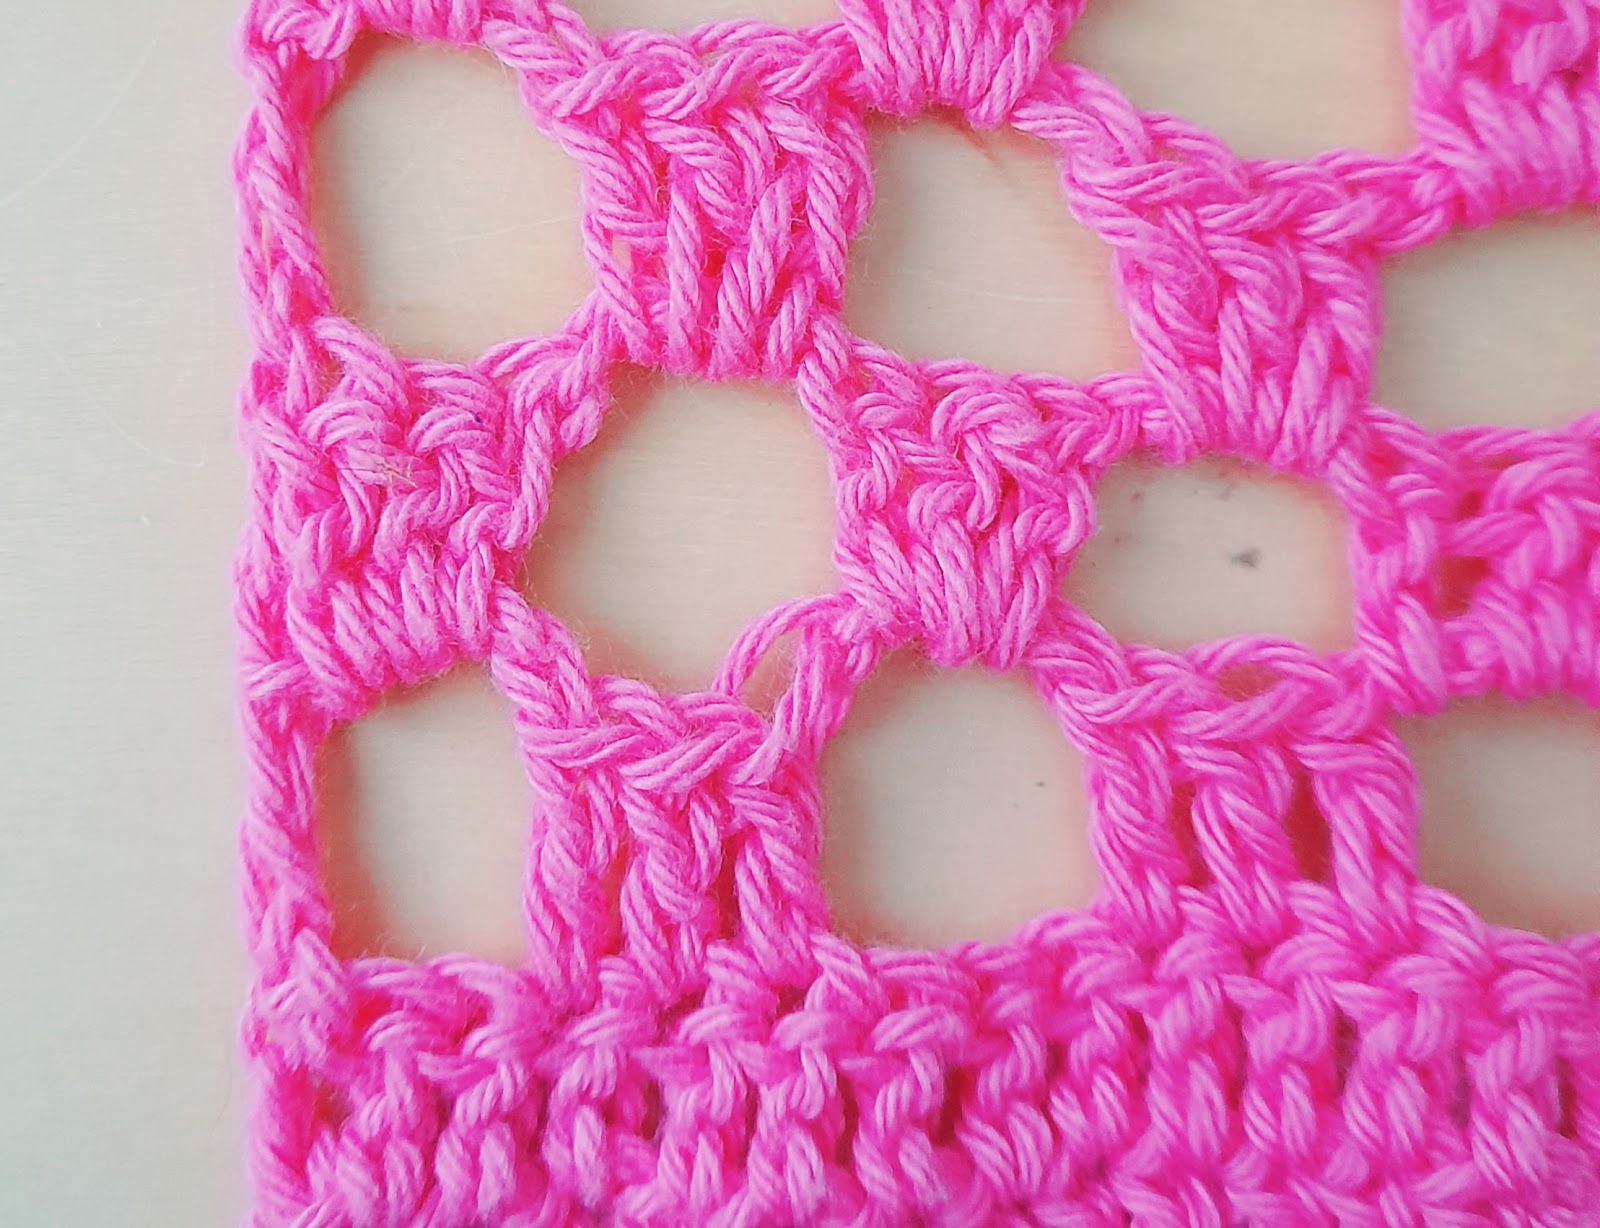
    Lace pattern (above)

    Sample shown in size M. 

    S- 26 3 Dc clusters. 

    M- 27 3 Dc clusters. 

    L- 29 3 Dc clusters. 

    Panel (make 2)

    Ch 160/166/178 (3 ch counts as 1st dc) Turn. 

    Dc in 4th ch from hook. Dc in every ch. Turn. (158/164/176 sts total)

    Ch 3, Dc in every Dc to end. Turn. (158/164/176 sts total)

    Work lace pattern (page 2)  for 9 (10/11) rows. 

    Next section: 

    Ch3 *3Dc in ch sp, Dc in next 3 Dc* Repeat * to end. Ch 3 and turn. 

    Dc in every dc to end. Turn. (2 dc rows total)

    Work lace pattern for 9 (10/11) rows. 

    Ch3 *3Dc in ch sp, Dc in next 3 Dc* Repeat * to end. Ch 3 and turn. 

    Dc in every Dc to end. Turn. (2 dc rows total). Fasten off. 

    Mark for armholes: 

    Count 47 (49/51) dc sts. Place removable marker on next st. Count another 61 (63/71) sts. Place marker on 62nd (64th/72nd) st. 48 (50/52) Dc sts after second marker. 

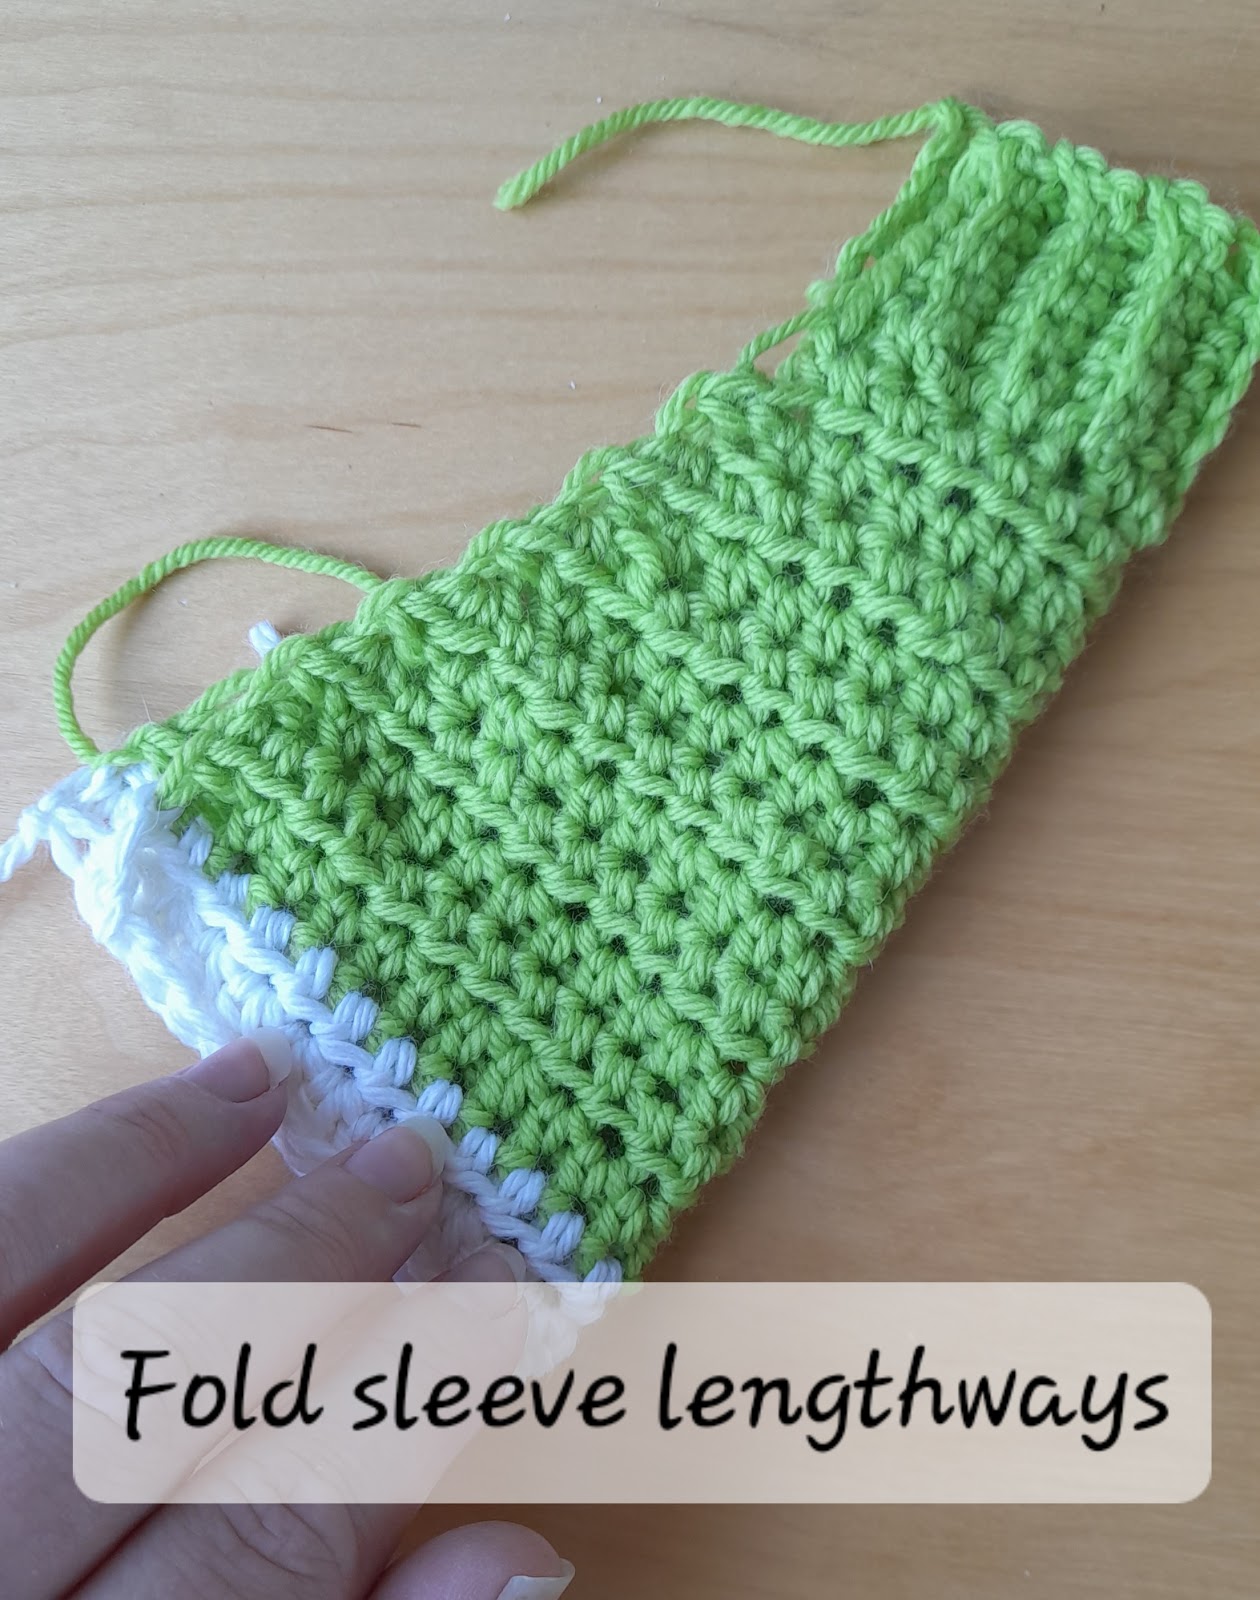
    Fold the piece lengthwise so that the two markers are matched. Secure the markers together.  

    Do this for the opposite panel also. 

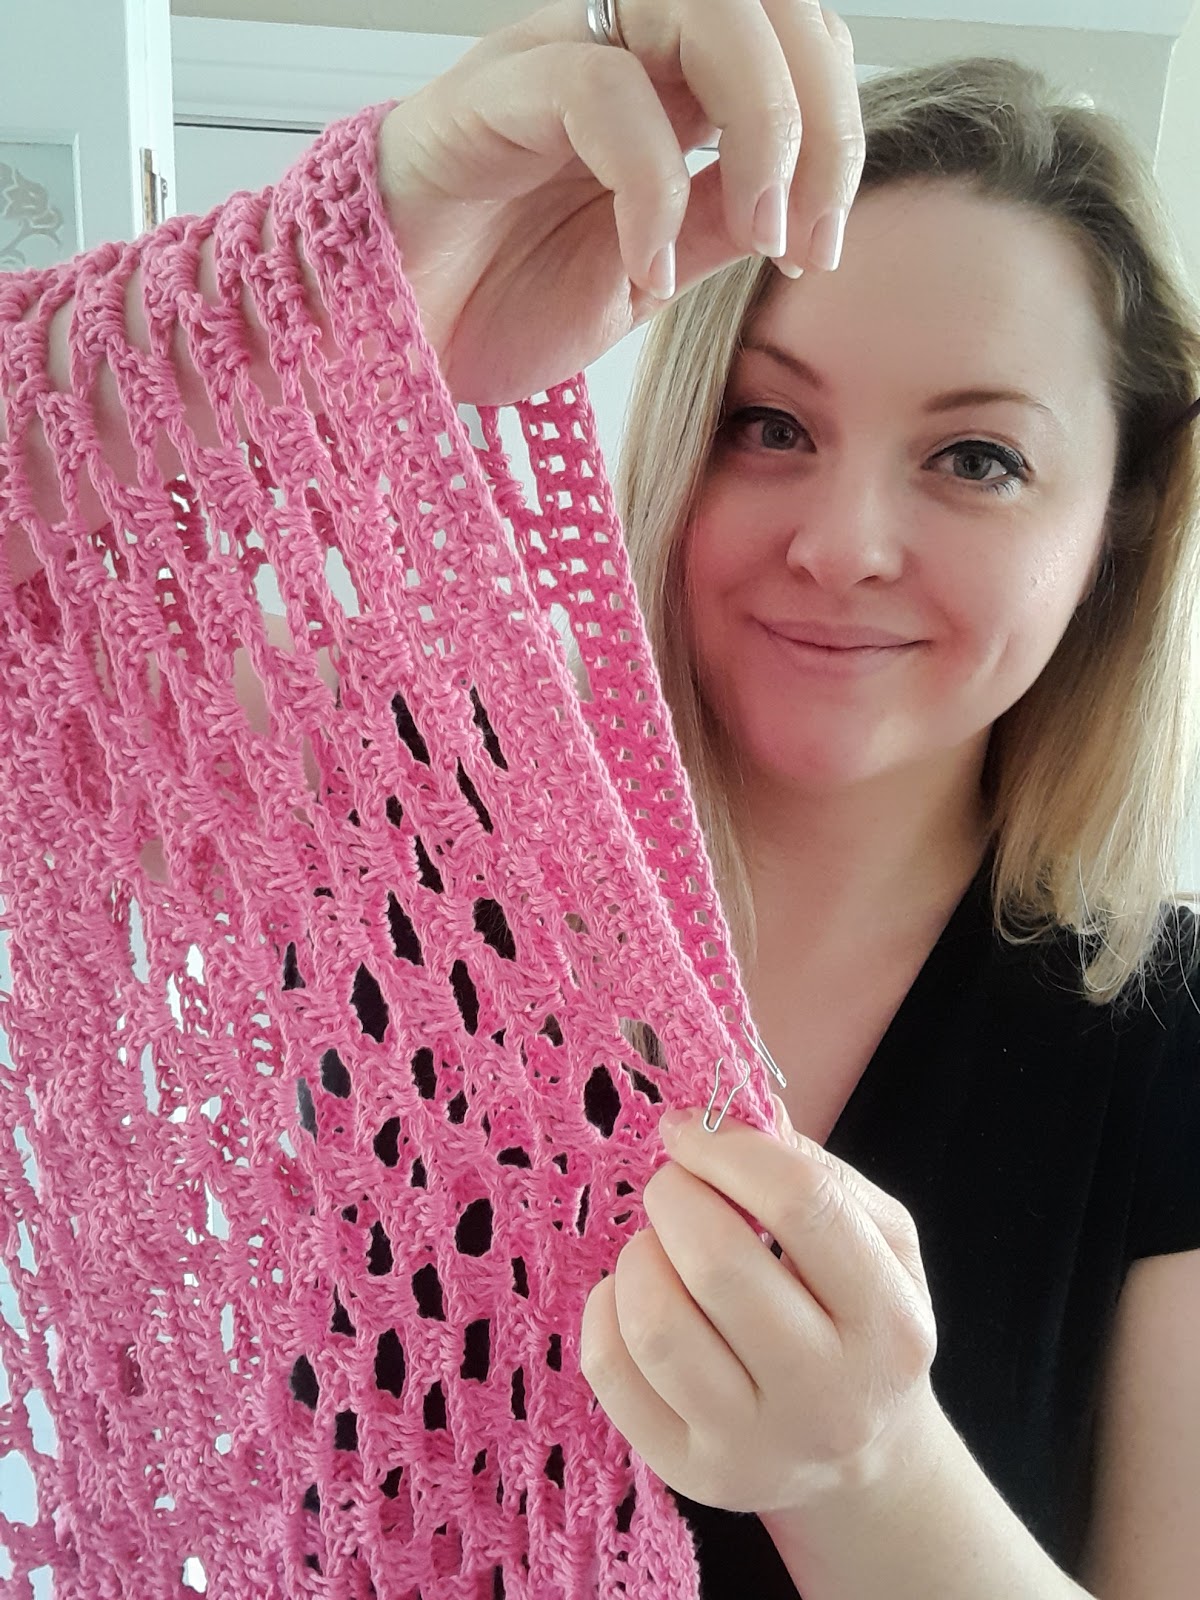
    Markers are matched to mark the sleeve opening. 
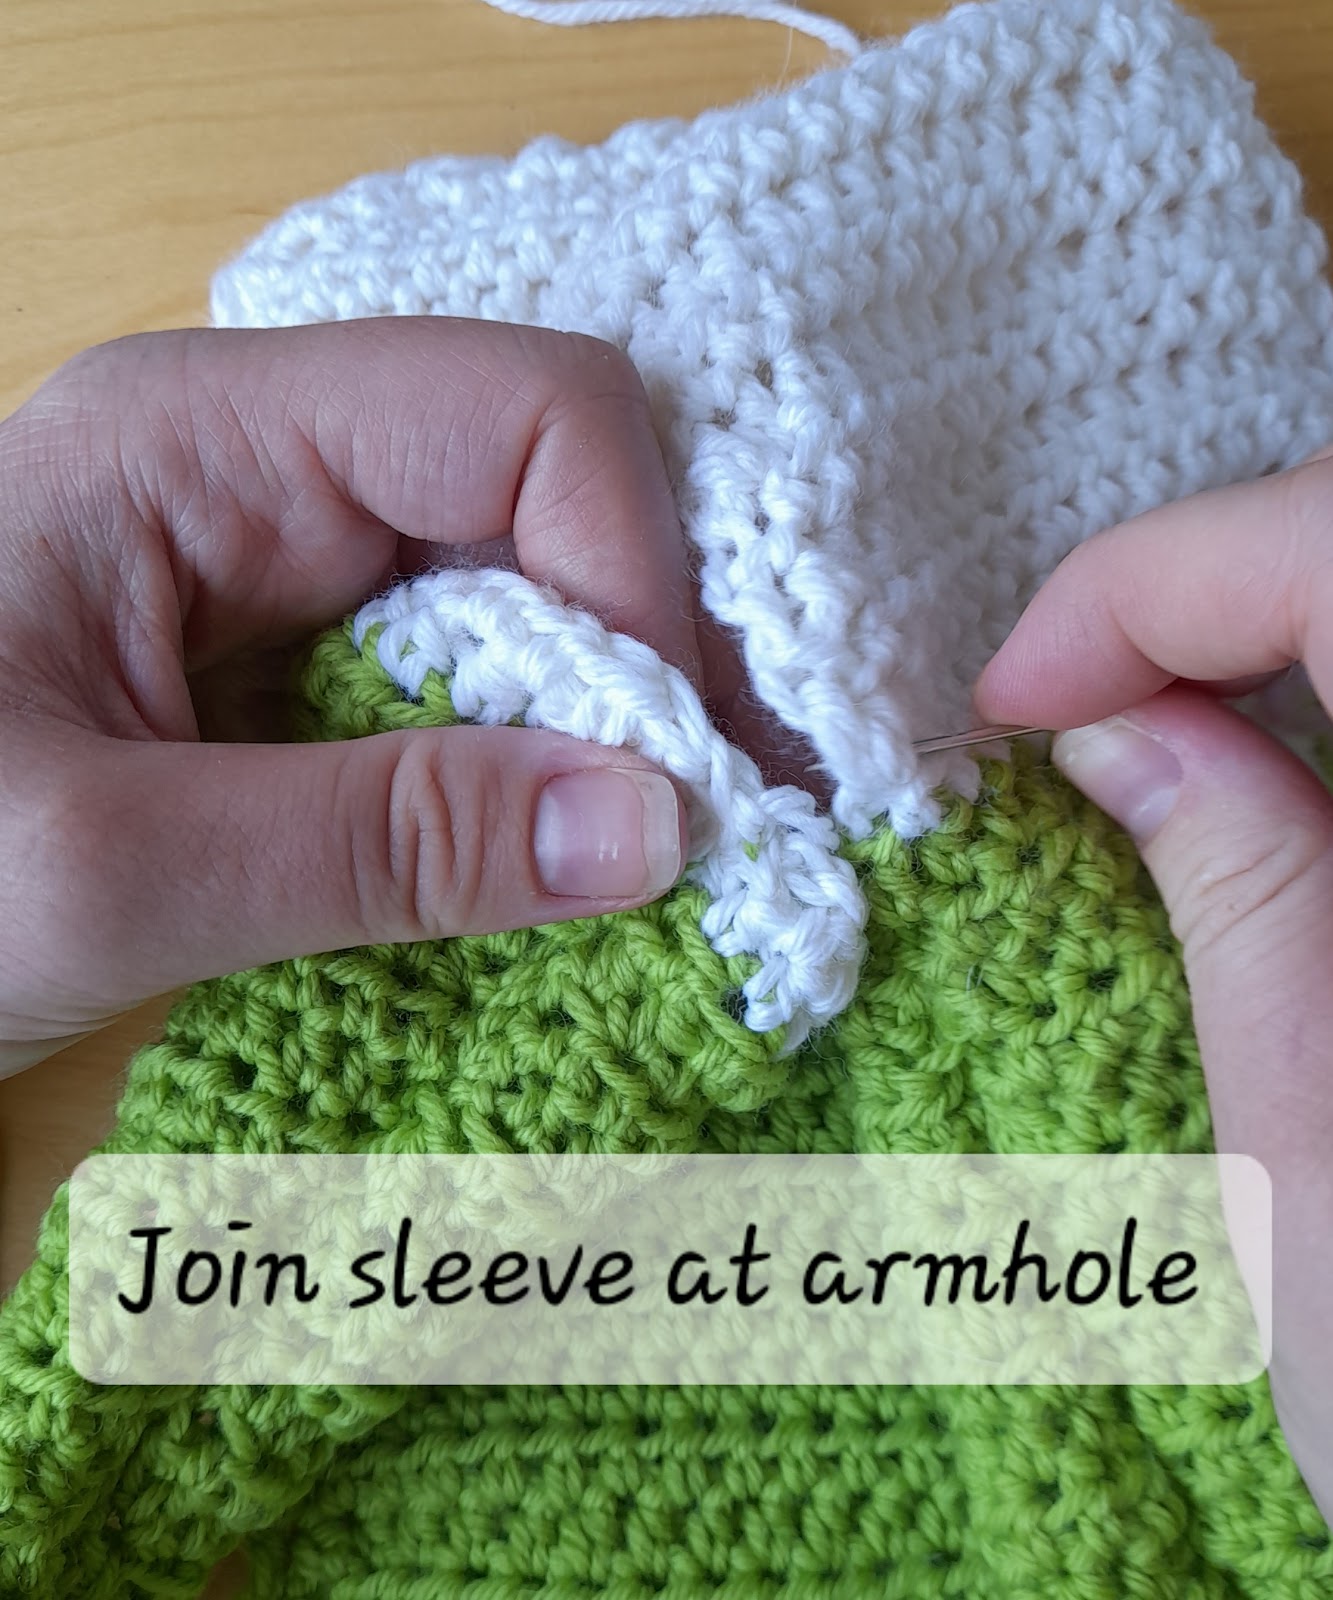
    Seam the side. 

    Using sl st join or a tapestry needle, seam the side of the piece from the hem to the underarm. This makes it easier to make the sleeve. 
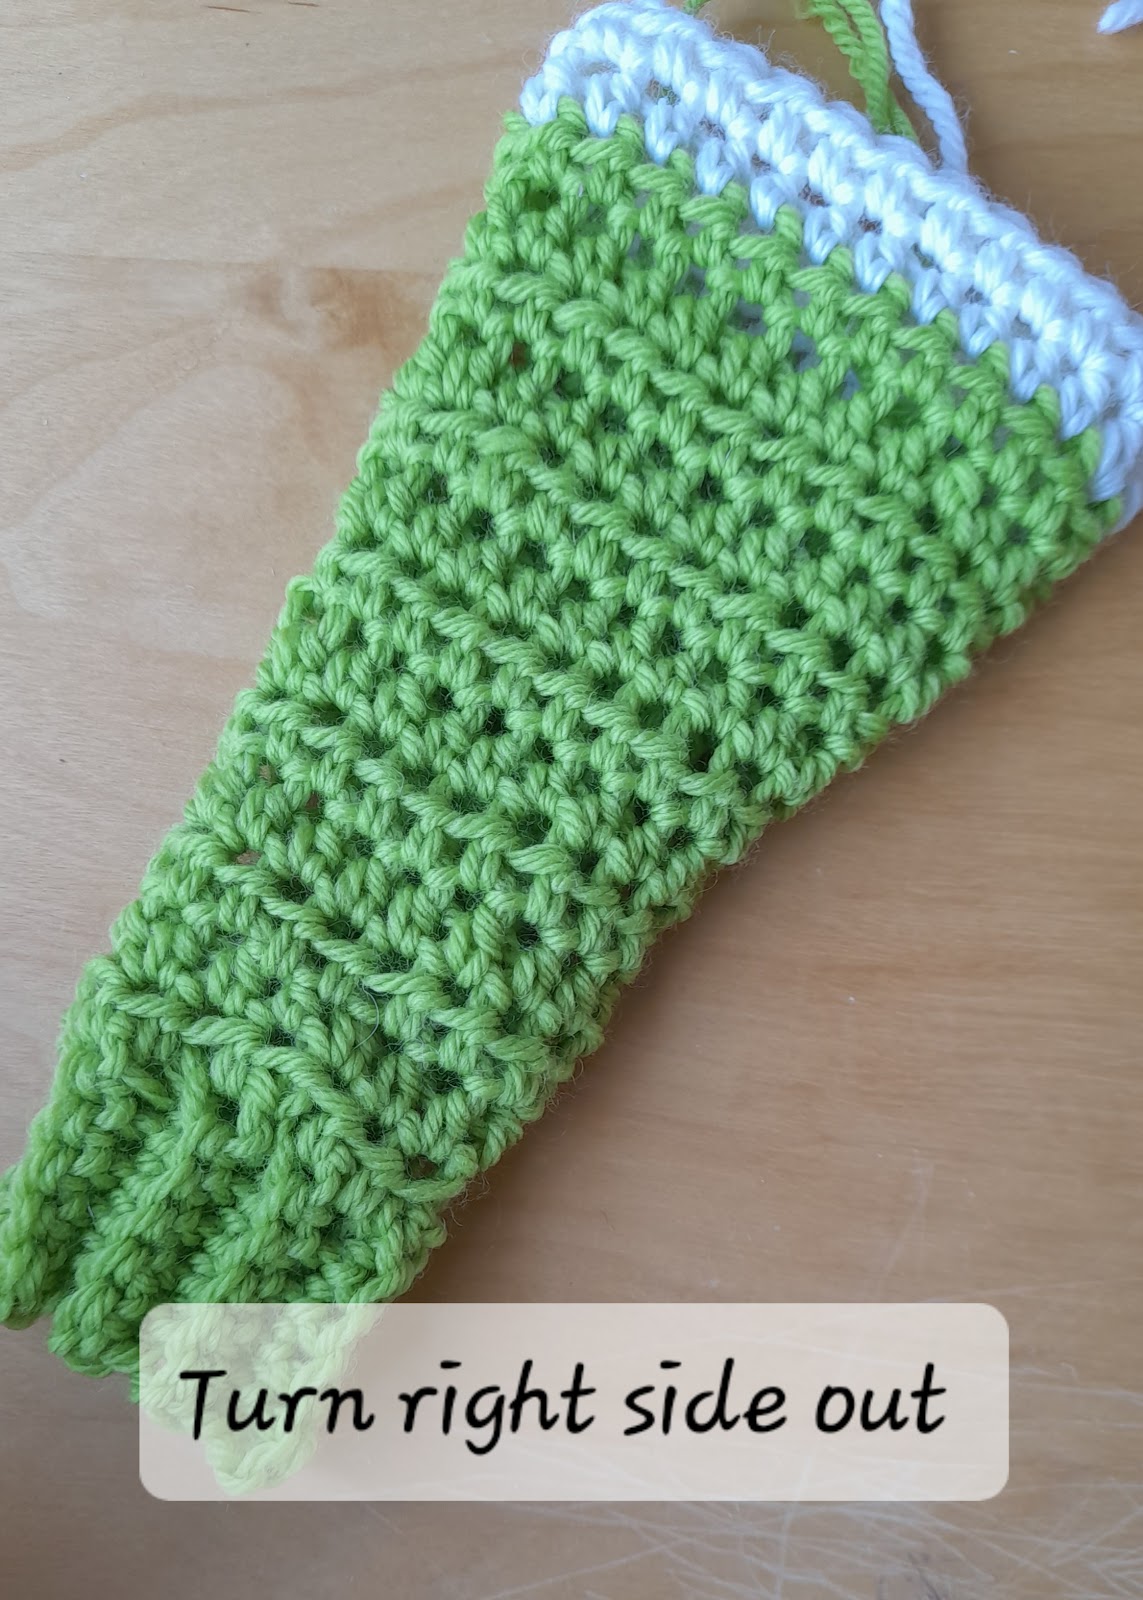
    Crochet summer kimono pattern free. Free crochet cardigan patterns for beginners. Mesh stitch crochet pattern ideas. Free crochet summer cardigan. Free summer crochet cardigan pattern.

    Sleeve

    Reattach yarn and ch 3 (counts as 1st dc). Dc in every dc st around. (62/64/72) dc sts in total. Sl st to join the round.

     Work 5 more rounds. Fasten off. 

    The stitches should be split like this: 

    S- 158ch 48/62/48

    M- 164ch 50/64/50

    L- 176ch 52/72/52

    Assembly

    Join the two back pieces, right sides together using sl st, or seam with a tapestry needle. 

    Back seam should be 51cm/ 53.5cm/56cm (20in/21in/22in) long. 

    Weave in ends and enjoy!

    Easy beginner crochet cardigan for summer. Crochet summer lace cardigan pattern. Simple summer cardigans to crochet.

    Thank you for using this free crochet cardigan pattern! If you have a Ravelry account, why not save it as a project?

    Crochet cardigan pattern free. Free crochet kimono cardigan PDF. Free crochet patterns using mesh stitch. How to crochet lace.
  • Easy baby crochet cardigan: Lovechunk sweater.

    Easy baby crochet cardigan: Lovechunk sweater.

    The Lovechunk sweater is a baby crochet cardigan pattern using worsted weight yarn. This ensures a quick, satisfying gift!

    If you’re in need of a quick, easy make to give to a new baby, try the Lovechunk baby sweater. Not only is it made using aran weight yarn for a quicker project but it is available in sizes 6 months to 2 years. Every baby needs a simple, drop shoulder cardigan for cooler days and photo opportunities. I chose aran weight for this design because it has just the right amount of squish without being too stiff. 

    Prefer to get your crochet patterns as a downloadable PDF?

    The Lovechunk baby sweater pattern PDF for this baby crochet cardigan is available here. 

    This quick cardigan is worked in 5 pieces so it’s the perfect small project to master your emerging crochet skills.  

    Really easy baby cardigan for crochet beginners. Crochet sweater for babies and toddlers. learn to crochet a quick and easy baby sweater pattern pdf.

    Mix it up with colour changing yarn or use 2 yarns to create a colour block effect. It is sure to be your go-to gifting sweater for many years to come. 

    There are affiliate links on this page. If you choose to purchase any yarn or tools with the links provided, I earn a small commission at no extra cost to you.

    Why is the Lovechunk baby sweater good for crochet beginners? 

    The Lovechunk baby sweater is an excellent crochet baby cardigan for crochet beginners to make as it helps you learn the fundamentals of crochet garment making in a small, manageable project. Learn how to crochet a flat, even fabric, change colour, seam and apply ribbed edging and cuffs. For such a small thing, this cardigan can help you master a lot of skills and understand how a crochet garment is constructed. 

    About the yarn

    I used Paintbox Wool Mix Aran because it’s so soft and comes in a range of vibrant colours.

    Lovechunk baby sweater modelled on a baby. Easy crochet cardigan pattern pdf. Quick crochet makes for babies and toddlers.

    The Lovechunk baby sweater modelled on my baby in September 2023, when she was 3 months old. She is wearing the 6m size, but she was 10lb when she was born, so always check the baby’s size before starting your project.

    Here’s why the Lovechunk baby sweater is an excellent project even if you’re not 100% confident on crochet garments: 

    • It requires no more than 200g (7oz) of aran weight yarn making it a budget-friendly project. 
    • It is worked in 5 flat pieces making each section bitesize and portable. 
    • You don’t have to do a colour change if you don’t want to. 
    • It takes much less time than a blanket or adult size garment. 
    • It only requires the knowledge of 2 crochet stitches- the half double (Hdc) and single crochet (Sc) making it really easy to remember. 
    • There is hardly any shaping required for the garment, so you can focus on making it.
    • Each section is clear to follow and is separate so you can focus on what’s best for you and when. 
    Easy baby crochet projects. A quick and simple baby sweater pattern for crochet.

    What crochet stitch knowledge do I need? 

    Below is the glossary of stitches from the pattern to help you understand what is required to make this crochet baby sweater. 

    Over on my beginners crochet playlist on Youtube you can learn to make both the Hdc stitch and the Sc stitch. Click here to go to my channel. 

    Other crochet stitches and terms that you’ll need to know in order to make this simple baby cardigan. 

    Ch: Chain. This either means yarn over and pull through a loop or it refers to the chain at the top of the previous stitch. 

    Hdc: Half double crochet (UK half treble). Yarn over, insert hook, yarn over and pull through all 3 loops on hook. 

    Sc: Single crochet (UK double). Insert hook, yarn over and pull through. Yarn over and pull through 2 loops on hook. 

    Sk: Skip stitches

    St(s): Stitch(es)

    Pattern uses US terms throughout. 

    It’s important to know your US terms. Here is a handy chart to remind you of the differences between US and UK crochet terms. 

    The difference betweenb UK and US crochet terms. Crochet terminology for beginners. Learn your crochet terms.

    I use US crochet terms in all of my patterns but I always recommend that beginners learn both terms as it will enable you to crochet absolutely everything. 

    Pattern: Easy crochet baby cardigan.

    Lovechunk Baby Sweater

    Every baby needs a simple, drop shoulder cardigan for cooler days and photo opportunities. I chose aran weight for this design because it has just the right amount of squish without being too stiff. 

    This quick cardigan is worked in 5 pieces. 

    Mix it up with colour changing yarn or use 2 yarns to create a colour block effect. It is sure to be your go-to gifting sweater for many years to come. 

    Gauge 

    13 sts and 10 rows to 10cm/4in with Hdc using 5mm crochet hook. 

    Please take time to swatch for tension. If there are fewer stitches in your swatch than suggested, decrease by 0.5mm increments until you get the right amount. If there are more stitches than shown above, increase your hook size by 0.5mm increments until you meet the amount. 

    Sample shown in size 2 (6-12m)

    Notes

    Ribbing: 

    The bottom waistband and the button bands are made with single crochet rib. This is a technique that involves making a single crochet stitch only in the back loop of every previous stitch. Normally, the hook goes under both loops, but for creating texture, you need to only insert into the back loop. 

    Size Chart

    Age Chest Finished body circumferenceFinished upper arm circumferenceFinished wrist circumferenceArmhole depthLower body lengthTotal body lengthArm length
    0-6m41cm/16in42cm/16.5in19cm/7.5in11cm/4.25in10cm/4in16cm/6in26cm/10in13cm/5in
    6-12m46cm/18in48cm/19in22cm/8.5in13cm/5in12cm/4.75in18cm/7in30cm/12in16cm/6in
    1 yr51cm/20in53cm/21in23cm/9.2514cm/5.5in13cm/5in20cm/8in33cm/13in20cm/8in
    2 yr56cm/22in58cm/22.75in27cm/10.5in16cm/6.25in14cm/5.5in22cm/9in36cm/14in22cm/9in

    Glossary 

    Ch: Chain. This either means yarn over and pull through a loop or it refers to the chain at the top of the previous stitch. 

    Hdc: Half double crochet (UK half treble). Yarn over, insert hook, yarn over and pull through all 3 loops on hook. 

    Sc: Single crochet (UK double). Insert hook, yarn over and pull through. Yarn over and pull through 2 loops on hook. 

    Sk: Skip stitches

    St(s): Stitch(es)

    Pattern uses US terms throughout

    Materials

    • 130 (150/180/200)g/ 4.5 (5/6/7)oz of aran weight yarn such as Paintbox Yarns Wool Mix Aran 180m/ 197yd per 100g/ 3.5oz ball. Colours used are Paper White and Slate Grey. 
    • 1 15mm/ 0.5in button. 
    • 1 removable stitch marker 
    • Darning needle
    • 5mm/ US 8 crochet hook, or size needed to obtain gauge. 

    You can find the Paintbox yarn I used for both cardigans here.

    Instructions:
    Back   

    Ch 7. Insert into 2nd ch from hook. 6 scs. Ch 1 (does not count as st), turn. 

    Starting in the 2nd ch from hook, sc in back loop of every st to end. Ch 1, turn. 6 sts. 

    Repeat last row 27 (31/35/39) times, or until waistband measures 20 (23/25/27)cm/ 8 (9/10/11)in when stretched. On last row, end with sc.

    Without fastening off, ch 2 (counts as hdc) and hdc 25 (29/33/37) sts across top of waistband. 26 (30/34/38) sts total. 

    Work 11 (13/15/17) more rows, or until total back measures 16 (18/20/22)cm/ 6 (7/8/9)in.

    If changing colour, work the next 11 (12/13/14) rows in colour 2. 

    If using 1 colour, work another 11 (12/13/14) rows, or until total back measures 26 (30/33/36)cm/ 10 (12/13/14)in. Fasten off. 

    Front panels (Make 2)

    Ch 7. Insert into 2nd ch from hook. 6 scs. Ch 1 (does not count as st), turn. 

    Starting in the 2nd ch from hook, sc in back loop of every st to end. Ch 1, turn. 6 sts. 

    Repeat last row 13 (15/17/19) times, or until waistband measures 10 (11/12/13)cm/ 4 (4.5/5/5.5)in when stretched.  On last row, end with sc.

    Without fastening off, Ch 2 (counts as hdc) and hdc 12 (14/15/16) sts across top of waistband. 13 (15/16/17) sts total. 

    Work 11 (13/15/17) more rows or until entire front panel measures 16 (18/20/22)cm/ 6 (7/8/9)in. 

    Shape neck 

    Hdc across 11 (13/13/14) sts. Ch 2, turn, leaving last 2 (2/3/3) sts unworked. 11 (13/13/14) sts total. 

    If changing colour, work the next 10 (11/12/13) rows in colour 2. 11 (13/13/14) sts total. 

    There is no obvious wrong side/right side so either work both panels the same as above and turn one piece over or cut yarn and skip 2 (2/3/3) sts before continuing hdc to end for the second panel. This will then leave a neck opening for left and right front. 11 (13/13/14) sts total. 

    If using 1 colour, work another 10 (11/12/13) rows, or until total front measures 26 (30/33/36)cm/ 10 (12/13/14)in. Fasten off. 

    Mark button hole

    Using a removable stitch marker, mark the 19th (20th/21st/22nd) row of the right panel. This will be where the buttonhole goes.  

    Sleeves (Make 2) 

    Ch 7. Insert into 2nd ch from hook. 6 scs. Ch 1 (does not count as st), turn. 

    Starting in the 2nd ch from hook, sc in back loop of every st to end. Ch 1, turn. 6 sts. 

    Repeat last row 13 (15/17/19) times, or until cuff measures 11 (13/14/15)cm/ 4 (5/5.5/6)in when stretched. On last row, end with sc.

    Without fastening off, ch 2 (counts as hdc), hdc 13 (15/17/19) sts across top of cuff. Ch 2, turn. 14 (16/18/20) sts total.

    Row 2: Hdc in 1st st, hdc to last st. 2 hdc in last st. (2 sts increased) Ch 2, turn. 

    Row 3: Hdc in 4th ch from hook. Hdc to end. Ch 2, turn.  

    Repeat Rows 2 and 3 until 10 (12/12/14) sts have been created. 24 (28/30/34) sts total. 

    Work even in hdc until sleeve measures 13 (16/20/22)cm/ 5 (6/8/9)in total. If changing colour, do so in the last 2 rows. Fasten off. 

    Finishing 

    1. Join shoulder seams first, starting from outer edge of shoulder and working your way inwards towards neck opening. 
    1. Sew each side seam up to armholes.         3.Seam sleeves and attach to armholes. 

    Buttonband 

    Attach yarn, starting at right bottom edge of front right panel. Sc into the side of every hdc row up to neck, around top of neck and down the left side hdc rows. 

    Sc in every sc until you get to the 19th (20th/21st/22nd) marked row of the right panel. Ch 1, sk 1 and sc to end. Remove marker. 

    Fasten off. Sew on button. Weave in ends and block, if desired.

    Simple crochet baby cardigan pattern. Worsted weight crochet patterns. Quick baby crochet pattern.
  • Starburst Cardigan. Chunky crochet cardigan pattern.

    Starburst Cardigan. Chunky crochet cardigan pattern.

    This is a free crochet pattern for a chunky, multi-coloured cardigan. You can either use this free version with ads, or the pattern is also available here with no ads.

    The main feature of this crochet cardigan pattern is the bobble stitch. This is a fun stitch that will be a breeze to make as once you’ve done the first row, you crochet into the spaces, not the stitches! Here’s how to do the bobble stitch:

    Bobble stitch- 

    Step 1: Yarn over, insert hook, Yarn over and pull through, Yarn over and pull through 2 loops. Leave remaining 2 loops on hook. 

    Step 2: Yarn over, insert hook, yarn over and pull through, yarn over and pull through 2 loops. Leave remaining 3 loops on hook. 

    Step 3: Yarn over, insert hook, yarn over and pull through. Yarn over and pull through 2 loops on hook. Yarn over and pull through all 4 remaining loops on hook.

    When worked flat: each end of the row will have an individual, double crochet stitch. Ch3 at the end of every row, yarn over and work into the chain spaces in the next row. 

    Simple crochet cardigan pattern free. Free crochet cardigan pattern for women. Cardigans for chunky yarn. Stylecraft special chunky. Ravelry cardigan patterns free. Rainbow cardigan pattern. Easy crochet sweaters and cardigans. The Starburst cardigan pattern pdf. Free crochet for women. Bulky yarn patterns.

    Starburst Cardigan: a chunky crochet cardigan pattern.

    Named after the much loved 90s fruit chews, this cardigan promises a burst of colour and a quick turnaround. The funnel sleeves give it a retro feel and the bobbles scream retro charm. 

    This article does use affiliate links. This means that if you do choose to purchase anything with the links I’ve used, I do earn a small commission from that purchase at no cost to you. Thank you!

    Wear it as an oversized addition to your wardrobe all year round!

    Materials needed: 

    Stylecraft special Chunky. 100% Acrylic; 144 metres / 157 yards per 100g / 3.5oz 1 (1,1*,2,2) balls of each colour. *Size M needs 2 balls of Denim in total for the border, but 1 of every other colour. They also do a value pack if you wanted to simply do it in one colour.

    • Raspberry (1023)
    • Meadow (1065)
    • Lavender (1188)
    • Fondant (1241)
    • Lipstick (1246)
    • Denim (1302)
    • Camel (1420)
    • Aspen (1422)
    • 6mm / USJ/10 crochet hook, or size needed to obtain gauge. 
    • 4 removable stitch markers. 
    • Darning needle for weaving in ends. 

    Instructions to make this simple crochet cardigan pattern:

    Gauge: 

    3 bobble stitches and 3 ch spaces/ 4 rows to 10cm/4” using a 6mm / USJ/10 crochet hook and Stylecraft Special Chunky.

    Bobble stitch- 

    Step 1: Yarn over, insert hook, Yarn over and pull through, Yarn over and pull through 2 loops. Leave remaining 2 loops on hook. 

    Step 2: Yarn over, insert hook, yarn over and pull through, yarn over and pull through 2 loops. Leave remaining 3 loops on hook. 

    Step 3: Yarn over, insert hook, yarn over and pull through. Yarn over and pull through 2 loops on hook. Yarn over and pull through all 4 remaining loops on hook.

    Things to be aware of before you make the Starburst crochet cardigan.

    When worked flat: each end of the row will have an individual, double crochet stitch. Ch3 at the end of every row, yarn over and work into the chain spaces in the next row. 

    US terms are used throughout. Please ensure that you are using the correct terms as this will significantly alter the finished result. 

    If you need a quick reminder of the US/UK terms, there’s a handy blog post here.

    When working in the round, you will need to sl st to join the round at the end. Start your next round by slipping across the top of the first cluster, rejoining your yarn when you get to the chain space. 

    When you are starting in the round, make 2 chains into the first ch sp. This counts as the first leg of the bobble. Complete step 2-4 to finish the bobble. 

    Information about sizing and yarn requirement.

    Sample shown is M. 

    The colours on the pattern sample M are worked from the bottom up in the following order: 

    1. Fondant 
    2. Raspberry
    3. Lipstick
    4. Lavender 
    5. Denim 
    6. Aspen
    7. Meadow 
    8. Camel 

    Note: At the end of every other row there will be an individual double crochet stitch. This makes the edging process easier. Check out the blog for more tips and videos on the Starburst cardigan. 

    Body measurement chart: 

    Size ChestSleeves Back
    XS26-30” (66-76cm )18” (46cm)28” (71cm)
    S32-36” (81-91cm)20” (51cm)28” (71cm)
    M40-44” (102-107cm)20” (51cm)30” (76cm)
    L46-48” (117-122cm22” (56cm)32” (81cm)
    XL50-52” (127-132cm)22” (56cm)32” (81cm)

    Glossary: 

    BobbleSee description on page 2
    Ch / Ch sp Chain(s)/ Chain space 
    DcDouble crochet (US terms) 
    Sk Skip stitches
    Sl Slip stitch

    Bobble table 

    See example of separating in this Youtube link here 

    SizeChainsBobblesFront SleeveBack
    XS69 ch  22 3310
    S78 ch 25 3411
    M102 ch33 5511
    L114 ch36 5614
    XL14446 7816

    Instructions for the cardigan:

    Row 1: Chain 69 (78/102/114/144) 

    (3 ch count as 1st dc) sk 2 ch, bobble in next ch, *ch 2, sk 2, bobble*  repeat from * to last ch OR bobble* Make a dc in last ch. 22 (25/33/36/46) bobbles. Ch 3 and turn. 

    Row 2 and every following row:

     *bobble in next ch sp, ch 2* repeat * to final dc. Make 1 dc, ch 3 and turn. 

    Changing colours every row, repeat row 2 for 20 (22/22/24/24) more rows 

    Separate for sleeves

    Isolate sections of the cardigan. Using the bobble chart, mark the beginning and end of the back stitches and mark the armholes. There should be 4 markers in total.  

    Front left/Front right

    Work only 3 (3/5/5/7) bobble stitches for the next row. 

    Work 5 (5/6/6/7) more rows. Fasten off. 

    Rejoin yarn and repeat on other side for front right 

    Back 

    Working with the bobble stitches on either side of the 2nd sleeve marker, work 5 (5/6/6/7) rows. Fasten off. 

    Join shoulder seams using sl st or seam with a darning needle. 

    Sleeves (work 2): 

    Joining new yarn, work 18 (20/22/22/24) bobble stitches evenly across armhole. Where there are bobble stitches under the armhole, you can work one bobble st into each ch sp as normal. Where you are working with the sides of stitches, work into the side of the posts/clusters. 

    To join each round, sl st into the top of the first bobble and sl across to next ch sp. Change colours here and start the next round with 2 ch and 2 more dcs in the bobble. 

    Work 20 (20/22/24/24) rounds in total. Fasten off. 

    Edges (including collar and front edges)

    Row 1: Starting at bottom left corner, insert hook into the ch sp and chain 3. 2 dc in the side of every stitch post and 2 dc in every ch sp along. Continue all the way around the left front, collar, right front and waistband. 

    Row 2: Dc in every stitch to end. Fasten off. 

    Weave in all ends and enjoy!

    Notes: This pattern uses bobble stitch clusters consisting of 3dc stitches joined together. The edging is worked using dc stitches. The cardigan is designed to be oversized. If you feel that the body is too long, please feel free to start your underarm marking 1 or 2 rows before the instructions state. 

    Love your project?

    chunky crochet cardigan pattern. Ladies crochet patterns. Free crochet sweater patterns. Free crochet cardigan pattern for beginners. Bulky crochet cardigans.

    Need to brush up on your crochet skills? Why not have a look at the other resources on the blog.