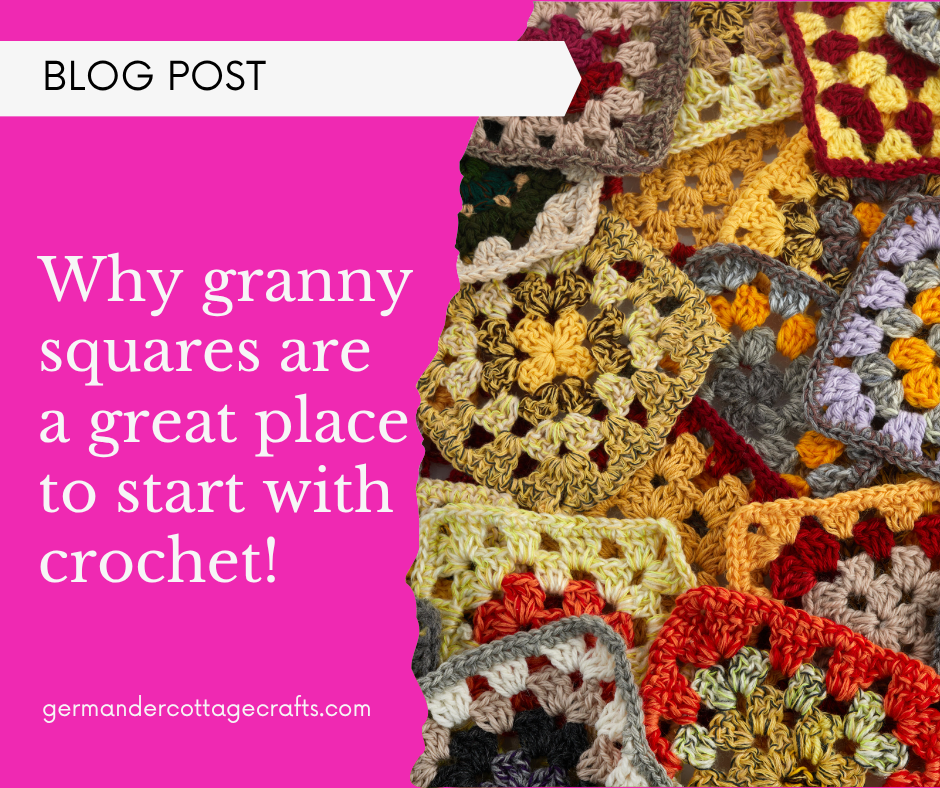
It’s a common misconception that crafters make to think that crochet is only about granny squares and anything that vaguely resembles a granny square. That’s not true. There is so much more to crochet than granny squares but it is a good place to start and I will tell you why in this post.
What else can I crochet?
First, we should talk about what other options there are for crocheters who don’t want to have a go at crochet squares. There are many things you can crochet without having to make anything square. Using any of the four basic crochet stitches, you can create garments, bags, blankets, toys, home decor and much much more.
All crochet stitch patterns are made of one of the following stitches:
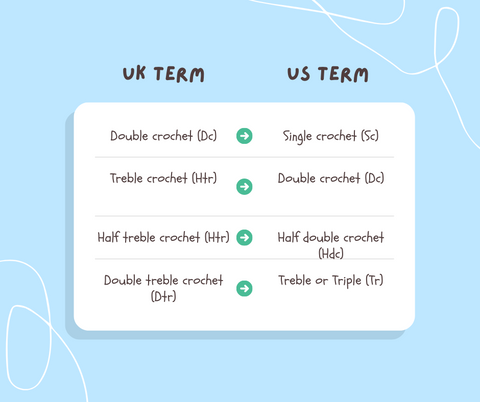
Single crochet (UK treble)
Half double crochet (UK half treble)
Double crochet (UK treble)
Every stitch following these stitches is just a variant or a ‘build’ on the basics. To make a triple stitch (UK triple treble) you make a double crochet twice. To make a shell or fan stitch, you need to make 5 double crochet stitches into the same chain. To make a v stitch, you make two double crochet stitches into the same chain, with one chain separating them to create the v shape.
If you do want to start with the granny square, that’s fantastic! You can learn a few things from this clever shape:
You can learn how to build in rounds.
Learn to change colours.
Learn to make corner spaces.
Learn how a chain space works.
Keep them small or make something massive!
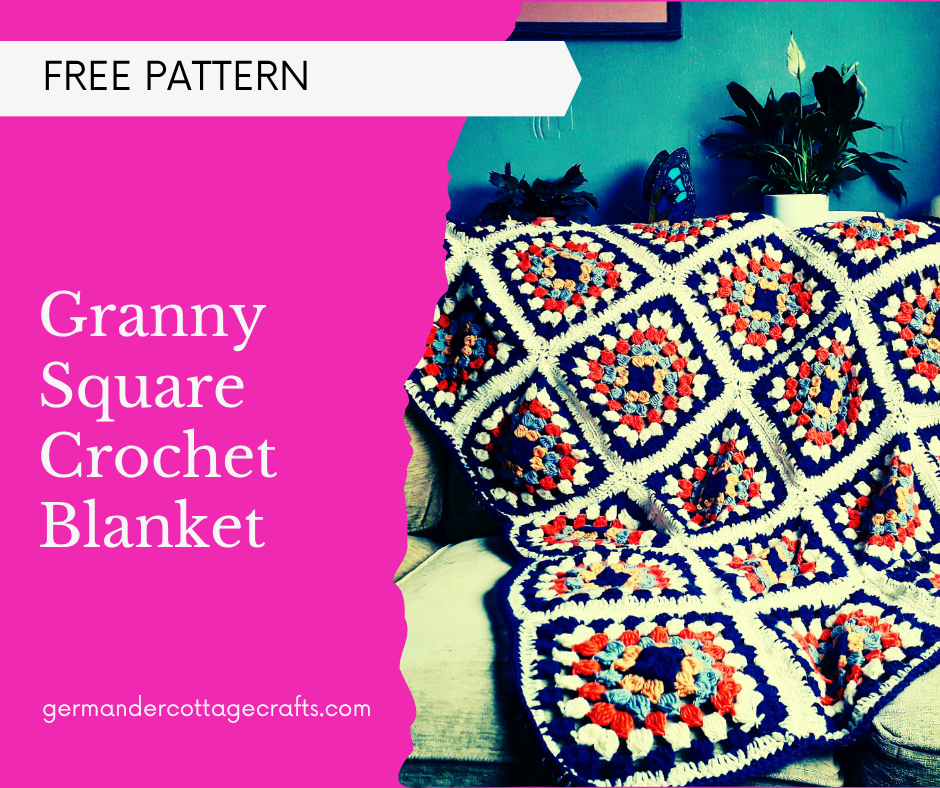
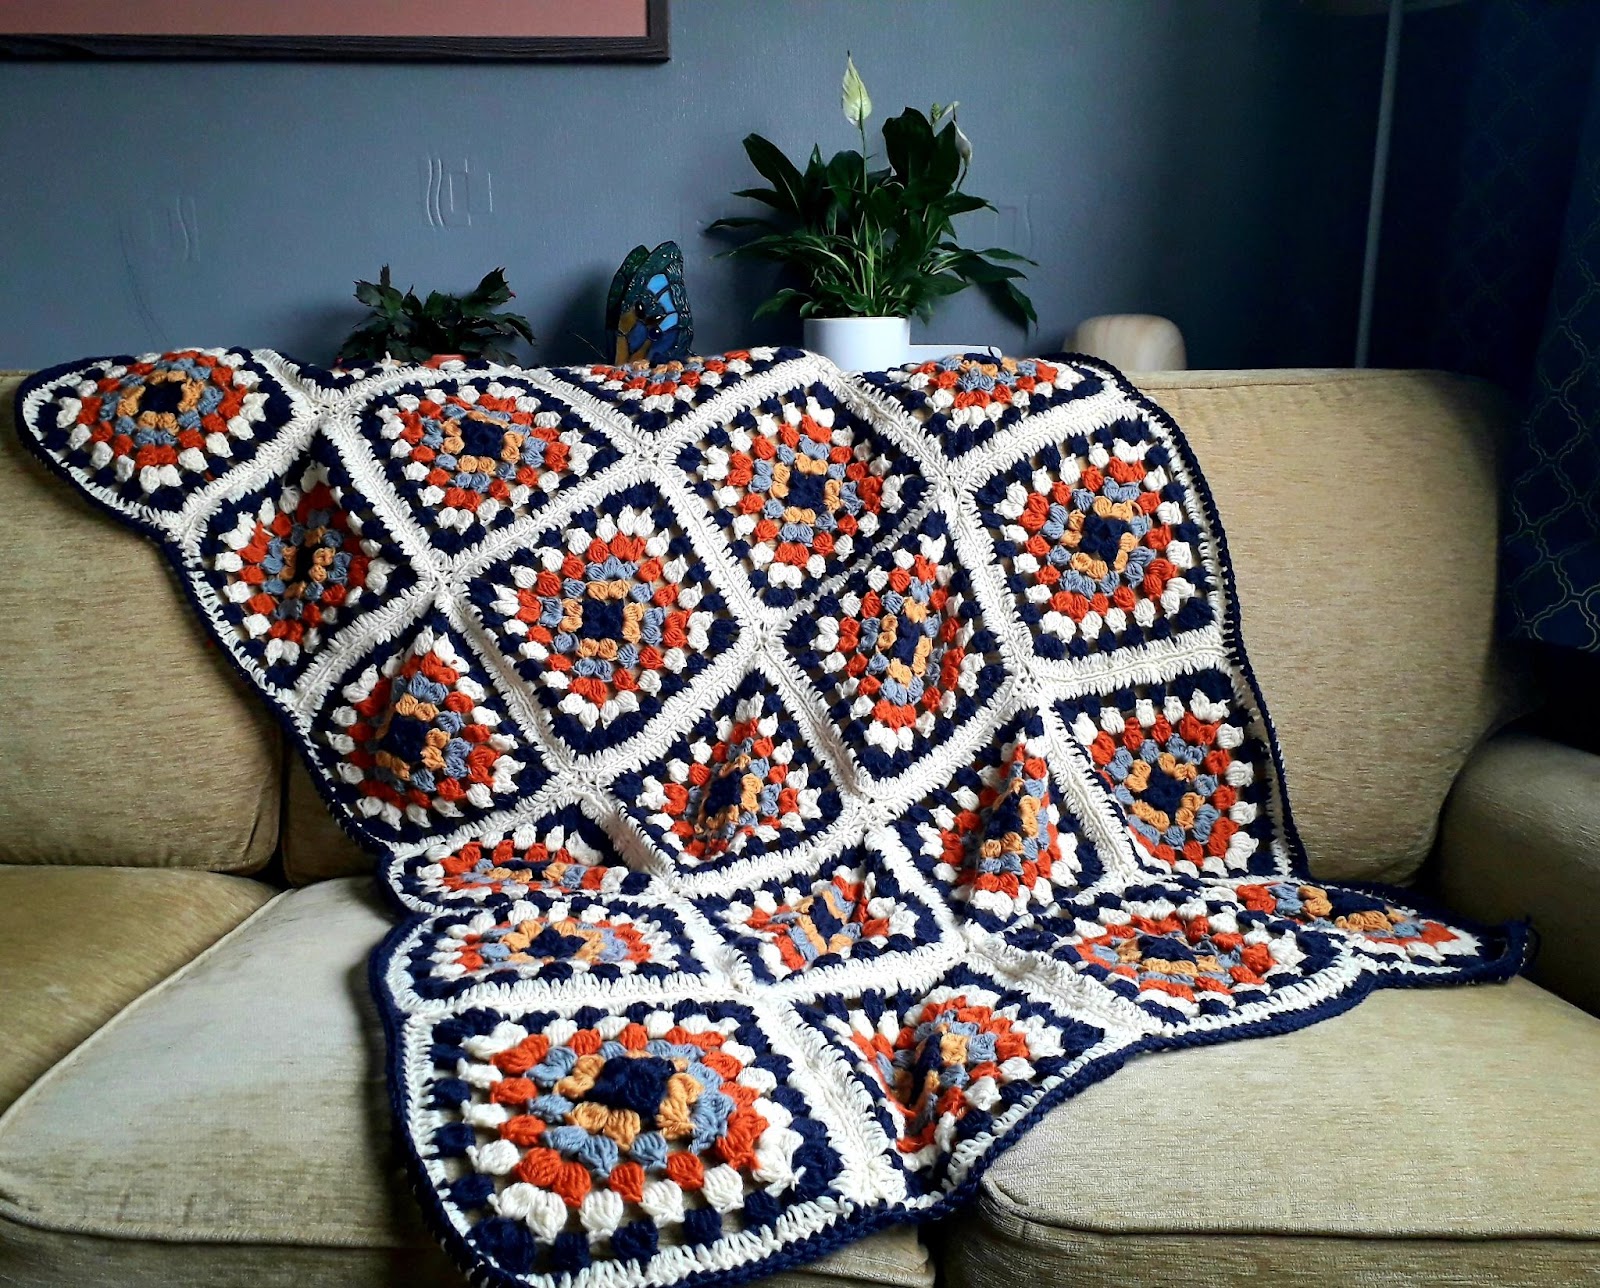
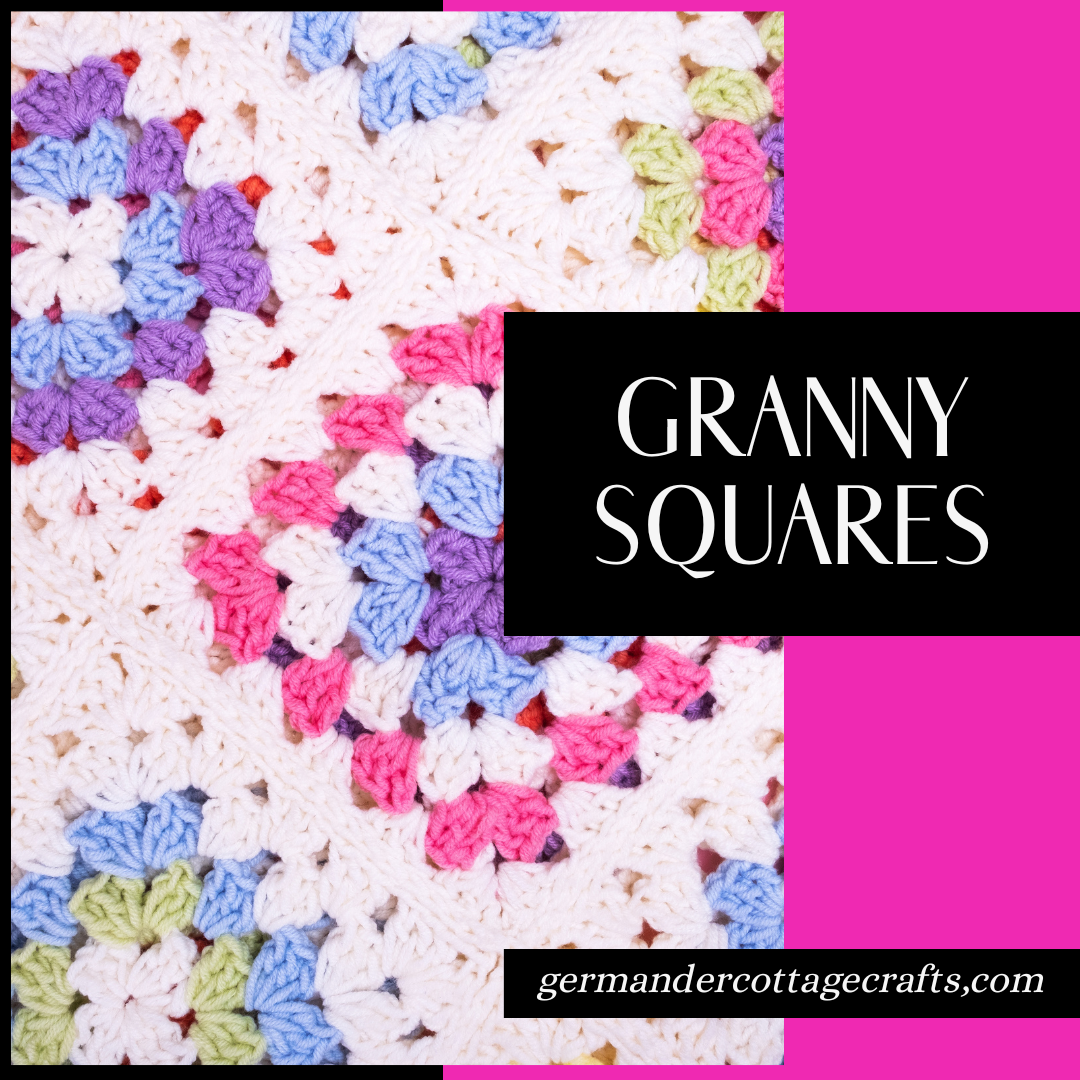
As you can see, you can learn a lot from that humble square. There’s something pretty and comforting about a granny square throw. This one is available as a free pattern here.
The humble granny square is a great place to start and here are some further posts to help you get going:
Sirdar Stories: Poetic Pastels Our Metro Square Top puts the fashionable crochet granny square front and centre. If you haven’t tried a granny square to wear yet, this is an easy crochet pattern to get you started. As well as your granny square, you’ll crochet panels of double crochet and use gradual shaping to create the flattering deep u-shaped neckline, tapered shoulders and neat fit that will make this top a summer staple. Great for beginners!
Crochet some pretty pastel granny squares, add a flattering open neckline and wide airy sleeves to make your summer essential Urban Hues Cardigan. Perfect pattern for intermediate. Use panels of granny stripes to get a neater fit and give your new favourite crop cardigan a crisp finish with a double crochet trim.
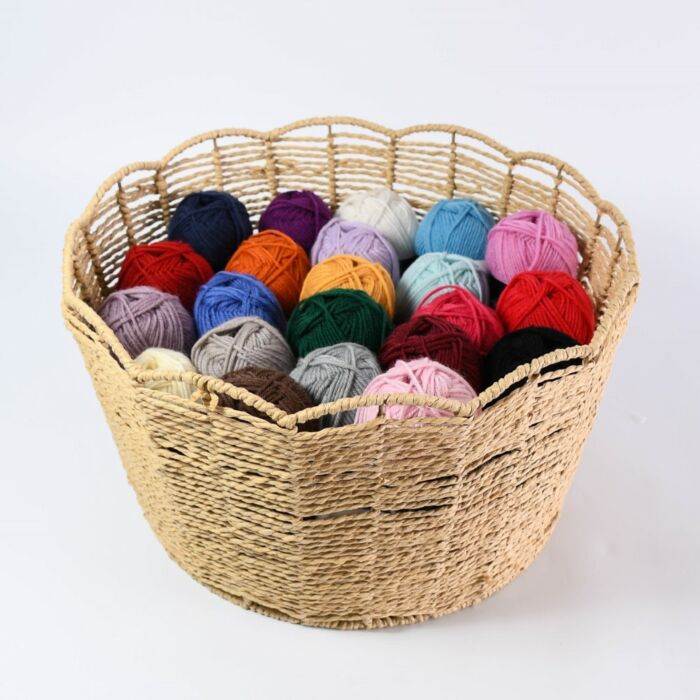
Crochet this beginner granny square blanket with a soft DK yarn for extra cosiness.
I’ve used Cygnet Pure Wool Superwash DK for my granny square blanket as it is soft, durable and feels lovely in a blanket.
In this article, I will guide you through making your first ever crochet blanket! Please note that I am a Woolbox affiliate, and if you choose to purchase the yarn via the links I have provided, I will receive a small commission at no extra cost to you.
How to crochet a basic granny square:
Although this video doesn’t show the exact same granny square as the one listed in the pattern, watching this video should help you to get the hang of it! All granny squares are the same in the general principle: start in the centre and grow each corner. It doesn’t matter what stitches you do, they’re all going the same way!
Stitches you need to know in order to make this granny square blanket.
Double crochet (UK Treble)
Abbreviations: Dc (US) Tr (UK)
The Dc is one of the most common crochet stitches you will come across. It’s speedy and tall. Your work will grow quickly.
Chain 3 and turn. Yarn over hook, insert hook, yarn over and pull through a loop. Yarn over and pull through 2 loops. Yarn over and pull through 2 loops.
When making a turning chain, always chain 3.
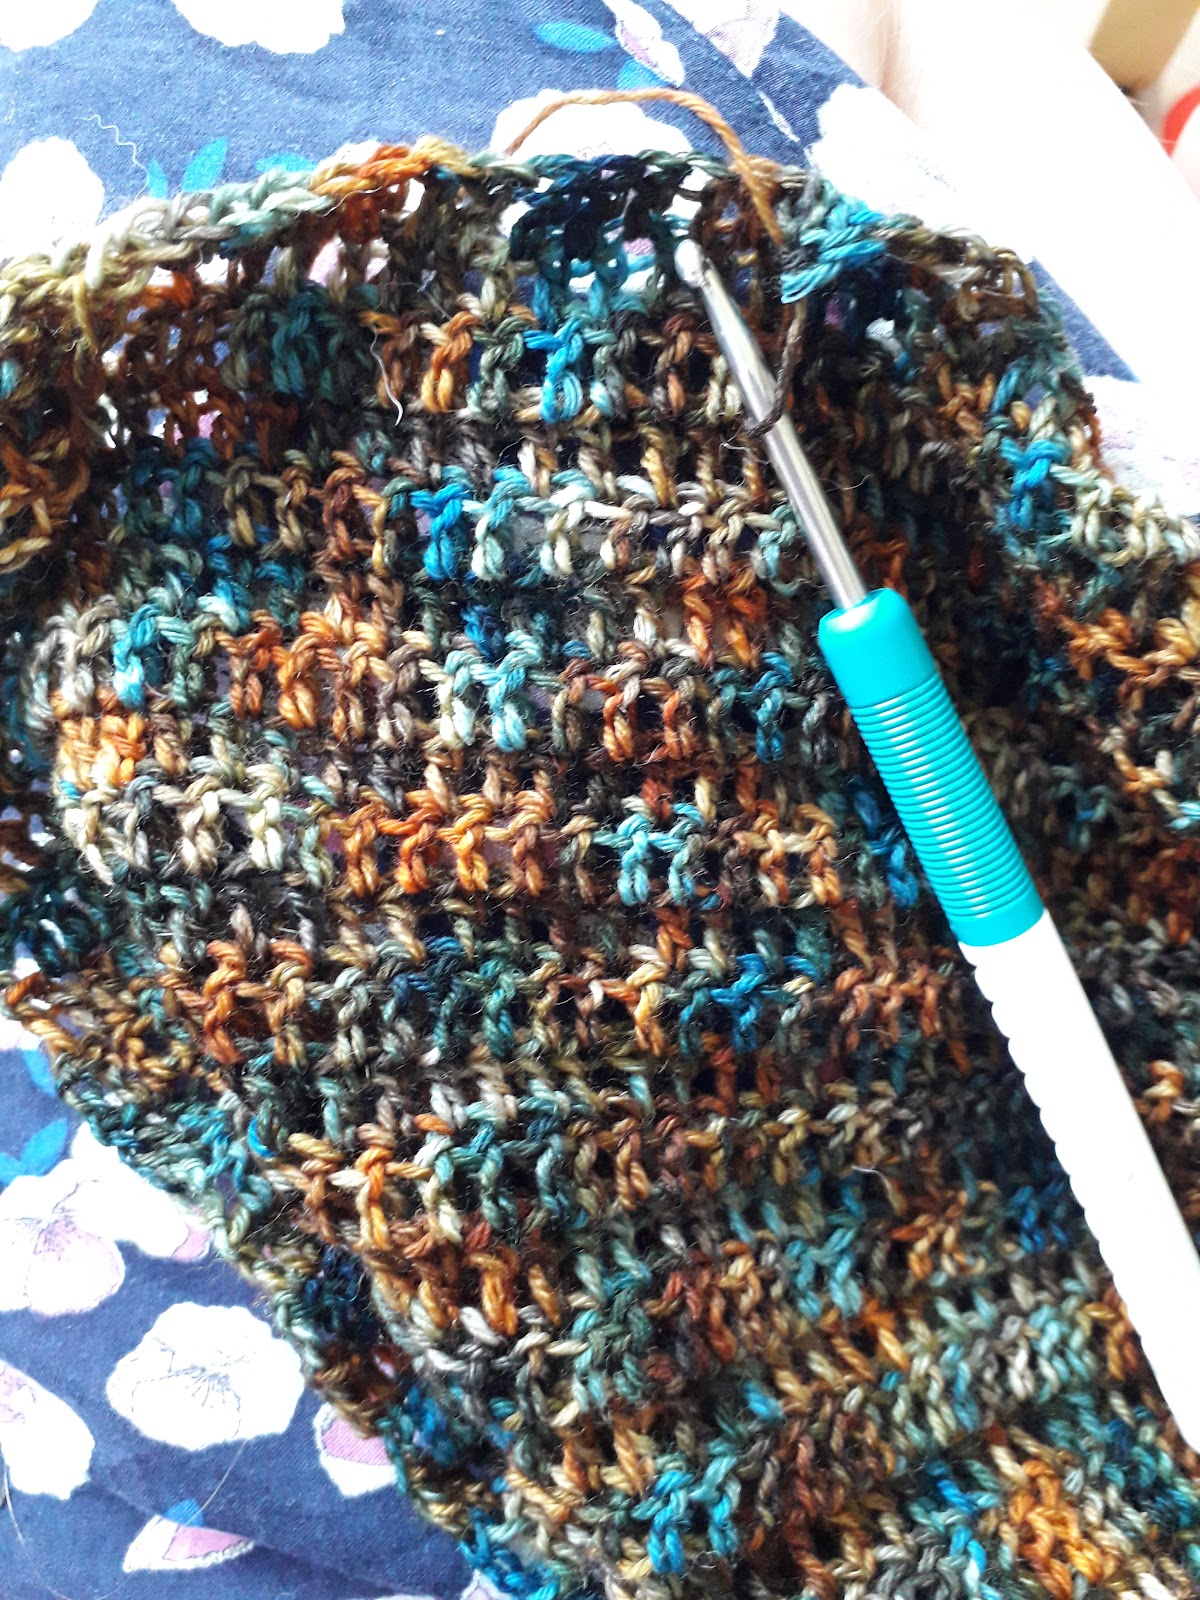
Start your practice by making a square of dc. Start by chaining 15. (12 ch + 3 ch for turning ch)
To fasten off: Just pull the last loop through and cut!
Beginner crochet has its hiccups. Here’s some troubleshooting:
My piece is getting narrower.
This could be a tension issue e.g. when you chain, you are pulling too tight and creating small, impenetrable loops. It could also be that you are forgetting your turning chain at the end. Another possibility is that when you turn the work around, you aren’t crocheting into the 4th chain from the hook. Always check to make sure you are starting in the 4th chain from hook.
My piece is getting wider.
The answer is usually that there are too many double crochet stitches either end. Sometimes when we turn the work around, we can miscount and put the next dc into the 3rd chain from hook, not the 4th. This then gives us an increase at the end of the work. For the first few rows, you really have to check where you are putting your hook. Count the amount of crochet stitches that you have too. Even the pros sometimes add an extra stitch without noticing!
My stitches don’t look tall enough.
Make sure that you are following the dc instructions. Yarn over before inserting the hook every time.
I can’t crochet into the chain,
This could be because your chain is too narrow. If you are pulling the yarn too tightly (common with beginners) you won’t be able to use the chain. Try loosening your grip or use a hook 1mm larger when chaining.
My piece is starting to become rounded.
You are probably putting too many dc stitches into either end, and accidentally working into the sides rather than just across the top. Stop, take a deep breath and start again. Crocheting when you are tired or distracted isn’t worth it. Trust me! I’ve done it many times.
Master granny squares with these tips:
Tips:
Crochet patterns are always written with abbreviations. Make yourself familiar with the glossary on a pattern, as it will explain what each abbreviation means.
If preferred, you can keep track of where you are by marking each row/round with a pencil.
Always check patterns to see if they are written using US crochet terms or UK crochet terms. It makes a big difference!
If you are going to substitute yarn brands, make sure that the meterage on the ball is the same or similar. Check out my article ‘The best granny square yarns’ to find the substitutes I recommend.
Glossary
Ch(ain) : Make a chain. Insert hook, yarn over and pull through loop.
Ch(ain) space
Dc: Double crochet. Yarn over hook, insert hook, yarn over and pull through 2 loops on hook. Yarn over and pull through 2 loops on hook.
Dc5tog: Yarn over as though to make a dc. Insert hook, yarn over and pull through 2 loops. Leave remaining loops on hook (2 loops), yarn over, insert hook, yarn over and pull through 2 loops. Leave remaining loops on hook (3 loops), yarn over, insert hook, yarn over and pull through 2 loops on hook leaving remaining loops on hook (4 loops) yarn over, insert hook, yrn over and pull through 2 loops, leave remaining loops on hook (5 loops) yarn over, insert hook, yarn over and pull through 2 loops on hook, leave remaining loops (6 loops) on hook. Yarn over, insert hook, yarn over and pull through all remaining 6 loops on hook.
Sl st: Insert hook into chain, yarn over and pull through. No height should have been added.
Part 2: Starting the squares
What you will need:
Your chosen yarn in order of appearance. I have started with navy blue to match the blanket sample.
1 pair of scissors to cut the yarn.
A 4mm crochet hook, or the right sized hook for your yarn.
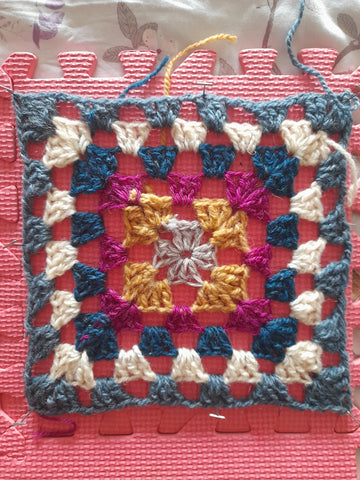
Round 1:
With colour A, chain 4 and sl st into the 1st chain (4th chain from hook) to make a ring.
Chain 2 (counts as 1st dc). Yarn over hook. Work dc5tog into the ring.
This is your first bobble stitch cluster.
Chain 2 (you may want to chain 3 if it seems too tight) and work 5dctog into the centre of the ring.
Repeat two more times. Sl st into top of 1st dc cluster to close the round.
Round 2:
Sl st across 1st dc cluster until you get to the 1st chain space.
Using clasp weft join, or by tying colour B to the strand of colour A, yarn over and insert hook into the chain space.Make a dc 5tog.
Chain 1 and work another dc5tog into the same chain space.
Chain 2 (or 3 if it is too tight/short) and dc5tog into the next chain space. Chain 1 and work 5dctog into the same chain space.
Repeat step 4 until you have 4 corners. Each corner should have 2 bobble stitch clusters. Sl st into the top of the first cluster to close the round.
Round 3:
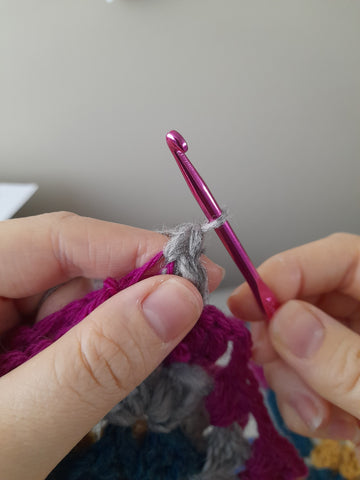
At this point, you will now have to work a single crochet bobble stitch between corners. Look out for it!
Using clasp weft join, or by tying colour C to the strand of colour B, yarn over and insert hook into the chain space.Make a dc 5tog. Chain 1 and work another dc5tog into the same chain space.
Chain 2 (or 3 if it is too tight/short) and dc5tog into the next chain space. This should not be a corner.
Chain 2. Make a dc 5tog. Chain 1 and work another dc5tog into the same chain space. Chain 2.
Complete the round by repeating steps 7 and 8 until you finish the last corner. Sl st to join with the 1st bobble cluster of the round.
Round 4-6:
Using clasp weft join, or by tying the next colour to the strand of the previous colour, yarn over and insert hook into the chain space.Make a dc 5tog. Chain 1 and work another dc5tog into the same chain space.
Chain 2 (or 3 if it is too tight/short) and dc5tog into the next chain space. This should not be a corner.
Repeat step 11 (Repeat once more for round 5 and twice more for row 6).
Chain 2. Make a dc 5tog. Chain 1 and work another dc5tog into the same chain space. Chain 2.
Complete the round by repeating steps 10 and 11 until you finish the last corner. Sl st to join with the 1st bobble cluster of the round.
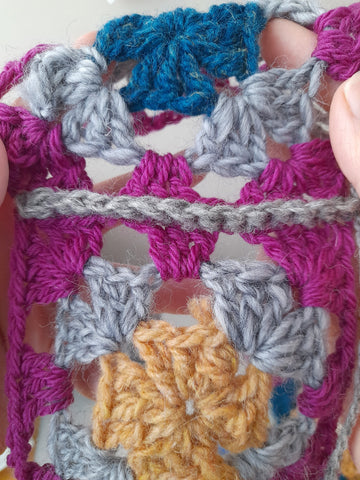
Using the border colour, chain 3 into the first chain space of the round. Make 2 more double crochet stitches.
Dc into the top of every following bobble stitch, and dc twice into every chain space (2 dc for corner chain spaces).
Sl st with the 1st dc of the round to close the square.
Repeat all steps a total of 24 times.
Joining your granny squares:
We join the squares using slip stitch (sl st) which is a crochet technique that you have learned already when making the granny square. The only difference here is that the slip stitches will become the seam rather than the end of a round.
When you use a slip stitch join, one side of the piece (right side) will lie flat and the other will have a ridge (wrong side) this is completely normal and is to be expected. Just make sure that you join all of your squares right side to right side and we won’t have a problem!
Place your two squares right sides together. The stitches should all lie parallel.
Working with outside loops only, sl st each st across to join. Make sure that you are only picking up the outside loops as this will affect the overall look of the square.
To join:. Starting at top right of the squares held together, insert your hook into the first outer loop of the square closest to you, picking up a loop. Insert your hook into the outer loop on the square furthest from you, picking up a second loop. 2 loops on hook. Now yarn over and pull through all 2 loops on hook. 1st slip stitch done.
Repeat this to the end ensuring that you have joined all stitches to the very corner of the square.
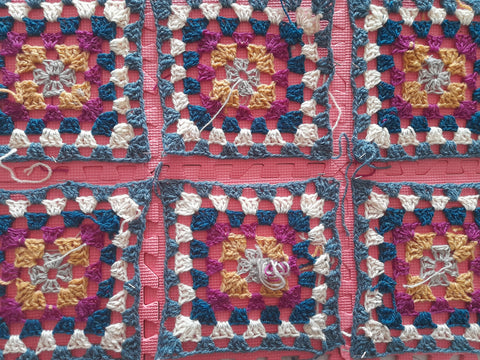
Join 4 squares together to make each panel. You should have 6 panels in total.
Making up:
You should now have 6 panels that consist of 4 squares each.
Join panels together using slip stitch. Take the time to ensure that all panels are right sides together when you are joining. The ridge should be on the wrong side of the blanket.
The finished blanket should be 4 squares wide and 6 squares long.
Border:
Working the border is simple. You do exactly the same as you do when you apply a border to each granny square.
The only difference is that you are making a dc into the dc below, just as you did when practising dc at the beginning.
Using the border colour, join the new yarn and chain 3 (This is the first dc). Dc in every stitch to the end. Sl st to join the round.
Repeat once more,
You can make your border as thick as you want. I made mine with 2 rounds of navy blue, but I could have easily done 3 or 4.
You can now block the blanket if you wish. Just ensure that it lies or hangs flat, and pin the corners to sharpen their angles.
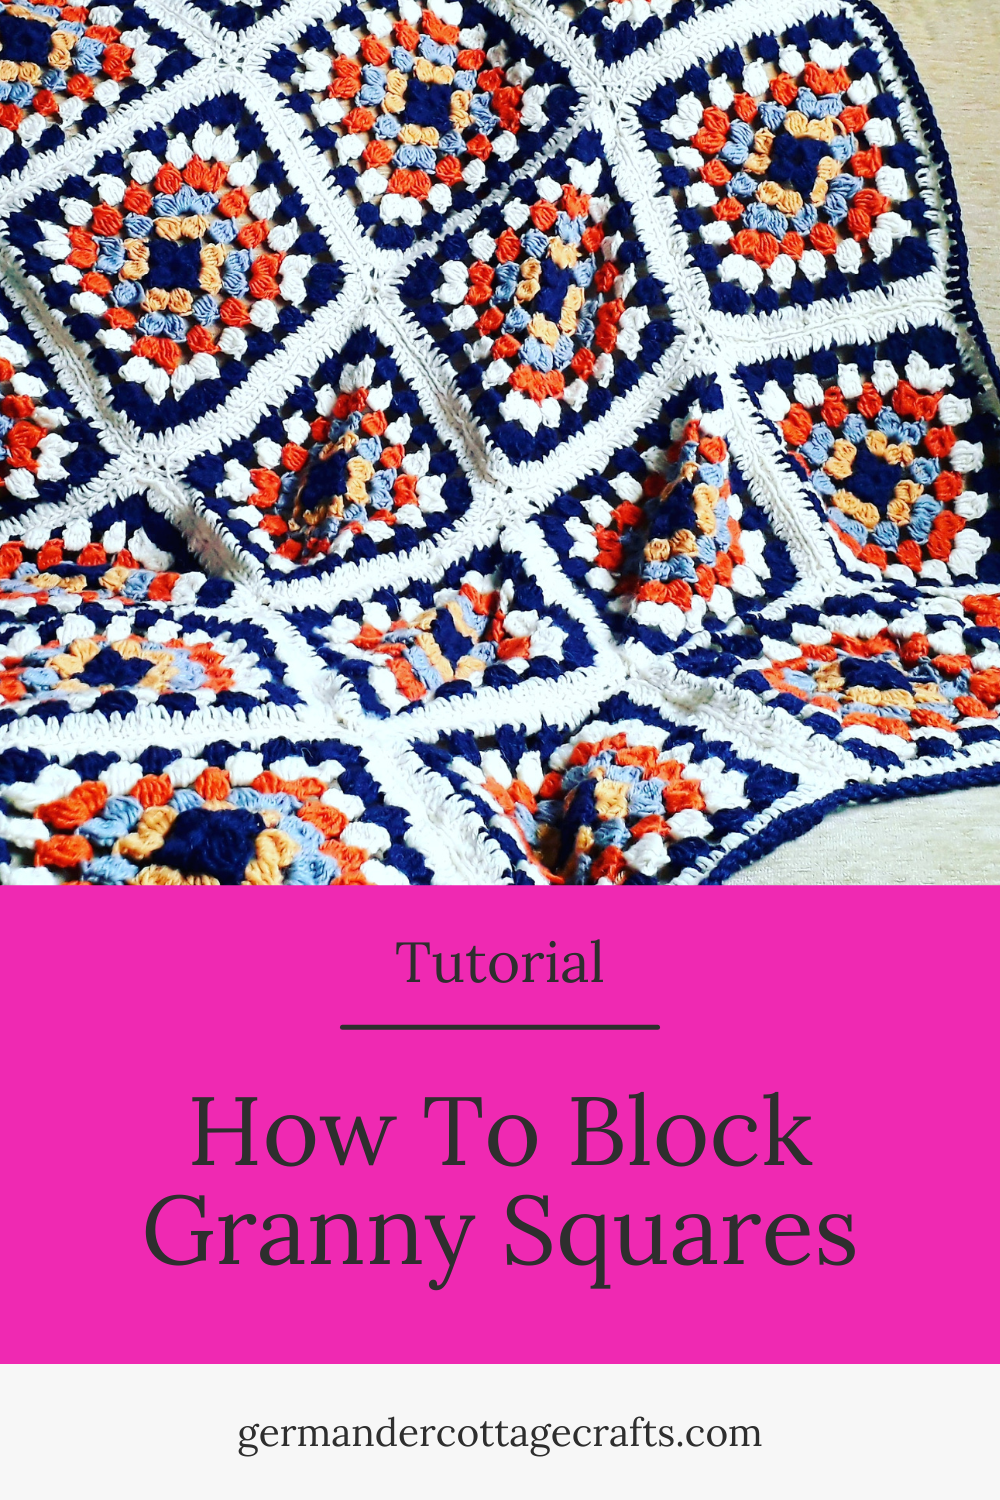
Have you made your granny squares, but you’re not sure how to block granny squares? In this post, I will show you how I block mine.
You’ve seen them around: absolutely beautiful crochet blankets that lay flat effortlessly. If you’re using a natural fibre to crochet granny squares such as wool or cotton, you will benefit from learning how to block granny squares. if you’re using synthetic fibres, you can still get fantastic results!
Want to make a granny square blanket but not sure how to keep it flat? Here’s your full guide to blocking squares.
What is blocking?
Blocking is a method that makers use to shape or flatten their knit or crochet projects. If you use natural fibres such as wool, you may benefit from blocking your pieces. The process of blocking will help to flatten any curling edges and balance any uneven stitches. It doesn’t have to be expensive or particularly risky.
Blocking is not compulsory but it can help especially if you are selling the finished work or giving it as a gift. It opens out lace or openwork and relaxes the fabric. It’s also an opportunity to shape things to the desired dimensions.
Why block granny squares?
You would iron your garments if you’d sewn them to give a professional finish, so why not block your knitting and crochet projects? It’s the same principle.
When it comes to squares, they can be blocked in several ways but I’m going to show you how to block them with water and a foam mat.
As part of the #StashBlanketCAL I am making a granny square blanket out of the aran yarn that I have in my stash. I’m really enjoying mixing the colours and making what I can with what I have. The yarn I am using is made from Shetland wool so I am blocking it to help flatten the pieces. This will give me a flatter blanket overall.
In this instance, blocking will help me to match up my granny squares and join them easily, as I will be able to see where edges match up.
I’ll show you how I block granny squares.
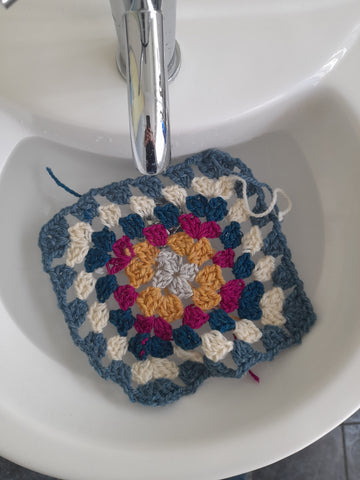
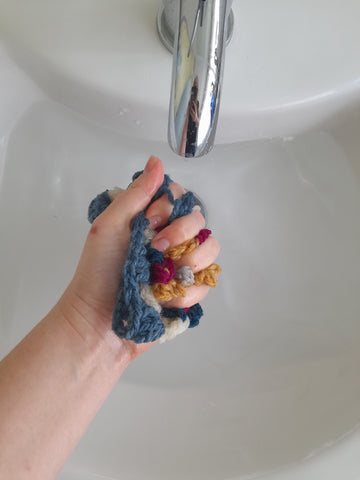
Step 1: Soak the square
You can buy a suitable soak wash for your knitting and crochet but I just use warm water.
I haven’t noticed any difference in using a soak. I barely smell the fragrance or feel a difference in the fabric. I could just be doing it wrong but I’ve mostly always used warm water and save the wool wash bottle for hand washing.
Step 2: Squeeze the square to get rid of excess water.
When pulling your pieces out of the water, don’t ever wring them. Always squeeze.
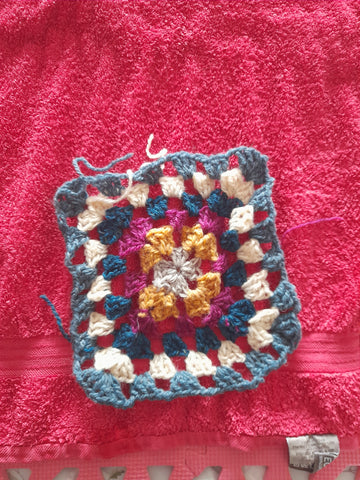
Step 3: Lay the piece on a towel.
I’m just using a hand towel because it’s just a granny square. For a jumper, I’d use something bigger. Squeeze as much water out of the square as you can with the towel and finish off with rolling it up. Either squeeze the towel or lean on it. I use my body weight to flatten the towel burrito.
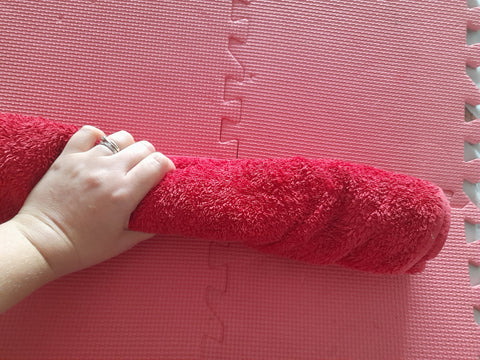
Step 4: Roll it up
This just adds a bit more pressure. It’s like wrapping your wet hair up in a towel after having a shower. It takes another layer of moisture off the piece. Do this nice and tight.
Step 5: Squeeze the burrito.
You can do this by squeezing it in your hands or kneel on it. I use my body weight if it is a larger project.
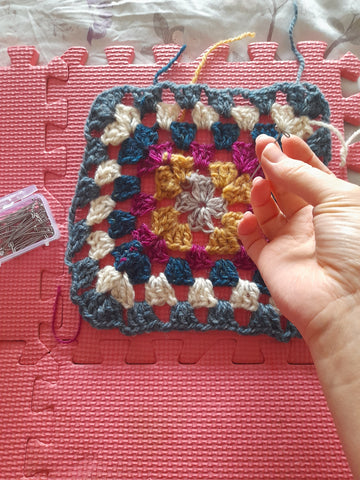
Step 6: Pin it in place.
I use foam play mats because the pin goes in with minimal resistance whole still holding the yarn for me. I also like how portable the mats are. Sometimes I need to keep my things blocking out of reach of tiny hands. I use T pins. They’re a special shape of pin and the T stops the work from slipping off. Pin to your desired dimensions. I started with the corners first.
Now what?
You just have to wait until it is dry now. Give it 48 hours or so depending on temperature and humidity. While you’re waiting, you can make some more squares!
I hope this was helpful. Do you like to use any other blocking methods? Let me know in the comments!
Hanna
This crochet tutorial on blocking squares is absolutely free. Please consider leaving a tip or sharing this post if you found it helpful. Happy hooking!
How to join your granny squares and turn that pile into something that screams “cottage core style”
So you’ve mastered the granny square (amazing!) but now you have mountains of squares and don’t know what’s next. Here I will show you how to join your granny squares (or any other squares) using my two favourite methods. This can be a fun experience as you can use your newly discovered methods to seam crochet garments, knit garments and other accessories.
For the sake of demonstration, I’ve used different coloured squares and a contrasting yarn colour for the seam. This is just so I can show you how to do it clearly. You can use any squares you like. You can also use the tail end yarns from your squares. It saves weaving them in!
2 types of join you could try for your granny squares or knitted squares.
For both methods I am about to show you: identify the corner. That is where you will start. If the corner isn’t aligned, you won’t match the sides. Try using a removable stitch marker such as a bulb pin to hold the corners together. There’s no escape then!
These two methods can be used for both crochet squares and knit squares. They are a pleasant alternative to seaming with a darning needle as you only need a hook. Remember to fasten off and knot the yarn when you’ve finished, otherwise it will come apart.
The Slip Stitch Join Method
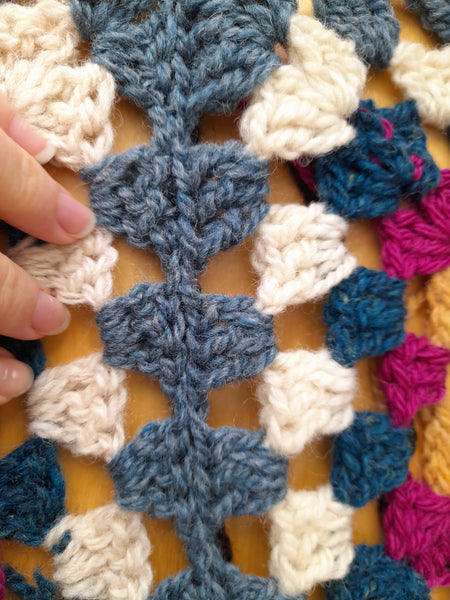
This is a method where you hold right sides together and slip stitch across the edges. One side will have a ridge (wrong side) and the other will have an almost invisible join. This is a popular method for those of us who love the right side to be completely flat. It’s a brilliant alternative to blanket mattress stitch as it looks the same without the sewing.
The ridge is pretty but it will be on the wrong side of the work. If you want a ridge on the right side of your work, join wrong sides together.
How to start the slip stitch join
Step 1:
To do the slip stitch join, first lay your pieces right sides together. Match the squares up as best you can. You can use removable stitch markers to help keep the stitches together, if it helps.
If you lay them flat you will see a bottom row of ‘vs’ and a top row of ‘vs’. these are the tops of the stitches, also referred to as chains in some patterns. Here I’m demonstrating with a classic granny square duo.
Step 2:
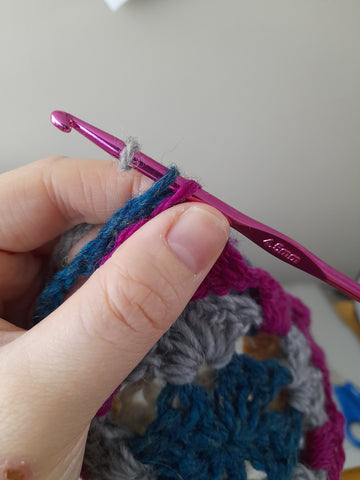
Slip your hook into the first pair of loops. These consist of the outer loop of the bottom square (pink) and the top square (blue).
Are you left or right handed? Note here that I have started with the right corner of the joined piece. I’m working right to left here because I am demonstrating right handed.
If you are left handed, you would be starting at the opposite corner on the left, working left to right. You will still be working with the same loops in the same order.
Step 3:
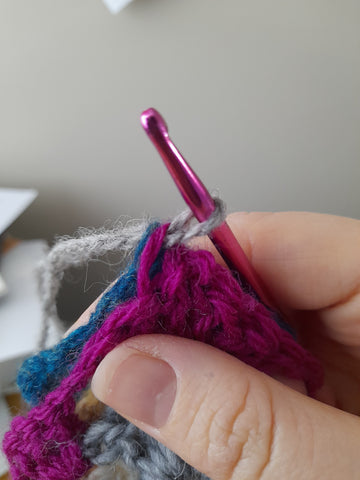
Yarn over and pull your hook hook through both of these loops. Make sure they are the outer loops, not the inner loops. If you slip through the inner loops, you’ll see the contrasting yarn on the other side. There’s no point in stressing here as you can just pull it back and try again if you make a mistake.
First slip stitch done!
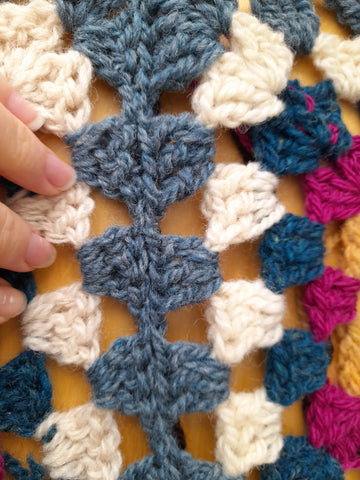
Repeat this method to the end of the top of these squares. As you work across, you’ll see the slipped stitches making this pretty chain stitch. This will be the wrong side of the work.
When you turn the piece over to see the right side, you should barely be able to see the contrasting yarn.
There is a black contrasting yarn under these stitches. You can barely see it!
How to do the single crochet join:
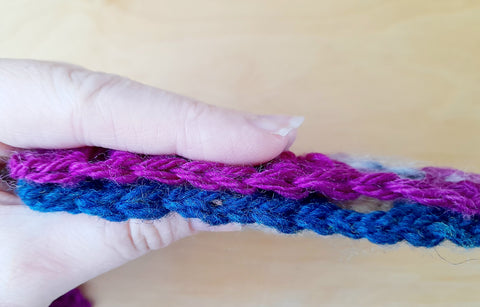
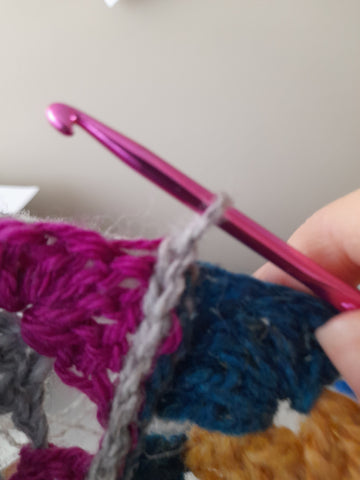
This join starts out as though it will become a slip stitch join, but before you do the slip, you make a single crochet (UK treble). The other main difference is that the wrong sides are together. The single crochet adds a pretty ridge to the right side. We want people to see it.
Here’s how it’s done:
Work as instructed for step 1-2 of the slip stitch join above but this time, join wrong sides together. When you pull through after the yarn over, only pull through 1 loop.
Yarn over and pull through 2 loops on hook. That’s it. That’s the single crochet join. If your join looks like the seam above, then you’ve missed one of these steps.
As the single crochet join adds a ridge to the right side of the blanket, you may want to use a matching colour or a contrasting colour.
The single crochet join should look obvious. It should be raised.
Single crochet join (pictured).
If you want to see a quick video demonstration of the slip stitch join, head over to my Youtube to see it. Really appreciate the help? Why not like and subscribe?
When I’ve been teaching my crochet students, often we will come across beginner problems. These are nothing to worry about and everybody makes mistakes when they’re starting out with crochet. If you’ve been making a granny square and it seems to be changing shape, curling, flopping or frilling, hopefully I can help with that!
With these simple methods, you can be sure that there is an easy fix for your granny square dilemma.
How to get your granny squares right every time. Here are some tips and tricks from Hanna, a crochet teacher and designer.
If you are new to crochet (or not so new) and have issues when it comes to making granny squares, there could be a few reasons why it’s not going well. Here I will talk about the most common reasons and I will offer solutions on how to address them.
Tension
Those who are new to crochet fall into the camps of too tight or too loose, mostly. This is normal and is a symptom of crochet being a brand new skill for you to learn. We cannot crochet like a pro after one youtube video. We all go wrong somewhere. For newcomers, it is usually tension. Here are three things that I advise:
Choose a bigger or smaller hook than what has been prescribed. If your squares are tight, curling up or looking round, it could be that your hook size is too small. If your square is really floppy and ruffling, it could be that the hook is too large. I always advise increasing by 0.5mm each time. For example, if I was to use DK yarn and a 4mm hook, the tension may be too tight, so I would have to use a 4.5mm hook to see a more relaxed tension. This is inevitable for some people. Some of us will always crochet tightly and some will always crochet loosely. This is why you need to look at your own stitches and see if they are smaller or larger than the pattern suggests. Adjust accordingly.
Make more chains than what is suggested. This is a simple trick and allows your corners to sit properly. If the pattern calls for one chain between your corner clusters, make 2. See how that works. If the pattern calls for 3 chains between clusters at the sides, perhaps chain 4 to help it relax. You will know what works when you see your square. Is it lying flat? Bingo.
What yarn you use can affect tension. Not all DK weight yarn is the same. Some are slimmer, some are bulkier. The category is quite broad. Take this into account when you are making your granny square. Also take into account the fibre. A standard acrylic such as Hayfield bonus may have less stretch and ability to relax after the square is made. Wool and cotton can be more forgiving after a soak and a block. If you have a tight square and it is acrylic, I would advise ripping back and starting again.
Click here to see the full granny square tutorial.