Blog

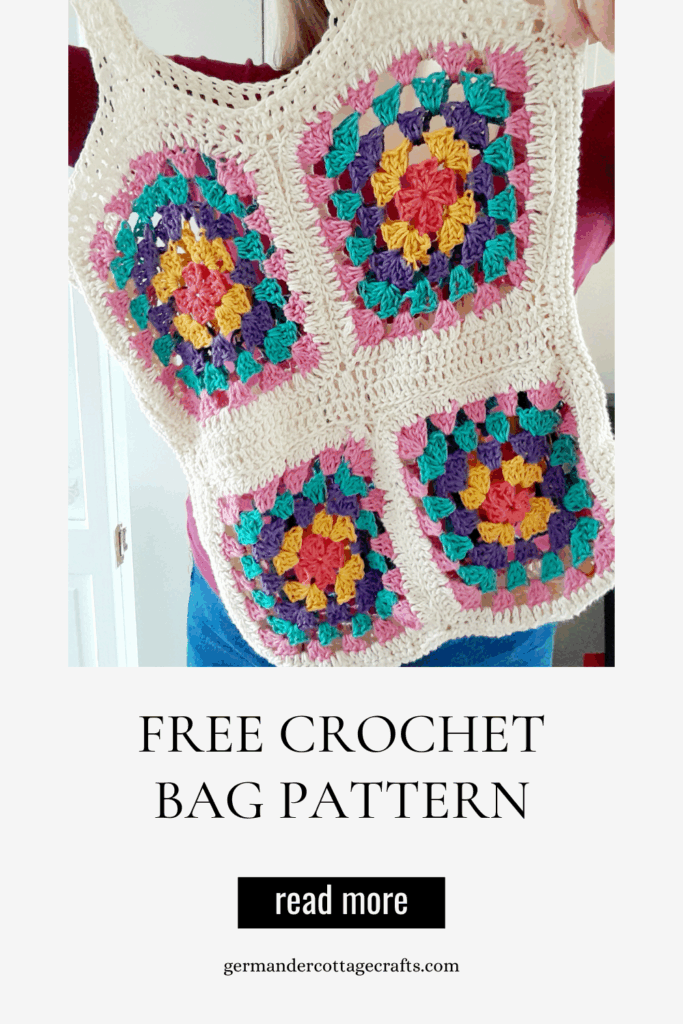
  • Totes Crochet Bag. Free Granny Square Tote Bag Pattern.

    Totes Crochet Bag. Free Granny Square Tote Bag Pattern.

    Free crochet tote bag pattern. Free corchet granny square pattern for beginners. Crochet a bag.

    If you love granny squares and functional crochet, here is a pattern for a simple crochet bag that uses joined up granny squares. This is a free pattern for a crochet tote bag.

    Can a beginner make this crochet bag? Here’s a quick skill check:

    You should be able to:

    • Make a chain.
    • Make the basic crochet stitches e.g. double crochet and single crochet. If you need help with your crochet terms, I have a guide here.
    • Make a granny square. Here’s a free tutorial if you’re not sure how to crochet a granny square.
    • Join granny squares. Here’s how.

    Totes crochet bag 

    The Totes crochet bag is a simple design for a crochet bag. This is a pattern for a simple cotton crochet tote bag using granny squares and a combination of slip stitch, double and single crochet. 

    Use this crochet bag for anything. The straps will be worked continuously rather than sewn on for added strength. 

    Materials: 

    • 1 4mm crochet hook
    • Cygnet 100% Cotton DK (100g per ball): 1 x Smokey Purple, 1 x Pepper, 1 x Peony Pink, 1 x Golden, 1 x Spring, 2 x Vanilla Cream. 
    • Darning needle 

    Here is the link to the video playlist. The videos do not replace the pattern instructions; they are there as support with visualising the project. It is still useful to learn to read the written instructions to develop your skills. 

    I use US crochet terms throughout. 

    Glossary: 

    ChChain. Yarn over and pull through the 1 loop on the hook. 
    Ch spThe space of gap that has been created by stitches. 
    DcDouble crochet stitch: Yarn over, insert hook, yarn over and pull through, yarn over and pull through 2 loops on hook. Yarn over and pull through 2 loops on hook. 
    ScSingle crochet stitch.Insert hook into the chain or stitch, yarn over and pull through. Yarn over and pull through 2. 
    Sl stSlip stitch. Insert hook into chain or chain space, yarn over and pull through.
    RS Right side of the work. 
    WS Wrong side of the work. 

    You can see in the square above where the corners are and how we only increase in corners. 

    Step 1: Granny squares (Make 8) 

    Round 1. 

    1. Using yarn A, ch 4. Sl st to join with the 1st chain. 
    2. Ch 2 and dc 2 times into the centre of the ring. 
    3. Chain 2 and dc 3 times into centre of the ring. (6 dcs in total.)
    4. Repeat last step 2 more times. (12 dcs in total)
    5. Sl st into top of first dc chain to join the round. 

    Round 2: 

    1. Using. yarn B, sl st across top of first 3 dcs to get to the 1st corner ch sp.  Ch 3 and dc twice into ch sp. (3 dcs in total) ch 1 and dc 3 times into same ch sp. First corner done. 
    2. Chain 2 and dc 3 times into next ch sp. Ch 1 and make 3 more dcs into same ch sp. 
    3. Repeat step 2 twice more. 
    4. Sl st with top of 1st dc to close the round. 

    Round 3

    1.  Using yarn C, sl st across top of first 3 dcs to get to the 1st corner ch sp.  Ch 3 and dc twice into ch sp. (3 dcs in total) ch 1 and dc 3 times into same ch sp. 
    2. Ch 2 and work 3 dcs into next ch sp to corner ch sp
    3. Ch 2, 3dc in next ch sp, ch 1 and make 3 more dcs into same ch sp.  
    4. Repeat step 1 and 2 to end.  
    5. Sl st with top of 1st dc to close the round.

    Round 4 and 5: 

    Changing colours (Yarn D and E) at the beginning of each round, work instructions for round 3, 2 more times until you have 5 completed rounds in total. 

    Border: 

    Using Vanilla Cream (Yarn F) join new yarn  and work 1 dc into the top of every dc stitch, and 2 dcs in every ch sp to end. Sl st to close round. 

    Assembly: 

    The squares are joined in pairs and then as fours after some distancing with dc stitch. 

    Panels (Make 4) 

     With RS together and yarn F, Sl st to join across one side from the top right corner to the top left corner.

    Dc in every dc for two rows across the top of each panel. 

    Joining panels. 

    With RS facing, lay the upper panel facing the lower panel. The lower edge of the upper panel should be in line with the upper edge of the top panel. Sl st across to join. The dc rows will now be in the centre and across the top of the bag. 

    You will now have two rectangular pieces: The front and the back of the bag. 

    Edges: 

    Vertical (side) edge: 

    With RS facing, sc across all dc sts for 4 rows. 

    Horizontal (bottom) edge: 

    With RS facing, sc across all dc sts for 4 rows. 

    Joining the bag. 

    With RS facing, starting at the top right corner, use sl st joining method to join the vertical seam, horizontal (bottom) seam and back up the left side vertical seam. 

    Straps (make 2)

    Using removable stitch markers or safety pins , mark 5 stitches at the top of the bag that sit in line with the centre of each top granny square on the front and the back of the bag. You need to mark 4 areas of the bag. 

    Using yarn E, join new yarn and dc 5 sts. Ch 2 and turn. 

    Work 39 more rows. 

    Sl st to join with the marked strap area of the opposite side. 

    Repeat for second strap. 

    Weave in ends and enjoy!
  • Why you should try the granny square

    Why you should try the granny square

    Why should you try the granny square?

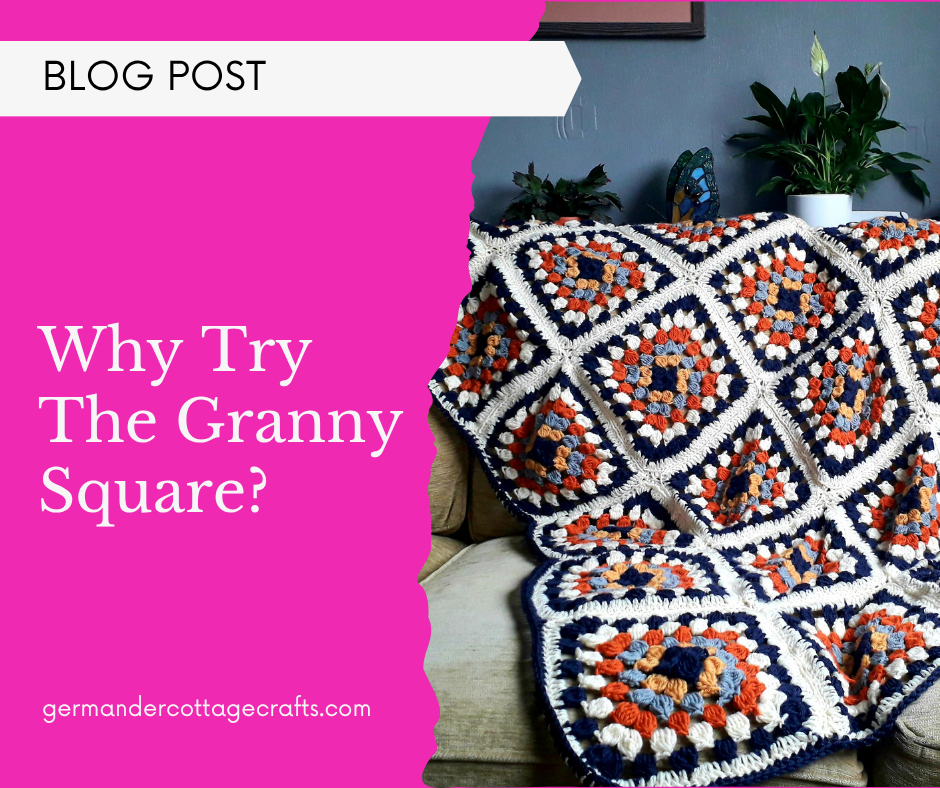
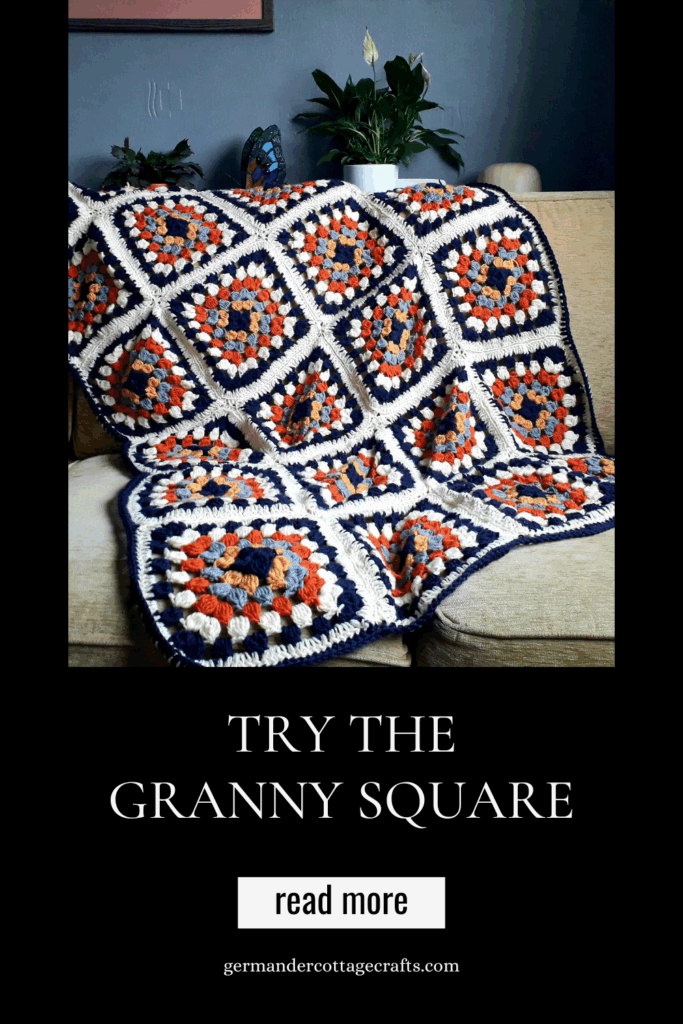
    If you’re new to crochet, you will have undoubtedly seen the granny square. It’s a square piece of fabric that looks like thick lace. It is worked from the centre out and can vary in colour and style. Some granny squares are tiny, while others are an entire blanket. Some start square and stay square, while others start round and finish square. Scroll down and you’ll see what I mean. 

    Granny squares haven’t really gone anywhere since their boom in the 1970s. As Debbie Stoller, author of Stitch and Bitch: The Happy Hooker recalls: 

    If you grew up in the seventies, as I did, you might fear the granny square–if only because, for a while, clothing was made of nothing else. Granny square vests, granny square shorts, granny square hats. Heck, I bet there was some kid out there who was forced to go to school wearing granny square underwear.

    Things are not so desperate these days but you certainly get the impression that granny squares are: 

    • Addictive 
    • Versatile 
    • Wearable (ish)  

    If you’ve seen anything from my Youtube channel recently, you will see that I too, am hooked on these clever little squares. You will see me making lots of them this month for the #StashBlanketCAL. This is a winter project where myself and anyone who wants to join will be making a blanket from their stash yarns. It’s lots of fun. Read more about that here. 

    What is a granny square for? 

    I was asked this via Twitter and I honestly have no idea. My understanding of the granny square is that it is convenient, takes up little yarn and little space and can be considered a piece of a greater puzzle. It helps you to get through scraps of yarn and build something big without the worry of long rows. 

    What can you do with granny squares? 

    Now for the fun part! What I’m going to show you next are some examples of where the granny square works and how you could use it. 

    Example A: The Battenberg blanket

    Crochet granny square blanket pattern. Battenberg blanket pattern for crochet.

    This is the Battenberg blanket from the Cherry Heart Blog. You can view it here

    I absolutely love this granny square design because it drapes so well and allows you to use all the colours you can, if you want to. It’s just gorgeous. You could work on this over a longer period of time and just make squares when you have the time. You would be able to work plenty of granny squares in one sitting as they’re so small. It’s also ideal for using up stash yarns!

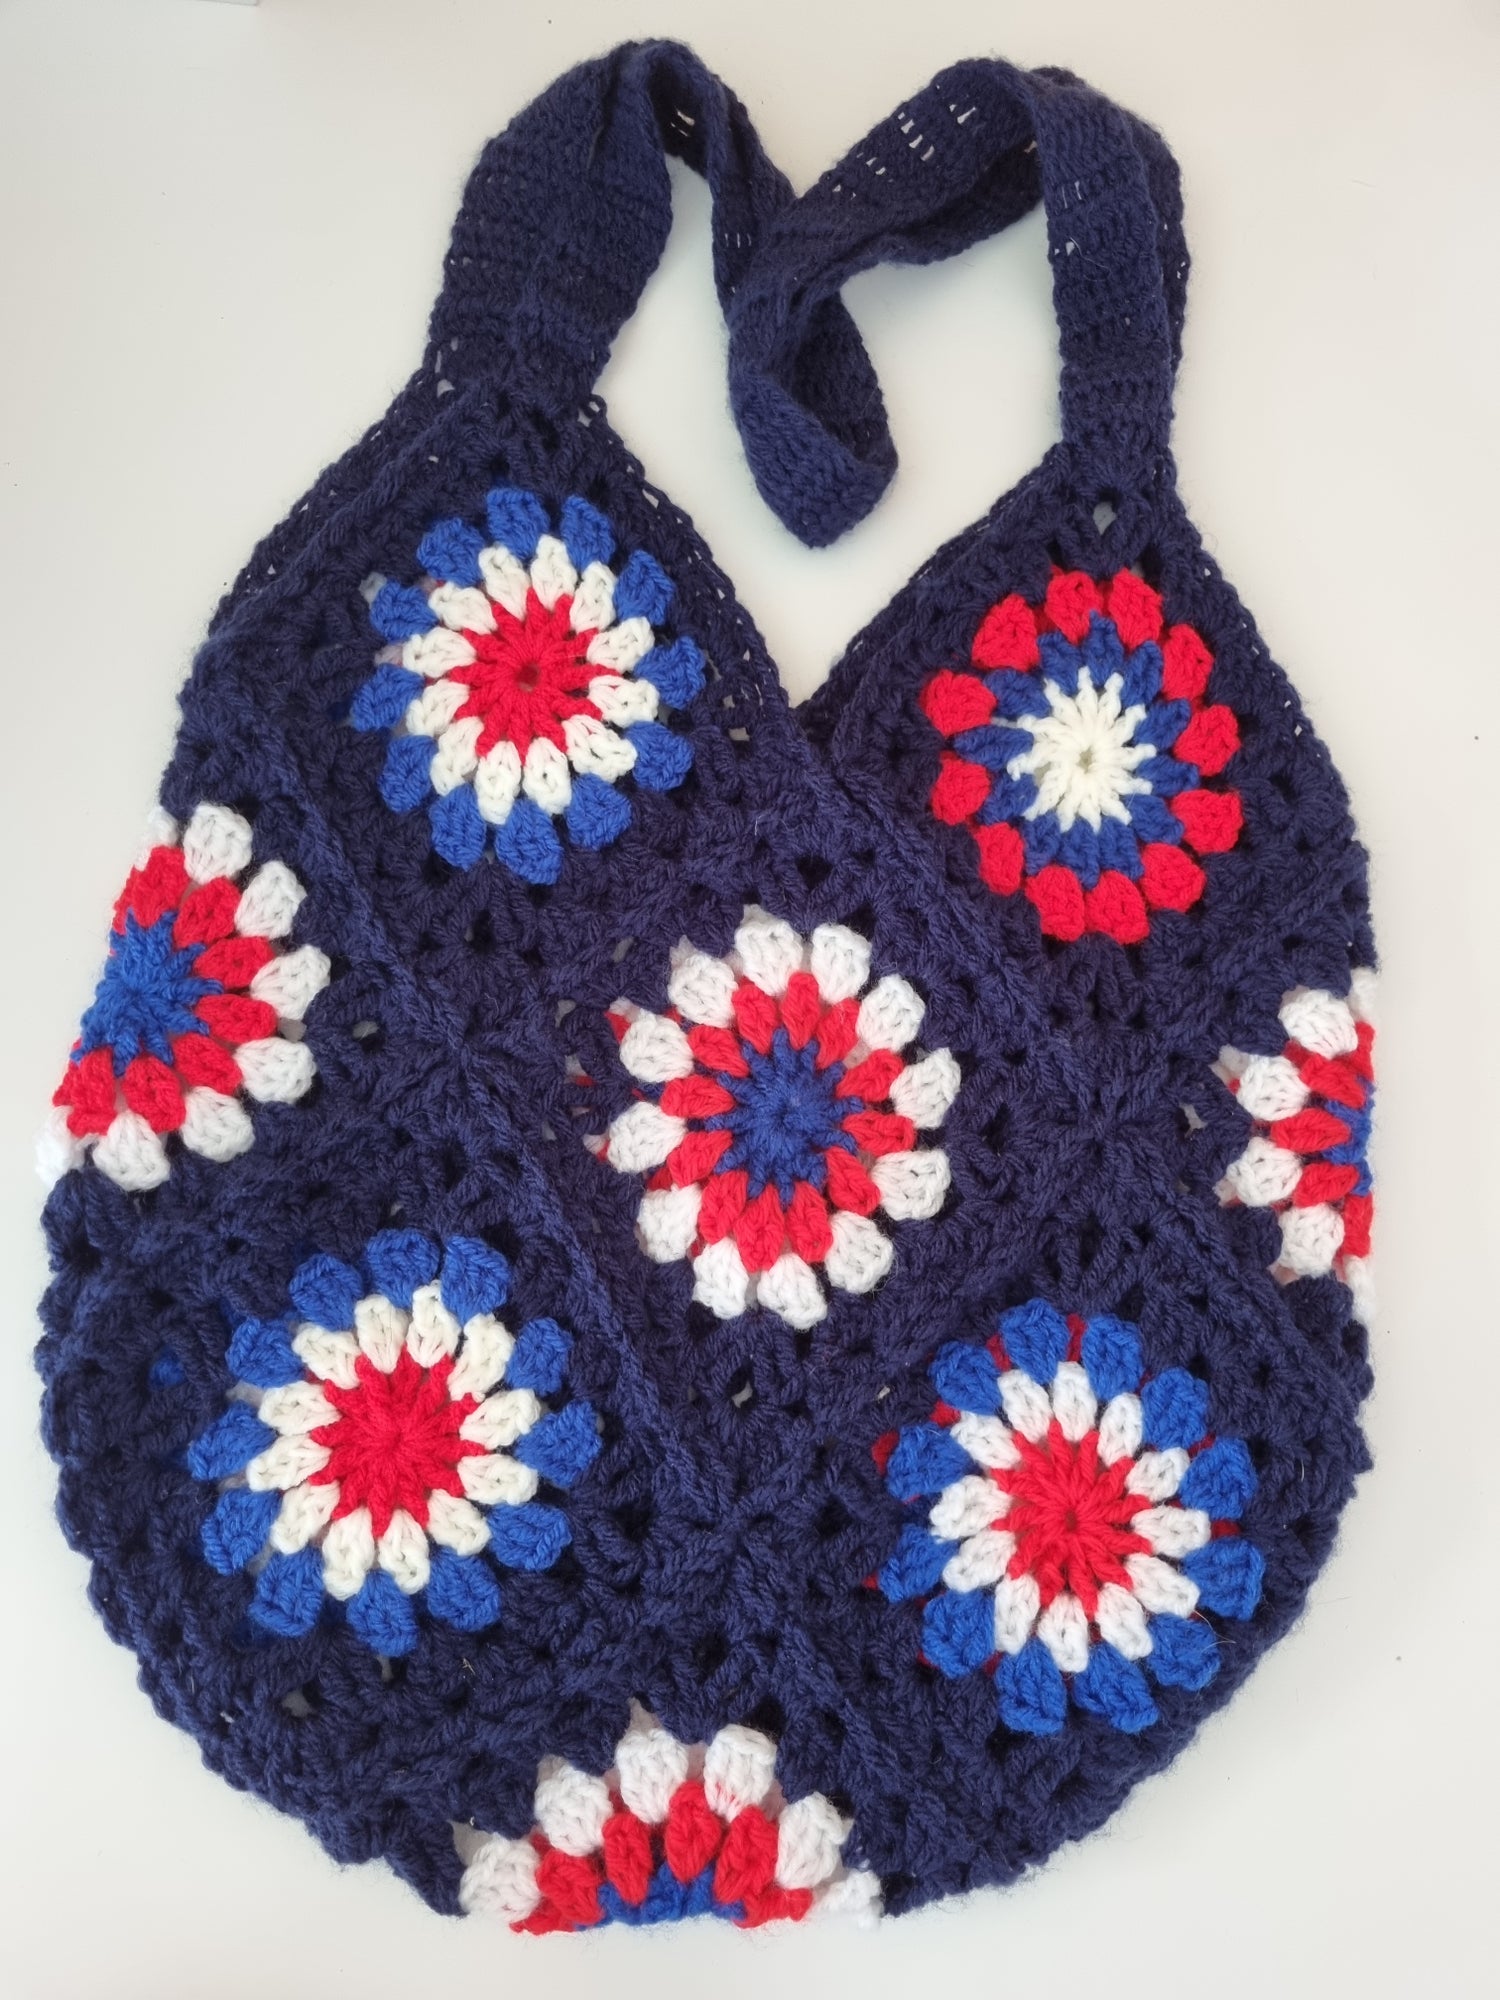
    Example B: The Squircle Bag

    Crochet market bag pattern by artisan crochet designs. Join multiple squares to make a bag. Squircle bag.

    This is the Squircle bag by Lyndsey of Artisan Crochet designs. It’s a very clever design as it uses the granny square but with an added element of circles. Circles with corners! I also love the way the squares have been joined together to make a cute market bag. Why not try this with some everyday yarn and use it as a way of keeping your carrier bag usage down? Try some sturdy cotton or hemp for heavier goods. This is another example of where the granny square absolutely works. You can get the Squircle bag pattern here. 

    Example C: Granny Square Cardigan

    Granny square crochet cardigan pattern.

    While granny squares undoubtedly make good accessories and blankets, you should try the granny square as part of a garment. This is the Granny Square Cardigan pattern by Janne Kleivset of Joy Of Modern Crochet. You can read more aboutt he pattern here. What I love about this is that you can make an entire garment but start off really small. A single granny square is no big ask. 

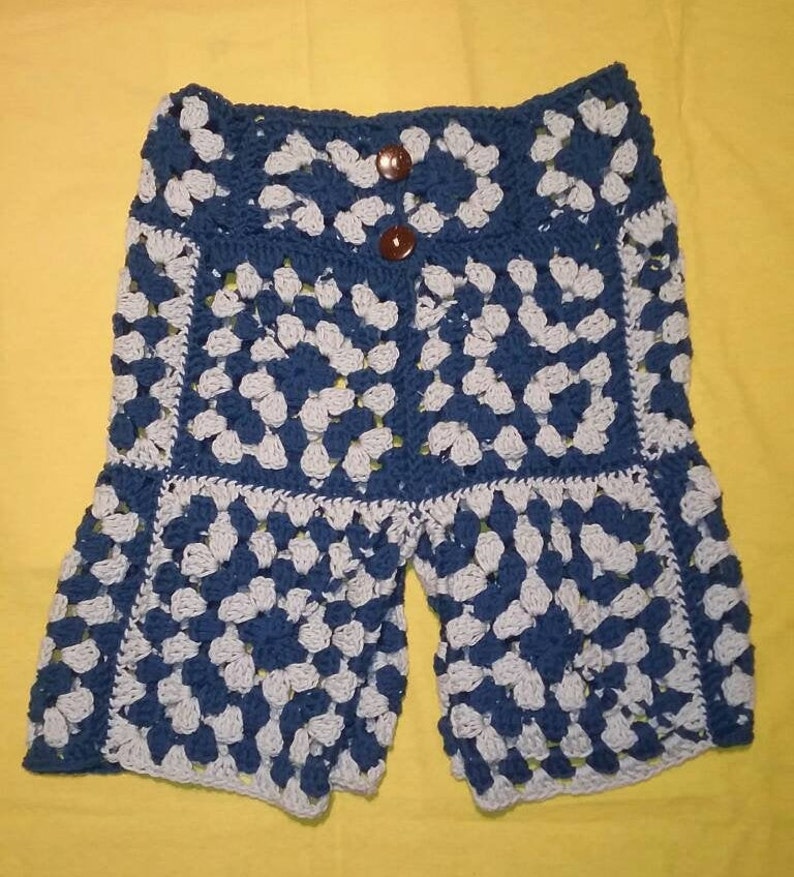
    Example D: Crochet shorts 

    I think this is a classic case of ‘just because you could, doesn’t mean that you should’. if you want to, go ahead! It’s just not my cup of tea. 

    Granny square crochet shorts

    Like I said, you do you. 

    Overall, you should definitely try the granny square. head to my Youtube for some straight to the point, quick granny square tutorials. Why not join my latest crochet along and work on your granny squares too? 

    Granny square crochet patterns and inspiration.
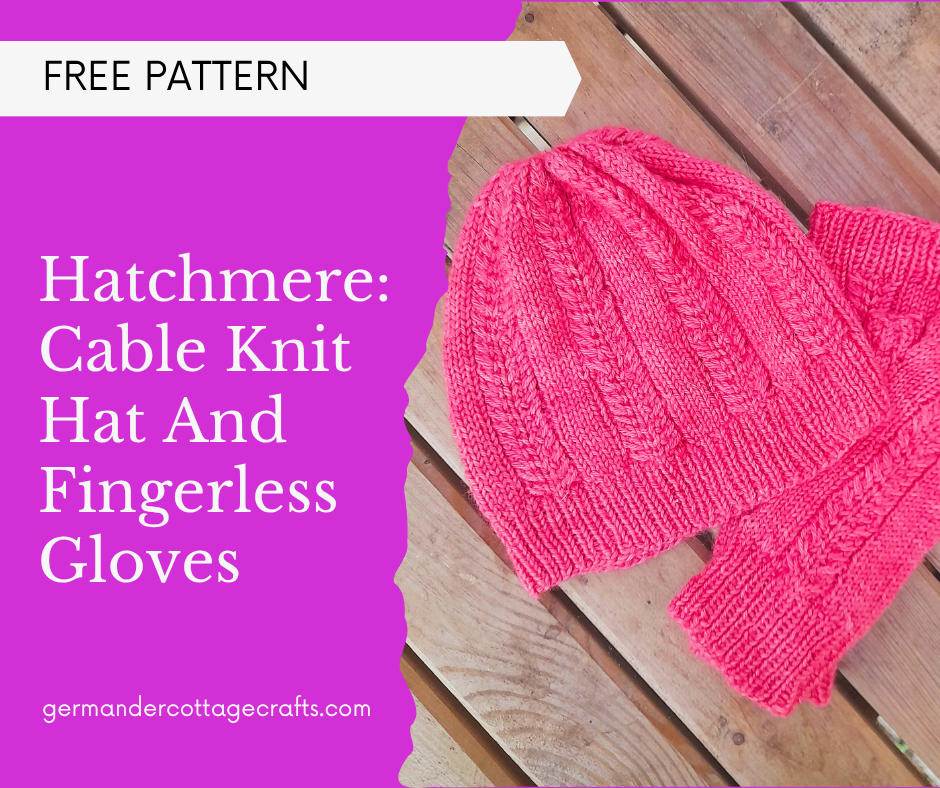
  • Hatchmere Hat Knitting Pattern. Cable knit hat free pattern.

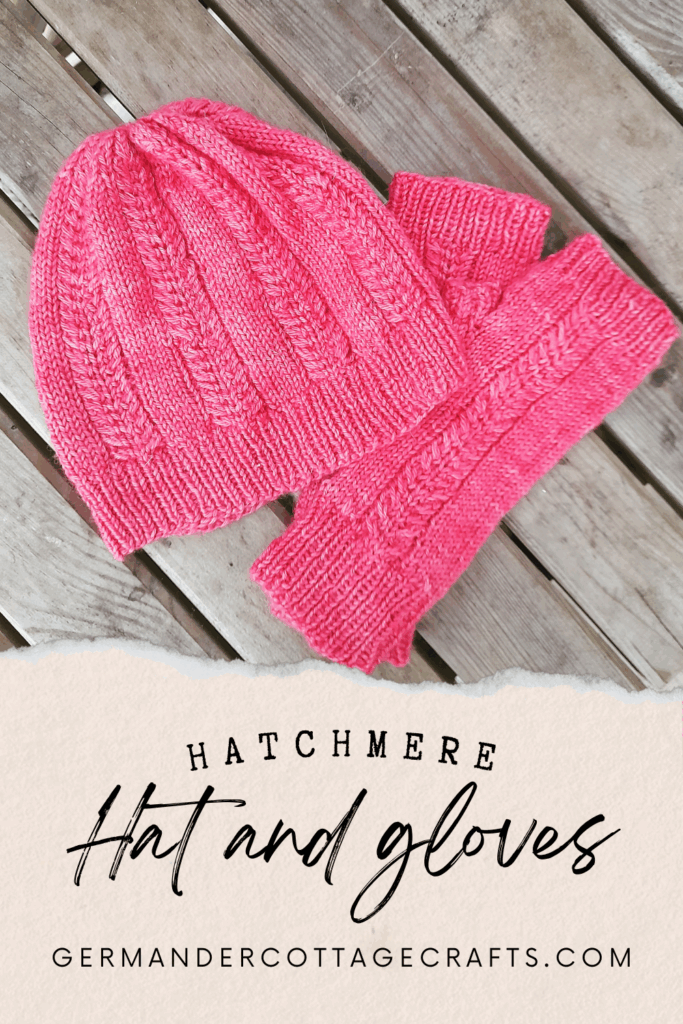
    Hatchmere Hat Knitting Pattern. Cable knit hat free pattern.

    Cable knit hat and mitts pattern. This pattern is free, but if you’d prefer the ad-free PDF, you can get it here or on Ravelry.

    The Hatchmere cable knit beanie hat and fingerless mitts are a really simple introduction to cable knitting. There is also a matching cowl you can try.

    On the edge of Delamere Forest, just behind the welcoming Carrier’s Inn, sits Hatchmere Lake. The captivating view from the Inn was obscured for years by high reeds & brambles, but is now cleared & a very pleasant sight.

    The simple cable stitches of the Hatchmere Hat & Mitts complementary set reflect the comings & goings of the Lake’s birdlife & the little prints & ripples they leave behind

    Free pattern for a cable knit hat and cable knit fingerless mitts. Simple cable knit patterns ofr winter. Free pattern for adult hat and gloves. Free beanie pattern knit cables.

    This hat and mitts set uses 2 skeins of Bowland DK in Dianthus. It’s a super soft, strong, buttery yarn made from the finest Bluefaced Leicester wool. 

    Cable Stitch Pattern 

    Worked over 9 sts: 

    Round 1: P1, K7, P1. 

    Round 2: P1, RC3, K1, LC3, P1. 

    The cable pattern will alternate in sync with the rnds e.g. Round 1 for the hat is the same as Round 1 of the cable pattern. 

    Glossary 

    CN- Cable needle

    CO- Cast on

    DPNs- Double pointed needles

    Inc- Increase

    K- Knit 

    LC- Left cable. 

    M1- Make 1. Knit into the front of the stitch, yarn over and knit into the back of the same stitch. 

    P- Purl 

    Rem- Remaining

    RC- Right cable 

    RC3 (Right cable 3)- Sl next 2 sts onto CN and hold at back of work. K next st from LH needle then K2 from CN. 

    LC3 (Left cable 3)- Sl next st onto CN, hold at the front of the work. K next 2 sts from LH needle, then K from CN. 

    PM- Place marker

    Rnd(s)- Round(s)

    Sl- Slip

    SM- Slip marker 

    Sts- Stitch(es)

    Hatchmere cable knit hat is a really simple beanie. Knit this cabe knit hat really easily with these step by step instructions. Winter knitting patterns free.

    What you’ll need to make this cable knit hat.

    Materials: 

    • 60/80/100g/2/3/3.5oz of DK yarn such as Bowland DK by Eden cottage yarns 100% British Bluefaced Leicester wool in colourway Dianthus. 225m / 246yd per 100g / 3.5oz
    • 4mm / US 6 DPNs or circular needle for magic loop method, or size needed to obtain gauge. 
    • 3.75mm / US 5 DPNs or circular needle for magic loop method.

    Notions 

    Cable needle. 

    Darning needle. 

    Optional: Pom pom maker. 

    Gauge 

    28 sts and 32 rows = 4” x 4” / 10cm x 10cm on 4mm / US 6 needles in cable pattern. 

    Hat will fit head size: 

    • Small: 54cm / 21in 
    • Medium:58cm / 22.5in 
    • Large: 62cm / 24in 

    Cable Stitch Pattern 

    Worked over 9 sts: 

    Round 1: P1, K7, P1. 

    Round 2: P1, RC3, K1, LC3, P1. 

    The cable pattern will alternate in sync with the rnds e.g. Rnd 1 for the hat is the same as Rnd 1 of the cable pattern. 

    Note: There will be 14 sts for each repeat–5 K st and 9 cable sts. 

    How to make your Hatchmere cable knit hat. Start here:

    With 3.75mm / US 5 needles, cast on 98 (112, 126) sts. Join to work in the rnd, being careful not to twist sts. 

    Work in 1 x 1 rib for 14 rnds. 

    If using a row counter, after 14 ribbing rnds are complete, reset it to 0. 

    Switch to larger needles 

    Rnd 1: *K5, rnd 1 of cable pattern over next 9 sts; repeat from * to end of rnd. 

    Round 2: *K5, rnd 2 of cable pattern over next 9 sts; repeat from * to end of rnd. 

    Work rnd 1 and 2 until piece measures 15cm / 6in  (17cm / 7in, 19cm / 8in) from cast on edge. 

    Crown shaping: 

    Taking care to follow the alternating cable pattern rounds: 

    Decrease rnd 1: *K1, K2tog, K2, work next rnd of cable pattern; repeat from * to end of round. (1 st decreased every st panel) 91 (112, 117) sts.

    Decrease rnd 2: *K4, work next rnd of cable pattern; repeat from * to end of rnd. 

    Decrease rnd 3: *K1, K2tog, K1, work next rnd of cable pattern; repeat from * to end of rnd. 84 (96, 108) sts.

    Decrease rnd 4: *K3, work next rnd of cable pattern; repeat from * to end of rnd. 

    Decrease rnd 5: *K1, K2tog, work next rnd of cable pattern; repeat from * to end of round. 77 (88, 99) sts.

    Decrease rnd 6: K2, work next rnd of cable pattern; repeat from * to end of round. 

    Decrease rnd 7: *K2tog, work next rnd of cable pattern; repeat from * to end of round. 70 (80, 90) sts.

    Decrease rnd 8: *K1, cable pattern* repeat to end. 

    Decrease rnd 9: Repeat rnd 8. 

    Finishing:

    Cut yarn leaving at least 10cm / 4 in. 

    Thread the darning needle with the yarn tail, then pull the tail through all remaining sts. Pull tight to close the hole. Secure, weave in and fasten off. 

    Block hat to open out cable pattern. 

    Love your Hatchmere cable knit hat? If you’d like to complete the set, here are the instructions for matching cable knit mitts.

    Mitts (make 2)

    Hatchmere cable knit hat and mitts. Free knitting pattern for cable knit fingerless gloves. Easy knits for winter. Gift knitting ideas. Eden Cottage Yarns

    Materials  

    • 80g/3oz of DK yarn such as Bowland DK by Eden cottage yarns in colourway Dianthus. 225m/246yd per 100g/3.5oz
    • 4mm / US 6 DPNs or circular needle for magic loop method, or size needed to obtain gauge. 
    • 3.75mm / US 5 DPNs or circular needle for magic loop method. 
    • Stitch holder (or spare yarn) for thumb of mitts. 
    • Cable needle. 
    • Darning needle. 
    • Stitch marker.  

    Gauge 

    28 sts and 32 rows =  10cm x 10cm / 4” x 4” on 4mm / US 6 needles in cable pattern. 

    Finished Measurements

    Mitts will fit hand circumference of up to 20cm / 8in – 23cm / 9in

    Finished size (unstretched): 18cm / 7in wide and 23cm / 9in long.

    Right glove: 

    CO 40 sts using 3.75mm / US 5 needles. Join to work in the rnd, being careful not to twist sts. 

    Work in K1 P1 rib for 16 rnds.**

    Switch to larger needles. 

    Rnd 1: K5, Rnd 1 of cable pattern, K to end. 

    Rnd 2: K5, Rnd 2 of cable pattern, K to end.

    Following cable pattern, work 14 more repeats, (30 rnds in total).

    Thumb gusset 

    Rnd 31: K5, next rnd of cable pattern, M1, K1, PM, M1, K to end. 42 sts.

    Rnd 32: Work in established stitch pattern around, without increasing, knitting increased sts from previous round. 

    Rnd 33: Work in established stitch pattern to 1 st before marker, M1, K1, SM, M1, work in established stitch pattern to end. 44 sts.

    Repeat Rnds 32 and 33 until there are 50 sts. 

    Next row: Work next 30 sts in established pattern, without increasing, turn, leaving rem 20 sts unworked. 

    Cast on 2 sts beginning of next row, K11, turn. 

    Cast on 1 st at beginning of next row. ***K these 14 sts for 2cm (¾ in), then work 3 rnds of K1, P1 ribbing. 

    Cast off all sts loosely. 

    Rejoin yarn to unworked sts, inc 1 st and work to end of rnd. 40 sts. 

    Work in established stitch pattern for 13 more rnds, starting at Rnd 2 of cable pattern. 

    Switch to 3.75mm / US 5 needles and K1, P1 for 9 rnds. 

    Cast off in rib on larger needles. 

    Sew up thumb seam and gap at the bottom of thumb. Weave in all ends. 

    Left glove: 

    Work as for Right glove until **.

    Rnd 1: K26, Rnd 1 of cable pattern, K to end. 

    Rnd 2: K26, Rnd 2 of cable pattern, K to end. 

    Following cable pattern, work 14 more repeats, (30 rnds in total).

    Thumb gusset: 

    Rnd 31: K20, M1, K1, PM, M1, next rnd of cable pattern, K to end. 42 sts.

    Rnd 32: Work in established stitch pattern around, without increasing, knitting increased sts from previous round. 

    Rnd 33: Work in established stitch pattern to 1 st before marker, M1, K1, SM, M1, work in established stitch pattern to end. 44 sts.

    Repeat Rnds 32 and 33 until there are 50 sts. 

    Next row: Work next 30 sts in established pattern, without increasing, turn, leaving rem 20 sts unworked. 

    Cast on 2 sts at beginning of next row, K11, turn. 

    Cast on 1 st at beginning of next row. Finish as for right glove from

    Hatchmere fingerless gloves and cable knit hat. Free pattern for winter hat ans fingerless mitts.

    Have you tried the matching Hatchmere Cowl?

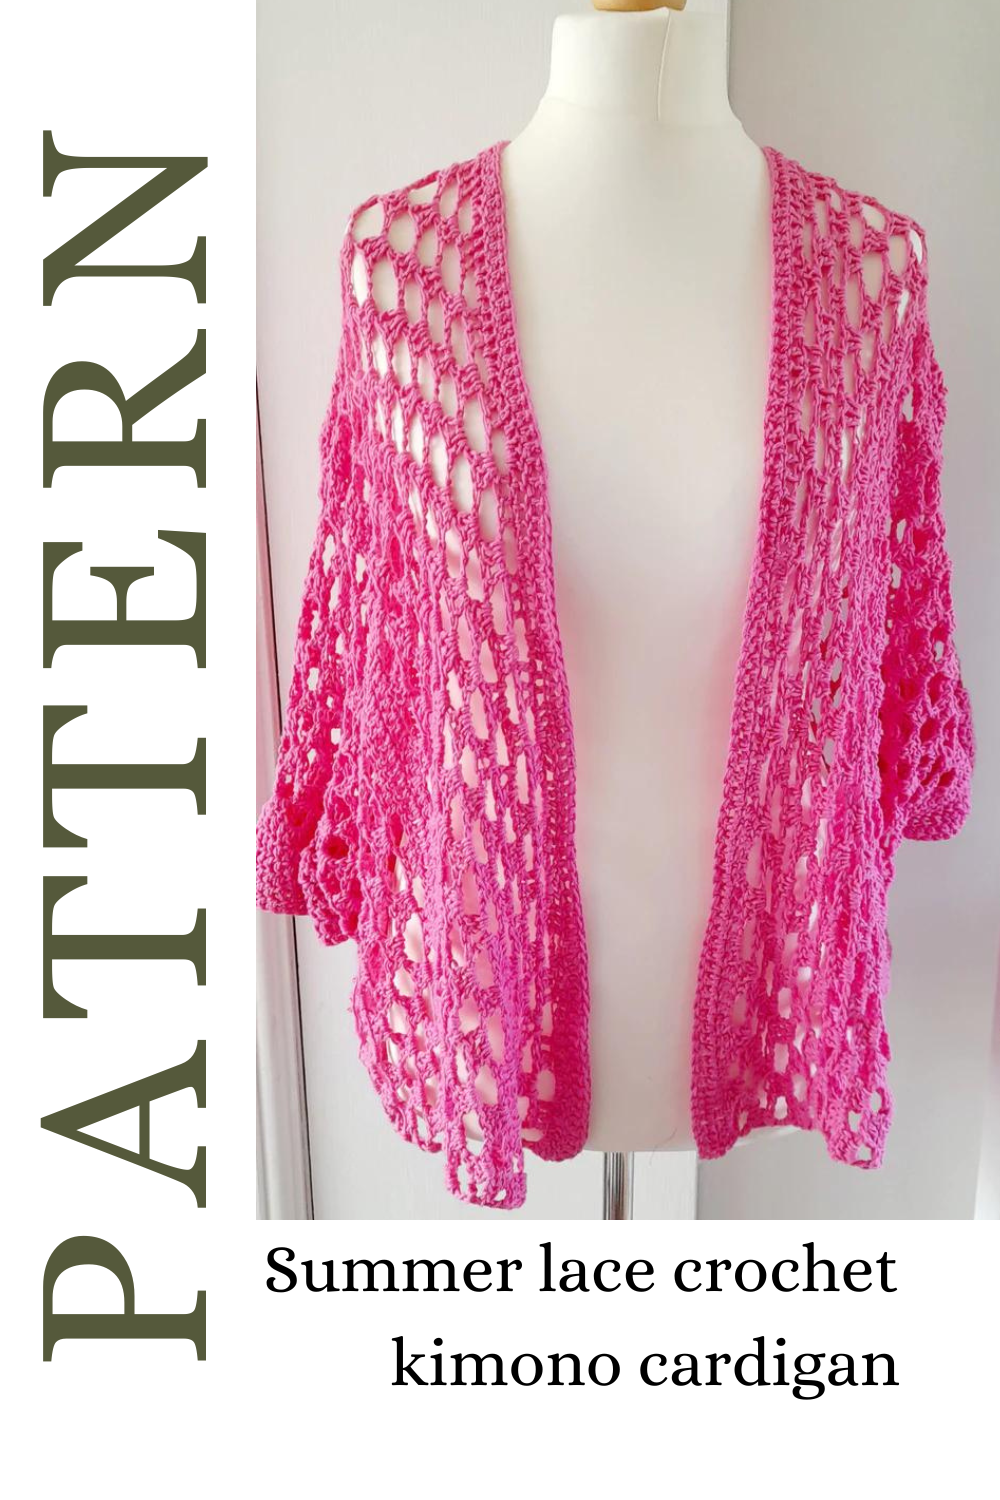
  • Summer crochet cardigan pattern. Mesh stitch crochet cardigan.

    Summer crochet cardigan pattern. Mesh stitch crochet cardigan.

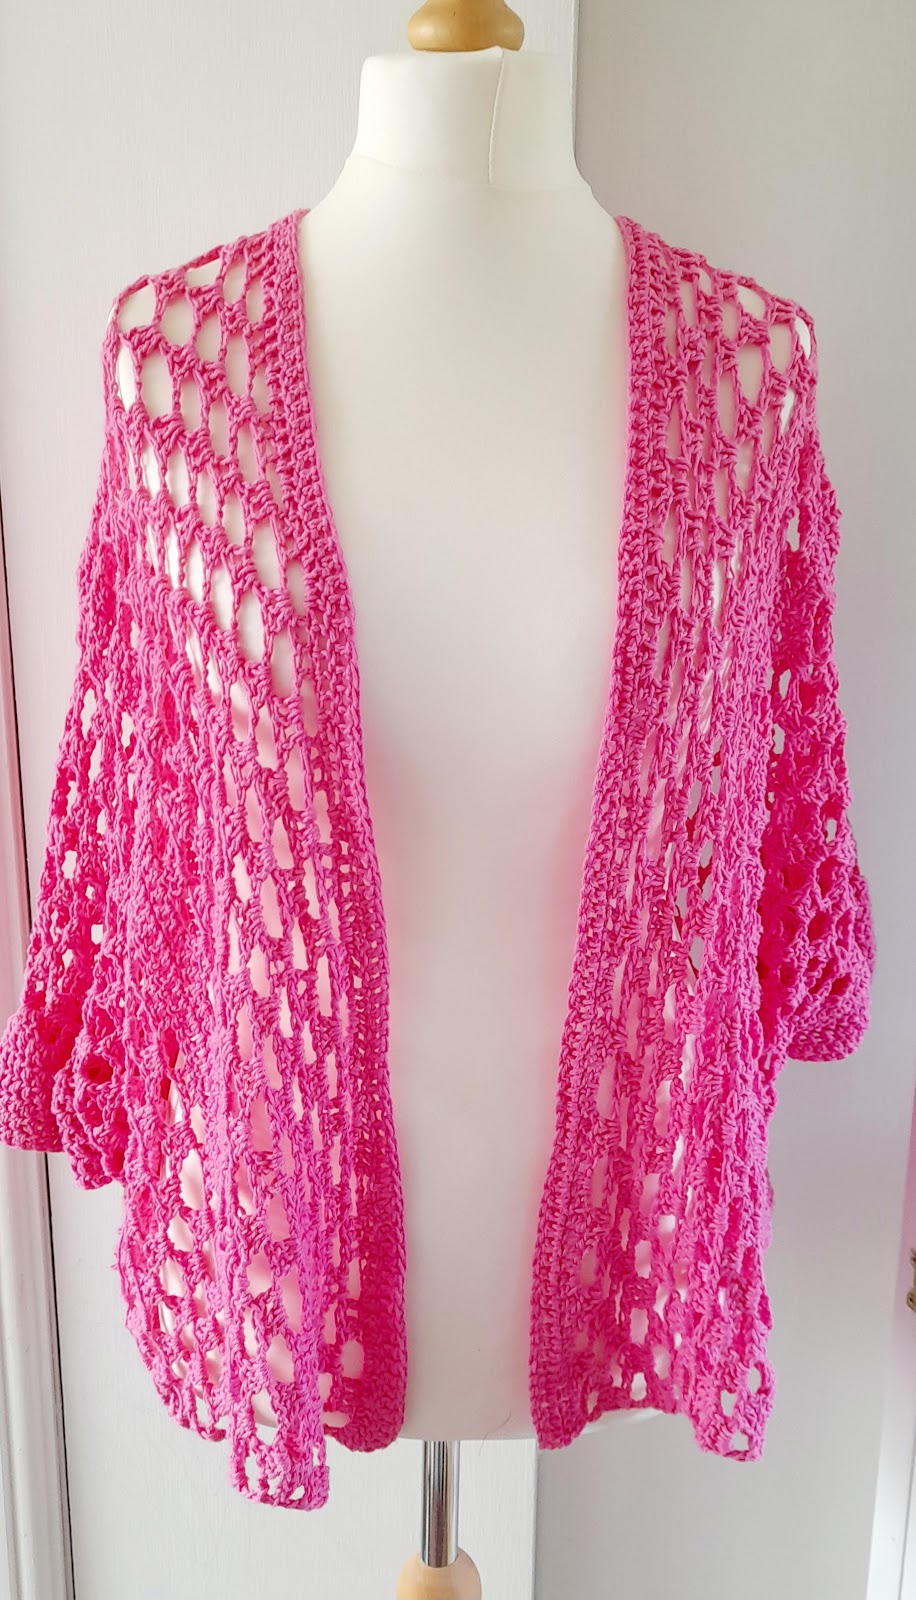
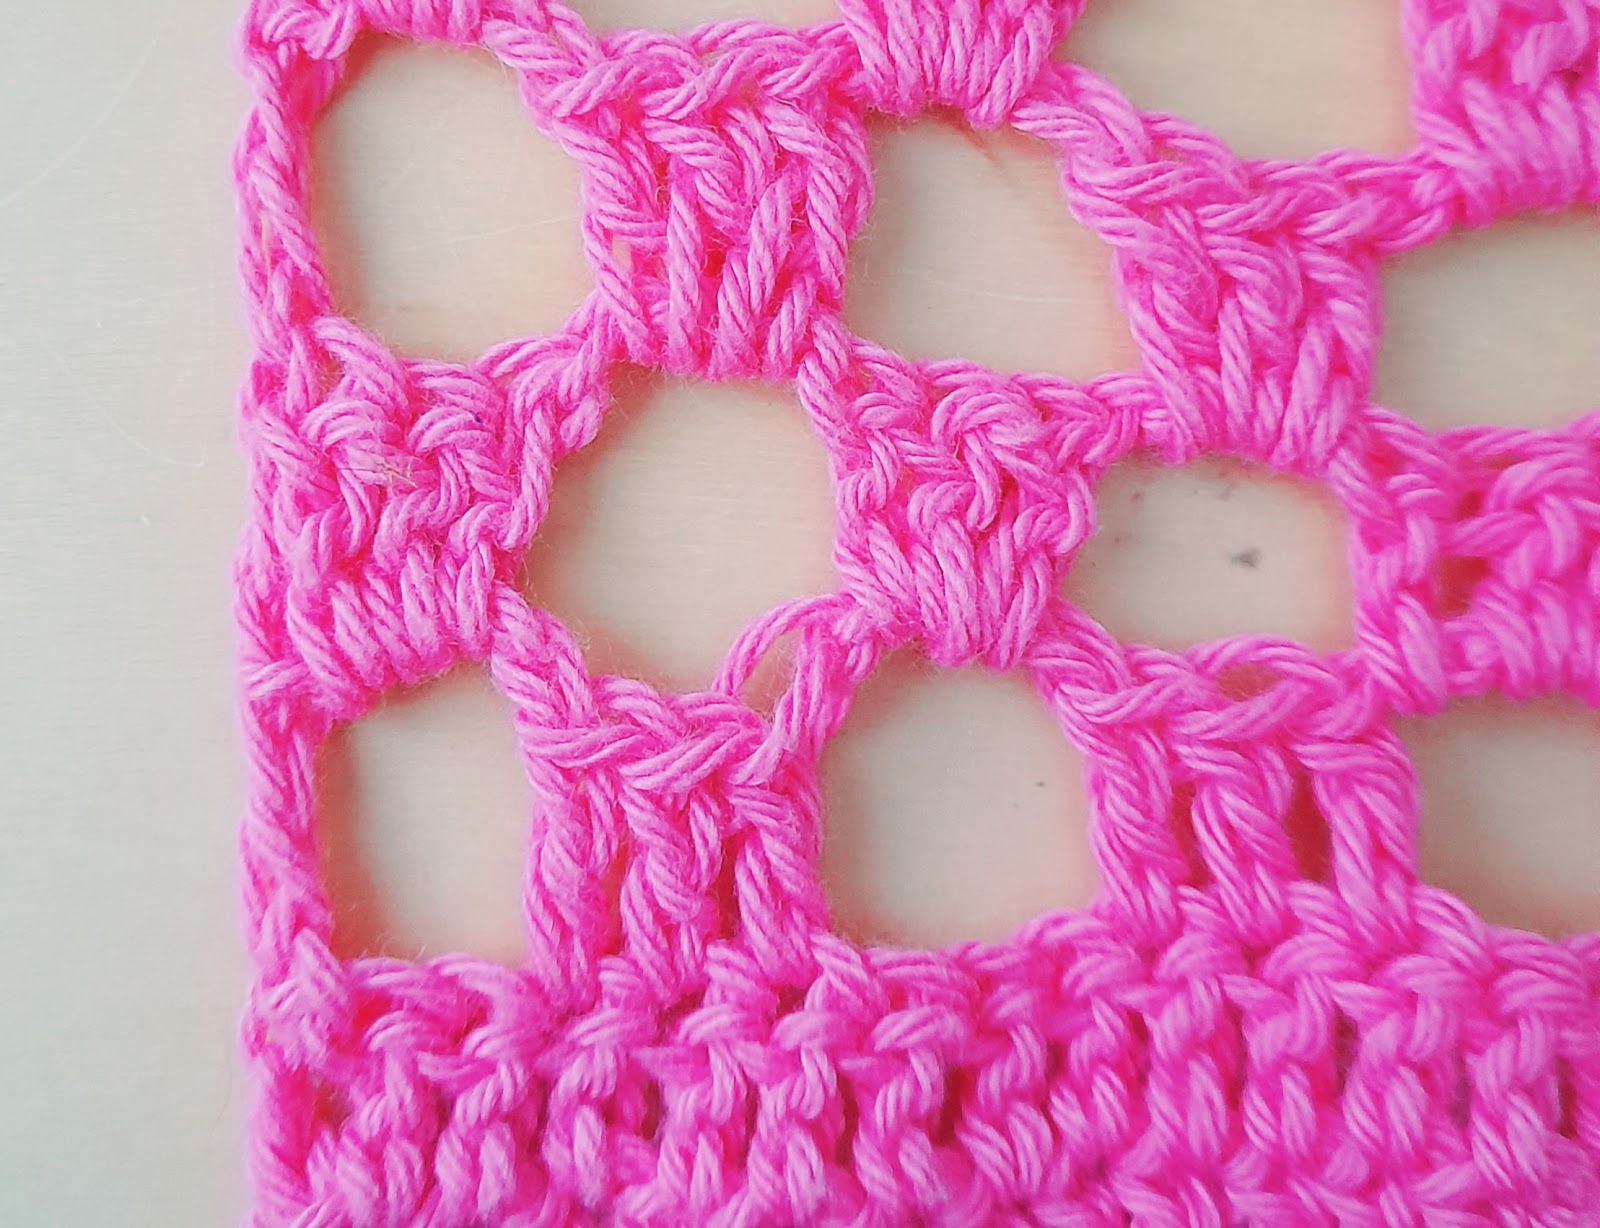
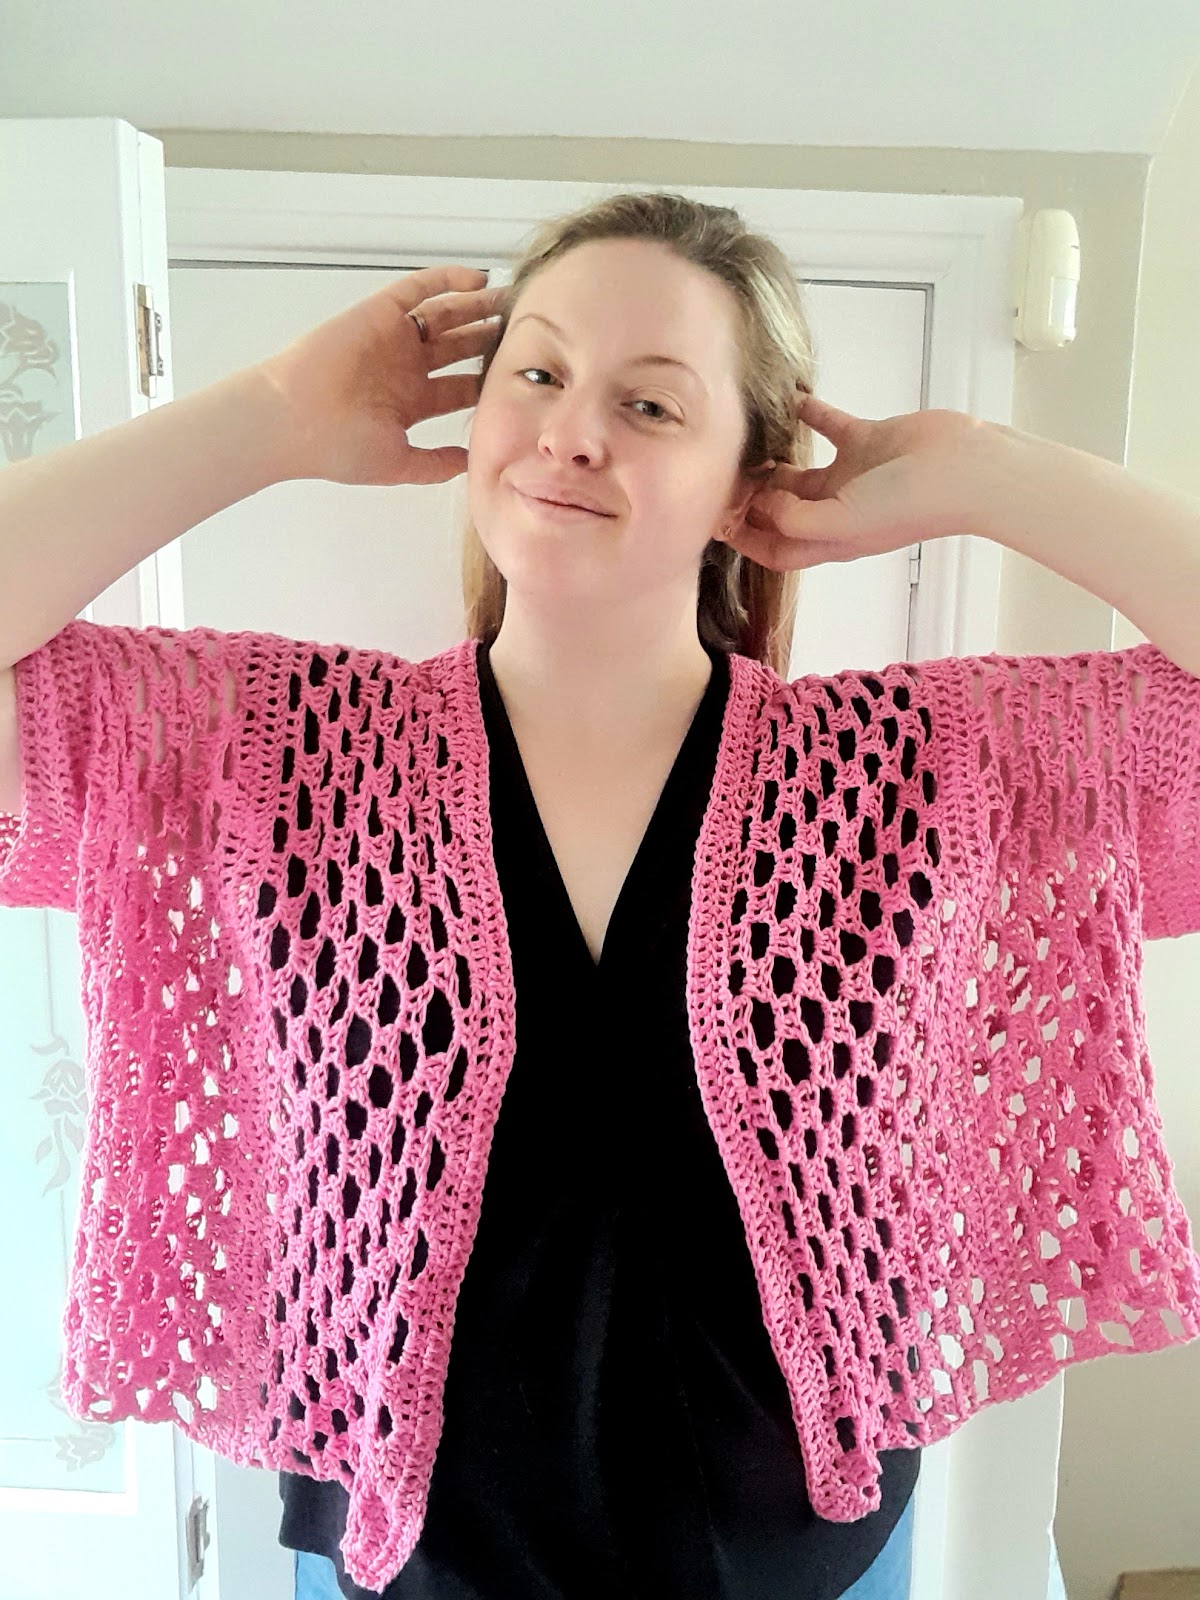
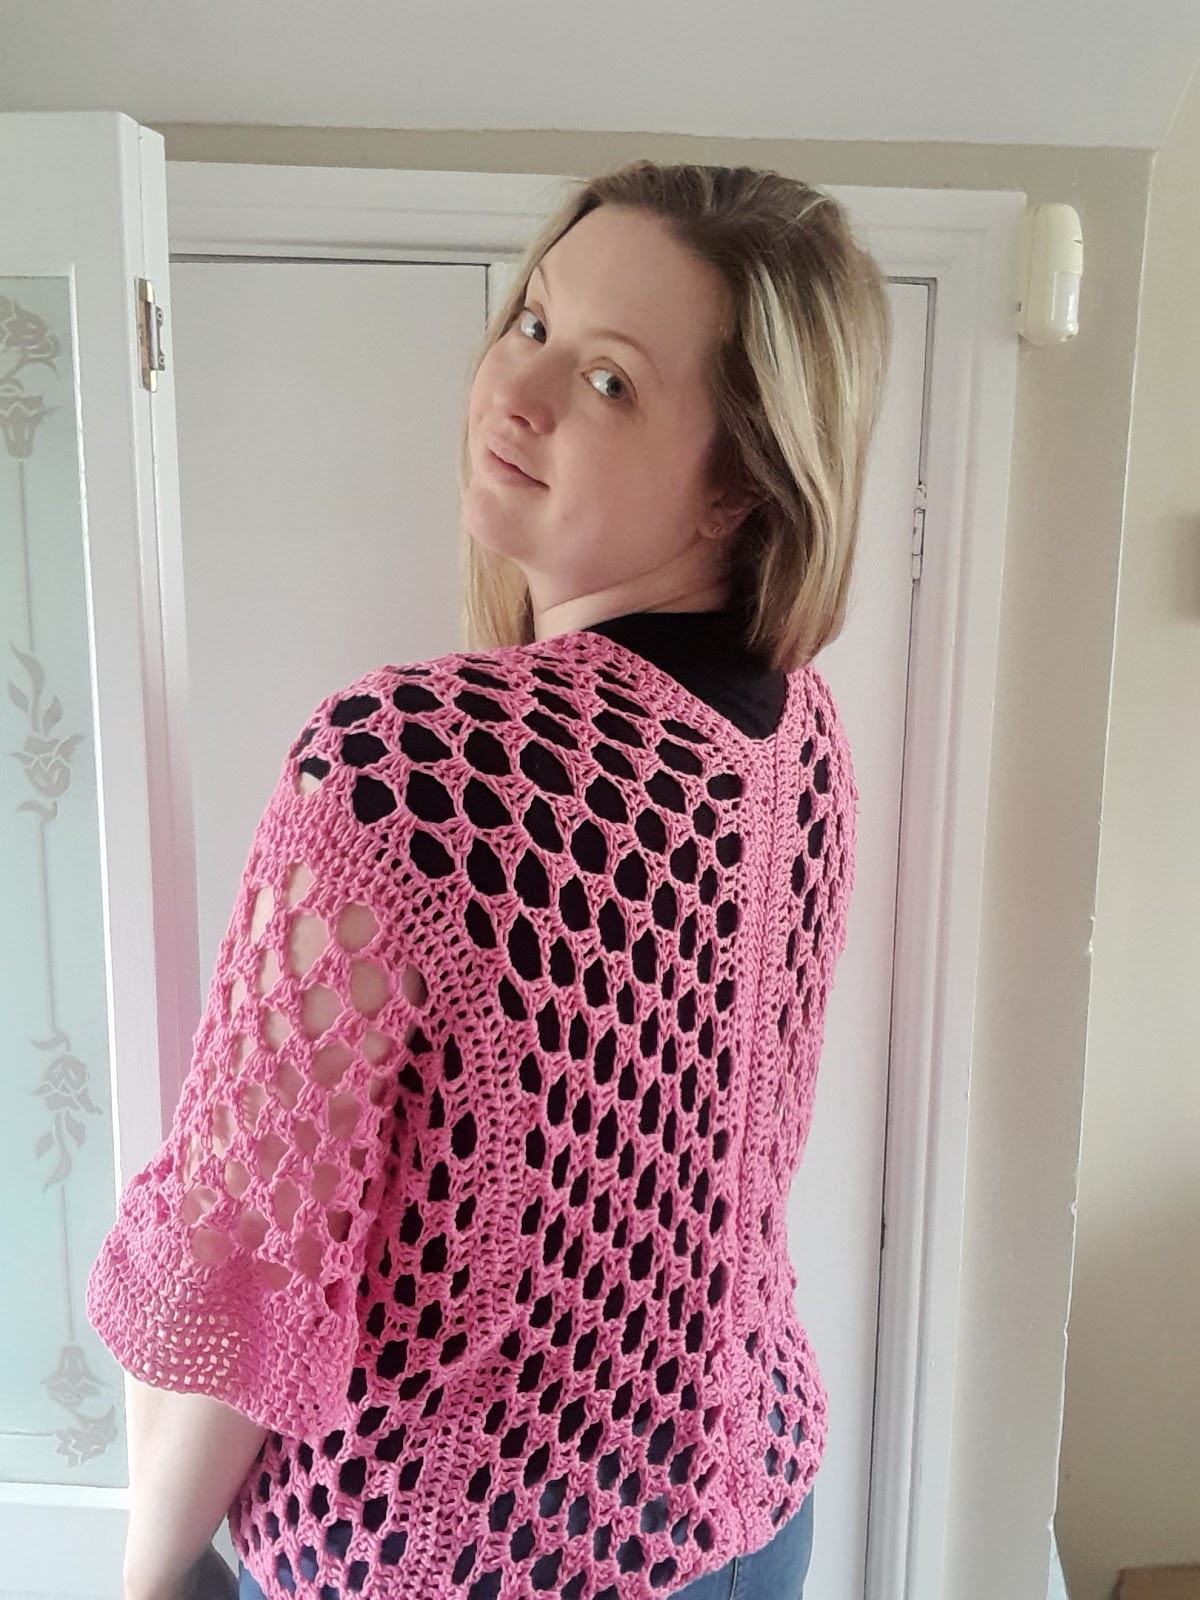
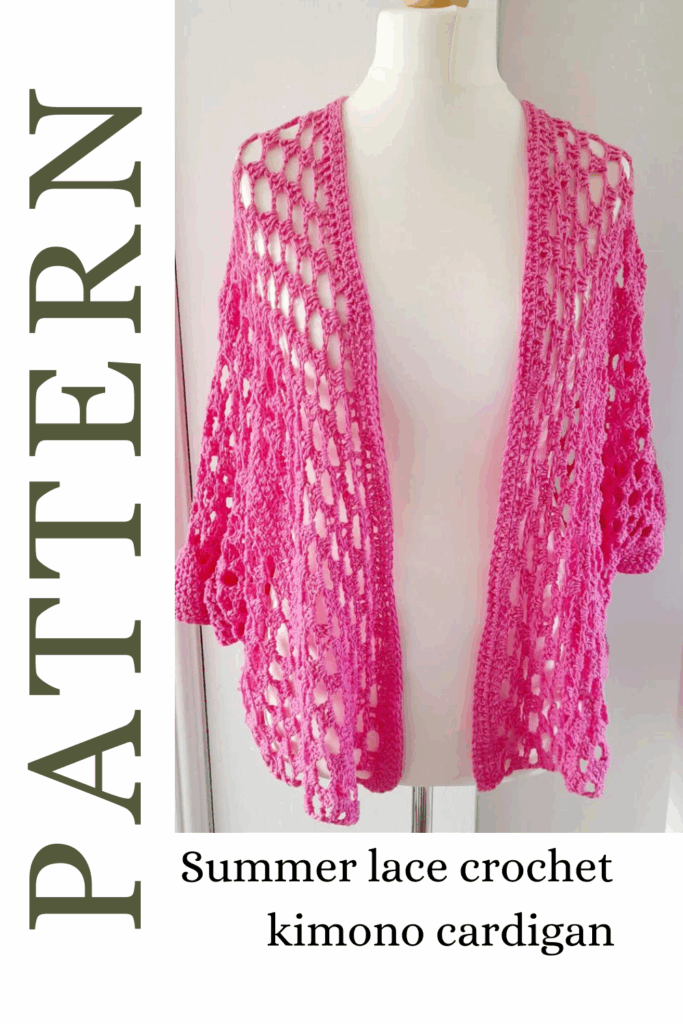
    Here’s a simple summer crochet cardigan with lace openwork and mesh stitch detail. This simple kimono sleeve cardigan is quick to make in cotton yarn.

    if you’d prefer to download the ad-free pdf of this pattern, you can do so on Ravelry or Ko-Fi.

    This article contains affiliate links, meaning that if you choose to buy from the links, I receive a small commission at no extra cost to you.

    This kimono lace cardigan is a summer must have. It’s lacy, light and goes with anything. Make sure you have one in several colours so that no outfit is off limits! The beauty of the kimono cut is the way it can flatter any shape. With the wide sleeves and open front, it has drape and moves beautifully on the wearer.

    All you need to know for this pattern is the double crochet stitch (US terms), chain and slip stitch join. 

    If you need to refresh your knowledge of crochet terms, I have a handy blog post here.

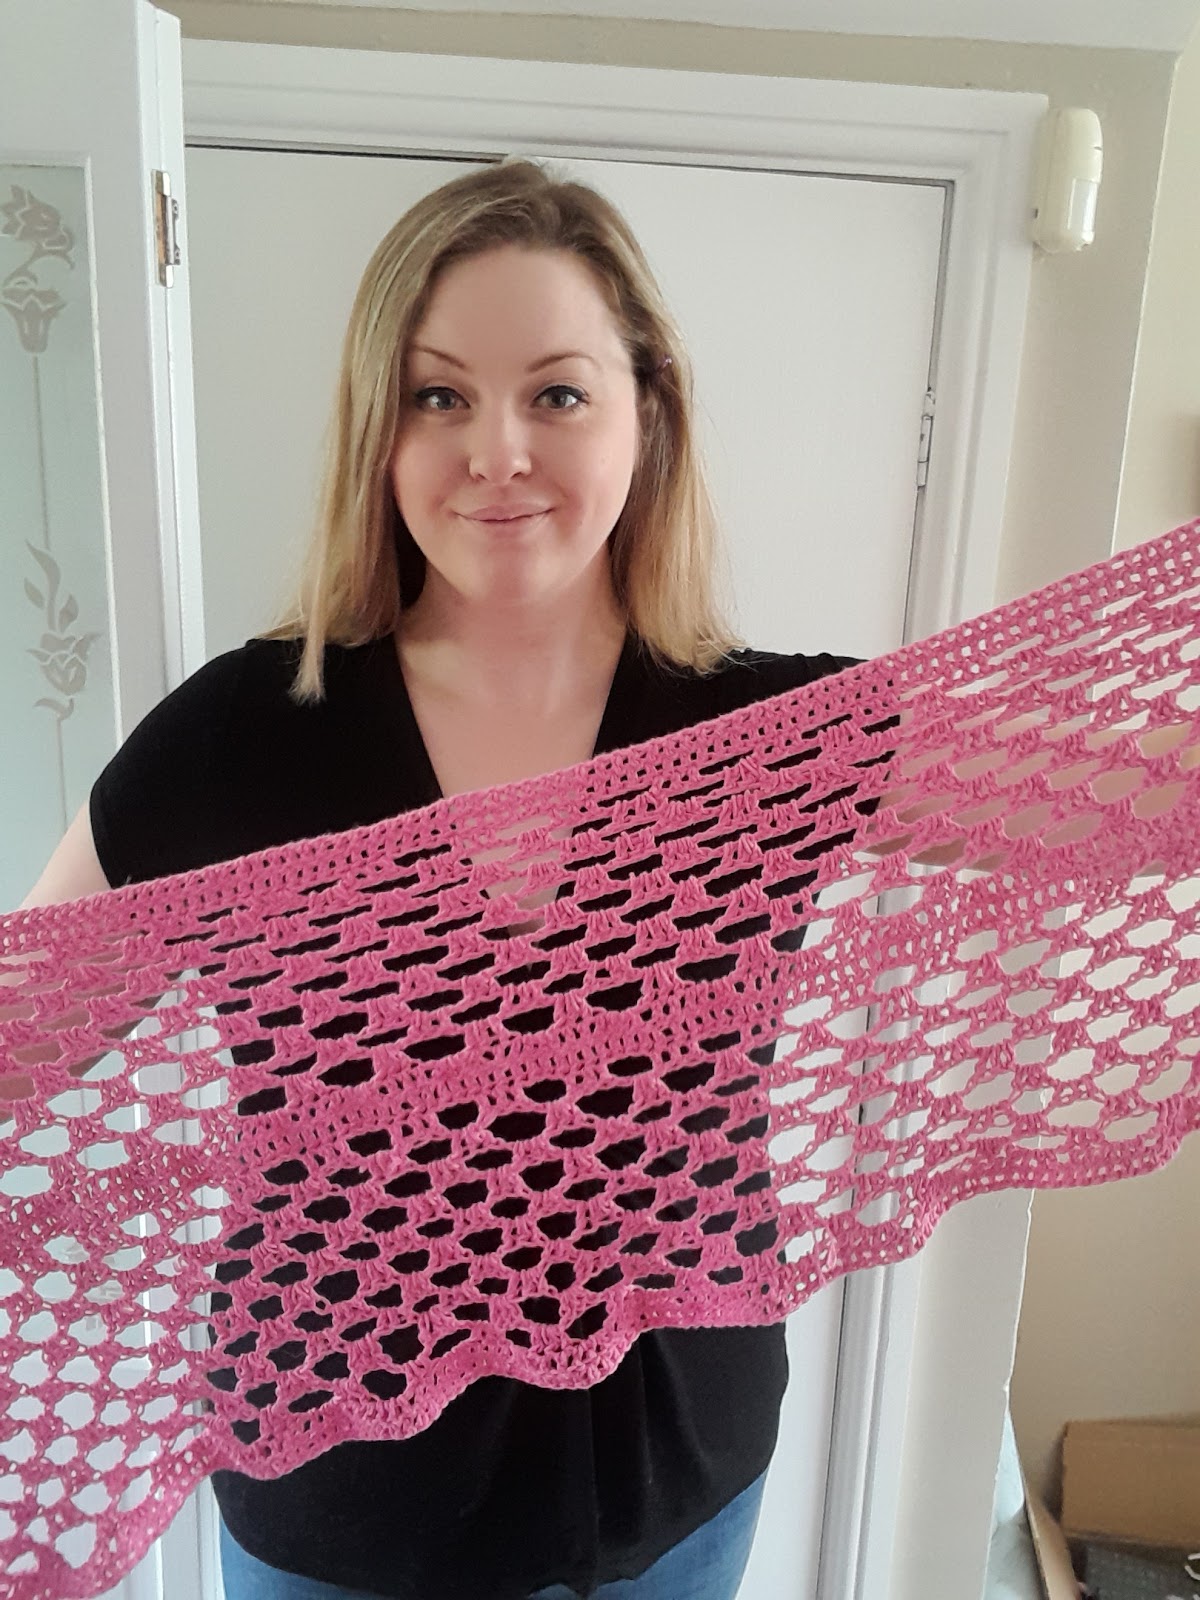
    This kimono style cardigan is worked sideways. 

    It is constructed by making two horizontal panels. The two panels are then folded lengthwise and the sleeves are worked in the round. 

    The left half is then seamed to the right half at the back and it is ready to wear! 

    Skills required to make this simple crochet cardigan:

    • Making a chain. This is essential to every beginner crochet pattern.
    • Double crochet (UK treble crochet). If you don’t know what that is, please check my handy stitch guide for crochet beginners.
    • Slip stitch join. If you don’t know what that even means, look at my post about joining granny squares. It’s the same join!

    Yarn required to make this simple, lightweight crochet cardigan with mesh stitch.

    I used Cygnet 100% cotton DK, which is a firm favourite at Germander Cottage Crafts but sadly, this yarn is discontinued. I have suggested some alternatives. This particular shade is called Peony pink! 

    If you can’t get your hands on this particular yarn, here are some great alternatives to consider:

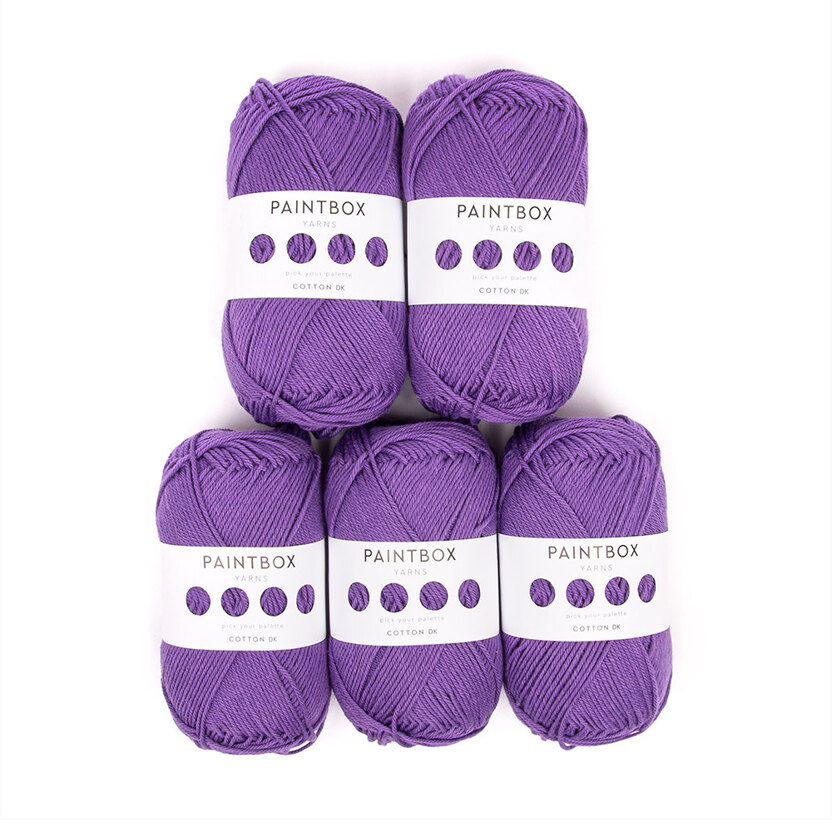
    Paintbox yarns cotton DK: £2.75 per 50g ball and it comes in a great range of vibrant or pastel colours, as well as neutrals. It’s 125m per 50g ball so you will need another ball or two depending on the size you’re making. It also comes in value packs.

    Debbie Bliss Piper DK 5 ball value pack: £40 for 5 balls of this 50% cotton 50% viscose yarn from Debbie Bliss. It’s 200m per 100g ball so matches the Cygnet cotton requirement perfectly. Warm, yet lightweight, Debbie Bliss’ Piper is a versatile DK weight yarn with a crepe texture that drapes beautifully. Piper produces fantastic stitch definition and it’s gloriously silky and smooth to knit. The colour palette is made up of 16 fresh and contemporary shades, which are perfect for seeing you through the changing seasons.

    King Cole Bamboo Cotton DK: King Cole Bamboo Cotton DK is a fabulous yarn choice for summer knits and baby clothes! Bamboo yarns are famous for their non-allergic properties, and Bamboo Cotton DK is deliciously smooth on the skin, thanks to its 50/50 mix of bamboo and cotton. Ideal for a cotton summer cardi and robust enough for baby clothes that need to be in and out of the wash, Bamboo Cotton DK comes in a gorgeous range of pastels, deliciously muted berry shades and some deep accent colours. It’s £5.69 per ball and you get 230m per 100g ball!

    The Pattern: Crochet Summer Lace Cardigan Pattern.

    US crochet terms used throughout.

    Crochet cardigan patterns for summer. Easy crochet kimono to make. Crochet kimono cardigan patterns free. Beginner crochet patterns free.

    Sample shown in size M on a 44” bust. 

    Glossary

    ChChain. Insert hook, yarn over pull through loop. 
    Ch spThe chain space or gap created by the chains of the previous row. Work into the space rather than the chain or stitch. 
    DcDouble crochet. Yarn over, insert hook, yarn over and pull through. Yarn over and pull through 2. Yarn over and pull through 2. 
    RepRepeat
    Sl stSlip stitch. Insert hook into loop, yarn over and pull through both loops. 
    SkSkip a chain. 
    St(s)Stitch(es)

    Gauge:  12 sts and 10 rows per 10cm/4in in dc using 4mm hook and DK yarn.

    1 3Dc cluster measures 2cm tall. Cluster gauge is approximate because of the loose stitch. 

    Materials: 

    • 350g/400g/450g of Cygnet 100% cotton DK in Peony PInk. (200m/219yd per 100g/3.5oz). 
    • 4mm/US 6 crochet hook or size needed to meet gauge. 
    • Tapestry needle 
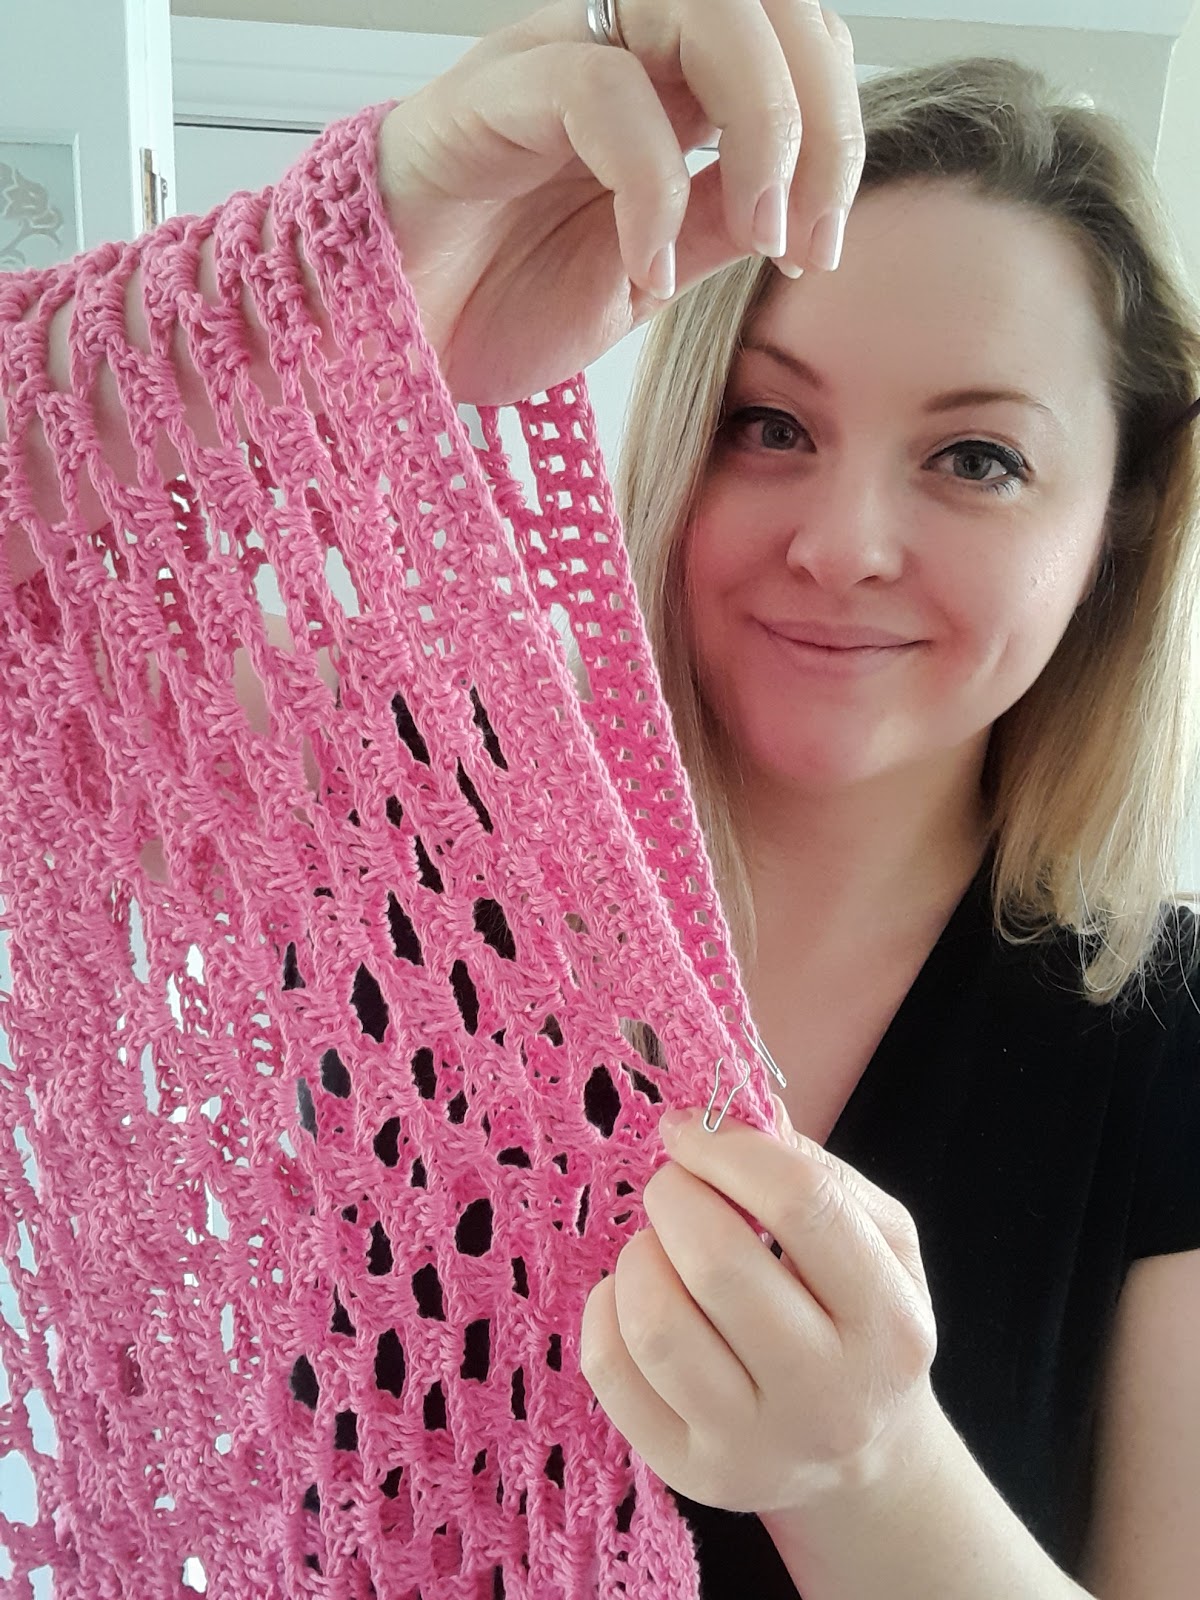
    • 4 removable stitch markers. 

    Sizes: 

    S can fit chest sizes 32-40″

    M can fit chest sizes 42-48″ 

    L can fit chest sizes 50- 56″ 

    Lace pattern: 

    Row 1: Ch3 (counts as 1st Dc) dc in each of next 3 ch *ch 3 sk next 3ch, Dc in each of next 3 ch* rep from * to last st. Dc in last ch. Turn.  

    Row 2: Ch 3 (counts as 1st dc). *3Dc in next ch- 3 loop, ch3*; rep from * to last Dc. Dc in last ch. Turn 

    Row 3: Ch3 (counts as 1st dc) *3Dc in first ch 3 sp, ch 3* repeat * to last ch 3 sp. Dc in top of turning ch. Turn. 

    Repeat rows 2 and 3 for pattern. 

    Panel measurements: 

    S: 156cm (61in) long and 42cm (16.5in)  wide 

    M: 162cm (64in) long and 46cm (18in) wide. 

    L: 174cm (68.5 in) long and 50cm (19.5in) wide. 

    Lace pattern (above)

    Sample shown in size M. 

    S- 26 3 Dc clusters. 

    M- 27 3 Dc clusters. 

    L- 29 3 Dc clusters. 

    Panel (make 2)

    Ch 160/166/178 (3 ch counts as 1st dc) Turn. 

    Dc in 4th ch from hook. Dc in every ch. Turn. (158/164/176 sts total)

    Ch 3, Dc in every Dc to end. Turn. (158/164/176 sts total)

    Work lace pattern (page 2)  for 9 (10/11) rows. 

    Next section: 

    Ch3 *3Dc in ch sp, Dc in next 3 Dc* Repeat * to end. Ch 3 and turn. 

    Dc in every dc to end. Turn. (2 dc rows total)

    Work lace pattern for 9 (10/11) rows. 

    Ch3 *3Dc in ch sp, Dc in next 3 Dc* Repeat * to end. Ch 3 and turn. 

    Dc in every Dc to end. Turn. (2 dc rows total). Fasten off. 

    Mark for armholes: 

    Count 47 (49/51) dc sts. Place removable marker on next st. Count another 61 (63/71) sts. Place marker on 62nd (64th/72nd) st. 48 (50/52) Dc sts after second marker. 

    Fold the piece lengthwise so that the two markers are matched. Secure the markers together.  

    Do this for the opposite panel also. 

    Markers are matched to mark the sleeve opening. 

    Seam the side. 

    Using sl st join or a tapestry needle, seam the side of the piece from the hem to the underarm. This makes it easier to make the sleeve. 

    Crochet summer kimono pattern free. Free crochet cardigan patterns for beginners. Mesh stitch crochet pattern ideas. Free crochet summer cardigan. Free summer crochet cardigan pattern.

    Sleeve

    Reattach yarn and ch 3 (counts as 1st dc). Dc in every dc st around. (62/64/72) dc sts in total. Sl st to join the round.

     Work 5 more rounds. Fasten off. 

    The stitches should be split like this: 

    S- 158ch 48/62/48

    M- 164ch 50/64/50

    L- 176ch 52/72/52

    Assembly

    Join the two back pieces, right sides together using sl st, or seam with a tapestry needle. 

    Back seam should be 51cm/ 53.5cm/56cm (20in/21in/22in) long. 

    Weave in ends and enjoy!

    Easy beginner crochet cardigan for summer. Crochet summer lace cardigan pattern. Simple summer cardigans to crochet.

    Thank you for using this free crochet cardigan pattern! If you have a Ravelry account, why not save it as a project?

    Crochet cardigan pattern free. Free crochet kimono cardigan PDF. Free crochet patterns using mesh stitch. How to crochet lace.
  • How to crochet a circle. Crochet circle pattern for beginners. Crochet a flat circle that doesn’t curl or frill.

    How to crochet a circle. Crochet circle pattern for beginners. Crochet a flat circle that doesn’t curl or frill.

    This is a free pattern for a crochet circle. How to crochet a flat circle 

    Creating your first crochet circle is really tough, especially when you don’t know how to make it bigger or how to make it lie flat. With this pattern I can explain how to:

    1. Start the circle
    2. Increase the circle
    3. Make it lie flat

    Materials required: 

    • 50g/1.75oz of cotton DK yarn such as Cygnet cotton DK (100% cotton, 200m/219 yd per 100g/3.5oz ball) Any DK yarn will do here.
    • 3.75mm/F-5 crochet hook.
    • Scissors 
    • Darning needle

    Terms are written in US crochet terms throughout. Not sure what they are? Here’s a handy blog post explaining US and UK crochet terms.

    It’s so handy to know how to make a crochet circle. They’re not just great for granny square designs but you can also make circles big enough to be place mats, bags or cushion covers. Have fun learning how to make a crochet circle that stays flat!

    When you’re done with the tutorial, I’ve included some fun crochet kits that you can try. They will not only help you to practice the crochet circle, but they will help you learn how to make other useful crochet shapes for home decor and toys!

    Now for the tutorial with step by step photos. Here’s how I make a circle in crochet.

    Step 1: Make a slipknot and make a chain of 6 sts. 

    A crochet hook with a chain of 6 chains.

    Step 2: Slip stitch with the 1st chain (not the slipknot) to create a ring. 

    Step 4: Chain 3 (counts as 1st double crochet stitch) 

    Step 5: Make another double crochet into the centre of the ring. 

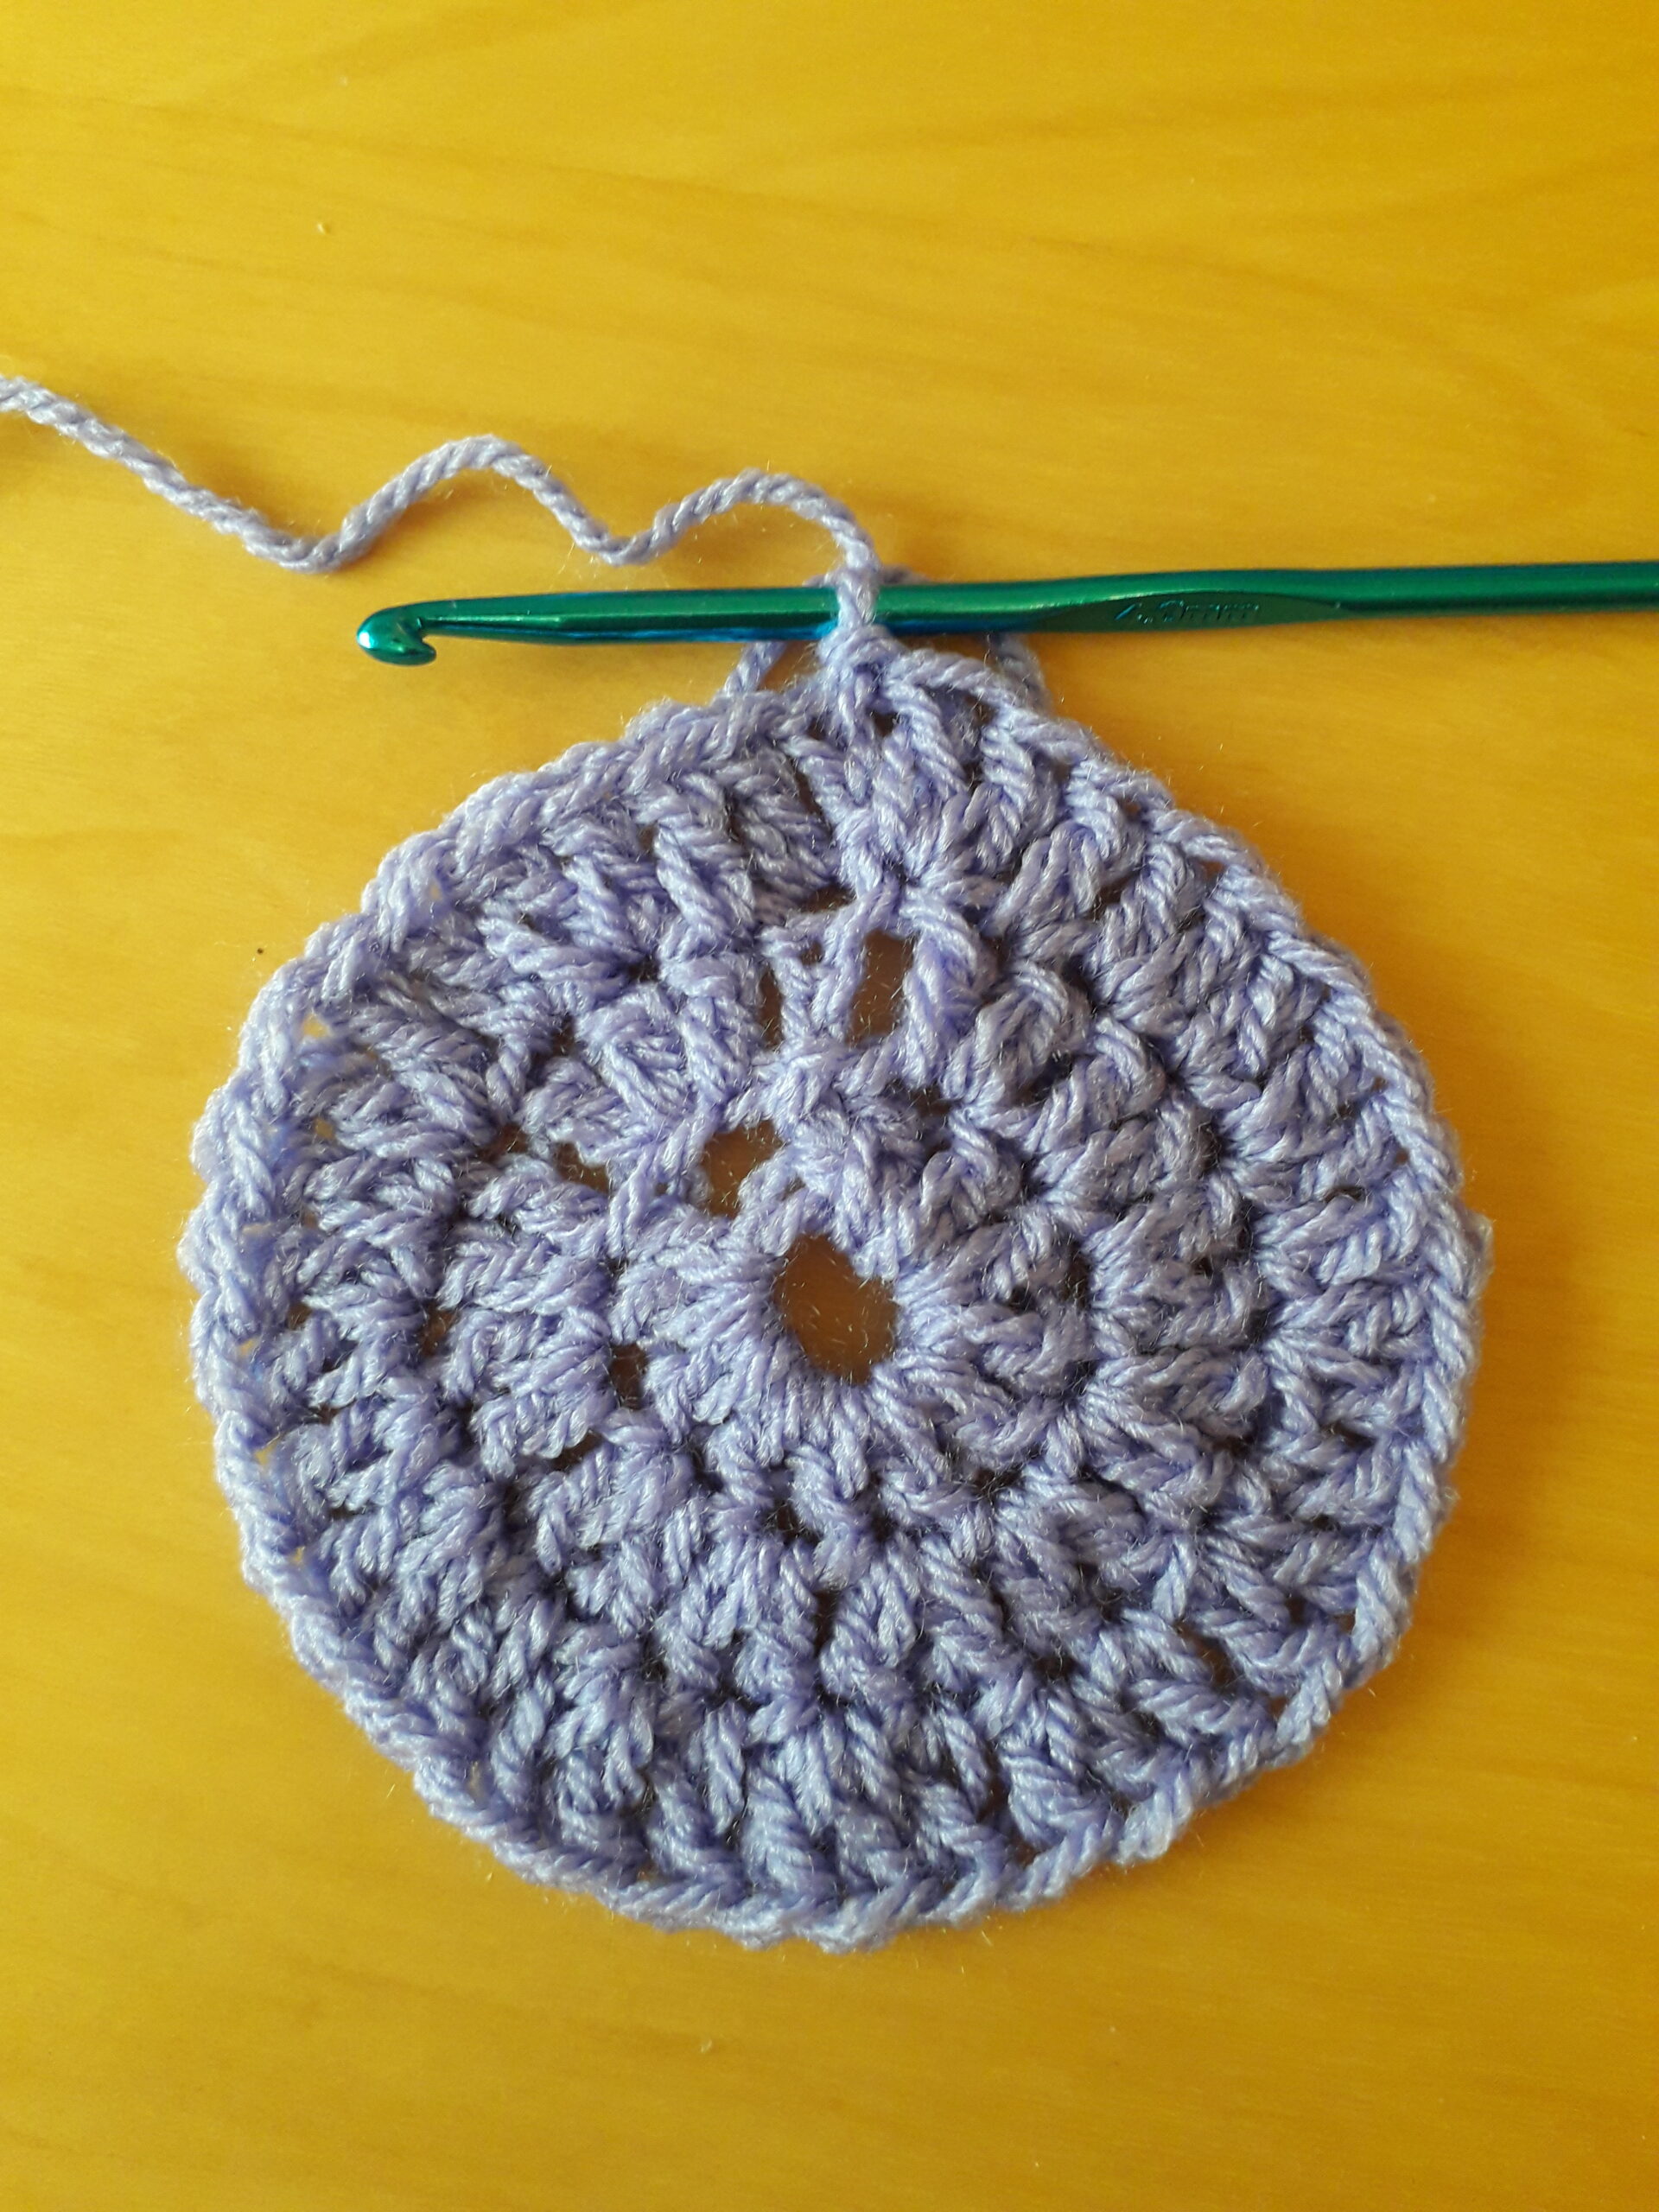
    Step 6: Make 10 more double crochet stitches into the centre of the ring. (12 sts in total).

    Step 7: Slip stitch to join the top of the chain 3 to the last dc. First round complete. (12 sts)

    A crochet circle in the first round.

    Next round: 

    A ch3 after the first round of crochet. Crochet a flat circle. This is a demonstration photo.

    Step 1: Chain 3 (counts as 1st double crochet) 

    Step 2: Make a double crochet stitch into the base of the chain 3. (1st increase done)

    The second stitch of the second crochet round when making a flat circle.

    Step 3: Make 2 double crochet stitches into the next stitch.

    Four stitches made for the second round of the crochet circle. Crochet circle tutorial in the round.

    Step 4: Make 2 double crochet stitches in every stitch around. (24 sts) 

    Step 5: Slip stitch with first chain 3 to close the round. 

    Two rounds done of a flat crochet circle. Crochet tutorial for beginners.

    Next round and all subsequent rounds: 

    Every round needs to increase by 12 stitches in order to retain shape and lie flat. 

    Round 3: 

    Start the round in the same way as the previous round but this time, make an increase every other stitch not every stitch. (36 sts)

    Round 4: Start the round in the same way as the previous round but this time, make an increase every 3rd stitch. That means there’s an increase in every 4th stitch. 

    Round 5 and all other rounds: Increase every 4th, 5th and 6th stitch per round. Make sure that the amount of stitches per round has increased by no more or less than 12 stitches

    Why not use your finished circle as a cute mat for plants or a placemat? 

    Crochet circles don’t always sit flat the first time around. here are some possible issues that will arise and how you can fix them:

    Circle starting to resemble an Elizabethan ruff?

    You have too many increases. Check to see whether you have made the appropriate amount of increases. If there are too many, start the round again.

    Circle starting to turn in like a bowl?

    You haven’t made enough increases. 

    Neither of the above solutions working?

    Change yarn and/or hook. It could be a tension issue. Always go up or down by 0.5mm until you reach your desired flatness.

    Email info@germandercottagecrafts.co.uk or visit my Youtube channel for further pattern help. 

    Patterns featuring crochet circles to inspire you:

    Please note, there are affiliate links here. This means that if you choose to purchase, I do receive a small commission at no further cost to you.

    Hoooked DIY Crochet Zpagetti Pouf Kit. Practice your crochet in-the-round with this quick and comfy Zpagettii pouf. They’ve been around for a while but we’re still loving the look of a knitted  and crochet poufs. Its soft textural shape of Zpagetti t-shirt yarns is both simple and complicated. With this DIY complete kit you can make your own affordable pouf. We have included a pair of jumbo knitting needles and also a crochet hook and both patterns so you can pick your favourite craft technique. This Hoooked knit & crochet set is also great as a creative DIY gift for a special someone. With this complete Hoooked kit you can cover a pouf with a cross section of 65-70 centimeters and a height of 30-40 centimeters.

    Paintbox yarns cotton Aran Daisy The Chick Crochet Kit. Practice your amigurumi skills with this adorable crochet chick kit. If you know how to crochet a circle, you can make cute little stuffed items like this!

    DMC Mindful Making The Peaceful Plant Pot Holders Crochet Kit. This kit will help you crochet a flat circle and also learn how to make it curl up on purpose to create the cylindrical shape perfect for pots, vases and bowls! Give your desk a mindful makeover with these gorgeous crochet plant pot holders.

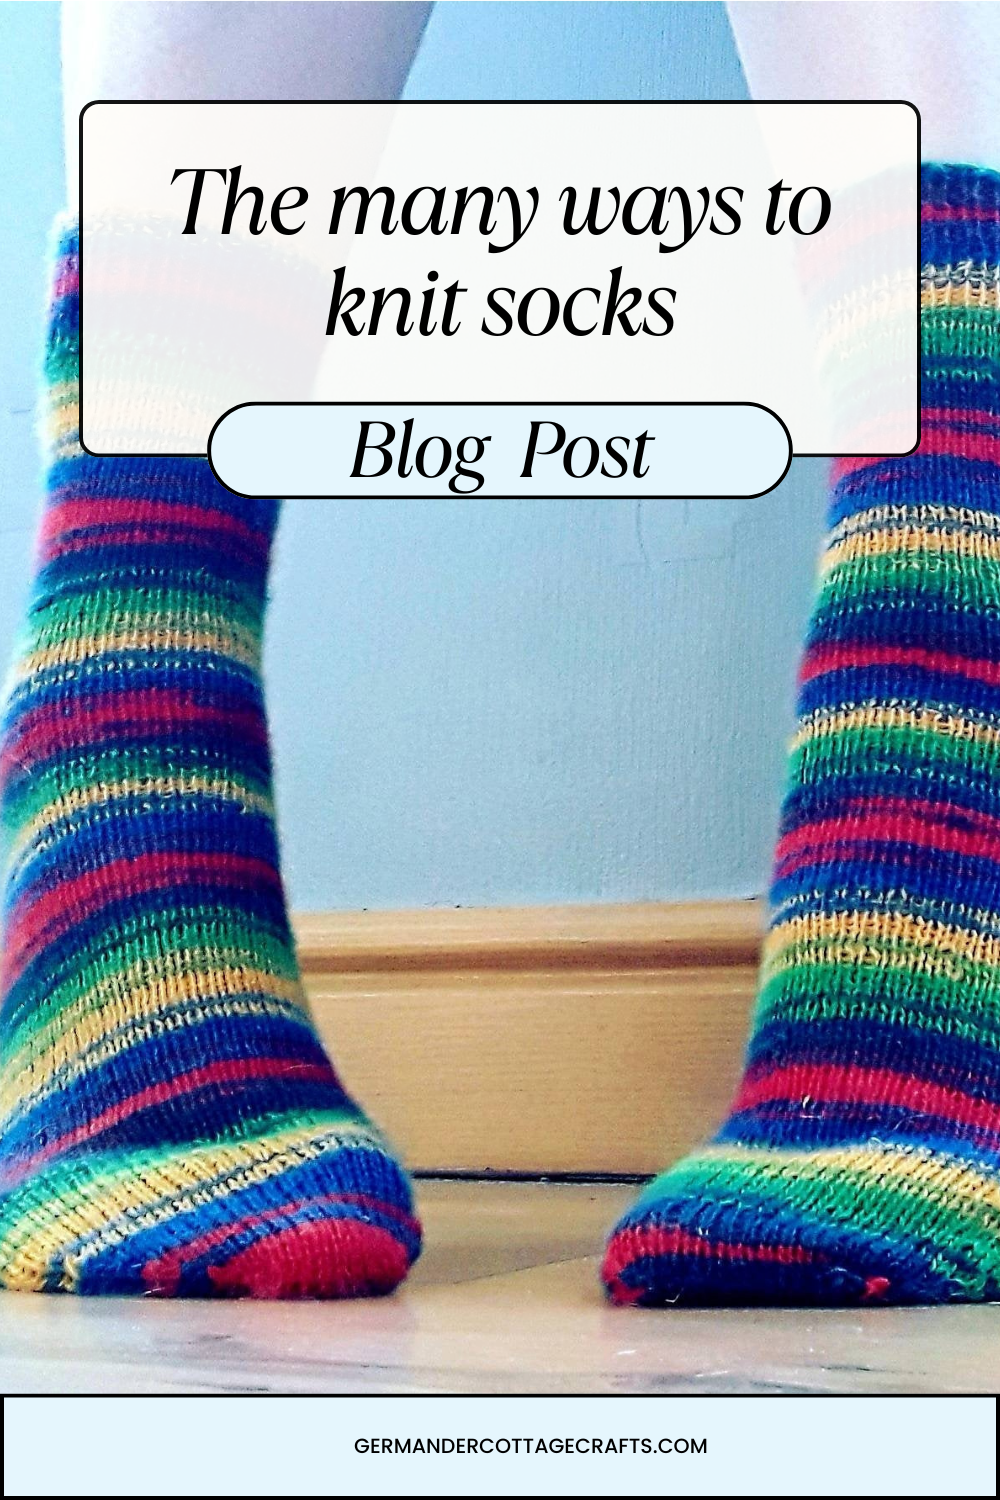
  • There are many ways to knit socks.

    There are many ways to knit socks.

    Are you sitting down? I’m going to talk you through the many ways to knit socks. 

    Last year I received a refund request from a customer. They weren’t happy with their sock knitting kit and wanted a refund on the needles. The customer’s words were something like “there’s circular needles in here. No good for knitting socks!” 

    Let’s ignore the fact that the contents of the kit will have been clearly listed before purchase and that I am a knitwear designer and hopefully know a thing or two about knitting socks. Let’s focus on the “no good for knitting socks!” How do you know? Have you tried? 

    After talking the customer round (excuse the pun) they were willing to give the circulars a try. I introduced them to the method of magic loop knitting. They had never heard of this before. If you knit, every day is a school day. There are many, many ways to do something that achieves the same results as something else. Magic loop is just one method. 

    This article may contain affiliate links, meaning that if you choose to shop through any of the links, I do earn a small commission.

    Long circular needles (magic loop)

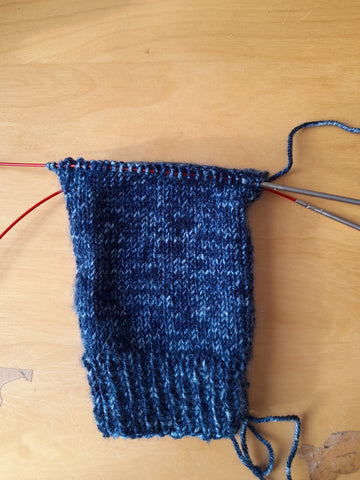
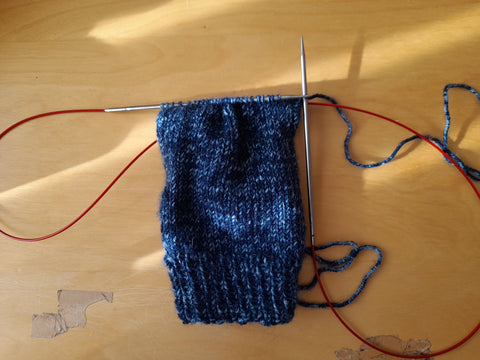
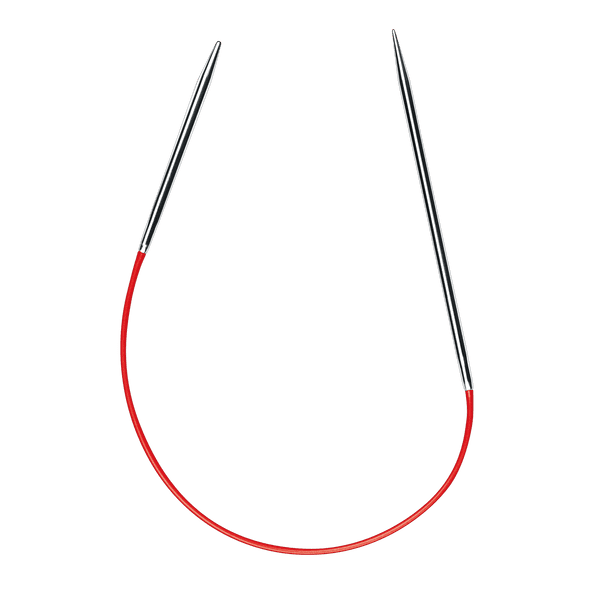
    Long circular needles aren’t just for hats and garments. You can use them for knitting flat as they are lighter and more compact than traditional straight knitting needles. What knitters do to make socks with long circulars is to choose circulars with a very long cable. I usually recommend 80cm or 100cm for socks. This cable is then pulled through to provide a loop on either side of the work. 

    In these photos I’m using Addi lace circulars with an 80cm cable.

    how to knit on magic loop

    I seem to find that if I was to join in the round at cast on (by pulling the cord through the halfway point of the stitches) I end up with a tangled mess and twisted stitches. This can be avoided entirely by knitting the first round in one flat row. When you have established the first row, simply pull the cord through the halfway point of stitches and carry on knitting. You will be left with the smallest of gaps at the top of the cuff but you can easily seam it closed at the end.

    Louise Tilbrook has a really handy tutorial for magic loop here

    Knitting on short circular needles 

    There are also short circulars. They’re brilliant for knitting the legs and the feet but you will need to switch to other circulars or DPNs for toe shaping. That’s not a preference thing- it’s just not physically possible to shape toes on 9 inch circulars.

    addi sockwonder short circular needles

    What I will say about the 9in circulars is that they create a tighter knit in my opinion. You definitely need to review your tension compared to when you use other methods. 

    Louise Tilbrook has a tutorial on knitting with tiny needles here. It can be hard to get to grips with them at first but if you can, it’s worth it. 

    Knitting with niche needles 

    There are also these funky little things called CraSyTrio. I think they’re awesome because they have the flexibility of the circular needle but a similar setup to double pointed needles.

    Double pointed needles

    Your experience with these will vary from “knitting ninja” to “fighting with a hedgehog” but if you persevere, I think you’ll be all right. I was wary of double pointed needles for a long time. I feared the complicated set up and when I started out, I would get myself into a tangle or lose my patience when one of the needles kept slipping off. 

    You may want to consider starting your DPN journey with something bigger like a sleeve or a hat. This will help you to practice and there’s more chance of you noticing dropped stitches with thicker yarn. 

    DPN hack: Cast on all of your stitches on one slightly larger needle. Using your smaller DPN needles, knit the set amount of divided stitches onto each needle. You will then have all stitches accounted for without having dropped your DPNs during cast on. Some patterns even tell you how many stitches to have on each needle e.g. there may be more stitches on the 3rd needle as that is the heel needle.

    If you need help choosing DPNs to knit with I have a blog post here.

     You can knit socks flat

    Even though knitting socks in the round is incredibly popular, there will always be knitters who prefer knitting them flat. I believe that these knitters are often left behind when it comes to sock design. Luckily, you can get a good range of flat knit socks thanks to the internet. I have a pattern for flat knit socks here that avoids all the requirements for stitch holders and multiple seams. Just sew up one seam at the end and you’re done.

    I hope you can find the time to explore all methods or practice a favourite. 

    Hanna 

    Sock knitting patterns to try!
    Easy flat knit, two needle socks.

    The Andalusian Stitch Socks

    Simple cuff-down beginner socks.

  • How to graft the toe of your sock. Kitchener stitch tutorial.

    How to graft the toe of your sock. Kitchener stitch tutorial.

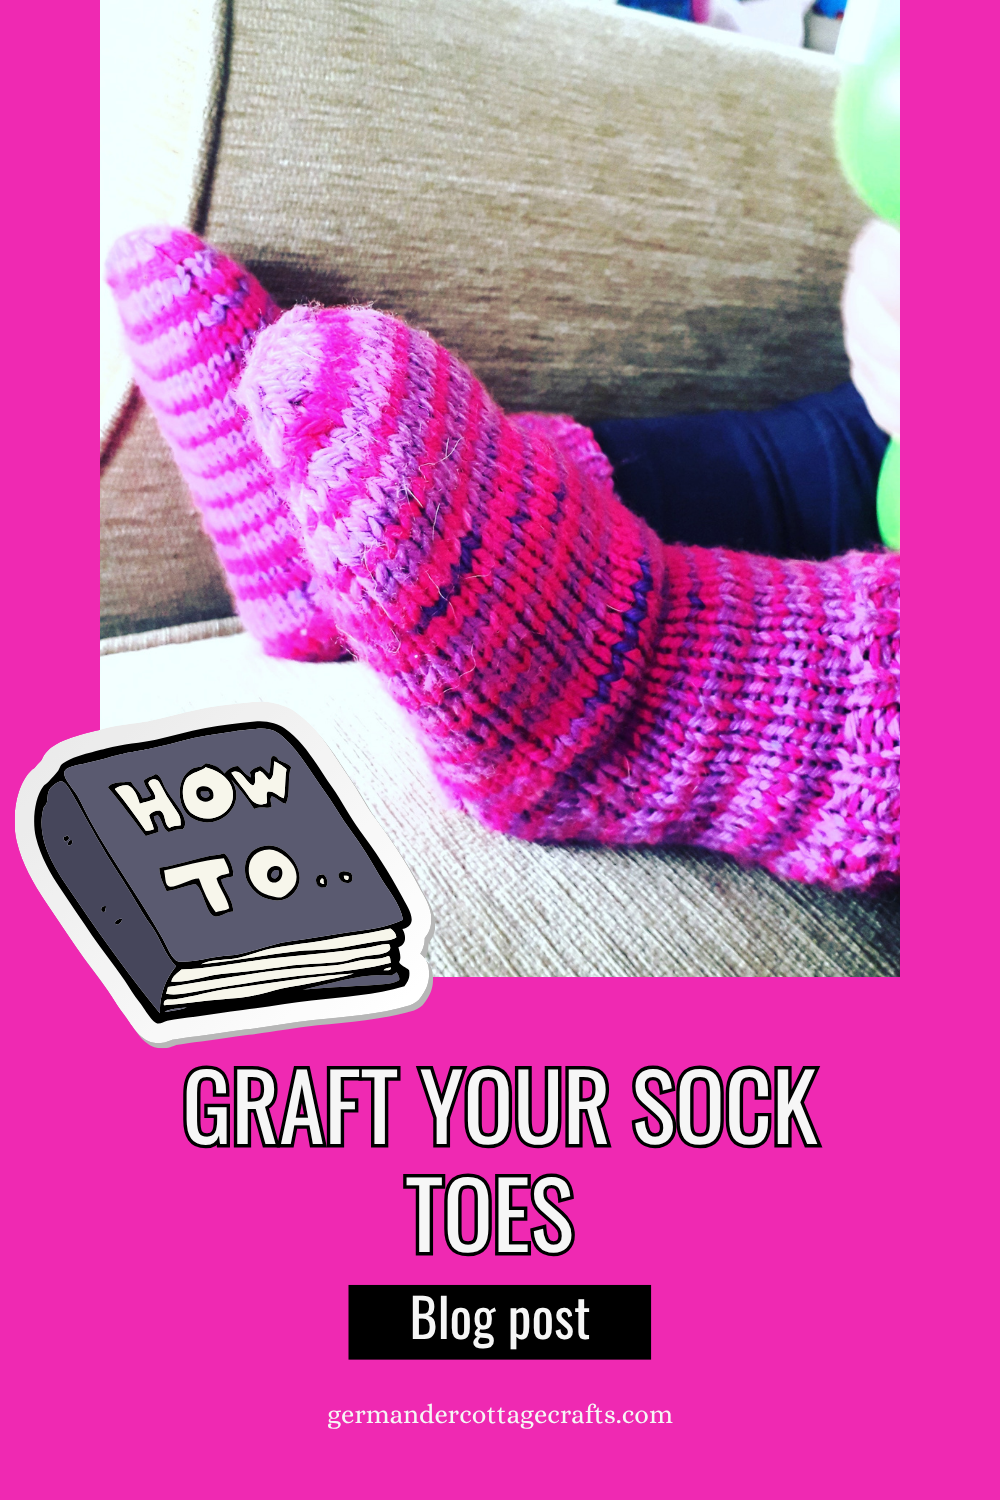
    Here’s a quick, step by step photo tutorial showing you how to graft the toe of your socks. This is a really handy technique for sock knitting and once you get used to the direction of the darning needle, you’ll be ready to cast on your next pair of socks!
    This method is also known as Kitchener stitch but knitters nowadays prefer to call it grafting. You can find out why here

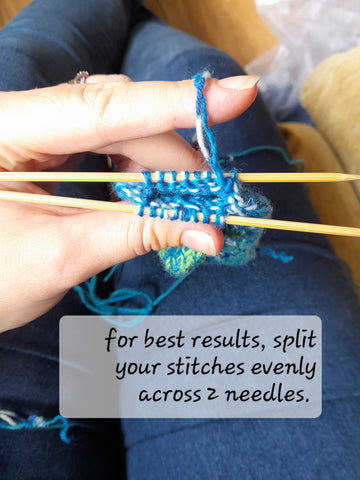
    To start, you have to end your toe knitting with an even number of stitches and they have to be divided between two needles. You can use any needles for this part but they have to sit parallel. Make sure that the two wrong sides of your work are facing. 

    To set up, you first need to have your darning needle to hand with your yarn tail threaded through it. 

    1. Put your darning needle through the first stitch on the front needle (the one closest to you) as if to purl and pull your yarn through. Leave the stitch on the needle. 

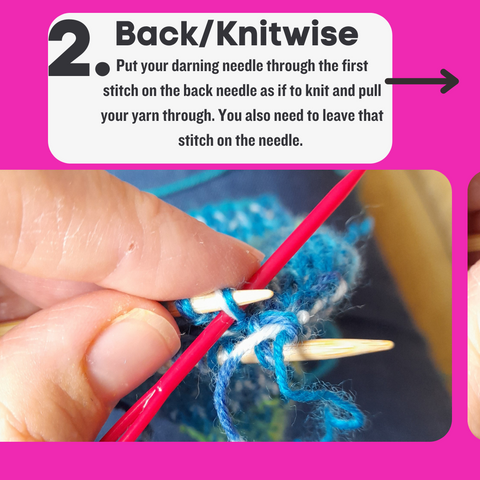
    2. Put your darning needle through the first stitch on the back needle as if to knit and pull your yarn through. You also need to leave that stitch on the needle. 

    The next 4 parts of this will be repeated to the end and they are as follows:  

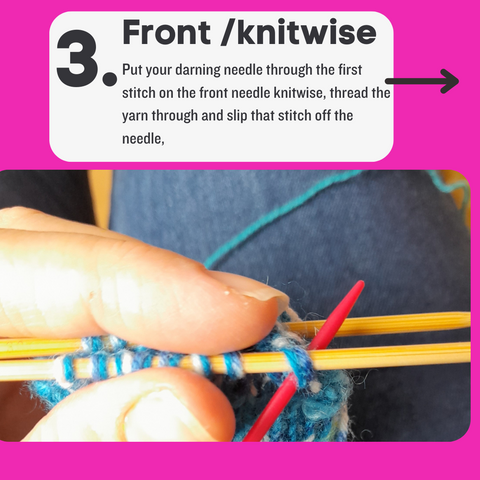
    3. Put your darning needle through the first stitch on the front needle knitwise, thread the yarn through and slip that stitch off the needle.

     4. Put your darning needle through the first stitch on the front needle purlwise, thread the yarn through and keep that stitch on the needle.

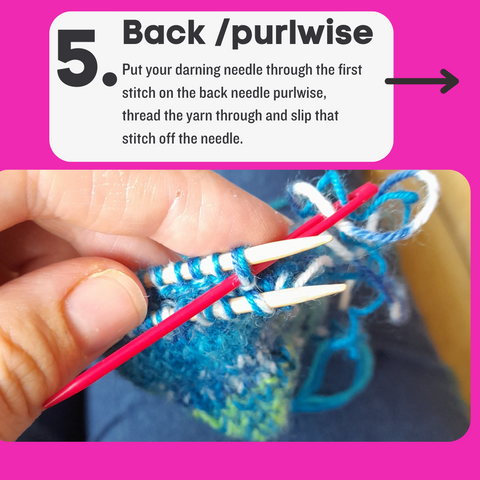
    5. Put your darning needle through the first stitch on the back needle purlwise, thread the yarn through and slip that stitch off the needle.

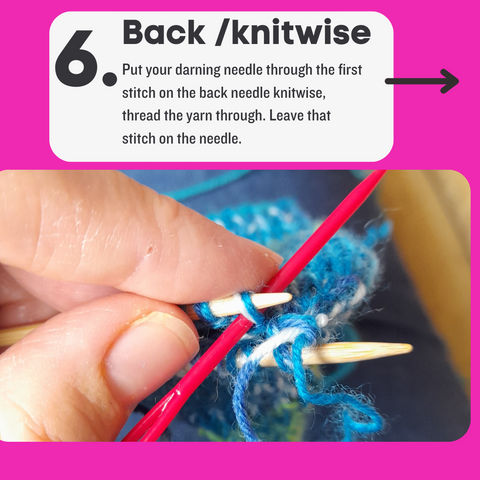
    6. Put your darning needle through the first stitch on the back needle knitwise, thread the yarn through. Leave that stitch on the needle. 

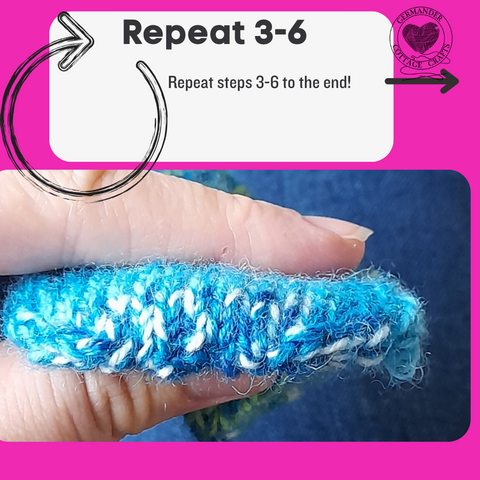
    Now repeat the last 4 steps (3-6) until you’ve closed your toe. Weave in ends and wear with pride! 

    Do you still need help with grafting? Here’s a handy video from my youtube channel demonstrating how to graft the toe of a sock. The instructions are at the end of this video.

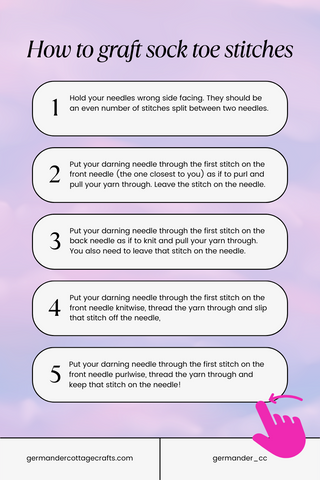
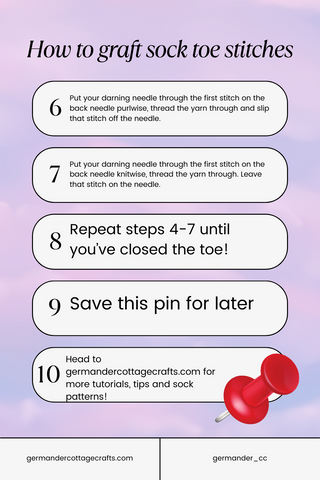
    I’ve put the instructions together here for you too for a Pinterest pin. Pin it for safe keeping! 

    How to do Kitchener stitch. Grafting sock toes together easy tutorial.
    How to graft sock toes closed. kitchener stitch tutorial

    Sock knitting patterns to try:

    Easy 2 needle flat knit socks patternSimple two needle flat knit sock pattern.

    The Flock Socks

    The Andalusian socks. Free textured sock knitting pattern.

  • Andalusian stitch socks. Free sock knitting pattern for a pair of simple, rib textured socks.

    Andalusian stitch socks. Free sock knitting pattern for a pair of simple, rib textured socks.

    The Andalusian stitch is one of my favourite stitches. It’s elegant, detailed and this is without having to do anything particularly complicated. This is a simple knit and purl stitch, and even someone trying socks for the first time could do this pattern. This sock pattern comes in three sizes and covers most adult foot sizes. Please make sure you measure around your foot before proceeding. Socks have negative ease, meaning they may seem small but that’s because they need to stretch to stay in place!

    Here’s a quick description of what the andalusian stitch actually is:

    Rounds 1-3: K all sts. 

    Round 4: *P1, K1; repeat  from * to end. 

    This is the Andalusian stitch pattern. 

    The Andalusian stitch socks are a simple, detailed sock design that are perfect for intermediate knitters looking to experiment with more textured detail.

    This pattern is available for free with ads, or, if preferred, you can get a handy PDF from Ko fi or Ravelry.

    This article does contain affiliate links, meaning that if you decide to purchase via the links, I earn a small commission.

    These are adult socks worked in the round from the cuff down. The textured Andalusian stitch pattern requires only knit and purl stitches to create a broken rib effect. I used a semi solid colour to emphasise the texture of both the sock and the heel. The heel is shaped using increases and decreases, and the toe is grafted together using the kitchener method. 

    For this sock pattern, I used High Twist Sock by Little Grey Girl Yarns (75% Superwash Merino & 25% Nylon) – 425m/465yd per 100g/3.5oz. Sample shown in the Avenell colorway, and it costs around £20. As this was a hand dyed yarn, sometimes the exact match won’t be available. Here’s a list of suitable alternatives to suit your budget:

    Other yarns to use for this pattern according to budget.

    King Cole Footsie 4ply: This 4ply sock yarn comes in a limited colour palette but it is only £5.54 ($7.40USD) per ball. You get a whopping 430m per ball, too. It’s excellent value and as it’s a solid colour, you’ll be able to see the stitches clearly! King Cole Footsie 4ply is a 100% synthetic yarn (93% acrylic, 7% other), so if you’re not fussed on wool or can’t wear it, this sock yarn is a better choice.

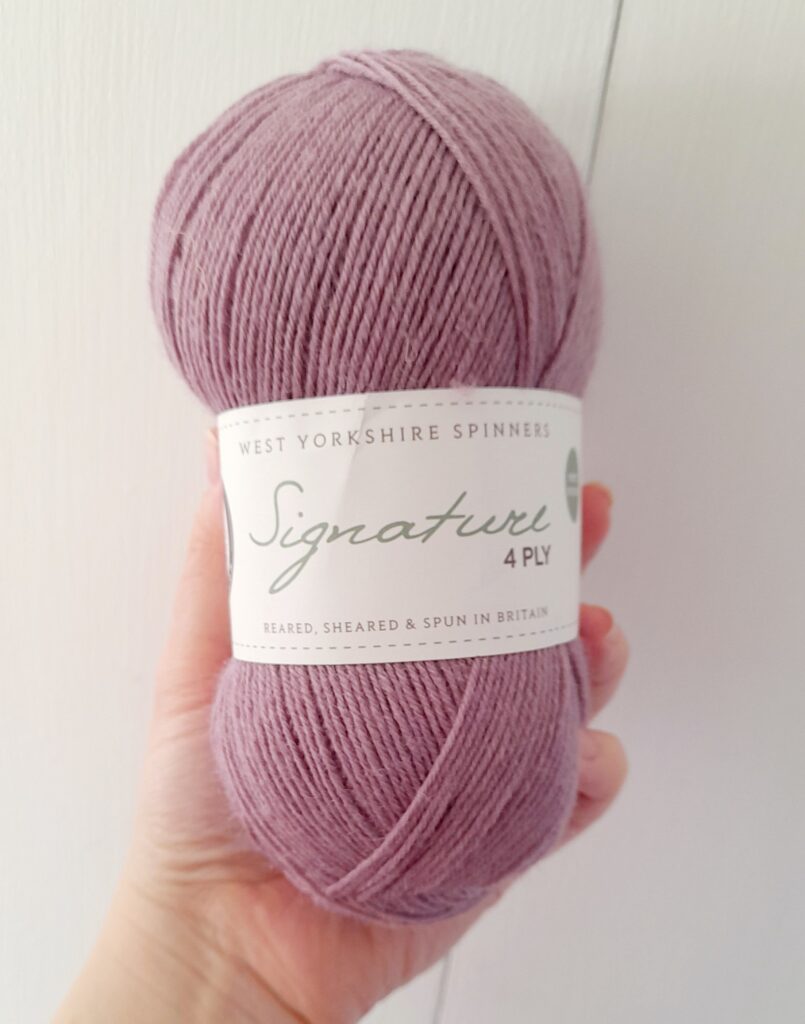
    West Yorkshire Spinners Signature 4ply: This yarn would work in a solid or self striping colourway. The yarn amount is the same and the gauge will be similar too. It’s not as ‘shiny’ as some hand dyed socks are, but the wool is still soft and incredibly comfortable. The crispness of the wool would ensure excellent stitch definition in this pattern particularly. I would recommend a colour like Poppy Seed, Pennyroyal or Fuchsia. Pennyroyal is pictured below.

    West Yorkshire Spinners Signature 4ply costs between £7.50 and £9

    Malabrigo Ultimate Sock: This 4ply yarn is at the more luxurious end of sock yarns. It’s 75% merino wool, so is very soft with that slight sheen. It is also hand dyed, so would look lovely with the texture of this sock pattern. It comes in a range of colours and is proced at or around £17.99, but one skein will do.

    The colour shown below is Zinnias (658).

    To make these socks, you will need to be familiar with the square heel. There’s a step by step photo tutorial here and a video below.

    How to knit the Andalusian stitch socks.

    Andalusian stitch sock knitting pattern. Socks with a simple rib detail. Easy free sock pattern. Cuff down sock knitting pattern to make. Free knit socks. beginner friendly sock knitting patterns. 4ply socks.

    Glossary

    DPN: Double pointed needles

    K: Knit

    K1, P1 rib: Knit 1 stitch, purl one stitch 

    K2tog: Knit two stitches together 

    M1L: Pick up the bar between the stitch you have just knitted and the one you are about to knit, bringing the needle from the front to the back. Knit into the back of the stitch. 

    M1R: Pick up the bar between the stitch you have just knitted and the next stitch, bringing the needle from the back to the front. Knit into the front. 

    P: Purl 

    P2tog: Purl two stitches together

    PM: Place marker

    PSSO: Pass slipped stitch over the knitted stitch. 

    RS: Right side

    SKP: Slip one, knit one, PSSO 

    SL: Slip stitch

    SM: Slip marker 

    St(s): Stitch(es)

    WS: Wrong side

    Gauge 

    35 stitches and 52 rounds = 10cm/4in using 2.5mm (US 1.5) needles

    Materials 

    • High Twist Sock by Little Grey Girl Yarns (75% Superwash Merino & 25% Nylon) – 425m/465yd per 100g/3.5oz. Sample shown in the Avenell colorway. 
    • Darning needle
    • 4 stitch markers
    • 2.5mm (US 1.5) circular (80cm/32in cable for magic loop) or DPNs or size needed for gauge.

    if you don’t have any suitable needles yet, I have a handy blog post here about DPNs, and one about circular needles to help you choose.

    Leg/foot circumference 

    Size 1: 6.5 in/16cm

    Size 2: 7.5 in/18cm

    Size 3: 8in/21cm

    The Pattern

    Cuff

    Loosely cast on 56 (64 72) sts, join to work in the round, being careful not to twist sts.

    Work in 1×1 twisted rib for 2.5cm/1in.

    Starting the leg of your andalusian stitch socks:

    PM after the first 28 (32 36) sts to establish halfway point. 

    Rounds 1-3: K all sts. 

    Round 4: *P1, K1; repeat  from * to end. 

    This is the Andalusian stitch pattern. 

    Repeat Rounds 1-4 until leg measures 18cm/7.25in from cast on. 

    Shaping your square (Dutch) sock heel.

    When working the heel, continue in the Andalusian stitch pattern for the stitches after the halfway marker. The heel and the underside of foot will be in knit stitch from now on. 

    Round 1: 

    M1R, PM (marker 2) and K 28 (32, 36) stitches, PM (marker 3) and M1L, SM (marker 1). Work Andalusian st pattern to end of round. 

    Round 2: 

    K to halfway marker, Andalusian st pattern to end of round, slipping markers as you come to them. 

    Rnd 3: 

    K to marker 2, M1R, SM, K 28 (32, 36) sts, SM and M1L, SM. Work Andalusian st pattern to end of round. 

    Repeat Rounds 2 and 3 until you have created 20 (22, 24) sts. 

    Turning the heel of your sock: 

    Working only with the first 48 (54, 60) sts continue as follows: 

    Short row 1: (RS) K to marker, SM, K 17 (20, 23) sts, SL1, K1 PSSO. This will now be referred to as SKP. Turn.

    Short row 2: (WS) P 7 (9, 11) sts, P2tog. Turn.

    Short row 3: (RS) K to 1 st before the gap which has formed, SKP. Turn. 

    Short row 4: (WS) P until 1 st before gap, P2tog. Turn.

    Repeat Rows 3 and 4 until there are 28 (32, 36) sts between the beginning of the round and the halfway marker (marker 1). This was the amount that you started with and your work should be RS facing with marker 2 on your right hand needle. 56 (64, 72) sts in total. 

    Set up in the round: 

    Rnd 1: 

    Remove marker 2. Insert needle as though making a M1R but instead of knitting, SL the twisted st on to right hand needle. K1 and PSSO. K to marker 3, remove marker 3, insert needle as though making a M1L but slip the twisted stitch onto left hand needle and K2tog. SM, K to end. 

    Foot: 

    K to halfway marker, Andalusian pattern to end of round until foot measures 2.5cm/1in less than desired length. 

    Toe

    Rnd 1: *SKP, K to 2 sts before marker, K2tog; repeat from to end. (4 sts decreased in total) 

    Rnd 2: K to end of round. 

    Repeat Rounds 1 and 2 until you have 36 (36, 40) sts in total. 

    THEN, decrease on every round until you have 20 (20, 24) sts in total. Remove marker 1. 

    Finishing

    Using kitchener method, graft the remaining sts together to close the toe. Weave in ends. 

    Thanks for using my andalusian stitch sock knitting pattern. Did you make a pair? Let me know in the comments. If you’d like, you can send me a photo of the socks and I’ll post them in the projects gallery here!

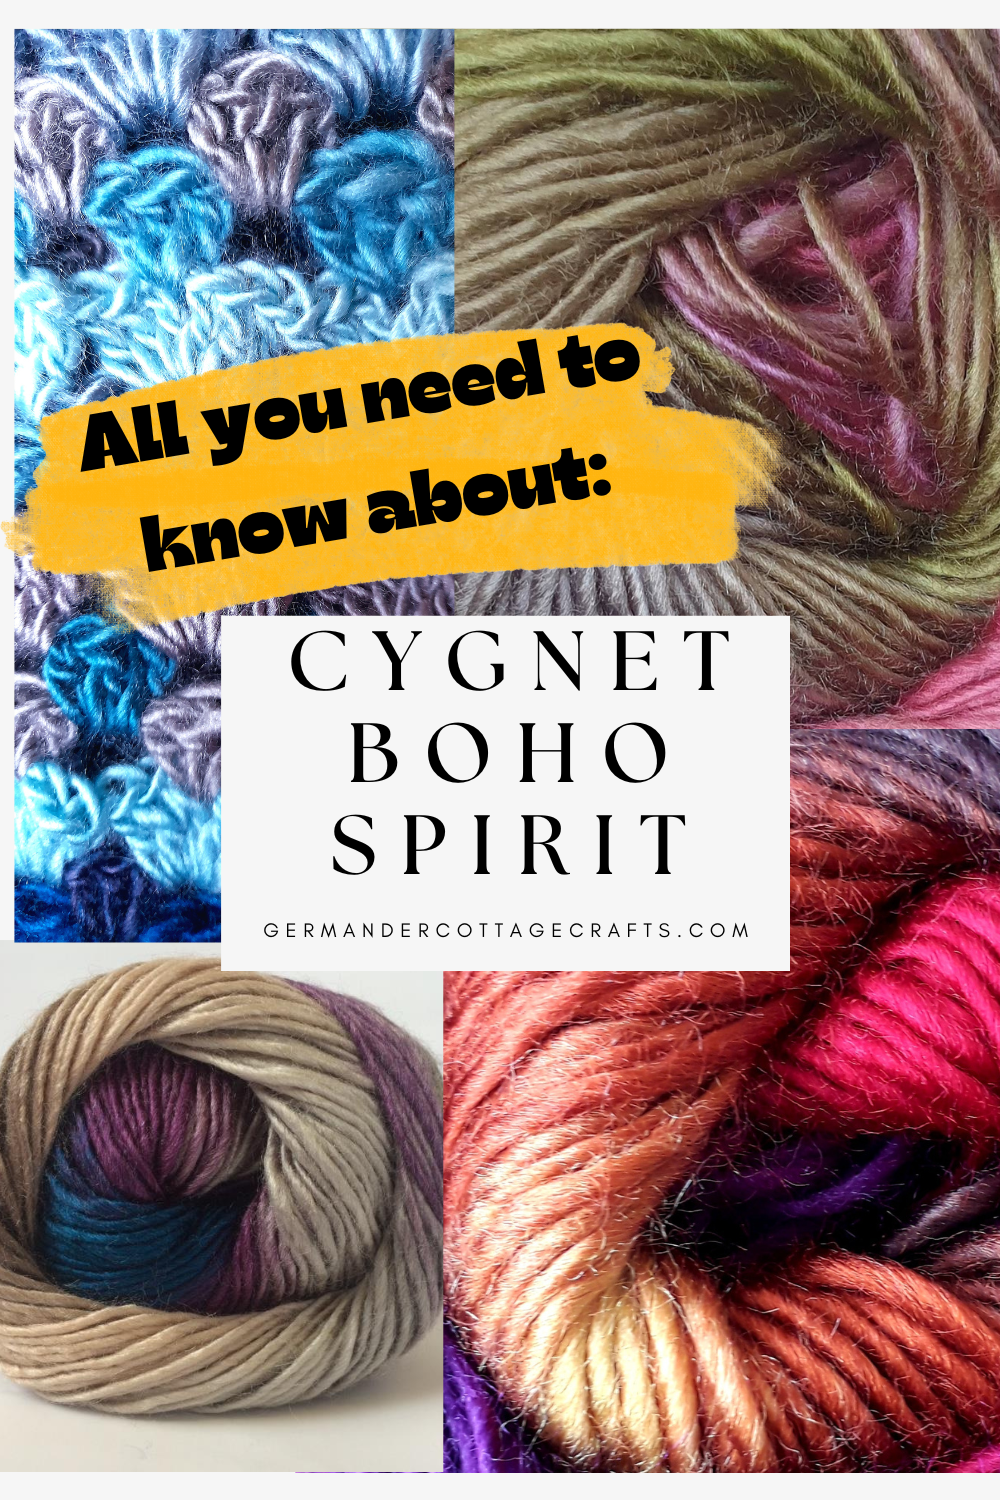
  • Cygnet Boho Spirit Yarn. Self striping yarns for knitting and crochet.

    Cygnet Boho Spirit Yarn. Self striping yarns for knitting and crochet.

    Is Cygnet Boho Spirit yarn double knit or worsted? Here I’ll explain the ins and outs of what Cygnet Boho is, where you can find it and what you can use it for. 

    As this is an ad free, free-to-view blog, I do use affiliate links in my blog posts such as this one. This means that if you do purchase via the links provided, I receive a small commission at no cost to you. 

    This is a deep dive into the incredibly popular Boho Spirit yarn. I’ve used it on so many designs that I’d like to think I have some expertise here. I’ve used it for crochet as well as knitting for both personal projects and designs. This yarn really took Cygnet to the forefront of the big box yarns as it was a hit with the crocheters and knitters. 

    1. What is Cygnet Boho Spirit yarn? 

    The exceptionally popular Boho Spirit was initially introduced as a limited edition range. As its introduction to the market resulted in an unprecedented level of demand (yay), it soon soon became a permanent range.

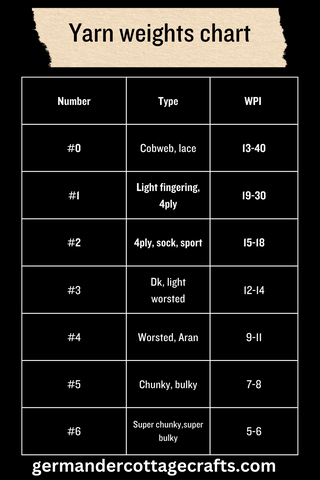
    It’s a medium weight yarn meaning “worsted”. Think of it as sitting in the middle of DK and Aran. You can see the yarn weight chart here to help you understand yarn weights: 

    Yarn weight chart. What are the yarn categories for yarn weight. Crochet for beginners.

    Love this grid? Why not Pin it for later? 

    A bit more about this popular, medium weight UK yarn. 

    Boho Spirit is a fabulously soft, variegated roving yarn. Due to the loftiness of the yarn, it is incredibly soft and versatile and works well knitted or crocheted and results in a soft garment with a beautiful subtle sheen. 

    In summary: 

    • Soft
    • Variegated
    • Lofty
    • Versatile
    • Subtle sheen

    This is a 100% acrylic yarn. Some acrylic yarns are very coarse. Some are very plastic-y, others are thin and squeak on your plastic needles. There are very popular acrylic yarns out there that are far too shiny (Looking at you, Caron simply soft). This hits different. It’s soft, it’s sturdy but as it has that roving quality about it, it might be difficult to unpick or unravel your project. The stitches kind of meld together once they’ve been made. That’s a real problem if you’re not the type of person who swatches. 

    If you do swatch, choose the right size tools and pay attention to your knitting or crochet project then this really is worth trying. I would absolutely not recommend it for the following as it has a fluffy halo: 

    • Toys.
    • Baby items.
    • Pet bedding.

    The loose, fluffy fibres are absolutely not safe for babies or anything that could be put in a child or pets mouth. This is why I would not recommend Cygnet boho spirit for those things. 

    It is however, perfect for garments, bags, blankets and accessories such as hats and scarves. 

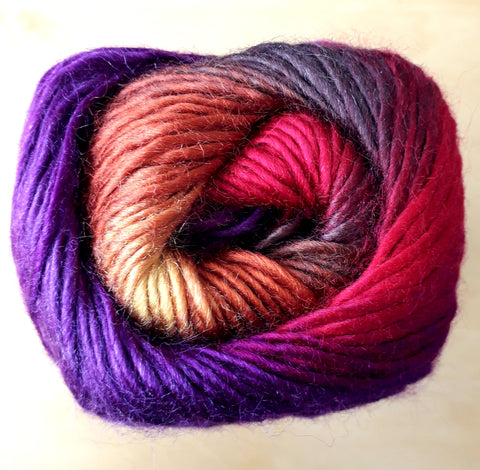
    Pictured: Cygnet boho spirit in Fantasy. 

    2. What weight is Cygnet Boho Spirit? 

    Although Cygnet Boho Spirit has been previously labelled as DK, it is actually thicker than standard DK and counts as a medium weight yarn. Cygnet themselves have recategorised Cygnet Boho Spirit as Worsted/Aran weight on their website. If you look at the ball band, the hook/needle size and gauge is actually better suited to worsted than it is to DK. You may also notice that ”DK’ has been knocked off the title. 

    I would always recommend swatching no matter what the label says. Cygnet boho spirit behaves happily with a 5mm crochet hook for me but I have loose crochet tension so please do experiment! It’s not a yarn that is prone to becoming quite stiff and dense so you really can get some excellent drape on larger needles and hooks. 

    3. What is roving yarn? 

    Usually, a roving is a long and narrow bundle of fibre. Rovings are produced during the process of making spun yarn from wool fleece, raw cotton, or other fibres. Their main use is as fibre prepared for spinning, but they may also be used for specialised kinds of knitting or other textile arts.

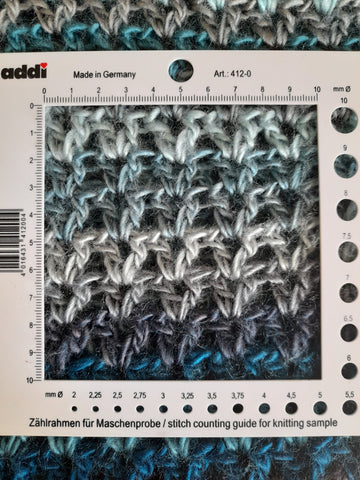
    Cygnet Boho is more of a roving-like yarn than roving itself, as it doesn’t easily come apart when you are working with it. It has been spun and is single ply. There is enough twist in it to knit up and crochet beautifully. See here for stitch definition when used in v stitch crochet: 

    Cygnet boho spirit yarn sapphire. Great yarns for crochet beginners.

    It is important to know that it holds up well in crochet, as crochet involves a lot of handling of both the yarn and the fabric. 

    What can I make with Cygnet Boho Spirit yarn? 

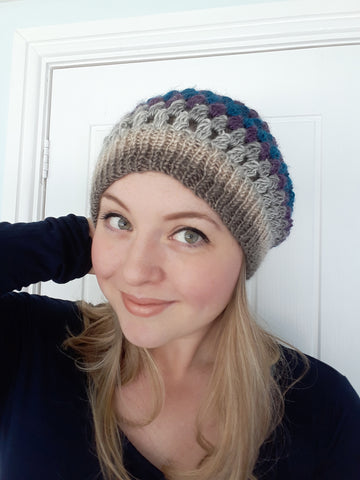
    Here are some of our patterns using Cygnet boho spirit yarn. First is the jewel hat, available in two versions: a crochet hat or a knit/crochet hybrid. Below is the hybrid version, but you can browse both hat patterns by clicking here.

    Jewel hat in colourway Chic. 

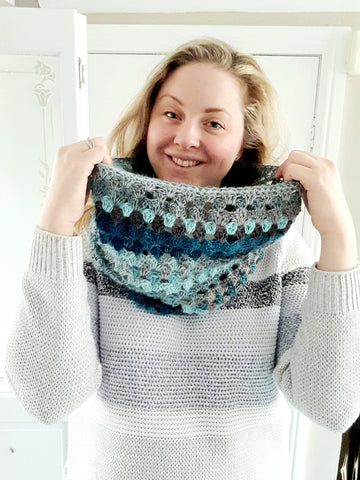
    There is also the Song of the sea snood which is a crochet snood. It’s fun and quick to work up when facing any blizzard! You can see the pattern here. 

    Cygnet boho spirit yarn and patterns. Easy crochet pattern medium weight yarn

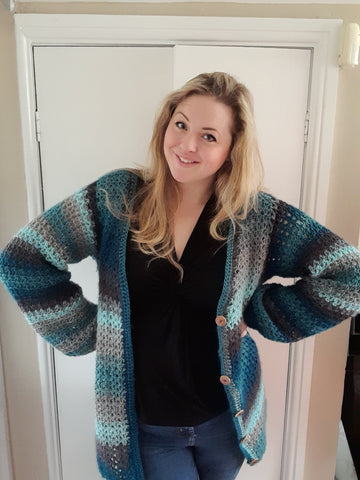
    The Breeze crochet cardigan pattern using Cygnet boho spirit yarn in Sapphire. 

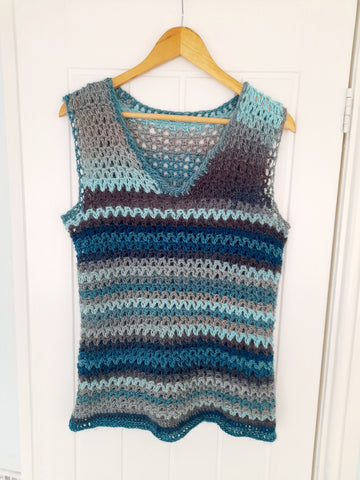
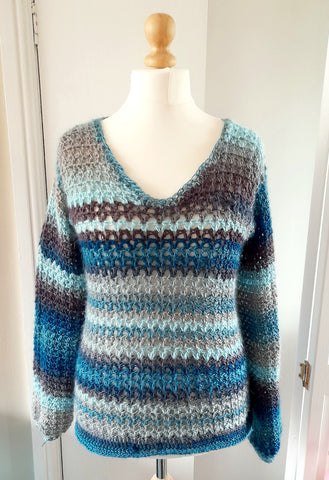
    The photographed sample shows the colourway Sapphire. Read more about it here. The Breeze cardigan will be available in 7 sizes from 32″ to 56″ and calls for fewer than 7 balls for the entire cardigan! I chose Cygnet Boho Spirit yarn for this design as it is really soft and hangs beautifully on garments.

    Breeze crochet V stitch cardigan for women

    The Breeze crochet top is available as a vest or as a long sleeve pullover. It will also be available in 7 sizes from a 32″ to 56″. 

    Cygnet Boho Tank top pattern women
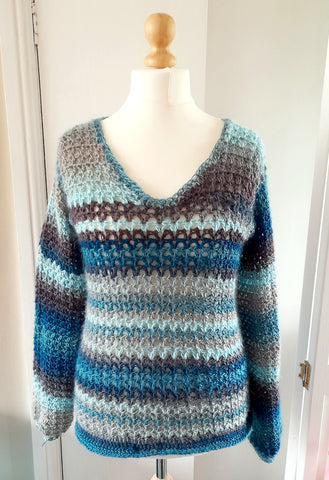
    V neck crochet sweater pattern for women

    You can find Cygnet Boho Spirit yarn at Woolbox.com. 

  • Simple cuff-down sock knitting pattern. Sock knitting for beginners.

    Simple cuff-down sock knitting pattern. Sock knitting for beginners.

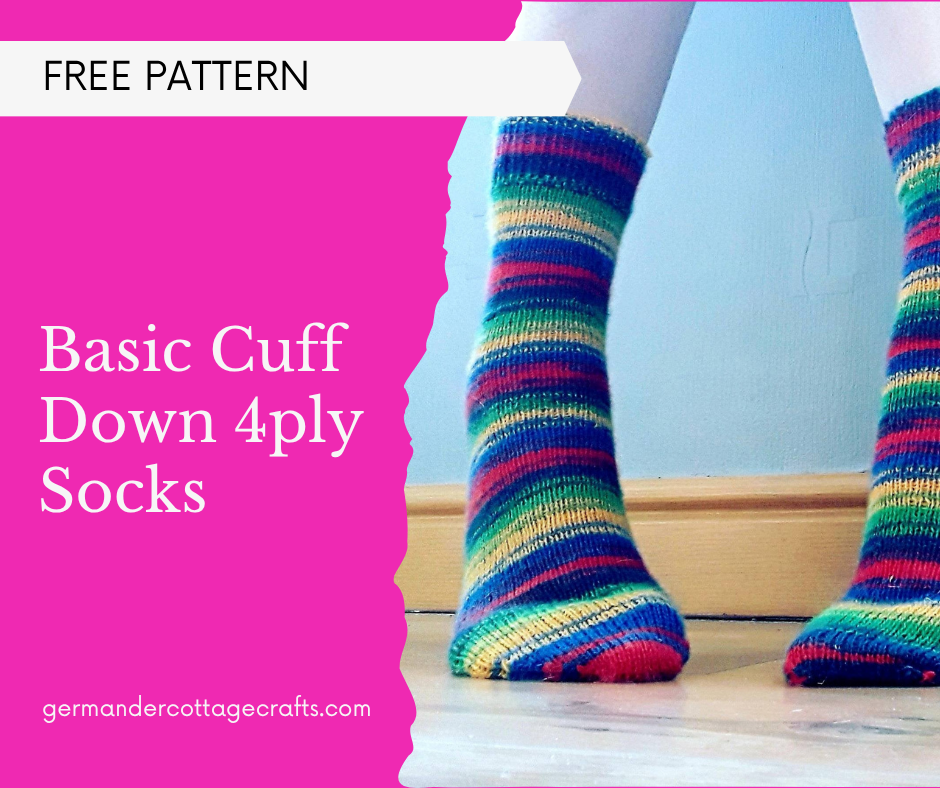
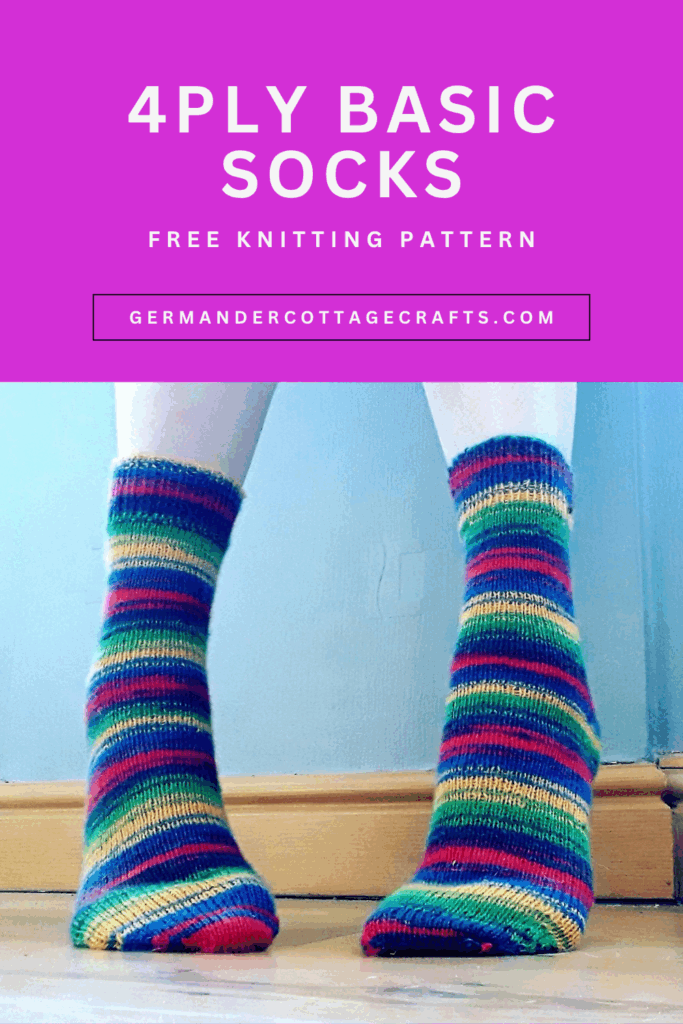
    This is a free sock knitting pattern for simple, cuff down socks with a square heel and shaped toe. This sock knitting pattern was designed by Hanna Gough in 2020, and it remains one of the most popular patterns for knitting socks with 4ply yarn.  

    If you’d prefer an ad-free PDF of this pattern, you can find one here.

    This sock pattern is perfect for beginners who want to knit their first pair of socks in the round. You will need to be able to:

    • Knit in the round.
    • Decrease and increase stitches.
    • Graft sock toes.

    If you’re not yet feeling confident with knitting in the round I do have a flat knit sock pattern here. Everyone can enjoy knitting socks!

    This is one of my best-known sock knitting patterns, and is perfect for those of you who know how to knit, but want to try knitting socks in the round. Knit your first pair of socks with this simple Basic 4ply Socks pattern and photo tutorial. I also have some helpful videos on youtube to help you understand the major points in the pattern such as casting on, shaping the heel and turning the heel.

    Scroll down to find my simple, cuff down beginner sock knitting pattern. It’s free to read, but if you’d prefer a handy PDF, there’s one here.

    This article contains some affiliate links. This means that if you choose to buy anything I have recommended here, I do earn a small commission.

    For this sock knitting pattern, I recommend needles such as addi aluminium DPNs , Knitpro or addi circular needles for knitting in the round.

    Easy sock knitting pattern for beginners. Simple cuff down socks. The image is of a pair of striped socks. This image supports the instructions as they are a finished pair of socks. The socks are knit using west yorkshire spinners signature 4ply yarn. The socks are beginner friendly.

    How to use this sock knitting pattern.

    Read through the pattern first, and then look at the glossary. When you’ve had a read through the pattern and understand what you will need and what skills are required, begin. Consult the pattern as often as you need to and take your time! Your socks will take as long as they take. Just enjoy the process.

    You will need: 

    100g of 4ply sock yarn (400m per 100g) such as WYS signature 4ply (main photo is Bright Side)

     Darning needle

    4 Stitch markers

    2.5mm circular (80cm cable for magic loop) or DPNs or size needed for gauge.

    Gauge: 

    35 sts / 10cm (4”)

    A note on construction

    You can knit these socks using DPNs or circulars. I have written the pattern with circulars in mind. If you need a bit more help when it comes to choosing needles, and want to know how to knit with double pointed needles, I have a helpful post here. If you want to know how to knit with magic loop, I have post here.

    Leg/foot circumference: 

    Size 1: 7 in/17cm

    Size 2: 8 in/20cm

    Size 3: 9 in/23cm

    Cuff

    Loosely cast on 56 (64 72) sts, join to work in the round.

    Work in 1×1 twisted rib for 2 in/5cm

    Leg

    Place a marker after the first 28 (32 36) sts to establish halfway point. K all rounds until piece measures  7.25” 18cm from cast on. 

    Heel

    Rnd 1: 

    M1R, PM (marker 2) and knit 28 (32, 36) stitches, PM (marker 3) and M1L. SM (marker 1). K to end of round. 

    Rnd 2: 

    K all stitches in round slipping markers as you come to them. 

    Rnd 3: 

    K to marker 2 , M1R, SM, K 28 (32, 36) sts, SM and M1L. SM. K 28 (32, 36) sts to end of round. 

    Repeat rounds 2 and 3 until you have created 20 (22, 24) stitches. 

    Turn heel: 

    Working only with the first 48 (54, 60) sts cont as follows: 

    Short row 1: (RS) K to marker, SM, K 17 (20, 23) sts, S1, K1 PSSO. This will now be referred to as SKP. Turn the work around.

    Short row 2: (WS) P 7 (9, 11) sts, P2tog. Turn.

    Short row 3: (RS) K to 1 stitch before the gap which has formed. SKP. Turn. 

    Short row 4: (WS) P until 1 stitch before gap. P2tog. Turn.

    Repeat rows 3 and 4 until there are 28 (32,36) sts between the beginning of the round and the halfway marker (marker 1). This was the amount that you started with and your work should be right side facing with marker 2 on your right hand needle. 56 (64, 72) sts in total. 

    Set up in the round: 

    Rnd 1: 

    Remove marker 2. Insert needle as though making a M1R but instead of knitting, slip the twisted stitch on to right hand needle. K1 and PSSO. K to marker 3, remove marker 3, insert needle as though making a M1L but slip the twisted stitch onto left hand needle and K2tog. SM,  K to end. 

    Foot: 

    K all rounds until foot measures 1 in/2.5cm less than desired length. 

    Toe

    Rnd 1: *SKP, K 26 (28, 34) ( K2tog* Repeat* until end of round.  (4 sts decreased in total) 

    Rnd 2:: K to end of round.  

    Rnd 3: *SKP, K to 2 sts before marker, K2tog* repeat to end. 

    Repeat round 1 and 2 until you have 36 (36, 40) sts in total. 

    THEN, decrease on every round until you have 20 (20, 24) sts in total. Remove marker 1. 

    Finishing: 

    Using kitchener method, graft the remaining stitches together to close the toe. Weave in ends. 

    Glossary: 

    K1 P1 twisted rib: Knit through the back loop, purl as normal. 

    BOR: Beginning of round. 

    PM: Place Marker

    SM: Slip marker. 

    M1R: Pick up the bar between the stitch you have just knitted and the next stitch, bringing the needle from the back to the front. Knit into the front. 

    M1L: Pick up the bar between the stitch you have just knitted and the one you are about to knit bringing the needle from the front to the back. Knit into the back of the stitch. 

    SL: Slip stitch

    PSSO: Pass slipped stitch over the knitted stitch. 

    P2tog: Purl two stitches together. 

    SKP: Slip one, knit one, PSSO. 

    K2tog: Knit two stitches together. 

    Other sock knitting patterns to try.

    Andalusian stitch socks.

    The Flock socks.

    Thank you for reading this sock knitting pattern. If you’ve made a pair, why not share a photo in the comments? Let others know what yarn you used and start the discussion! Sock knitting brings lots of people together and can be really handy when you want a quick, satisfying project but don’t have a lot of time.

    Simple cuff own sock knitting pattern free. Free sock pattern