Blog

  • Easy baby crochet cardigan: Lovechunk sweater.

    Easy baby crochet cardigan: Lovechunk sweater.

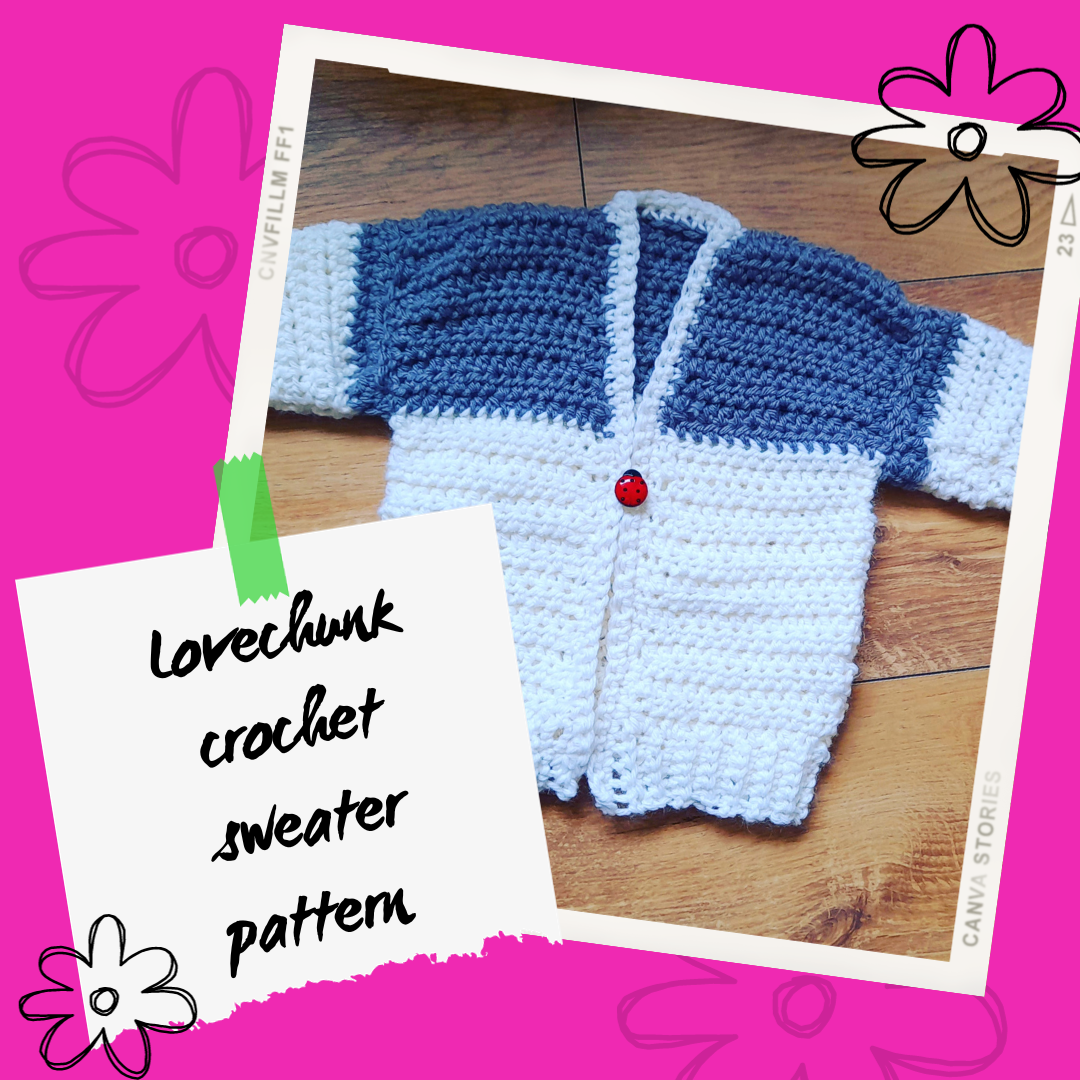
    The Lovechunk sweater is a baby crochet cardigan pattern using worsted weight yarn. This ensures a quick, satisfying gift!

    If you’re in need of a quick, easy make to give to a new baby, try the Lovechunk baby sweater. Not only is it made using aran weight yarn for a quicker project but it is available in sizes 6 months to 2 years. Every baby needs a simple, drop shoulder cardigan for cooler days and photo opportunities. I chose aran weight for this design because it has just the right amount of squish without being too stiff. 

    Prefer to get your crochet patterns as a downloadable PDF?

    The Lovechunk baby sweater pattern PDF for this baby crochet cardigan is available here. 

    This quick cardigan is worked in 5 pieces so it’s the perfect small project to master your emerging crochet skills.  
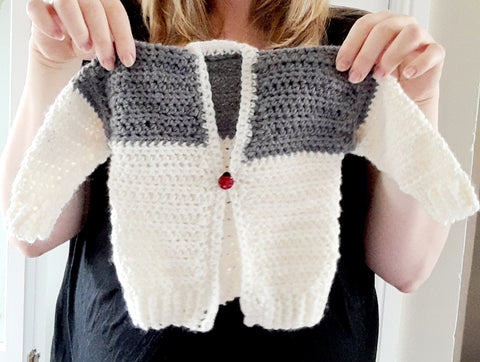
    Really easy baby cardigan for crochet beginners. Crochet sweater for babies and toddlers. learn to crochet a quick and easy baby sweater pattern pdf.

    Mix it up with colour changing yarn or use 2 yarns to create a colour block effect. It is sure to be your go-to gifting sweater for many years to come. 

    There are affiliate links on this page. If you choose to purchase any yarn or tools with the links provided, I earn a small commission at no extra cost to you.

    Why is the Lovechunk baby sweater good for crochet beginners? 

    The Lovechunk baby sweater is an excellent crochet baby cardigan for crochet beginners to make as it helps you learn the fundamentals of crochet garment making in a small, manageable project. Learn how to crochet a flat, even fabric, change colour, seam and apply ribbed edging and cuffs. For such a small thing, this cardigan can help you master a lot of skills and understand how a crochet garment is constructed. 

    About the yarn

    I used Paintbox Wool Mix Aran because it’s so soft and comes in a range of vibrant colours.
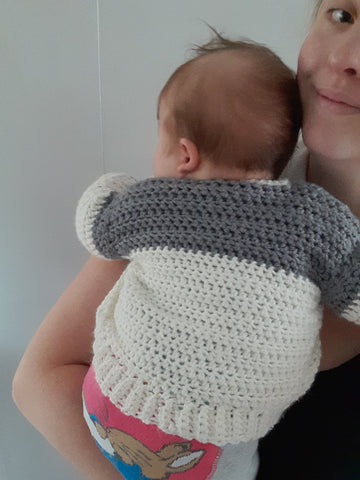
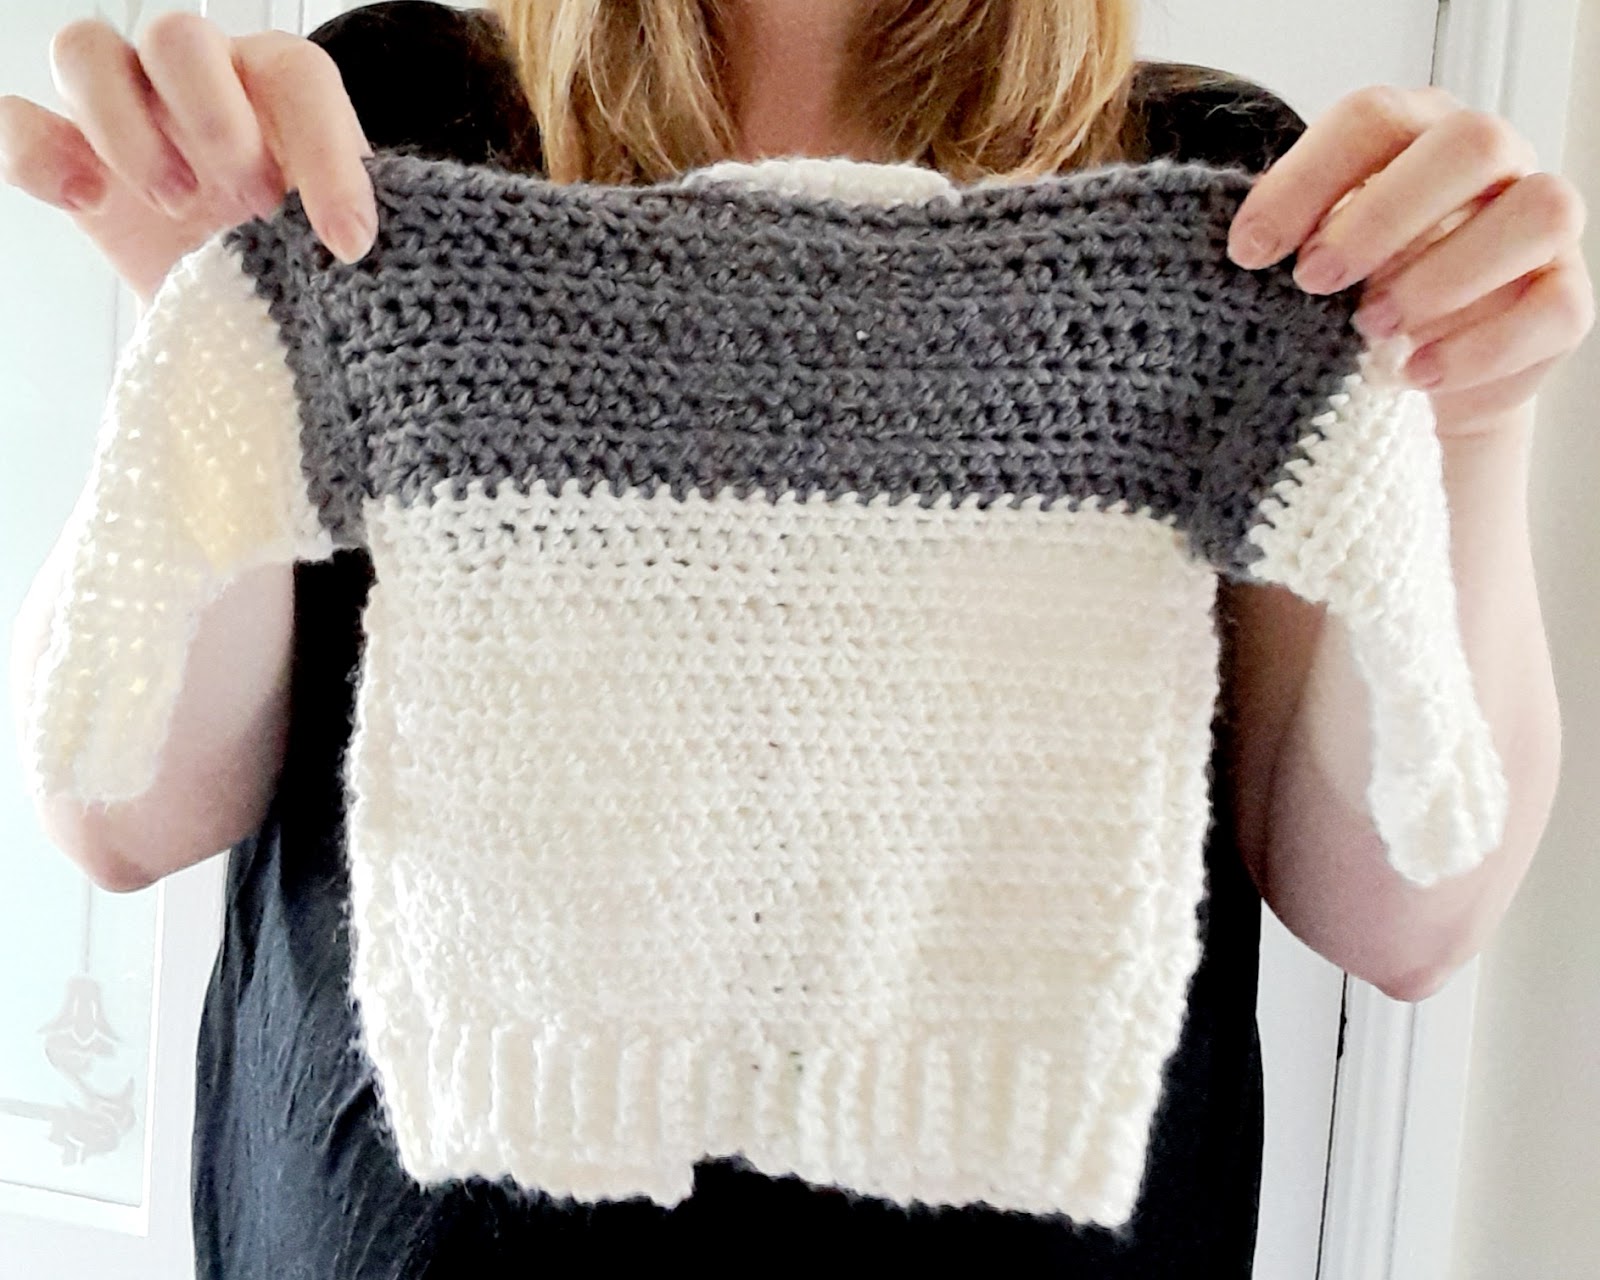
    Lovechunk baby sweater modelled on a baby. Easy crochet cardigan pattern pdf. Quick crochet makes for babies and toddlers.

    The Lovechunk baby sweater modelled on my baby in September 2023, when she was 3 months old. She is wearing the 6m size, but she was 10lb when she was born, so always check the baby’s size before starting your project.

    Here’s why the Lovechunk baby sweater is an excellent project even if you’re not 100% confident on crochet garments: 

    • It requires no more than 200g (7oz) of aran weight yarn making it a budget-friendly project. 
    • It is worked in 5 flat pieces making each section bitesize and portable. 
    • You don’t have to do a colour change if you don’t want to. 
    • It takes much less time than a blanket or adult size garment. 
    • It only requires the knowledge of 2 crochet stitches- the half double (Hdc) and single crochet (Sc) making it really easy to remember. 
    • There is hardly any shaping required for the garment, so you can focus on making it.
    • Each section is clear to follow and is separate so you can focus on what’s best for you and when. 
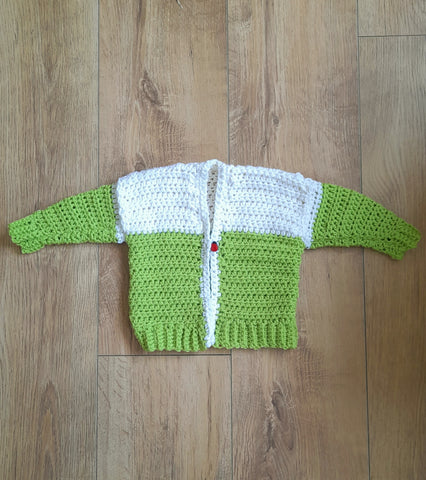
    Easy baby crochet projects. A quick and simple baby sweater pattern for crochet.

    What crochet stitch knowledge do I need? 

    Below is the glossary of stitches from the pattern to help you understand what is required to make this crochet baby sweater. 

    Over on my beginners crochet playlist on Youtube you can learn to make both the Hdc stitch and the Sc stitch. Click here to go to my channel. 

    Other crochet stitches and terms that you’ll need to know in order to make this simple baby cardigan. 

    Ch: Chain. This either means yarn over and pull through a loop or it refers to the chain at the top of the previous stitch. 

    Hdc: Half double crochet (UK half treble). Yarn over, insert hook, yarn over and pull through all 3 loops on hook. 

    Sc: Single crochet (UK double). Insert hook, yarn over and pull through. Yarn over and pull through 2 loops on hook. 

    Sk: Skip stitches

    St(s): Stitch(es)

    Pattern uses US terms throughout. 

    It’s important to know your US terms. Here is a handy chart to remind you of the differences between US and UK crochet terms. 
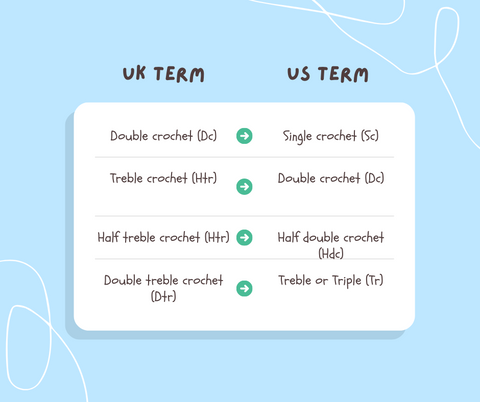
    The difference betweenb UK and US crochet terms. Crochet terminology for beginners. Learn your crochet terms.

    I use US crochet terms in all of my patterns but I always recommend that beginners learn both terms as it will enable you to crochet absolutely everything. 

    Pattern: Easy crochet baby cardigan.

    Lovechunk Baby Sweater

    Every baby needs a simple, drop shoulder cardigan for cooler days and photo opportunities. I chose aran weight for this design because it has just the right amount of squish without being too stiff. 

    This quick cardigan is worked in 5 pieces. 

    Mix it up with colour changing yarn or use 2 yarns to create a colour block effect. It is sure to be your go-to gifting sweater for many years to come. 

    Gauge 

    13 sts and 10 rows to 10cm/4in with Hdc using 5mm crochet hook. 

    Please take time to swatch for tension. If there are fewer stitches in your swatch than suggested, decrease by 0.5mm increments until you get the right amount. If there are more stitches than shown above, increase your hook size by 0.5mm increments until you meet the amount. 
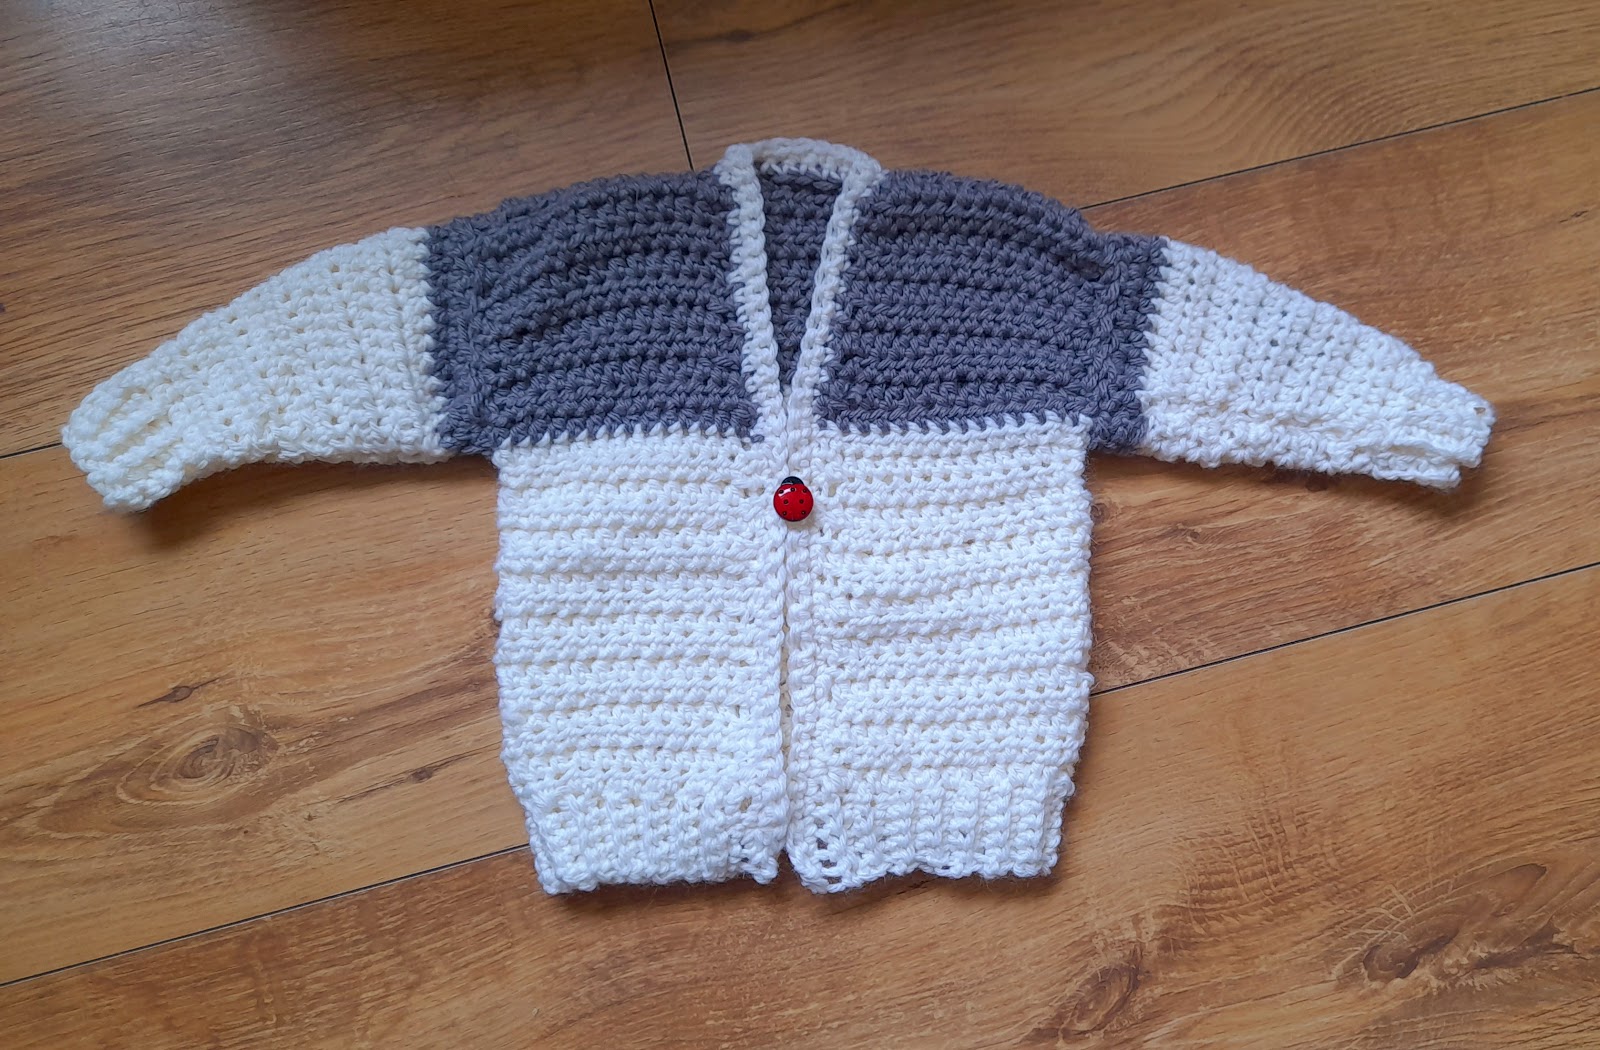
    Sample shown in size 2 (6-12m)

    Notes

    Ribbing: 

    The bottom waistband and the button bands are made with single crochet rib. This is a technique that involves making a single crochet stitch only in the back loop of every previous stitch. Normally, the hook goes under both loops, but for creating texture, you need to only insert into the back loop. 

    Size Chart

    Age Chest Finished body circumferenceFinished upper arm circumferenceFinished wrist circumferenceArmhole depthLower body lengthTotal body lengthArm length
    0-6m41cm/16in42cm/16.5in19cm/7.5in11cm/4.25in10cm/4in16cm/6in26cm/10in13cm/5in
    6-12m46cm/18in48cm/19in22cm/8.5in13cm/5in12cm/4.75in18cm/7in30cm/12in16cm/6in
    1 yr51cm/20in53cm/21in23cm/9.2514cm/5.5in13cm/5in20cm/8in33cm/13in20cm/8in
    2 yr56cm/22in58cm/22.75in27cm/10.5in16cm/6.25in14cm/5.5in22cm/9in36cm/14in22cm/9in

    Glossary 

    Ch: Chain. This either means yarn over and pull through a loop or it refers to the chain at the top of the previous stitch. 

    Hdc: Half double crochet (UK half treble). Yarn over, insert hook, yarn over and pull through all 3 loops on hook. 

    Sc: Single crochet (UK double). Insert hook, yarn over and pull through. Yarn over and pull through 2 loops on hook. 

    Sk: Skip stitches

    St(s): Stitch(es)

    Pattern uses US terms throughout

    Materials

    • 130 (150/180/200)g/ 4.5 (5/6/7)oz of aran weight yarn such as Paintbox Yarns Wool Mix Aran 180m/ 197yd per 100g/ 3.5oz ball. Colours used are Paper White and Slate Grey. 
    • 1 15mm/ 0.5in button. 
    • 1 removable stitch marker 
    • Darning needle
    • 5mm/ US 8 crochet hook, or size needed to obtain gauge. 

    You can find the Paintbox yarn I used for both cardigans here.

    Instructions:
    Back   

    Ch 7. Insert into 2nd ch from hook. 6 scs. Ch 1 (does not count as st), turn. 

    Starting in the 2nd ch from hook, sc in back loop of every st to end. Ch 1, turn. 6 sts. 

    Repeat last row 27 (31/35/39) times, or until waistband measures 20 (23/25/27)cm/ 8 (9/10/11)in when stretched. On last row, end with sc.

    Without fastening off, ch 2 (counts as hdc) and hdc 25 (29/33/37) sts across top of waistband. 26 (30/34/38) sts total. 

    Work 11 (13/15/17) more rows, or until total back measures 16 (18/20/22)cm/ 6 (7/8/9)in.

    If changing colour, work the next 11 (12/13/14) rows in colour 2. 

    If using 1 colour, work another 11 (12/13/14) rows, or until total back measures 26 (30/33/36)cm/ 10 (12/13/14)in. Fasten off. 

    Front panels (Make 2)

    Ch 7. Insert into 2nd ch from hook. 6 scs. Ch 1 (does not count as st), turn. 

    Starting in the 2nd ch from hook, sc in back loop of every st to end. Ch 1, turn. 6 sts. 

    Repeat last row 13 (15/17/19) times, or until waistband measures 10 (11/12/13)cm/ 4 (4.5/5/5.5)in when stretched.  On last row, end with sc.

    Without fastening off, Ch 2 (counts as hdc) and hdc 12 (14/15/16) sts across top of waistband. 13 (15/16/17) sts total. 

    Work 11 (13/15/17) more rows or until entire front panel measures 16 (18/20/22)cm/ 6 (7/8/9)in. 

    Shape neck 

    Hdc across 11 (13/13/14) sts. Ch 2, turn, leaving last 2 (2/3/3) sts unworked. 11 (13/13/14) sts total. 

    If changing colour, work the next 10 (11/12/13) rows in colour 2. 11 (13/13/14) sts total. 

    There is no obvious wrong side/right side so either work both panels the same as above and turn one piece over or cut yarn and skip 2 (2/3/3) sts before continuing hdc to end for the second panel. This will then leave a neck opening for left and right front. 11 (13/13/14) sts total. 

    If using 1 colour, work another 10 (11/12/13) rows, or until total front measures 26 (30/33/36)cm/ 10 (12/13/14)in. Fasten off. 

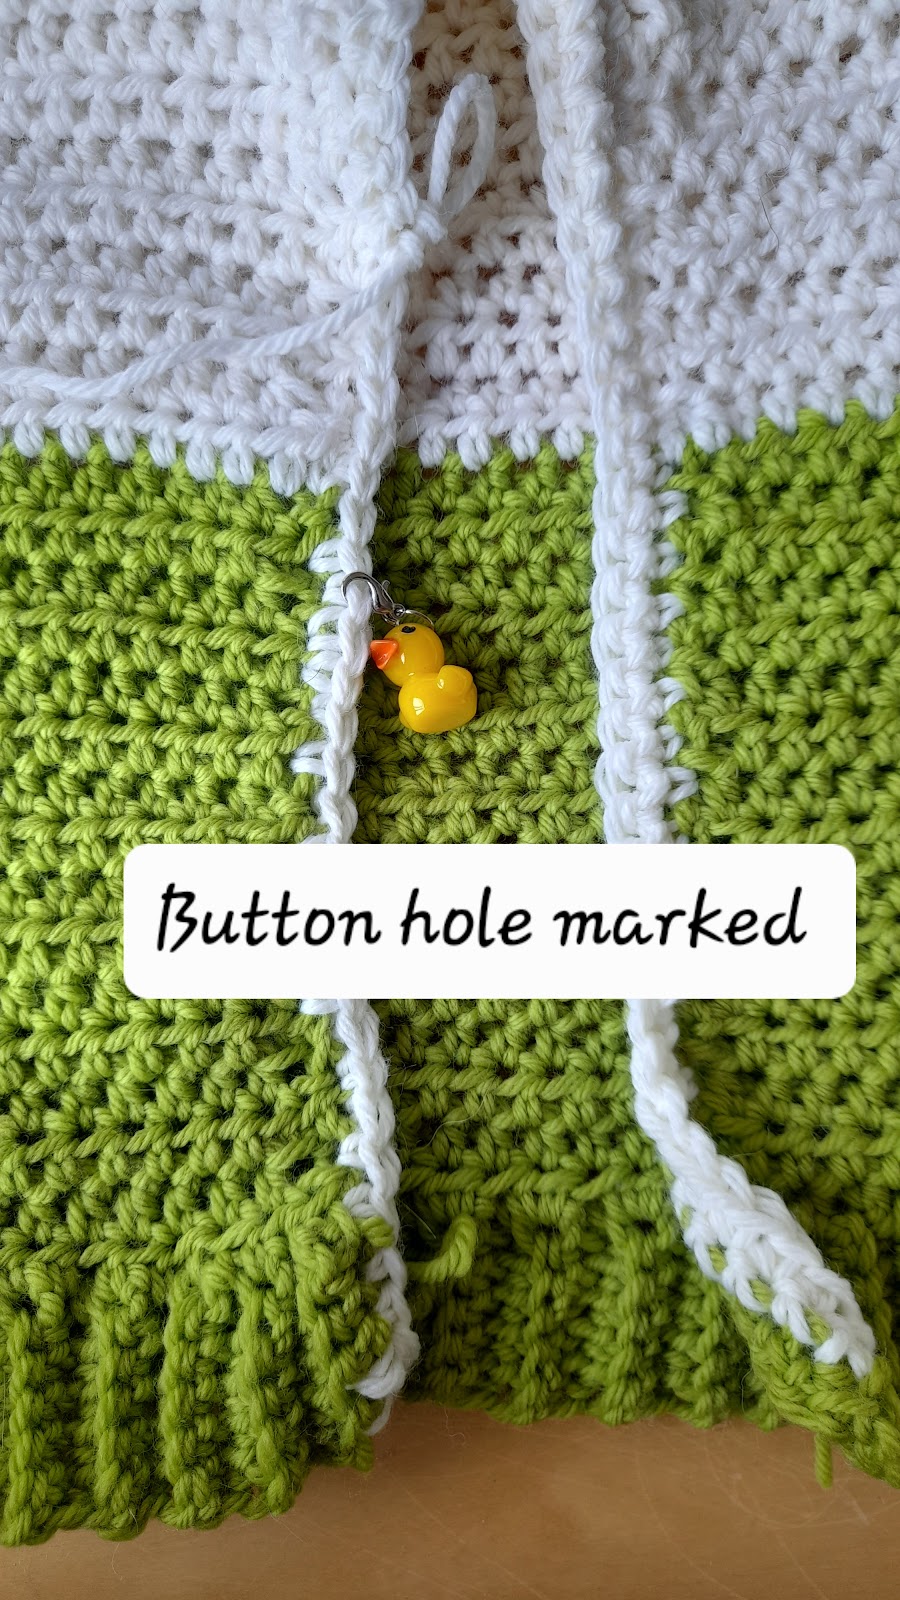
    Mark button hole

    Using a removable stitch marker, mark the 19th (20th/21st/22nd) row of the right panel. This will be where the buttonhole goes.  

    Sleeves (Make 2) 

    Ch 7. Insert into 2nd ch from hook. 6 scs. Ch 1 (does not count as st), turn. 

    Starting in the 2nd ch from hook, sc in back loop of every st to end. Ch 1, turn. 6 sts. 

    Repeat last row 13 (15/17/19) times, or until cuff measures 11 (13/14/15)cm/ 4 (5/5.5/6)in when stretched. On last row, end with sc.

    Without fastening off, ch 2 (counts as hdc), hdc 13 (15/17/19) sts across top of cuff. Ch 2, turn. 14 (16/18/20) sts total.

    Row 2: Hdc in 1st st, hdc to last st. 2 hdc in last st. (2 sts increased) Ch 2, turn. 

    Row 3: Hdc in 4th ch from hook. Hdc to end. Ch 2, turn.  

    Repeat Rows 2 and 3 until 10 (12/12/14) sts have been created. 24 (28/30/34) sts total. 

    Work even in hdc until sleeve measures 13 (16/20/22)cm/ 5 (6/8/9)in total. If changing colour, do so in the last 2 rows. Fasten off. 

    Finishing 

    1. Join shoulder seams first, starting from outer edge of shoulder and working your way inwards towards neck opening. 
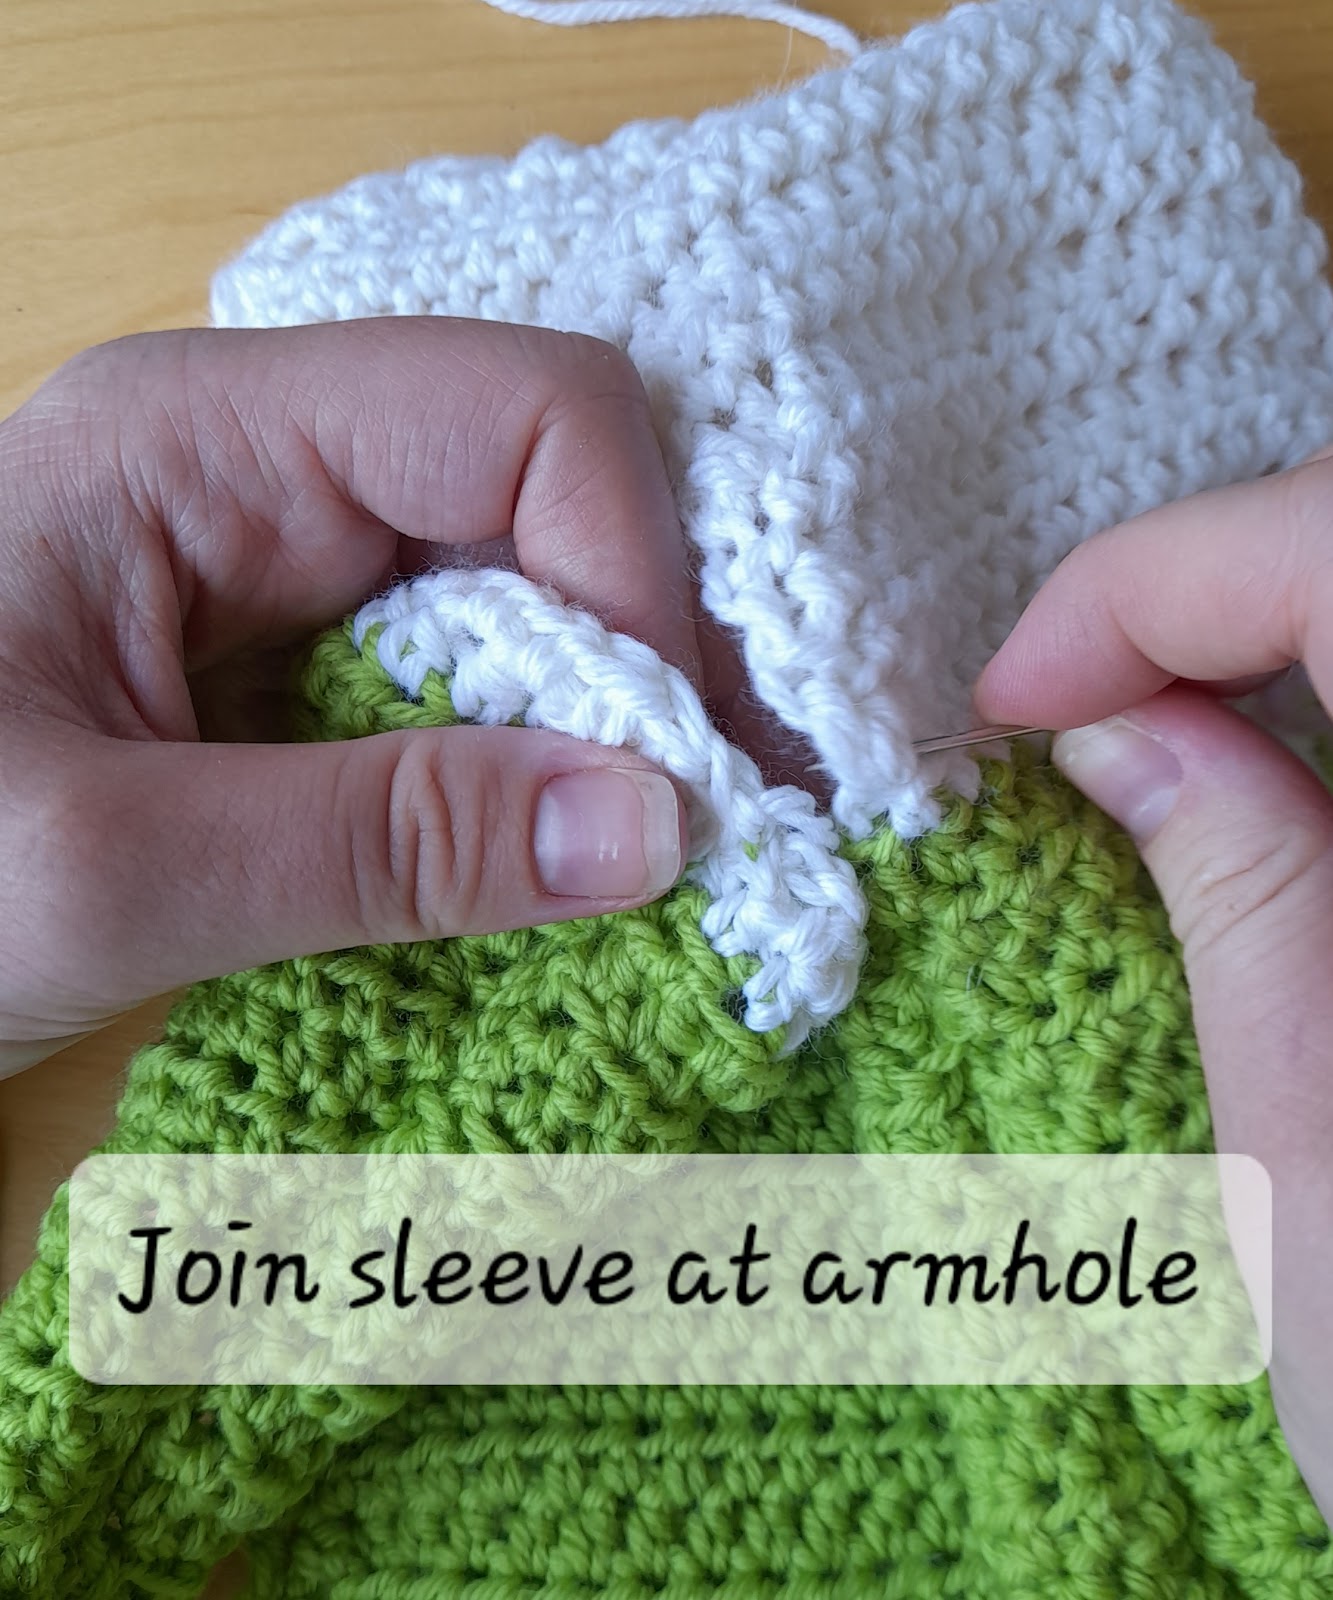
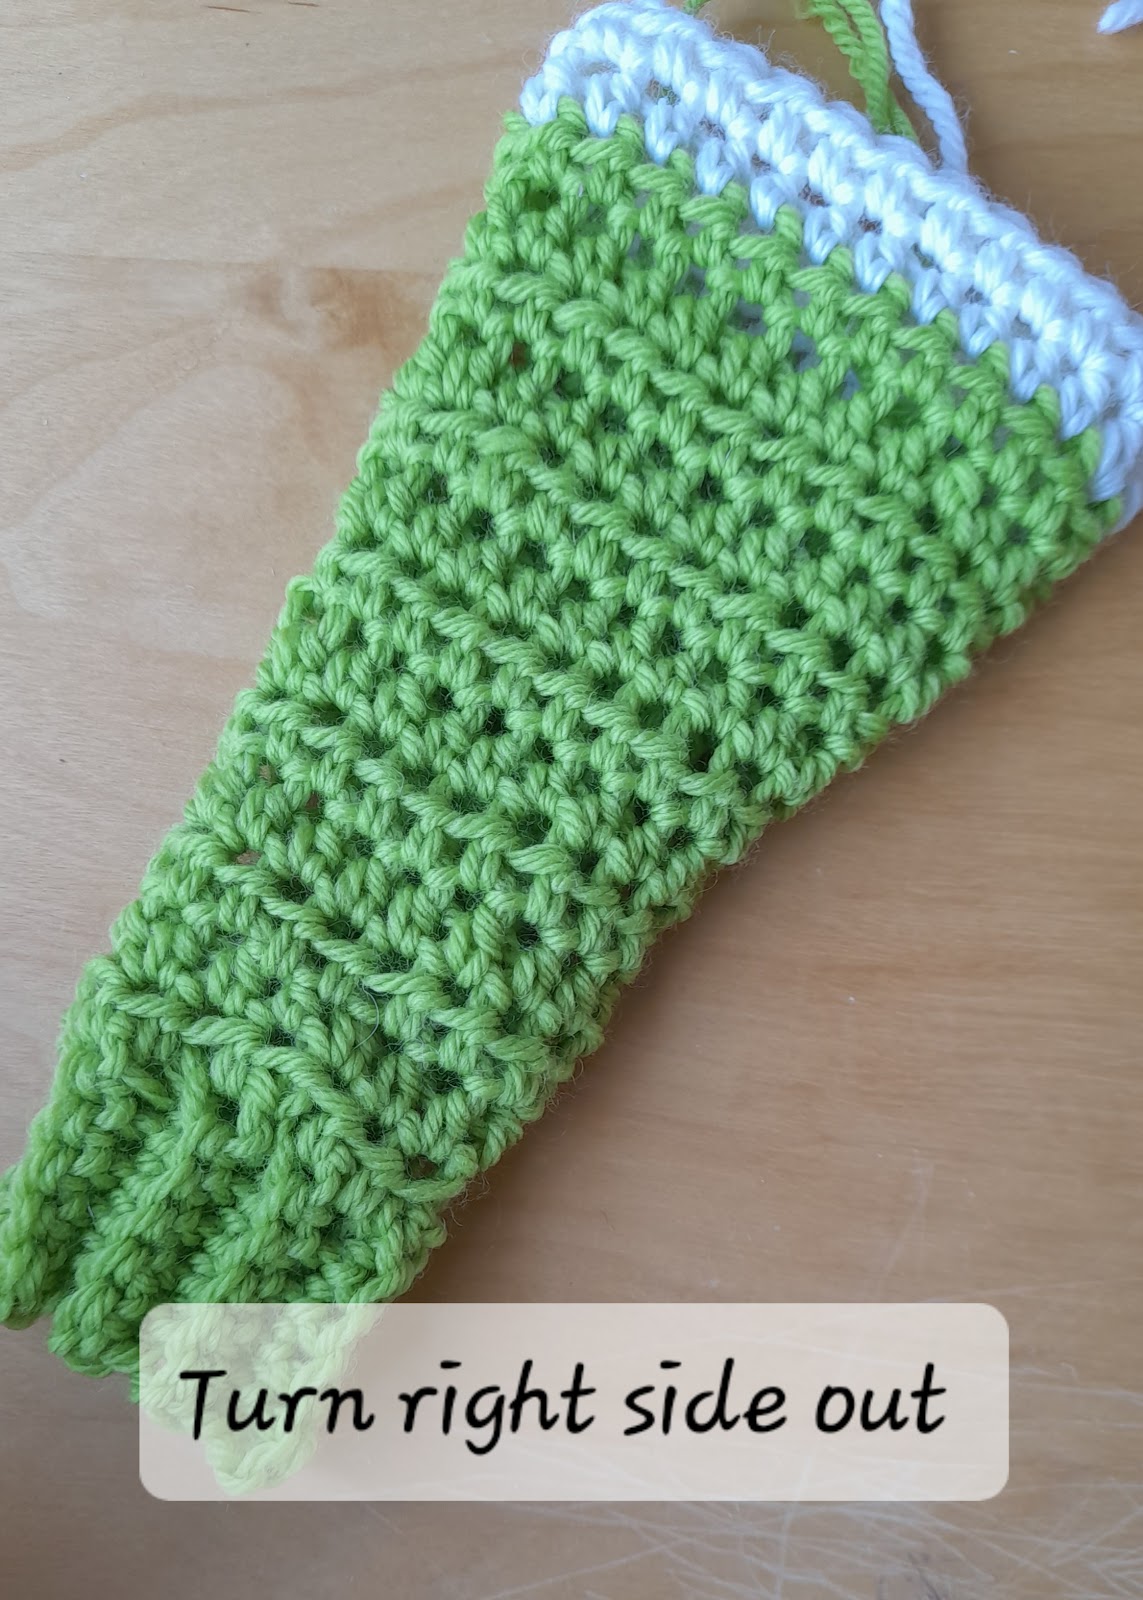
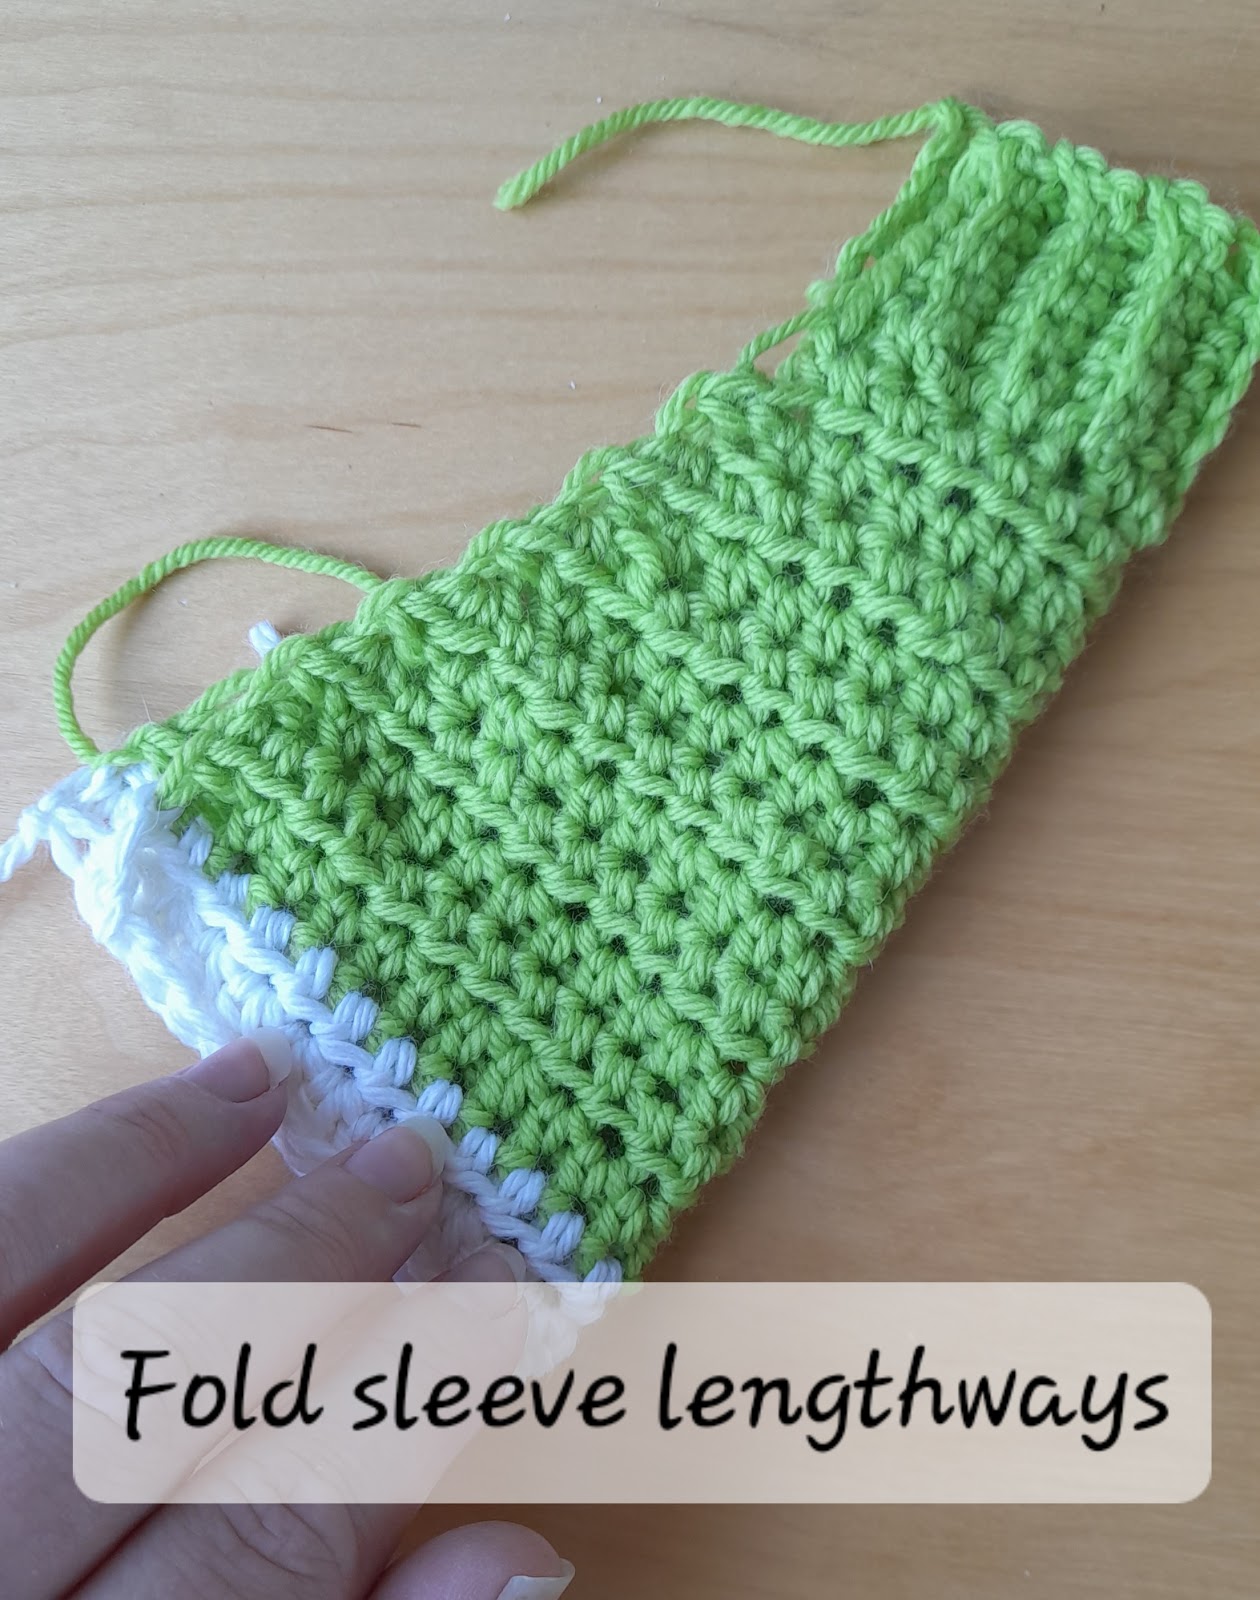
    1. Sew each side seam up to armholes.         3.Seam sleeves and attach to armholes. 

    Buttonband 

    Attach yarn, starting at right bottom edge of front right panel. Sc into the side of every hdc row up to neck, around top of neck and down the left side hdc rows. 

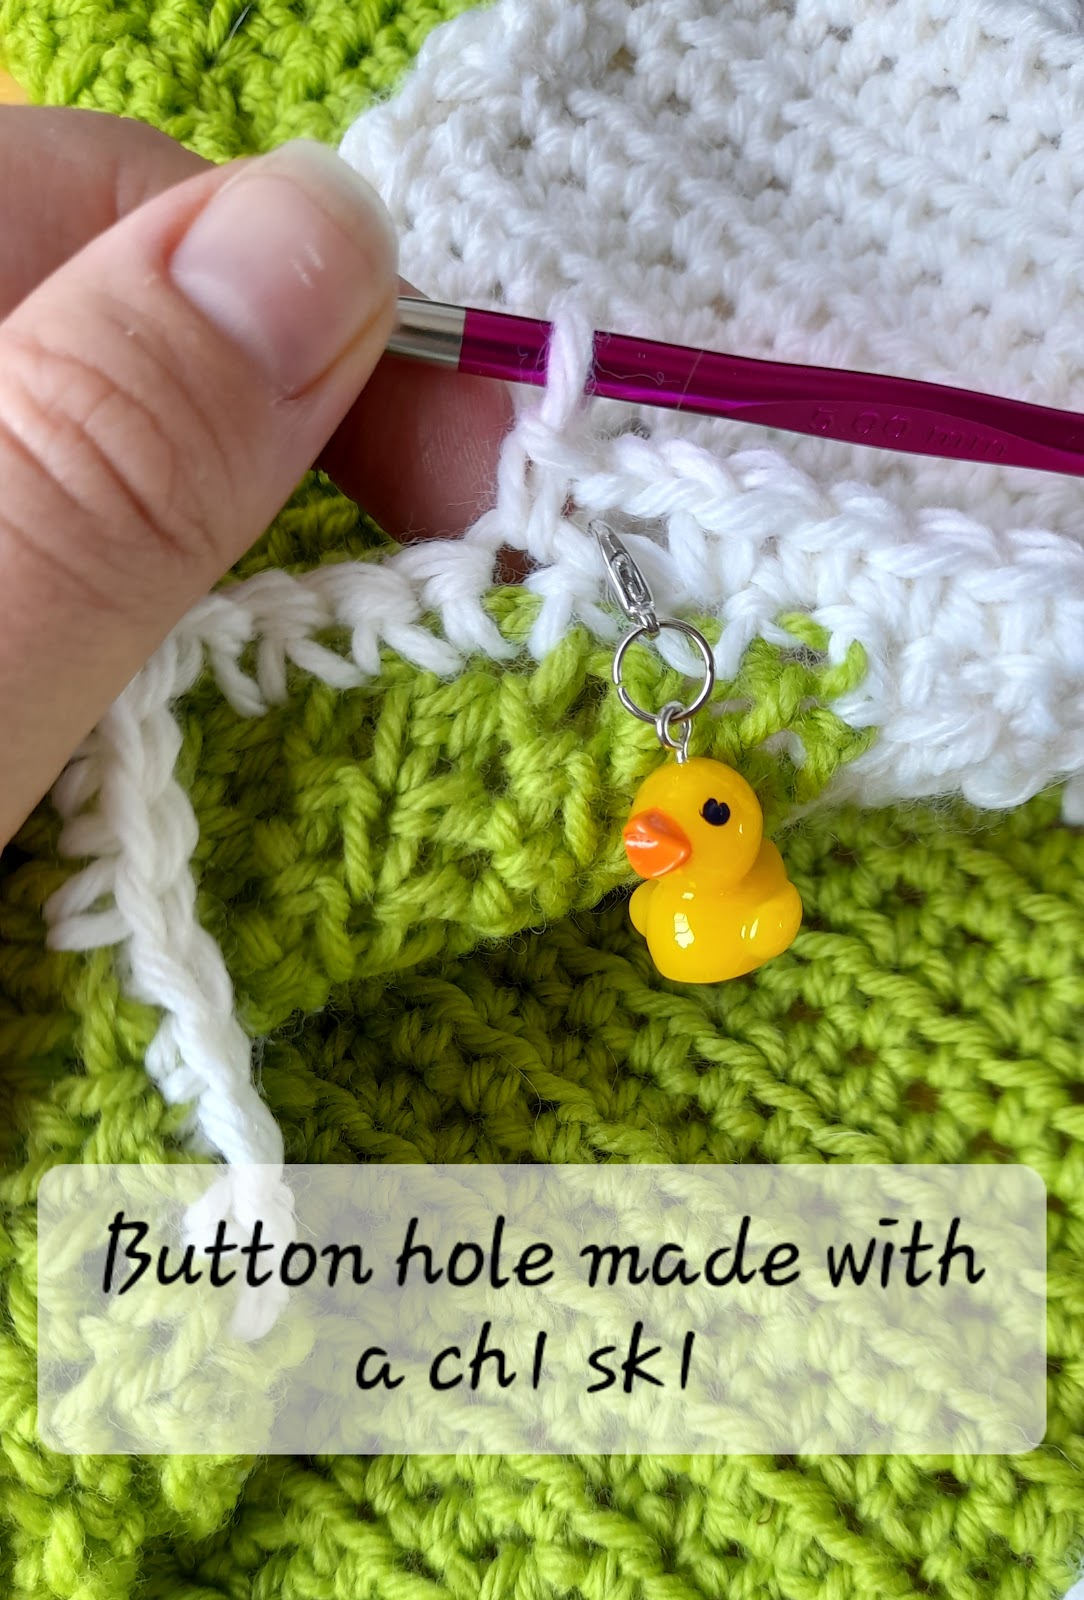
    Sc in every sc until you get to the 19th (20th/21st/22nd) marked row of the right panel. Ch 1, sk 1 and sc to end. Remove marker. 

    Fasten off. Sew on button. Weave in ends and block, if desired.
    Simple crochet baby cardigan pattern. Worsted weight crochet patterns. Quick baby crochet pattern.
  • How to make T-shirt yarn. DIY T shirt yarn tutorial.

    Here’s how to make your own t shirt yarn from fabrics you may want to recycle instead of throwing out. 

    I first decided to use up some t shirt yarn when my lovely dog accidentally walked some poo into the house, smeared it onto the sheepskin rug and then lay on it for extra measure. I was devastated as that was her favourite place to sleep but there was no way I was going to get the sheepskin clean again. I was also short of another £50-£100 for a new sheepskin rug so my only option was to crochet something with what I already had around the house. 

    I can’t be the only person with a long history of different dress sizes, varying tastes in clothing and a box full of old t shirts that were not good enough to sell or give to charity but were still useful. If they have holes in, seams falling apart or are faded and threadbare, they’re still really useful for making home decor. 

    I also asked my Dad to donate some t shirts that are now too big for him. He donated some XXL t shirts and it helped me to finish off my crochet rug in a way that a size 10 women’s t shirt or age 5 leggings could not. 

    It was such a fun project. It’s like magic. You take a t shirt, cut it in a very specific way, stretch the strips and wind them into a ball. I’ll show you how I did it:

    Materials required: 

    • Good fabric scissors. You’ll get smoother edges this way and limited fraying. I used these Fiskars scissors.
    • A t shirt or dress made of stretchy cotton jersey.
    • A roll such as a wrapping paper tube (optional) or your arm.
    • A flat surface to work on.

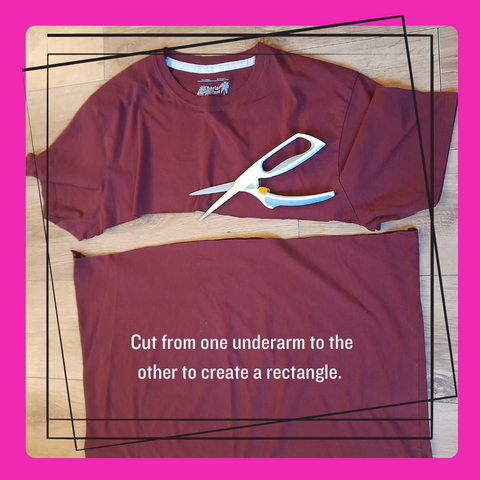
    First take the T shirt and cut from one underarm to the other in a horizontal direction. This frees up a tube or rectangle and you can make some yarn with absolutely no knots. 

    Cut your tshirt yarn easily. First cut it into a rectangle for a long length of yarn

    Cut off the bottom seam or unpick it first and then use it as part of the rectangle. 

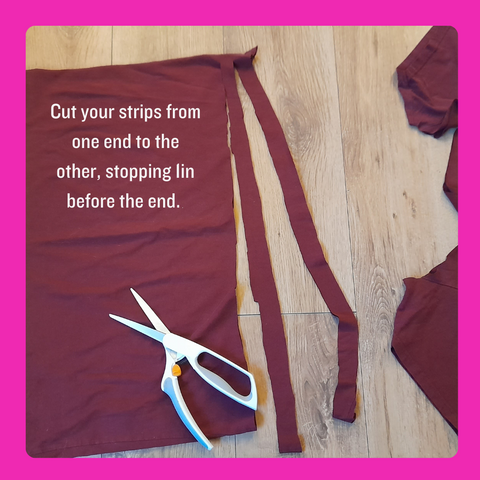
    You need to cut across the t shirt in 1-2in strips depending on how thick you want your yarn to be. I cut mine in 2.5cm/1in strips as I had a 10mm hook but if you are using finger crochet or want to use a bigger hook, by all means go for the larger strip. T shirt yarn is very forgiving so it doesn’t matter if your strips aren’t symmetrical. 

    You have to cut across from one end to the next but you do not cut the end instead, you cut to about 1inch from the side seam (or side if you don’t have side seams). Keep cutting from one edge to 1 in before the other. You will only cut one side completely. 

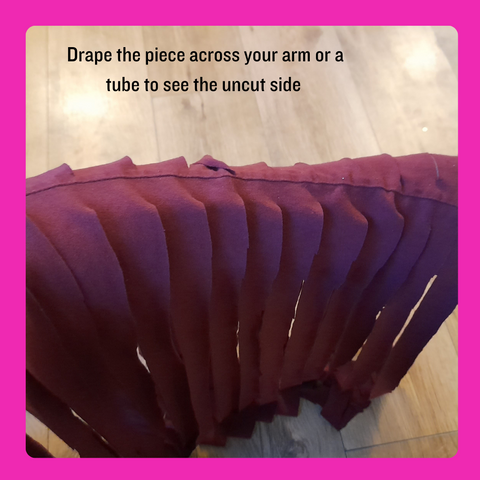
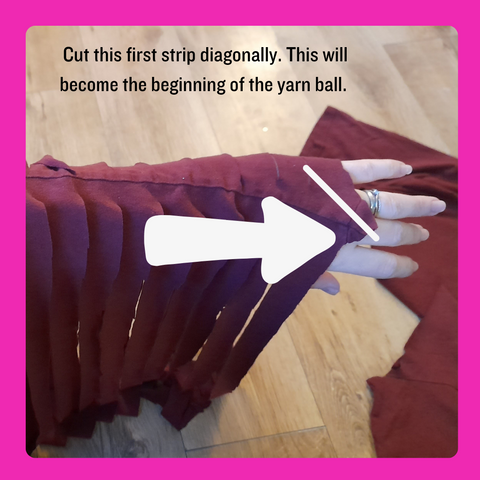
    Next, you need to drape the uncut edge of the tshirt across your arm or a tube such as a wrapping paper roll. This enables you to see the uncut fabric. You will then cut the first top strip on the right diagonal (left leaning). That will be the beginning of the yarn ball. 

    If you’re left handed, work from the left to right, cutting diagonally from the bottom left to the top right. 

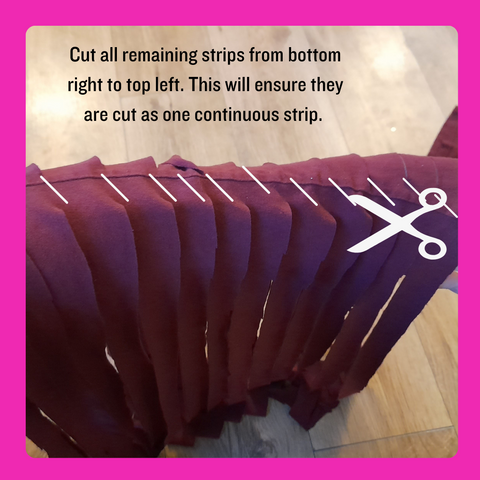
    You then need to cut from the top of the bottom right strip diagonally so it matches up with the top right strip. 

    Keep cutting the left leaning diagonal strips until there’s one strip left. Cut that off completely just as you did with the first strip. That is the other end of the yarn. 

    Don’t worry if you make a mistake here and end up with smaller strips. Just tie them together. The knots can be hidden under stitches. 

    How to wind it into a ball

    At this point you can give the strips a little stretch. This just gives you more mileage out of the yarn and evens it out as it folds over on itself like bias binding does. 

    Can I use the rest of the t shirt? 

    You can but you won’t get as much fabric as you did with the body and there will be knots. I’ll pop another blog post up soon to show you how to do that but if you’re happy with the yarn that you have, why not just use the top parts as cleaning rags? They’re much more eco friendly than microfibre cloths as they don’t release microplastics when washed. 
    Can I cut up other fabric? 

    Yes. I used some of my daughter’s holey leggings too. I checked to see what direction the fabric was stretching in and I had a choice between cutting across the leg horizontally (just like with the t shirt) or cutting up the leg lengthways into strips. The latter method does result in pieces that need tying together but you’re never going to get away with that. 

    I also used a stretchy maternity dress as t shirt yarn. I just used the exact same method as I did with the t shirt. It was jersey knit fabric so it works absolutely fine. 

    You can also cut up fabrics that are not stretchy but these will not be as forgiving  to work with so you might want to use a larger hook. 

    Here’s how to cut up your yarn using the whole tshirt. 

  • Perfect cotton yarns to crochet and knit with this summer.

    Perfect cotton yarns to crochet and knit with this summer.

    Want to crochet or knit something cute for summer but you’re not sure which yarns to work with? In this guide I’ll show you what’s on offer when it comes to cotton. 

    Here is my selection of cotton yarns that are perfect for your spring and summer projects. 

    This blog post does contain affiliate links. This means that I do earn a small commission at no cost to you. 

    Plant based yarns

    Cotton is a number once choice for summer and it’s easy to understand why: 

    • It’s machine washable.
    • It breathes. 
    • It comes in a range of vibrant colours. 
    • It works with everything from washcloths to sundresses. 

    Types of cotton yarns on the market: 

    Pima cotton– This is generally understood as yarn that is 30% stronger than regular cotton. It is made using longer fibres of cotton and therefore results in a softer cotton than standard. Pima cotton is very popular for making clothing worn close to the skin. It has a silk like quality thanks to its sheen and feel. 
    Mercerised cotton– This cotton yarn will be soft and silky when you handle it, too. The reason for the softness of mercerised cotton is the finishing process. The threads are then passed through caustic soda under tension. This swells the fibres and makes them thicker but also, stronger and softer than standard cotton. 

    Standard cotton– You’ll see this especially with yarns that are used for toys, bags and home wares such as washcloths. The way it is spun is slightly looser than pima and mercerised but it is still strong and durable. Standard cotton can be soft, too as it depends on the thread count of the fibre. The only main difference here is that standard cotton yarn hasn’t been treated for softness so after a few washes, your crochet garment may feel washed out. 

    Here are my top choices for cotton yarns.

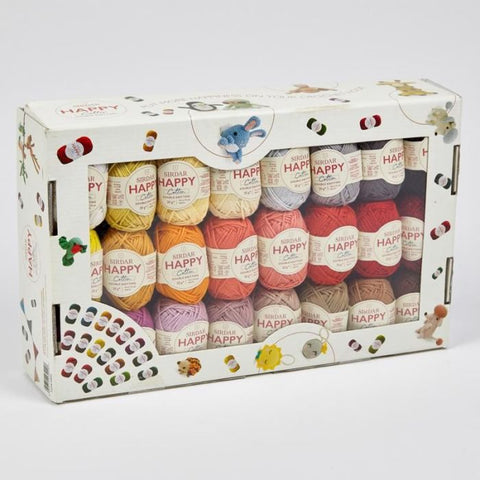
    1. Sirdar happy cotton DK is my number one choice for amigurumi and toys. It is available in a range of vibrant colours and comes in 20g balls. This means that you won’t end up with lots of yarn after making a small project. It’s a great choice for the minimalist or the amigurumi enthusiast. 

    Sirdar happy cotton dk. The best cotton yarn for crochet toys

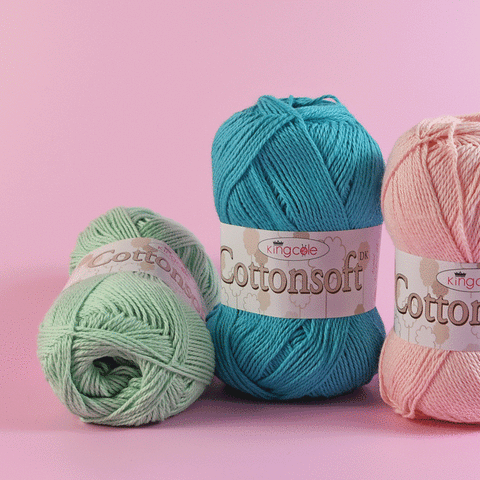
    2. King Cole Cottonsoft DK  This cotton yarn is exactly what it says on the label- it’s soft. It’s a cotton yarn making it soft and durable for clothing and things like baby blankets. You could also check out King Cole Cottonsmooth which is a mercerised cotton version of this yarn and is even softer but it is slightly more expensive than Cottonsoft. 

    King cole cottonsoft dk. Colourful yarn for summer crochet

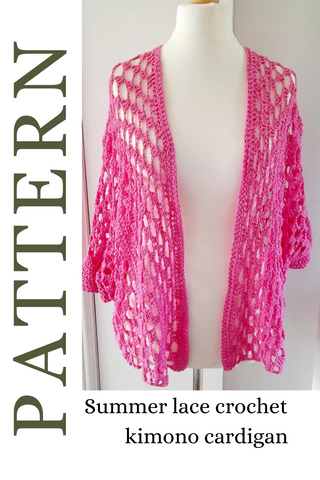
    This yarn makes excellent summer garments as it is soft and machine washable. I find that a lot of cotton yarns have a tendency to feel like a hard dishcloth after a few washes but cottonsoft is different. It would work really well for something like the Summer Lace Kimono Cardigan. 

    Summer kimono cardigan pattern. Crochet garments using cotton yarn.

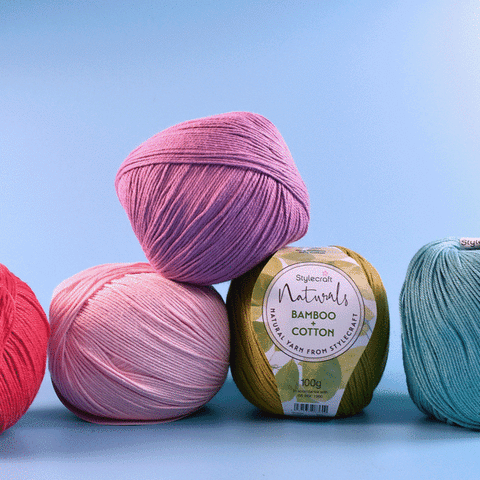
    3. Stylecraft Naturals Bamboo and Cotton  This range of bamboo cotton yarn is a great plant based material for your next crochet project. It’s 60% Bamboo and 40% cotton so if you find cotton a bit too tough to wear, try this. The bamboo adds more breathability and softness. This yarn is also available in DK and you get 250m per 100g ball. I’d recommend using this for all crochet projects that ask for DK cotton yarn. 

    Stylecraft naturals bamboo and cotton yarn

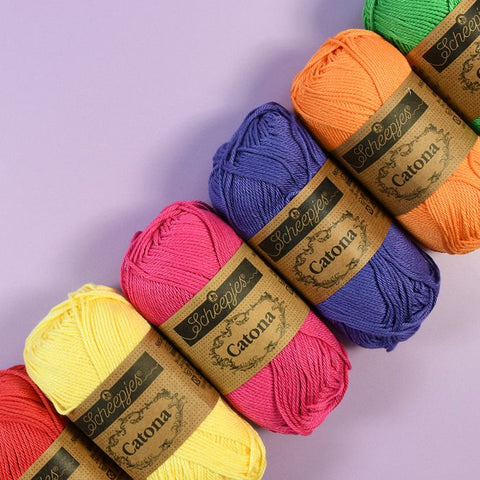
    Sheepjes Catona 4ply cotton yarn. 

    The widely popular Scheepjes Catona yarns have become a go-to yarn for many crafters.

    It’s made from 100% Mercerised Cotton. It’s a fingering weight yarn and it is naturally breathable and characterised by a soft, delicate sheen and a smooth and supple touch.

    You can use this one to create a range of garments, amigurumi, accessories, homeware items and toys for kids as it is so versatile. It comes in handy 50g balls. You get 125m per ball. 

    Being EN71-3 certified, Catona is safe to use by those with a sensitive touch such as babies or children, not to mention that this yarn is produced using recycled waste water, offering a more sustainable choice as well for eco conscious crafters.

    Sheepjes catona cotton yarn for knitting and crochet

    My favourite thing about Sheepjes Catona in particular is the range of colours. I can imagine the Enchanted garden blanket being worked up in one of these shades!

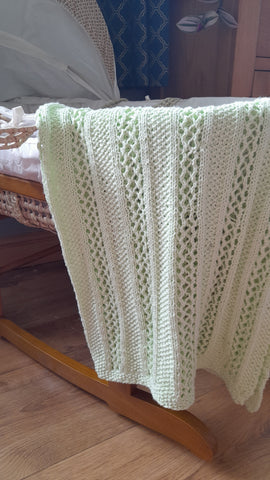
    Cotton yarn for lace baby blankets.

    Not a fan of 100% cotton yarns? Here are some synthetic yarns that have been blended with cotton, wool or silk. 

    I’d recommend these yarns if you really love natural fibres like cotton but like to work with a bit of stretch. 

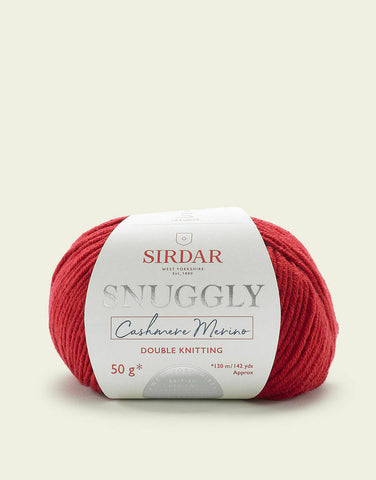
    1. Sirdar Snuggly Cashmere Merino is 57% Wool 33% Acrylic 10% Cashmere. Although acrylic is known to be quite sweaty in the summer, this blend of acrylic with cashmere and merino ensures that it is soft, has a bit of stretch and is breathable. Merino wool is celebrated as a moisture wicking fibre that also regulates the temperature of the wearer so you really shouldn’t leave it out of your summer options.

    This yarn is available in a range of delicious jewel tones and is a more sustainable option than acrylic alone. Wool fibres make excellent summer cardigans, wraps or sweaters as they can be lightweight and easy to wear as part of a layered outfit. If you live in the UK, I’m sure you are familiar with the need for layers! 

    Don’t be fooled by Sirdar snuggly’s excellent track record of baby yarns either. This yarn is perfect for garments for you. Although it would make an excellent baby yarn, it does run the risk of shrinkage and felting as it is such a delicate yarn. It would therefore make a beautiful summer crochet garment or accessory that doesn’t require much washing as wool is antimicrobial. 

    sirdar snuggle cashmere merino. Baby yarns for summer.

    2. King Cole Linendale DK is a linen blend yarn. It’s 57% cotton, 30% Viscose and 13% linen. This is an excellent summer crochet yarn as these three fibres are so very popular in summer clothing. Visit any high street shop and you’ll find this fibre content in most things. Viscose is a semi-synthetic fibre, also known as rayon. It is made from regenerated wood pulp and is incredibly lightweight. This yarn would therefore make an excellent breathable, light, warm weather wearable. 

    Use it in place of any DK yarn. Remember to check the gauge! 

    3. Last but not least is the Sheepjes whirl cake in 4ply. 

    This is such a gorgeous yarn and it takes care of the colour changes for you! You get 1000m of yarn in a 150g ball of 4ply. It’s made of 60% cotton and 40% acrylic so you really do get the benefits of both fibres. 

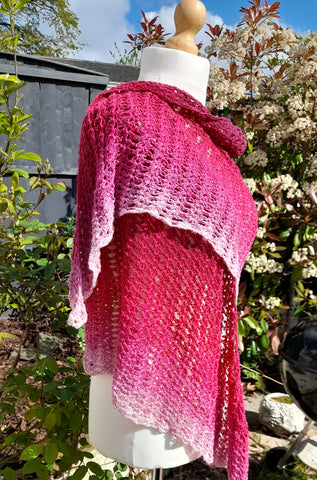
    Knit or crochet absolutely anything in it. My crochet shawl, Aurora Nox was made using Sheepjes Whirl in Forbidden Fuschia. 

    Modern crochet patterns. Modern lace crochet shawl pattern. Scheepjes whirl shawl patterns.

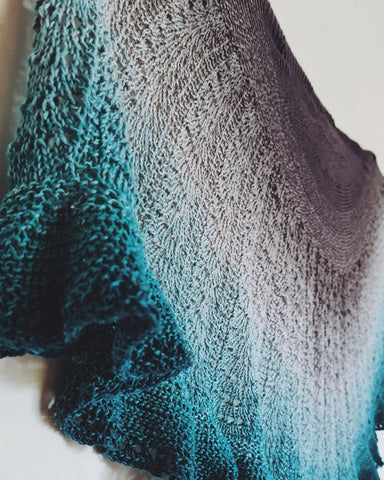
    If you would prefer to knit a shawl, Louise Tilbrook’s St Bees Shawl is an excellent use of a Sheepjes Whirl cake. Louise used the colourway green Tea Tipple. 

    knitted lace shawl using a sheepjes whirl cake

    As you can see, there’s lots of fun to be had with a Sheepjes whirl cake. I think the cotton element gives it that lightness and drape but the acrylic keeps the stitches in place. It’s very hard to stretch this out of shape like you can with 100% cotton. 

    Best cotton yarns for spring and summer. Great natural fibres for knitting and crochet. Image shows five colours balls of yarn.
  • Starburst Cardigan. Chunky crochet cardigan pattern.

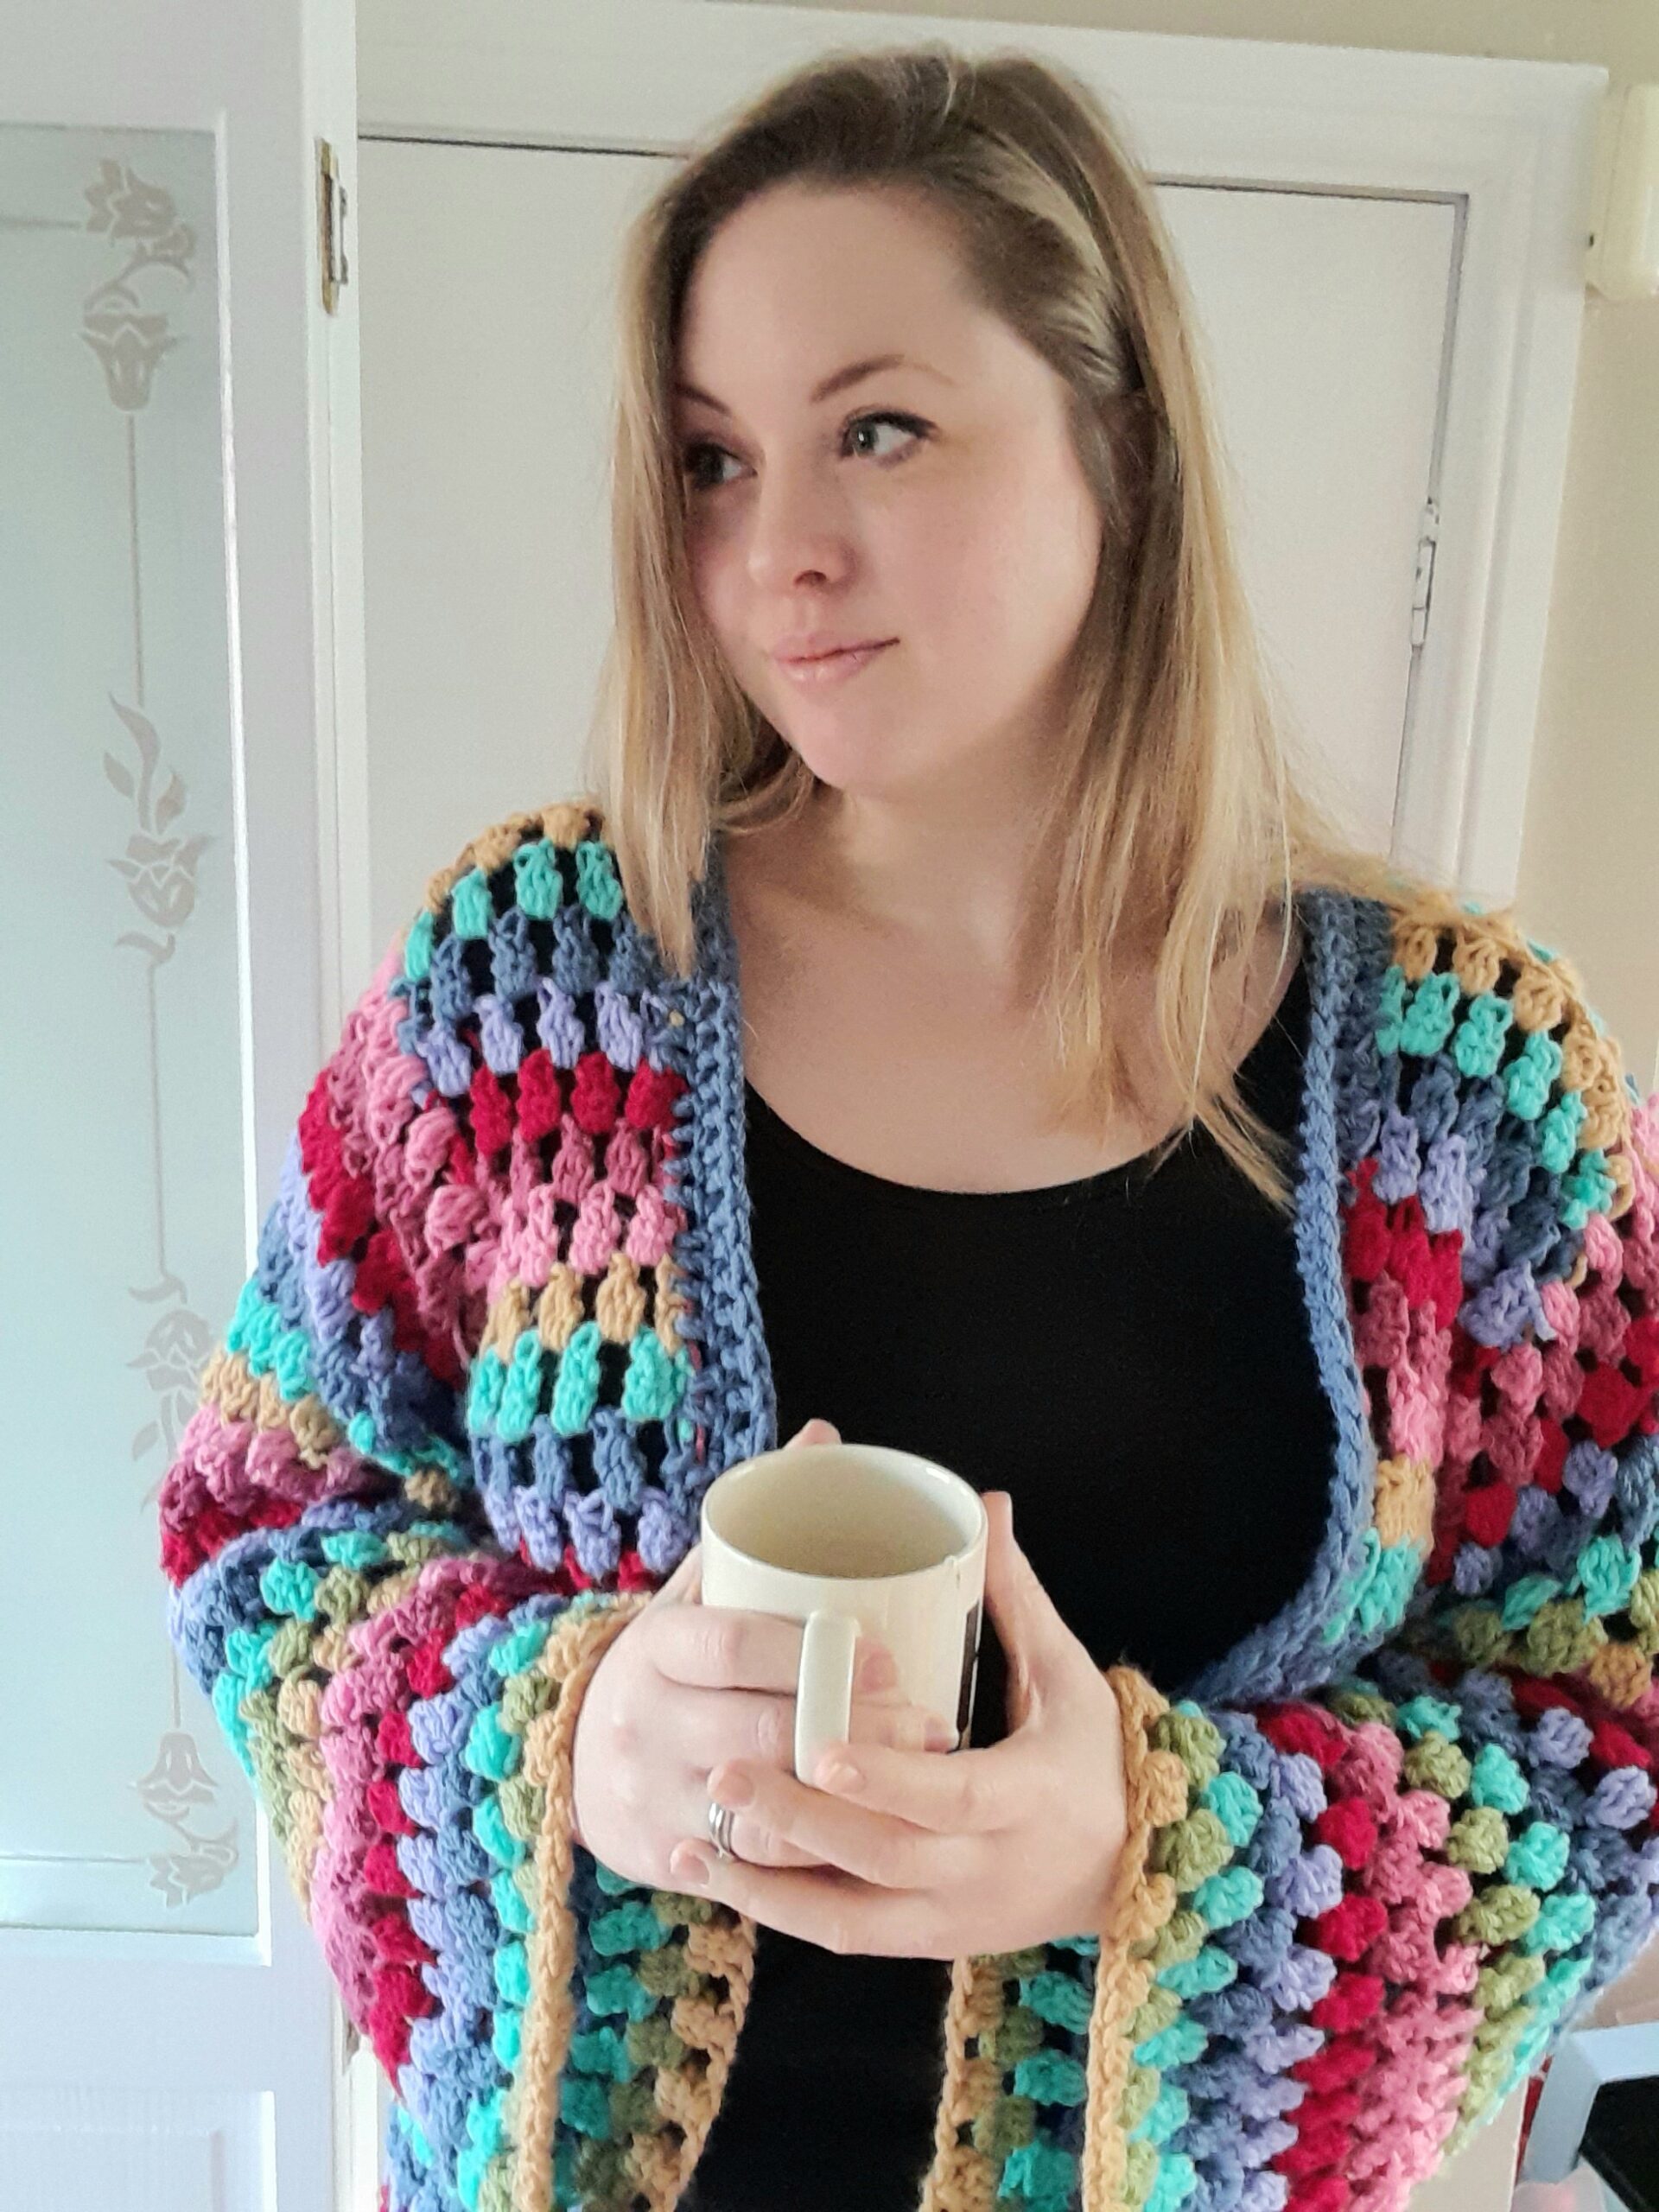
    Starburst Cardigan. Chunky crochet cardigan pattern.

    This is a free crochet pattern for a chunky, multi-coloured cardigan. You can either use this free version with ads, or the pattern is also available here with no ads.

    The main feature of this crochet cardigan pattern is the bobble stitch. This is a fun stitch that will be a breeze to make as once you’ve done the first row, you crochet into the spaces, not the stitches! Here’s how to do the bobble stitch:

    Bobble stitch- 

    Step 1: Yarn over, insert hook, Yarn over and pull through, Yarn over and pull through 2 loops. Leave remaining 2 loops on hook. 

    Step 2: Yarn over, insert hook, yarn over and pull through, yarn over and pull through 2 loops. Leave remaining 3 loops on hook. 

    Step 3: Yarn over, insert hook, yarn over and pull through. Yarn over and pull through 2 loops on hook. Yarn over and pull through all 4 remaining loops on hook.

    When worked flat: each end of the row will have an individual, double crochet stitch. Ch3 at the end of every row, yarn over and work into the chain spaces in the next row. 

    Simple crochet cardigan pattern free. Free crochet cardigan pattern for women. Cardigans for chunky yarn. Stylecraft special chunky. Ravelry cardigan patterns free. Rainbow cardigan pattern. Easy crochet sweaters and cardigans. The Starburst cardigan pattern pdf. Free crochet for women. Bulky yarn patterns.

    Starburst Cardigan: a chunky crochet cardigan pattern.

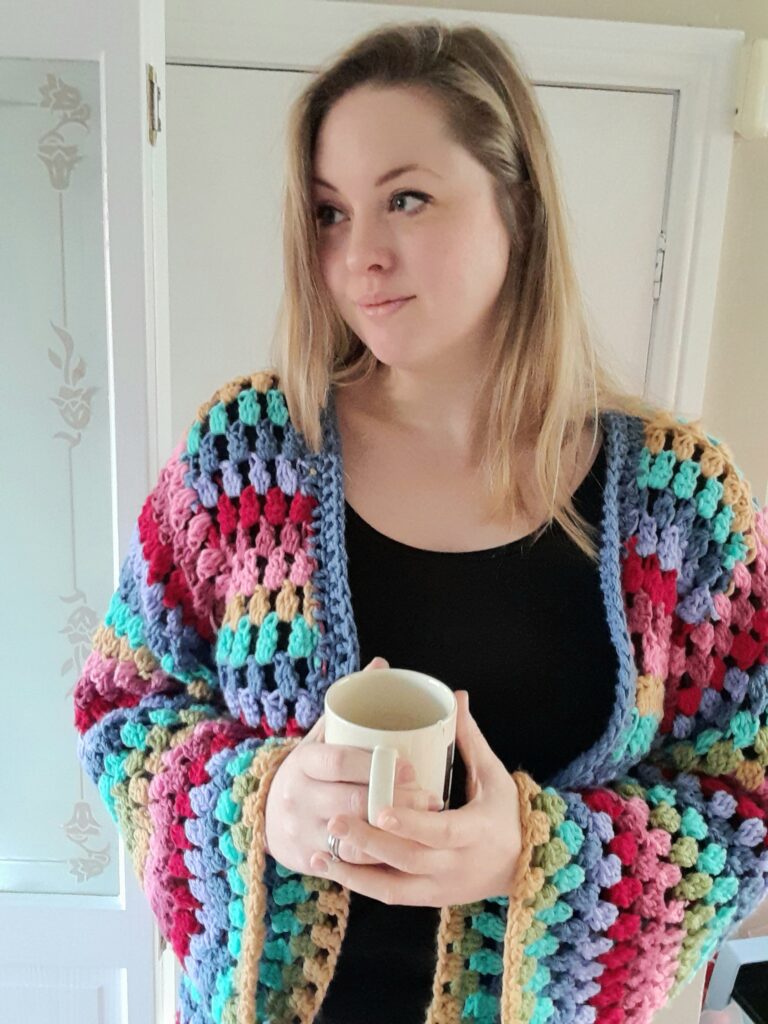
    Named after the much loved 90s fruit chews, this cardigan promises a burst of colour and a quick turnaround. The funnel sleeves give it a retro feel and the bobbles scream retro charm. 

    This article does use affiliate links. This means that if you do choose to purchase anything with the links I’ve used, I do earn a small commission from that purchase at no cost to you. Thank you!

    Wear it as an oversized addition to your wardrobe all year round!

    Materials needed: 

    Stylecraft special Chunky. 100% Acrylic; 144 metres / 157 yards per 100g / 3.5oz 1 (1,1*,2,2) balls of each colour. *Size M needs 2 balls of Denim in total for the border, but 1 of every other colour. They also do a value pack if you wanted to simply do it in one colour.

    • Raspberry (1023)
    • Meadow (1065)
    • Lavender (1188)
    • Fondant (1241)
    • Lipstick (1246)
    • Denim (1302)
    • Camel (1420)
    • Aspen (1422)
    • 6mm / USJ/10 crochet hook, or size needed to obtain gauge. 
    • 4 removable stitch markers. 
    • Darning needle for weaving in ends. 

    Instructions to make this simple crochet cardigan pattern:

    Gauge: 

    3 bobble stitches and 3 ch spaces/ 4 rows to 10cm/4” using a 6mm / USJ/10 crochet hook and Stylecraft Special Chunky.

    Bobble stitch- 

    Step 1: Yarn over, insert hook, Yarn over and pull through, Yarn over and pull through 2 loops. Leave remaining 2 loops on hook. 

    Step 2: Yarn over, insert hook, yarn over and pull through, yarn over and pull through 2 loops. Leave remaining 3 loops on hook. 

    Step 3: Yarn over, insert hook, yarn over and pull through. Yarn over and pull through 2 loops on hook. Yarn over and pull through all 4 remaining loops on hook.

    Things to be aware of before you make the Starburst crochet cardigan.

    When worked flat: each end of the row will have an individual, double crochet stitch. Ch3 at the end of every row, yarn over and work into the chain spaces in the next row. 

    US terms are used throughout. Please ensure that you are using the correct terms as this will significantly alter the finished result. 

    If you need a quick reminder of the US/UK terms, there’s a handy blog post here.

    When working in the round, you will need to sl st to join the round at the end. Start your next round by slipping across the top of the first cluster, rejoining your yarn when you get to the chain space. 

    When you are starting in the round, make 2 chains into the first ch sp. This counts as the first leg of the bobble. Complete step 2-4 to finish the bobble. 

    Information about sizing and yarn requirement.

    Sample shown is M. 

    The colours on the pattern sample M are worked from the bottom up in the following order: 

    1. Fondant 
    2. Raspberry
    3. Lipstick
    4. Lavender 
    5. Denim 
    6. Aspen
    7. Meadow 
    8. Camel 

    Note: At the end of every other row there will be an individual double crochet stitch. This makes the edging process easier. Check out the blog for more tips and videos on the Starburst cardigan. 

    Body measurement chart: 

    Size ChestSleeves Back
    XS26-30” (66-76cm )18” (46cm)28” (71cm)
    S32-36” (81-91cm)20” (51cm)28” (71cm)
    M40-44” (102-107cm)20” (51cm)30” (76cm)
    L46-48” (117-122cm22” (56cm)32” (81cm)
    XL50-52” (127-132cm)22” (56cm)32” (81cm)

    Glossary: 

    BobbleSee description on page 2
    Ch / Ch sp Chain(s)/ Chain space 
    DcDouble crochet (US terms) 
    Sk Skip stitches
    Sl Slip stitch

    Bobble table 

    See example of separating in this Youtube link here 

    SizeChainsBobblesFront SleeveBack
    XS69 ch  22 3310
    S78 ch 25 3411
    M102 ch33 5511
    L114 ch36 5614
    XL14446 7816

    Instructions for the cardigan:

    Row 1: Chain 69 (78/102/114/144) 

    (3 ch count as 1st dc) sk 2 ch, bobble in next ch, *ch 2, sk 2, bobble*  repeat from * to last ch OR bobble* Make a dc in last ch. 22 (25/33/36/46) bobbles. Ch 3 and turn. 

    Row 2 and every following row:

     *bobble in next ch sp, ch 2* repeat * to final dc. Make 1 dc, ch 3 and turn. 

    Changing colours every row, repeat row 2 for 20 (22/22/24/24) more rows 

    Separate for sleeves

    Isolate sections of the cardigan. Using the bobble chart, mark the beginning and end of the back stitches and mark the armholes. There should be 4 markers in total.  

    Front left/Front right

    Work only 3 (3/5/5/7) bobble stitches for the next row. 

    Work 5 (5/6/6/7) more rows. Fasten off. 

    Rejoin yarn and repeat on other side for front right 

    Back 

    Working with the bobble stitches on either side of the 2nd sleeve marker, work 5 (5/6/6/7) rows. Fasten off. 

    Join shoulder seams using sl st or seam with a darning needle. 

    Sleeves (work 2): 

    Joining new yarn, work 18 (20/22/22/24) bobble stitches evenly across armhole. Where there are bobble stitches under the armhole, you can work one bobble st into each ch sp as normal. Where you are working with the sides of stitches, work into the side of the posts/clusters. 

    To join each round, sl st into the top of the first bobble and sl across to next ch sp. Change colours here and start the next round with 2 ch and 2 more dcs in the bobble. 

    Work 20 (20/22/24/24) rounds in total. Fasten off. 

    Edges (including collar and front edges)

    Row 1: Starting at bottom left corner, insert hook into the ch sp and chain 3. 2 dc in the side of every stitch post and 2 dc in every ch sp along. Continue all the way around the left front, collar, right front and waistband. 

    Row 2: Dc in every stitch to end. Fasten off. 

    Weave in all ends and enjoy!

    Notes: This pattern uses bobble stitch clusters consisting of 3dc stitches joined together. The edging is worked using dc stitches. The cardigan is designed to be oversized. If you feel that the body is too long, please feel free to start your underarm marking 1 or 2 rows before the instructions state. 

    Love your project?

    chunky crochet cardigan pattern. Ladies crochet patterns. Free crochet sweater patterns. Free crochet cardigan pattern for beginners. Bulky crochet cardigans.

    Need to brush up on your crochet skills? Why not have a look at the other resources on the blog.

  • Free crochet stitch guide for beginners.

    Free crochet stitch guide for beginners.

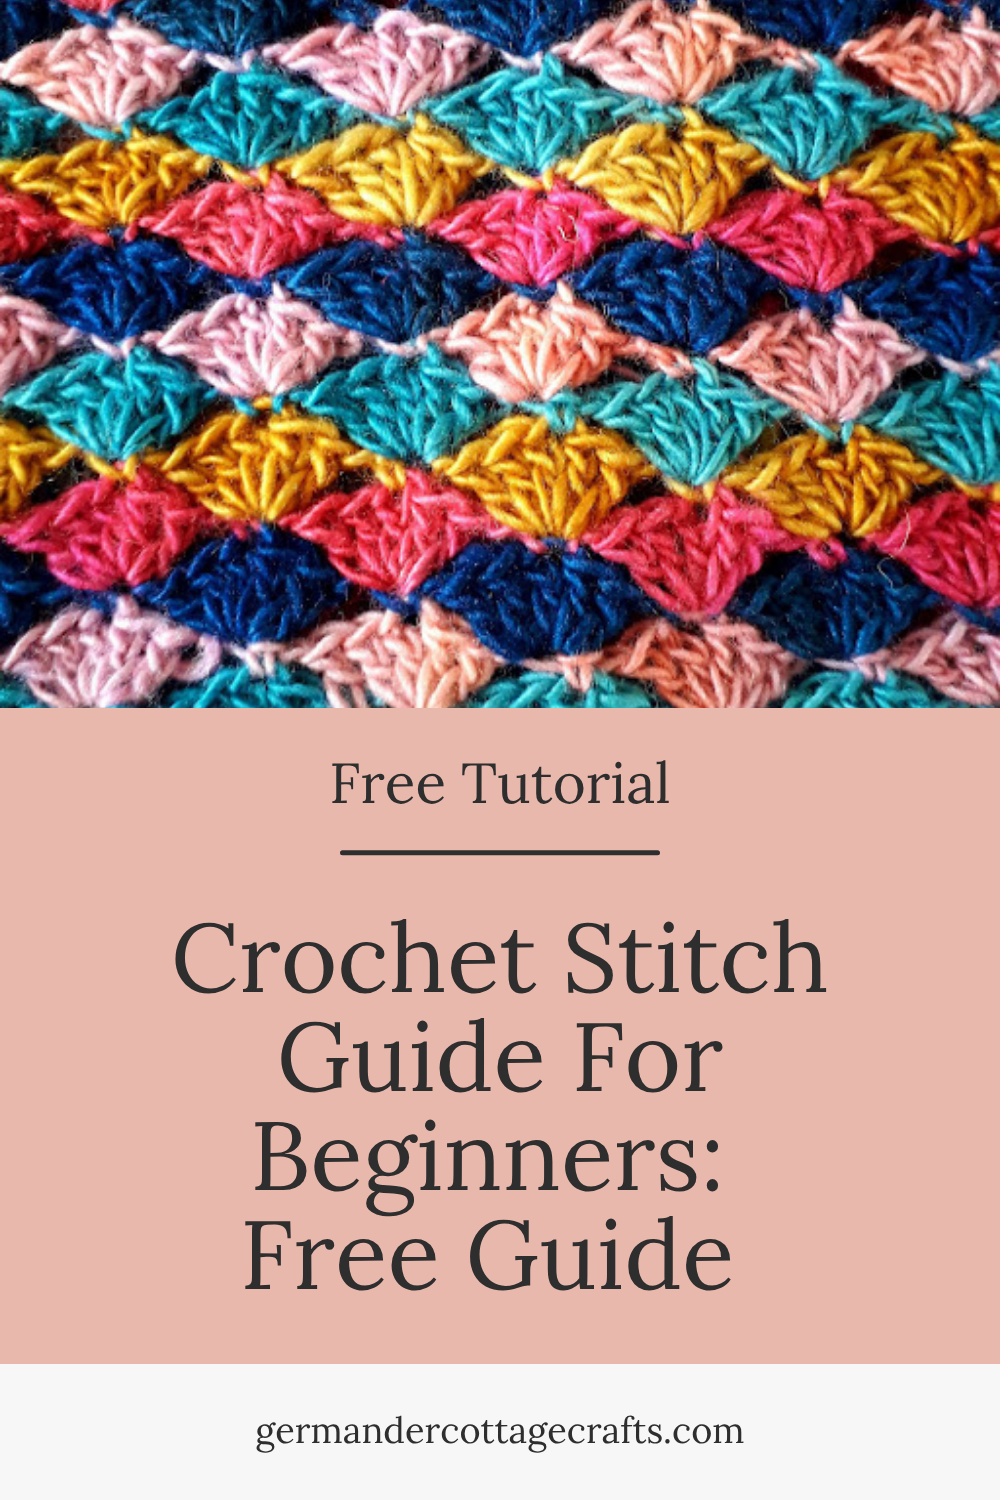
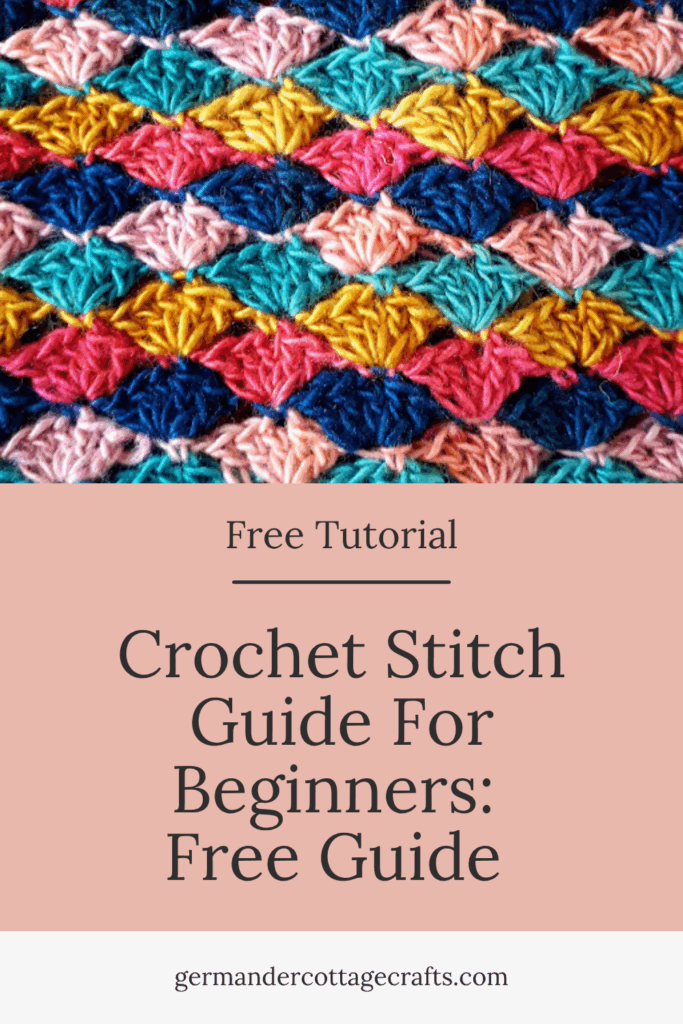
    Want to learn to crochet but you’re not sure what the stitches are? Or maybe you’re not sure what stitch you should start with as a beginner. In this post I’ve shared my crochet stitch guide for absolute beginners. My students swear by this pattern. I hope it’ll be handy for you, too!

    If you’d prefer a handy PDF of this guide, it is available here.

    Think of this crochet stitch guide as the official quick reference companion for learning crochet. This works as a way to remind yourself of what stitches mean when you are working on a project. I also include the UK variations for the terms. 

    Inside: 

    • Single crochet 
    • Half double crochet 
    • Double crochet 
    • Triple crochet 
    • V stitch crochet
    • Shell stitch crochet. 

    In this guide with clear colour photographs I explain how many chains you need as well as how to do each stitch. Please make sure you have a look at the photographs, or visit my youtube channel for more help.


    Crochet stitches for beginners

    The basics 

    This is an introductory guide to the main basic crochet stitches. If you’d like to see demonstrations, please subscribe to my youtube channel by clicking here. 

    Single crochet (UK Double Crochet)

    Abbreviations:  sc (US) dc (UK). 

    Single crochet is the smallest stitch you can do in crochet. It is commonly used in dishcloths, face scrubbies and amigurumi. The dense, short stitches are great for toys as the stuffing is less likely to leak out! Single crochet also works great for baskets as it provides a dense, sturdy fabric. 

    Directions:

    Insert hook, yarn over and pull through a loop, yarn over and pull through 2 loops. 

    When making a turning chain, always chain 1. 

    Half double crochet (UK Half Treble)

    Abbreviations: Hdc (US) Htr (UK)

    I really like half double crochet as it starts off as a double but ends as a single. It’s a tall enough stitch without all of the work. 

    Yarn over hook, insert hook, yarn over and pull through a loop. Yarn over and pull through the 3 loops on the hook. Do this in every chain. 

    When you get to the end, chain 2 and turn.

    Double crochet (UK Treble)

    Abbreviations: Dc (US) Tr (UK)

    The Dc is one of the most common crochet stitches you will come across. It’s speedy and tall. Your work will grow quickly. 

    Chain 3 and turn. Yarn over hook, insert hook, yarn over and pull through a loop. Yarn over and pull through 2 loops. Yarn over and pull through 2 loops. 

    When making a turning chain, always chain 3. 

    This is a close up of the double treble (Dtr) or Triple crochet as it is known in the US. This stitch features in the crochet stitch guide for beginners.

    Triple crochet (Double Treble (UK) 

    Abbreviations: Tr (US) (Dtr UK)

    This is a very tall stitch (but not the tallest!) requiring a turning chain of 4 stitches. 

    Yarn over twice, insert hook. Yarn over and pull through a loop. *Yarn over and pull through 2 loops. Repeat * 2 more times.

    When turning, always chain 4. 

    V stitch 

    Abbreviations: V st

    V stitch is a crochet lace stitch. We create the vs by using double crochet and chains. 

    V stitch is made by working a multiple of 3 chains plus an additional 4 chains. 

    First row (after chaining)  

    Make a dc (UK Tr) into the 5th chain from hook. Chain 1 and make a second Dc (UK tr) into the same stitch. Skip the next 2 chains and and make another V into the next stitch. Continue until you only have 2 chains left. Skip one chain and make a single dc into the next chain. 

    Second row: Make a 3 ch turning chain, make a V into the centre of the last V you made. This is called the chain space. Chain 1 and do the same again in every V across. When you get to the end, make a single Dc (UK Tr) into the last chain. Repeat for every following row. 

    Shell stitch

    Shell stitch chains are always a multiple of 6 plus 2 additional chains. 

    Row 1: Single crochet (UK double) into the 2nd chain from the hook, skip the next 2 chains, and dc (UK tr) 5 times into the next chain, sk next 2 chains, sc into the next chain, sk 2, dc 5 times into the next chain. Repeat to end, where you should end with one sc. 

    Row 2: Chain 3 and turn. Dc 2 more times into the last sc of the previous row. *Make a sc into the top centre stitch of the next shell, then make 5 dc into the next sc*. Repeat * to end and make 3dc into the last sc. 

    Row 3: Ch 1 and sc into the first dc of the previous row, *dc 5 times into the next sc, sc into the top centre stitch of the next shell* repeat to end, ending with a sc. 

    Repeat rows 2 and 3 to end. 

    This guide is free. If you would like to support the website, please consider leaving a tip or share this post!

    cards
    Powered by paypal
    Free Crochet Guide For Beginners.

    Thank you for using my crochet stitch guide.

  • How to stop your crochet from getting smaller.

    How to stop your crochet from getting smaller.

    This is a common crochet problem for beginner crocheters. When you’re working flat or in the round, you may notice that your crochet piece is starting to shrink! It can also bloom, growing inexplicably wider. Let’s take a look at why this happens. Does this sound like you?

    • You’re working on a flat piece and it is getting narrower and narrower.

    Maybe I can help.

    Here are 4 common reasons why your crochet seems to be getting smaller. Let me help you stop that from happening.

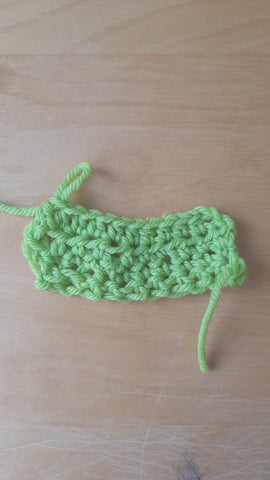
    Why is my crochet getting smaller. Fix your uneven crochet stitches. This picture shows a piece of crochet that is shrinking because a stitch has been skipped.

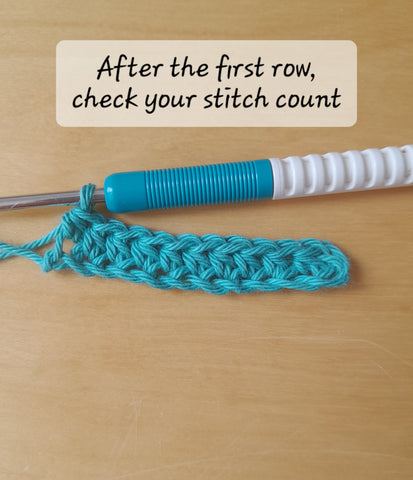
    1. After the first row, check your stitch count. 

    This may seem like a really obvious one but you’d be amazed at how one missed stitch can go under the radar until it’s 30 rows too late. If you’re practising crochet for the first time, stick with 10-20 stitches at a time. This will help you to study your stitches without the exhaustion of having to rip back an entire jumper that is 4 inches too narrow. Trust me, these little stumbles in the early days will earn you all the skills. 

    Check your stitch count at the end of a row to make sure that your stitches are even.

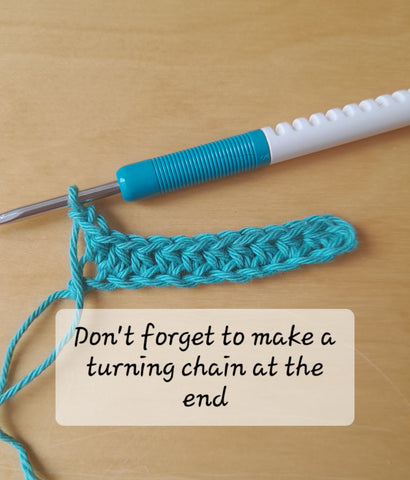
    2. Don’t forget to make a turning chain when you finish a row. 

    You’d be surprised to hear how often this happens; people forget to make a turning chain. The reason the turning chain exists is to make the transition into the next row as smooth as possible. Not making a turning chain could result in a stitch at the end that is too short and causes the piece to slope inwards. You will then probably miss it when you’re working back across the row, leading to fewer overall stitches. 

    If you’d like a handy guide on turning chains and stitches at your fingertips, you should download my crochet stitch guide for beginners. 

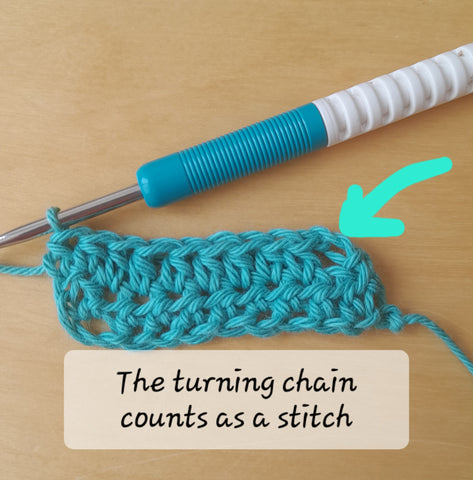
    The turning chain in crochet counts as a stitch. Don't forget to make a turning chain at the end of a row.

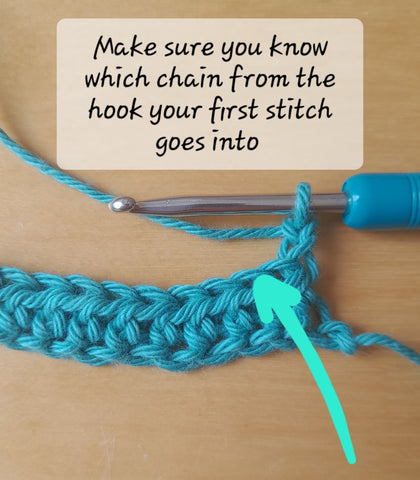
    3. Make sure that you know which chain is the one you’re supposed to be working with on the next row.

    Is it the 3rd chain from the hook, the 4th chain or the 5th chain? The chain on the hook does not count. You have to count the chains from the hook. Inserting the first stitch too early will result in a wider piece whereas inserting too late can result in a narrower piece. In this picture, I have made a ch2 for a half double crochet and should be inserting my hook into the 4th chain from the hook. Can you see what I mean by “4th chain from the hook”? 

    You need to know which chain to insert your hook into. This will depend on the stitch that you are making

    4. Remember that the turning chain counts as a stitch. 

    Whether you are making a turning chain at the beginning of the row or just coming to the end of a row- the turning chains count! If you do not make a stitch into the top of the previous turning chain, you will not get an even amount of stitches and your crochet will start to shrink. 

    The turning chain in crochet counts as a stitch. How to keep your crochet stitches even.

    Tip: Use a removable stitch marker to mark the top of the turning chain. 

    use a removable stitch marker to keep track of crochet turning chains.

    This is a bit fiddly but when you are learning, it will save you so much hassle. Just take it off after you’ve made your last stitch and insert it into the top of the next turning chain. Hopefully you’ll get so sick of seeing it that you will learn to never miss the turning chain again. 

    In conclusion, just do these four things and you should see the end of crochet shrinkage!

    1. Check your stitch count. Check it again. This gets easier the more practised you are in crochet. Eventually, you will be able to just tell if your crochet doesn’t look right, but while you’re a beginner, count, and count again!
    2. Remember to make a turning chain. You can’t just turn and crack on. Always make sure there is a turning chain, because that will be the first stitch, which brings me to point 3:
    3. Are you making the first stitch of the next row in the 2nd chain from hook, 3rd chain from hook, 4th? Check! This matters massively.
    4. Remember that the turning chain counts as a stitch. The pattern will say if the turning chain isn’t included. Always assume it counts as first stitch unless the pattern says otherwise.
    How to stop your crochet from shrinking. Crochet help for beginners. the image shows a piece of crochet with a heading that says 'stop your crochet from getting smaller.'

  • How to block granny squares. Step by step crochet tutorial for beginners.

    How to block granny squares. Step by step crochet tutorial for beginners.

    Have you made your granny squares, but you’re not sure how to block granny squares? In this post, I will show you how I block mine.

    You’ve seen them around: absolutely beautiful crochet blankets that lay flat effortlessly. If you’re using a natural fibre to crochet granny squares such as wool or cotton, you will benefit from learning how to block granny squares. if you’re using synthetic fibres, you can still get fantastic results!

    If you’ve read my other blog post on how to crochet a granny square, you’ll be ready to try joining granny squares, and last of all: blocking granny squares!

    Want to make a granny square blanket but not sure how to keep it flat? Here’s your full guide to blocking squares.

    What is blocking?

    Blocking is a method that makers use to shape or flatten their knit or crochet projects. If you use natural fibres such as wool, you may benefit from blocking your pieces. The process of blocking will help to flatten any curling edges and balance any uneven stitches. It doesn’t have to be expensive or particularly risky. 

    Blocking is not compulsory but it can help especially if you are selling the finished work or giving it as a gift. It opens out lace or openwork and relaxes the fabric. It’s also an opportunity to shape things to the desired dimensions. 

    Why block granny squares?

    You would iron your garments if you’d sewn them to give a professional finish, so why not block your knitting and crochet projects? It’s the same principle. 

    When it comes to squares, they can be blocked in several ways but I’m going to show you how to block them with water and a foam mat. 

    As part of the #StashBlanketCAL I am making a granny square blanket out of the aran yarn that I have in my stash. I’m really enjoying mixing the colours and making what I can with what I have. The yarn I am using is made from Shetland wool so I am blocking it to help flatten the pieces. This will give me a flatter blanket overall. 

    In this instance, blocking will help me to match up my granny squares and join them easily, as I will be able to see where edges match up. 

    I’ll show you how I block granny squares.

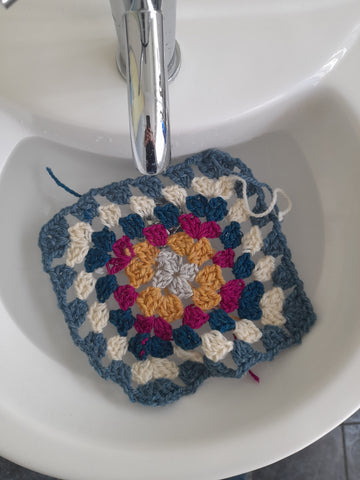
    Step 1: Soak the square 

    You can buy a suitable soak wash for your knitting and crochet but I just use warm water. 

    I haven’t noticed any difference in using a soak. I barely smell the fragrance or feel a difference in the fabric. I could just be doing it wrong but I’ve mostly always used warm water and save the wool wash bottle for hand washing. 

    A granny square soaking in a basin

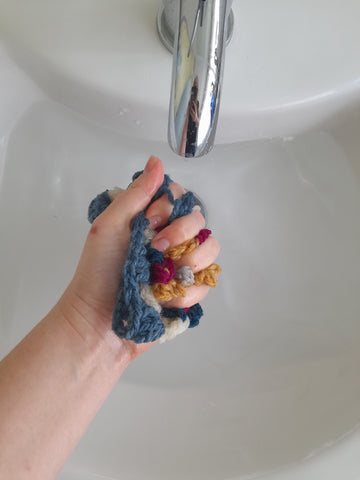
    Step 2: Squeeze the square to get rid of excess water. 

    When pulling your pieces out of the water, don’t ever wring them. Always squeeze. 

    Wet blocking. Squeeze the excess water out of your square

    Step 3: Lay the piece on a towel. 

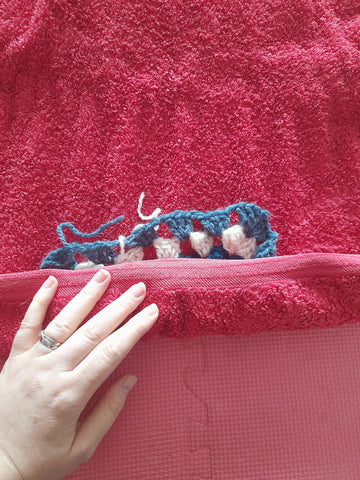
    I’m just using a hand towel because it’s just a granny square. For a jumper, I’d use something bigger. Squeeze as much water out of the square as you can with the towel and finish off with rolling it up. Either squeeze the towel or lean on it. I use my body weight to flatten the towel burrito. 

    Wrap the piece up in a towel to absorb excess moisture

    Step 4: Roll it up

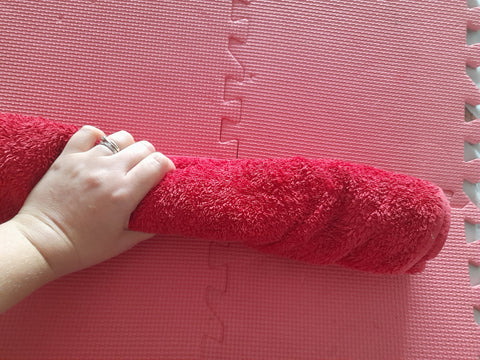
    This just adds a bit more pressure. It’s like wrapping your wet hair up in a towel after having a shower. It takes another layer of moisture off the piece. Do this nice and tight. 

    Roll up your crochet piece like a burrito

    Step 5: Squeeze the burrito. 

    You can do this by squeezing it in your hands or kneel on it. I use my body weight if it is a larger project.  

    yarn burrito

    Step 6: Pin it in place. 

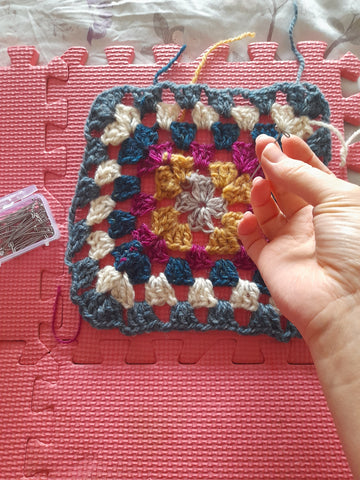
    I use foam play mats because the pin goes in with minimal resistance whole still holding the yarn for me. I also like how portable the mats are. Sometimes I need to keep my things blocking out of reach of tiny hands. I use T pins. They’re a special shape of pin and the T stops the work from slipping off. Pin to your desired dimensions. I started with the corners first. 

    Use t pins to pin out the squares
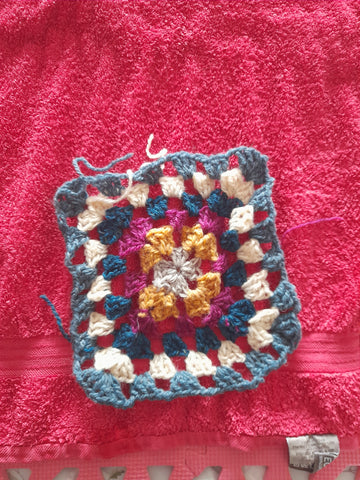
    A pinned out, blocked granny square

    Now what? 

    You just have to wait until it is dry now. Give it 48 hours or so depending on temperature and humidity. While you’re waiting, you can make some more squares! 

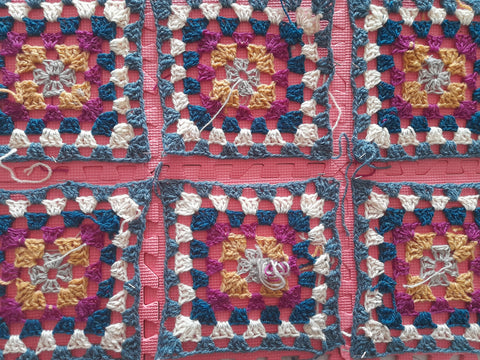
    6 flat granny squares blovked out on a blocking mat

    I hope this was helpful. Do you like to use any other blocking methods? Let me know in the comments! 

    Hanna 

    cards
    Powered by paypal

    This crochet tutorial on blocking squares is absolutely free. Please consider leaving a tip or sharing this post if you found it helpful. Happy hooking!

  • Free Beginner Granny Square Pattern For Beginners

    Free Beginner Granny Square Pattern For Beginners

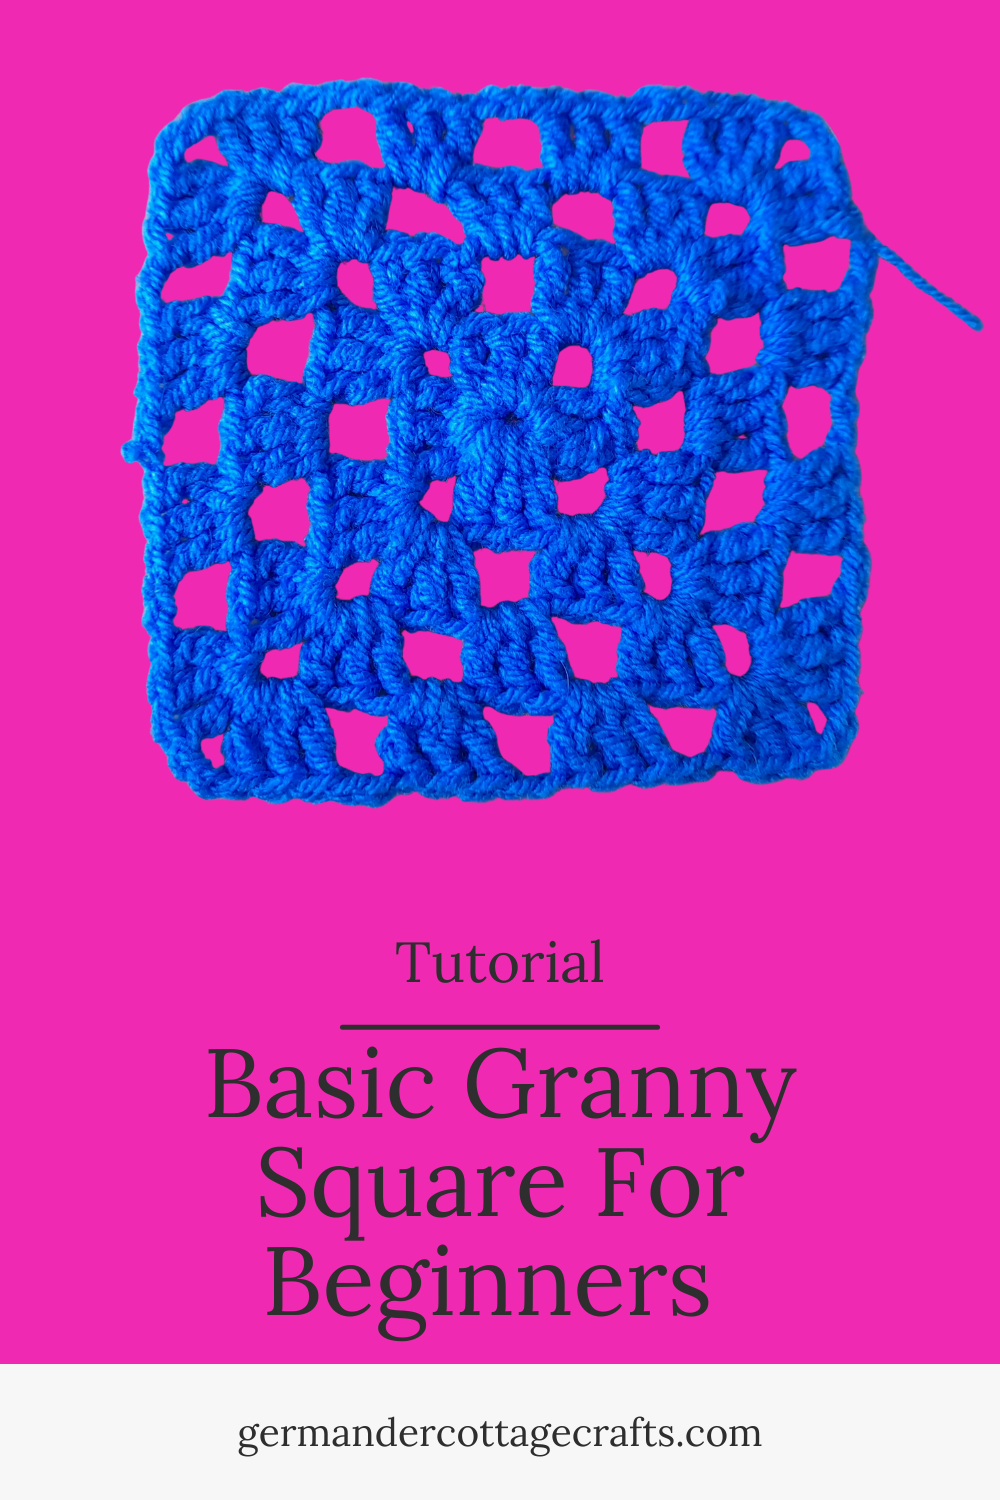
    Below you’ll find my free granny square crochet pattern just for beginners. If you’ve been wanting to make your own crochet squares for a while but don’t know where to start, this is a great place! I wrote this pattern to accompany a youtube tutorial which you can find below. If you’d prefer the written instructions, it’s all here.

    If you’d rather have the ad-free version, you can download the PDF of this pattern here.

    Learn to make a granny square with this easy, step by step tutorial. Before you know it, you’ll be whipping up granny squares everywhere, any time!

    Basic granny square pattern 

    These are instructions for a basic beginner granny square. There is a free tutorial attached to this pattern here. https://youtu.be/u0FFaFjJj7M 

    Glossary 

    ChChain. Yarn over and pull through the 1 loop on the hook. 
    Ch spThe space of gap that has been created by stitches. 
    DcDouble crochet stitch: Yarn over, insert hook, yarn over and pull through, yarn over and pull through 2 loops on hook. Yarn over and pull through 2 loops on hook. 
    SlSlip stitch. Insert hook into chain or chain space, yarn over and pull through.

    To work the granny square, we start with a chain, join it to make a ring and work our first dc cluster into the centre of that ring. After that, we chain and work dcs into every chain space. Once you get the hang of it, the granny square is versatile and can come in any combination of stitches!

    Materials required to make a granny square:

    • 4mm (US 6) crochet hook. 
    • A small amount of DK weight yarn. 30g/1oz
    • Scissors 

    Instructions: 

    Start by making a slipknot. 

    Round 1. 

    1. Ch 4. Sl in 4th ch from hook.
    2. Ch 2 and dc 2 times into the centre of the ring.  1st cluster formed. 
    3. Chain 2 and dc 3 times into centre of the ring. (6 dcs in total.)
    4. Repeat last step 2 more times. (12 dcs in total)
    5. Sl st into top of first dc chain to join the round. 

    Round 2: 

    1. Sl across top of first 3 dcs to get to the 1st corner ch sp.  Ch 3 and dc twice into ch sp. (3 dcs in total) ch 1 and dc 3 times into same ch sp. First corner done. 
    2. Chain 2 and dc 3 times into next ch sp. Ch 1 and make 3 more dcs into same ch sp. 
    3. Repeat step 2 twice more. 
    4. Sl with top of 1st dc to close the round. 

    Round 3

    1. Sl across top of first 3 dcs to get to the 1st corner ch sp.  Ch 3 and dc twice into ch sp. (3 dcs in total) ch 1 and dc 3 times into same ch sp. 
    2. Ch 2 and work 3 dcs into next ch sp to corner ch sp
    3. Ch 2, 3dc in next ch sp, ch 1 and make 3 more dcs into same ch sp.  
    4. Repeat step 1 and 2 to end.  
    5. Sl with top of 1st dc to close the round.

    Round 4 and 5: 

    Work instructions for round 3, 2 more times until you have 5 completed rounds in total. There will be more chain spaces to work between corners as the square gets bigger. 

    To finish your square, just sl and fasten off. 

    This is a free pattern for beginners. If you loved this, please consider leaving a tip or sharing on social media!

    cards
    Powered by paypal
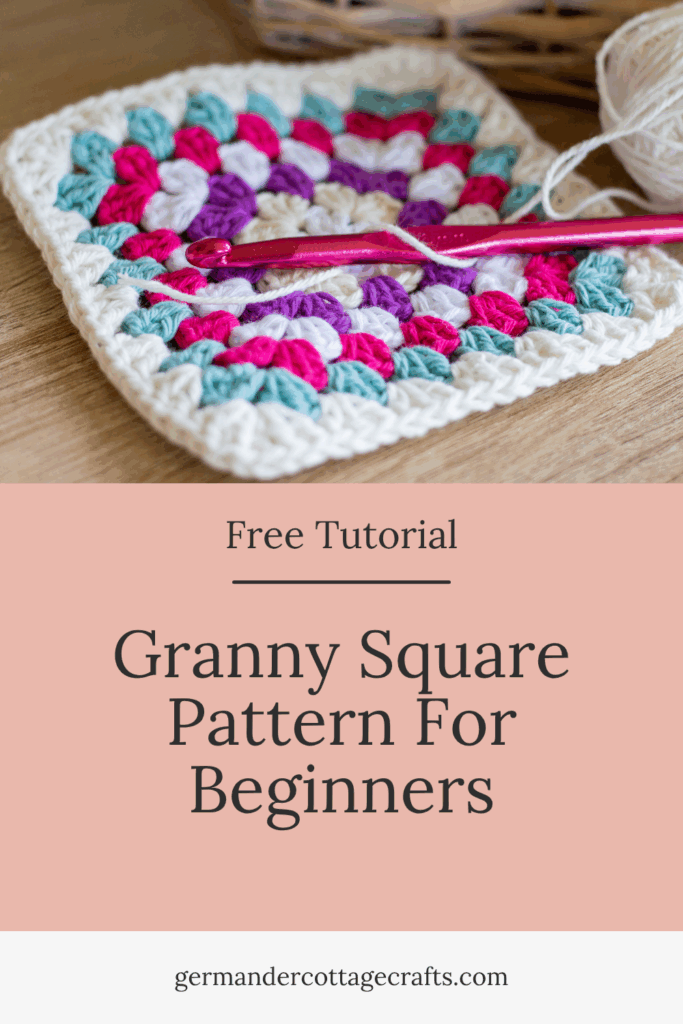
    Free Granny Square Crochet Pattern For Beginners. Image shows a granny square with a crochet hook resting on it.

  • Free crochet shower puff pattern.

    Free crochet shower puff pattern.

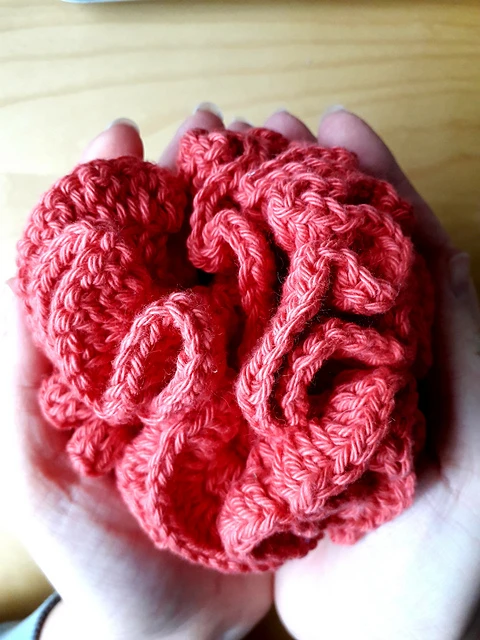
    Below is my free crochet shower puff pattern which is suitable for beginners as well as crocheters who are looking for a quick, satisfying stash-busting project! This pattern uses a small amount of cotton yarn and is lots of fun.

    I first came up with the idea of a crochet shower puff when I was looking at crochet for the home. The added bonus of this project is that it is eco friendly if you use a sustainable yarn.

    Plastic-free crochet shower puff pattern

    Crochet yourself a washable cotton shower puff or give to friends and family as a last minute gift. This puff uses less than 100g of DK weight cotton- a handy stashbuster! 

    Instructions are written in US terms throughout. 

    The puff is made by establishing the ring of the core first, which won’t be seen once the puff is complete. You will then create the handle, which involves making 40 chains and connecting it to the centre ring with a slip stitch. The piece is then worked in the round using single crochet and double crochet. 

    Instructions are for a crochet bath puff. Please note that whether you choose the recommended yarn or not, for best result, please use cotton dk yarn, as this can be washed at 60 degrees to maintain hygiene. 

    To celebrate your move to plastic free bathing, I have teamed up with pretty-savage.co.uk to offer an exclusive discount code. Just use code PUFF10 to claim 10% off your order of plastic free soaps, soaks and much more. 

    Materials needed: 

    • 60g of cotton DK yarn. I used 1 ball of Cygnet 100% cotton DK (200m/ per 100g ball) in shade Pepper. 
    • 1 3.75mm crochet hook. 
    • 1 darning needle. 

    Instructions: 

    Core: 

    Ch 5. Sl st into 1st ch to close. 

    Handle: 

    Ch 40. Sl into ring to close loop.

    Body: 

    Round 1: Ch 1, 25sc into ring. Sl into 1st dc to join the round. 

    Round 2-4: Ch 2, 3dc in every dc around. Join with a sl st in first dc to close round. 

    Fasten off and weave in ends. 

    Glossary 

    Ch: Chain 

    Dc: Double crochet 

    Sc: Single crochet

    Sl: Slip stitch. 

    Thank you for visiting Germander Cottage Crafts. This pattern is free, but if you would like to purchase the PDF or leave a gratuity the buttons are below!

    cards
    Powered by paypal
  • How to get started with crochet: A beginner’s guide.

    Here’s some beginner crochet patterns and guides to help you get started with crochet.

    Where do you start when you want to learn to crochet but you’re a beginner? Here!

    Something that comes up often is the question “where do I start with crochet?” and that depends on you, the individual. Some beginners are as bold as brass and practically say “hit me with it” , determined to conquer any challenge that arises, whereas others want small steps, simplicity and progress that they can record slowly and observantly. 

    What type of crochet beginner are you? 

    It’s easy enough to work out based on what your appetite is and what you are working towards. If you can scroll through a few Youtube videos and think “I’ve got the hang of this” then good for you! The amount of content out there aimed at crochet beginners is pretty extreme. It can be very hard to navigate across really busy waters of the internet. Some of us can navigate without any particular help, while others need someone to steer the ship at first. 

    If you want slow and steady, or find that you switch off easily, maybe written instructions are better suited for you. You can read them quietly, in your own time without the distraction of adverts, different accents or unfamiliar terms. You can then look at videos to support what you have already learned. 

    I’m going to show you a range of beginner friendly patterns and guides that will help you to start your crochet journey. 

    Starting small

    Learning to crochet is a journey that will take weeks, months and years to get the hang of. Please don’t let that put you off. Here are some small but satisfying projects for a crochet beginner. 

    Crochet rainbow keyring kit. 

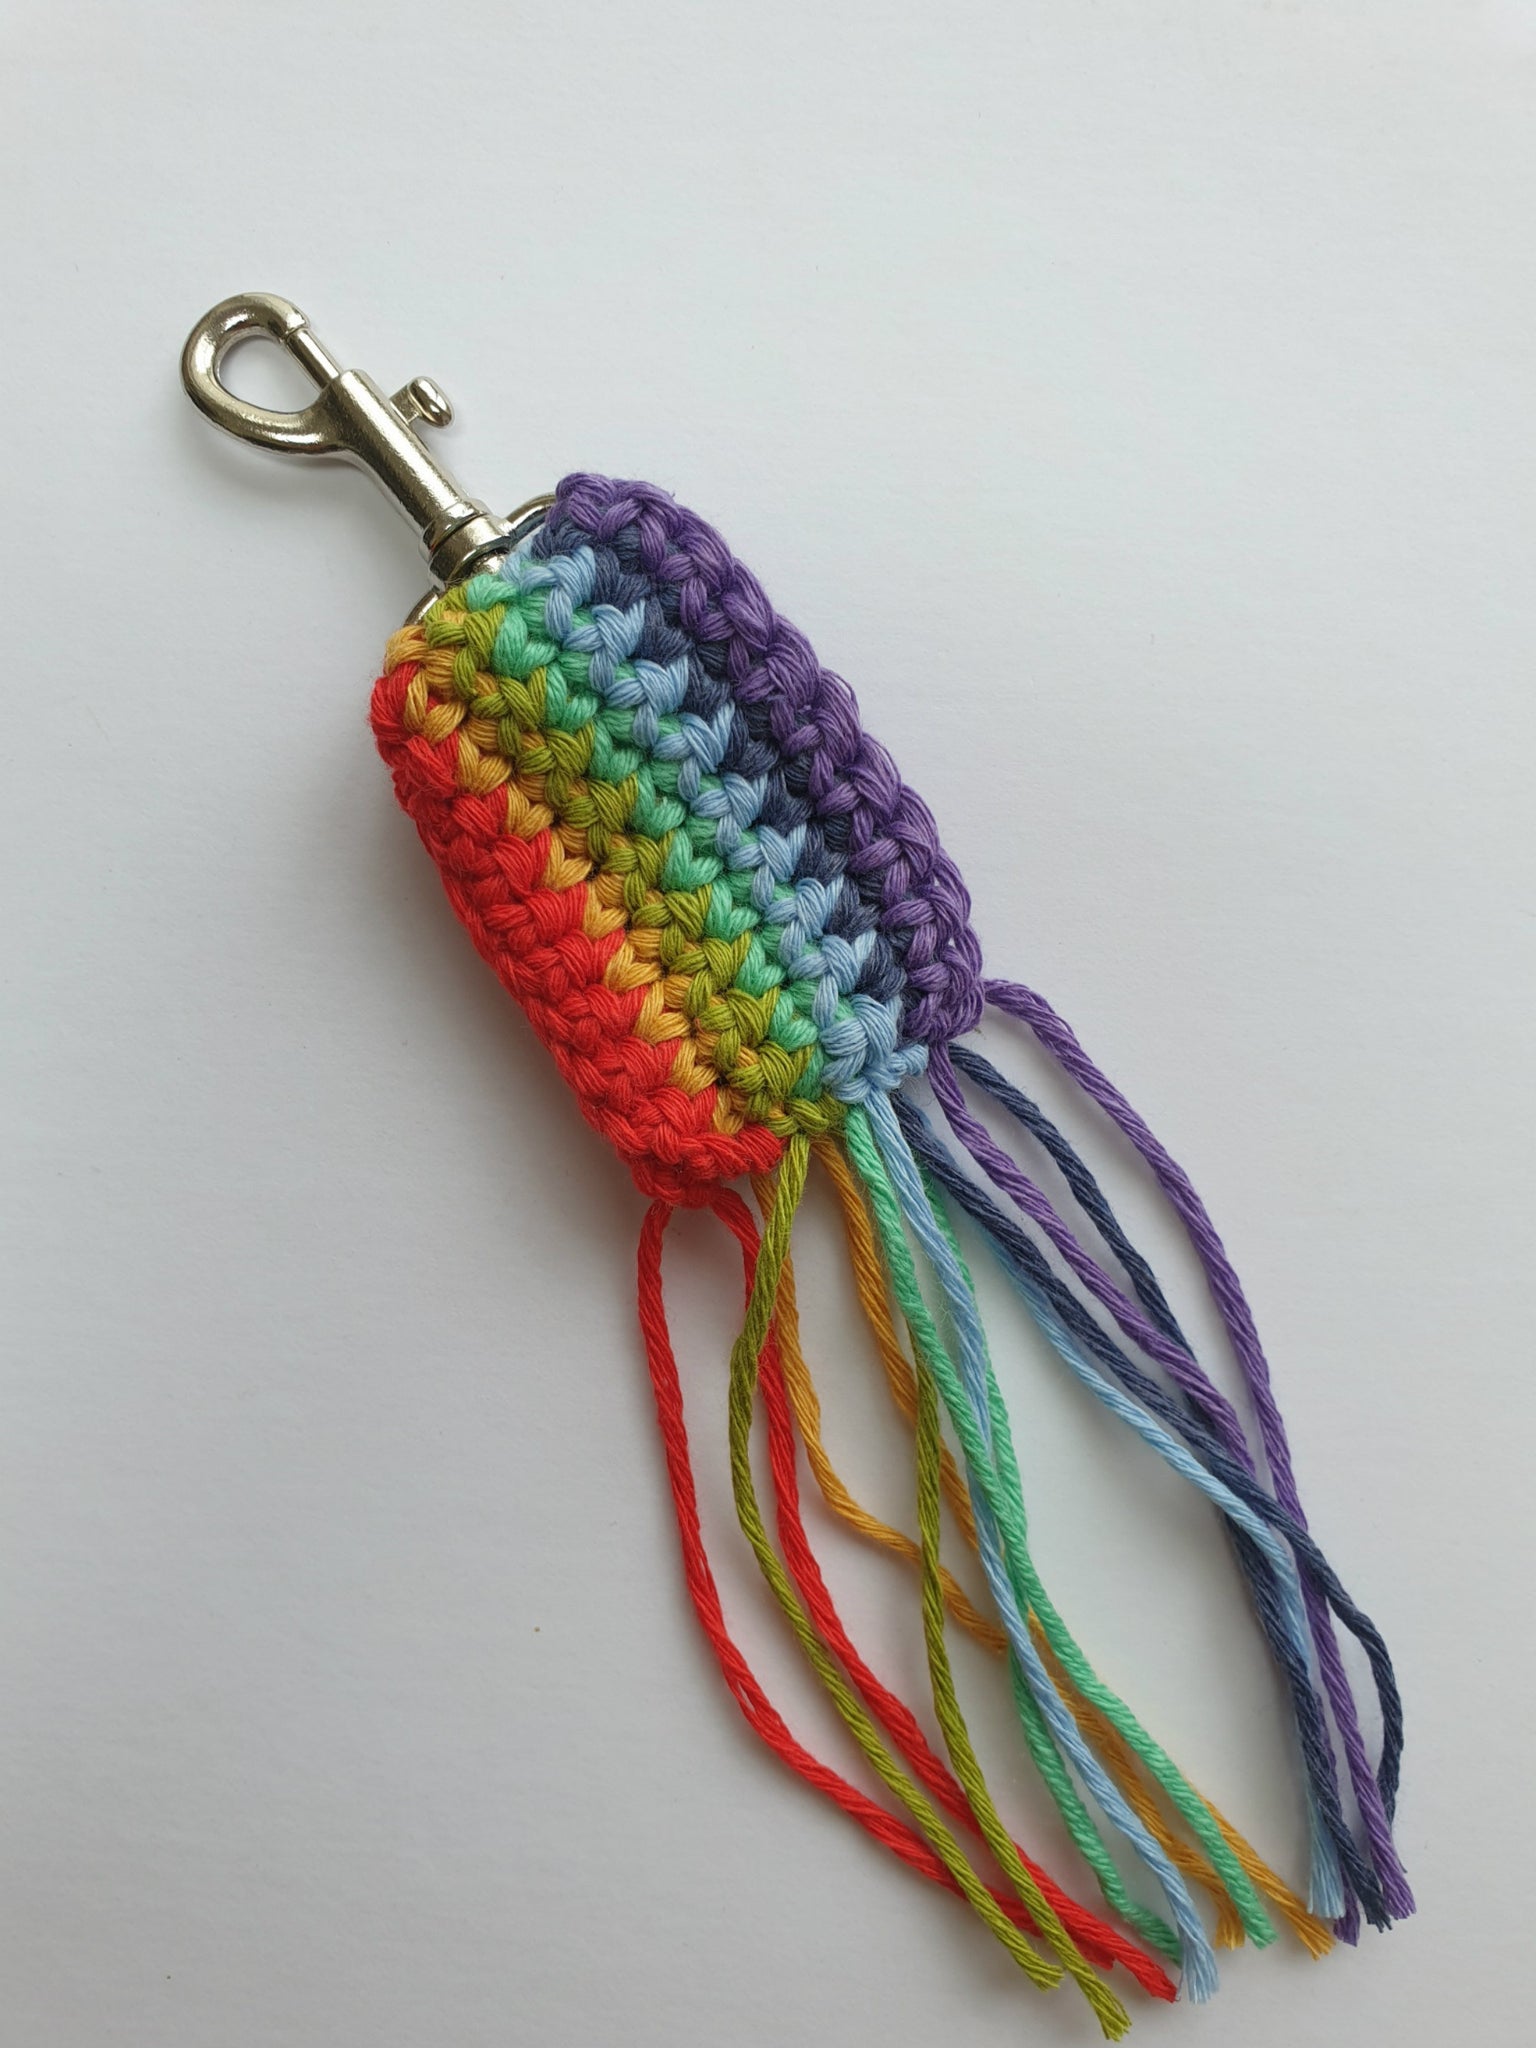
    In this kit by One Creative Cat, you get the yarn and the pattern together. This takes the headache out of knowing which yarn to choose. You will need to provide your own 4mm crochet hook and a pair of scissors but other than that, this is a satisfying beginner project for you to try! You can find more about the kit here. 

    Rainbow keyring crochet kit by One Creative Cat. Easy pattern

    Crochet pot holder beginner pattern

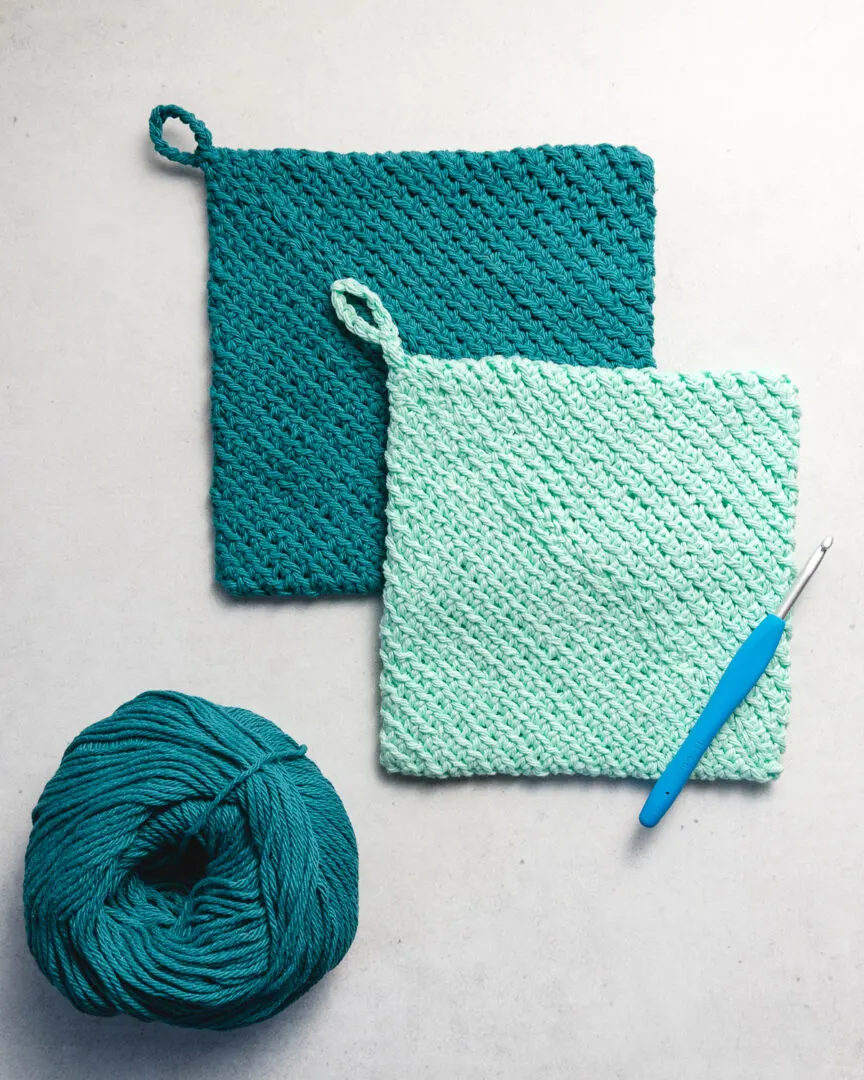
    Here’s a pattern that allows you to practice one stitch and make a square shape. It’s a free pattern from Sarah Maker and is really simple, functional and great to practice with. Use some cotton DK yarn as acrylic is not heat proof! Find the pattern here.  As you’ll see from the pattern it recommends a cotton yarn. I recommend Cygnet 100% cotton DK which you can find here

    Pattern for a double thickness crochet pot holder suitable for crochet beginners

    The above patterns are perfect for beginners as they have step by step instructions and require only one basic crochet stitch. 

    What are the basic crochet stitches? 

    If you have trouble remembering the basic crochet stitches or don’t even know where to start, here’s my guide on the 6 basic stitches to get you started. It’s a downloadable PDF that I wrote to compliment my Youtube tutorials. You can subscribe to the beginners playlist here. 

    Here’s an example of one of the tutorials. This is the single crochet stitch and is featured in most beginner patterns: 

    Ready for something bigger? Here are some patterns for the more adventurous beginner. 

    Below you’ll find some crochet patterns that are great for refreshers as well as beginners. They also have supporting video tutorials provided within the pattern. 

    Basic granny square beginner pattern 

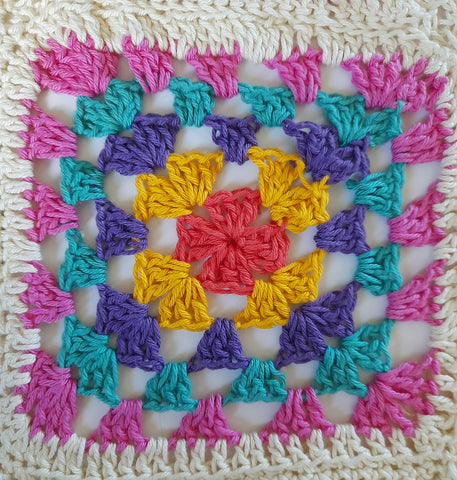
    Try this pattern if you want to learn how to read crochet patterns. This is a skill worth investing your time in as it will help you to understand a range of instructions. As you come across abbreviations you will also be able to tackle more challenging patterns! Click here to see the beginner granny square pattern. Every new crocheter should at least try the granny square! 

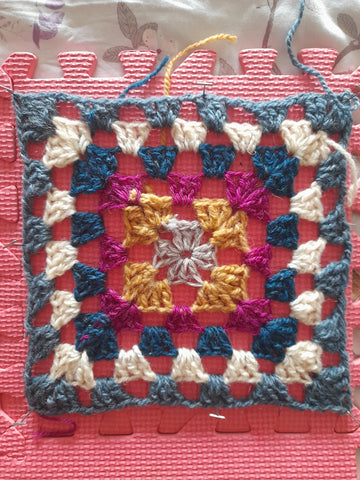
    Close up of a multi colour granny square

    Plastic free shower puff crochet pattern. 

    This is a great beginner pattern for those who want to learn to crochet in the round. It’s very similar to how you would crochet a granny square. You can either use the free pattern with ads, or there’s an option to download it from Ravelry too!

    Free pattern. Crochet shower puff made with cotton DK yarn.

    Beginner friendly yarns 

    I think as a beginner you can’t go wrong with DK yarn or Worsted weight/Aran yarn and a 4 or 5mm hook. This is what you’ll find at most craft classes or crochet workshops. All of the above patterns ask for yarn and hooks within this range. 

    Remember about fibre types and purposes though and please, please, please don’t make oven gloves, pot holders or tea towels out of acrylic as this is not heat proof. It will melt into the user’s hands. Cotton is perfect for functional items such as the aforementioned but also for accessories such as bags and wash cloths. Save wool and acrylic for cowls, scarves, garments and toys. 

    cards
    Powered by paypal