Blog

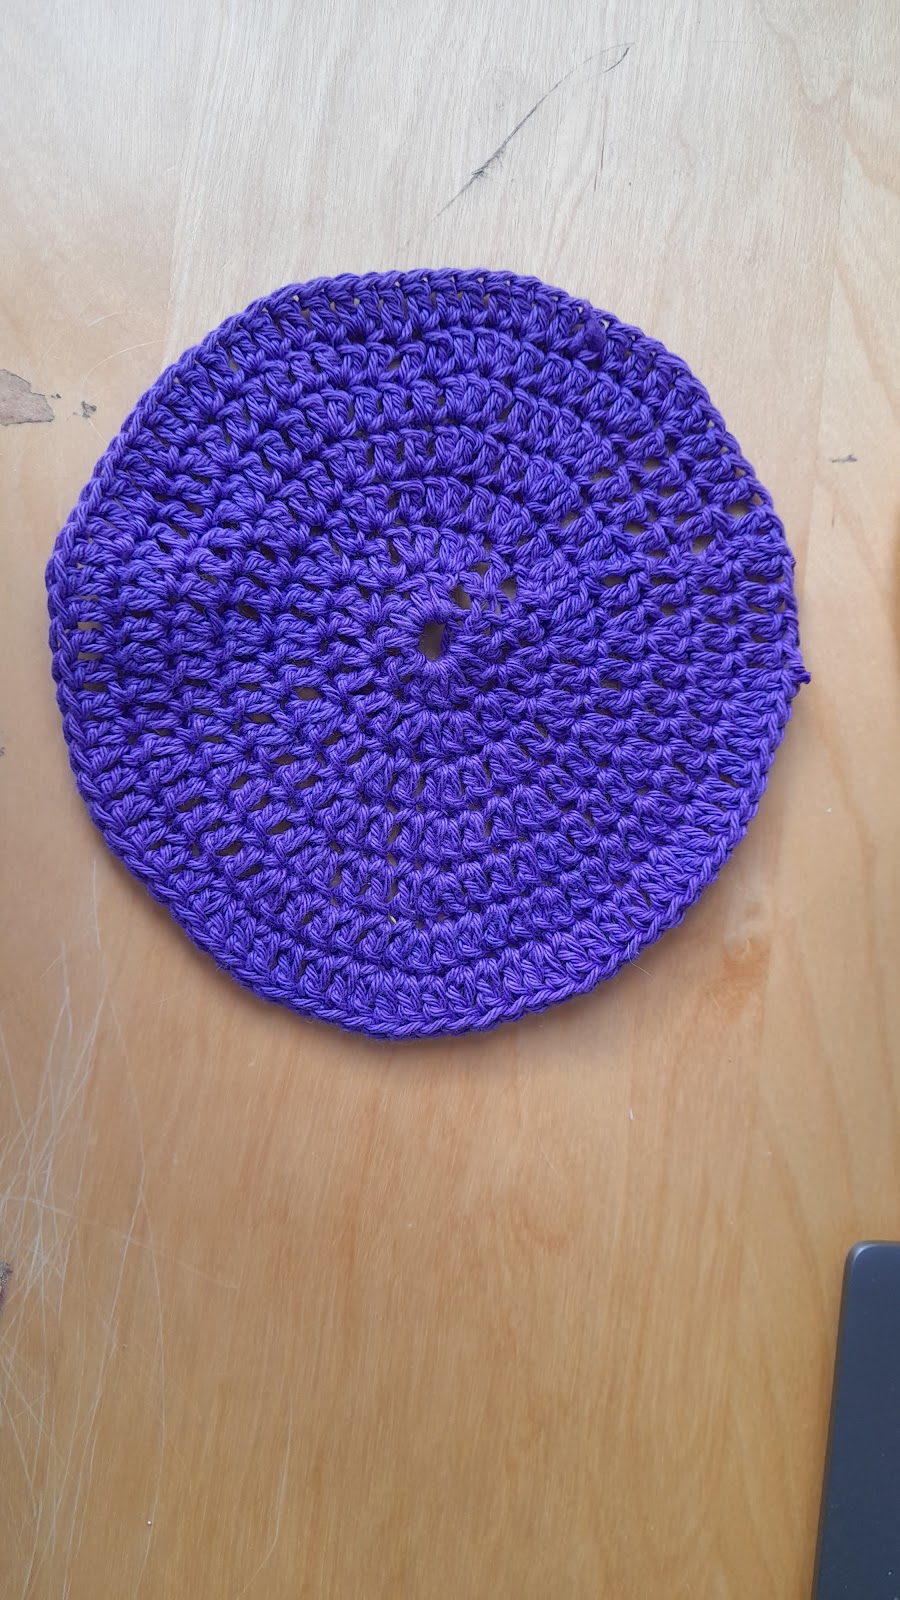
  • How to crochet a circle. Crochet circle pattern for beginners. Crochet a flat circle that doesn’t curl or frill.

    How to crochet a circle. Crochet circle pattern for beginners. Crochet a flat circle that doesn’t curl or frill.

    This is a free pattern for a crochet circle. How to crochet a flat circle 

    Creating your first crochet circle is really tough, especially when you don’t know how to make it bigger or how to make it lie flat. With this pattern I can explain how to:

    1. Start the circle
    2. Increase the circle
    3. Make it lie flat

    Materials required: 

    • 50g/1.75oz of cotton DK yarn such as Cygnet cotton DK (100% cotton, 200m/219 yd per 100g/3.5oz ball) Any DK yarn will do here.
    • 3.75mm/F-5 crochet hook.
    • Scissors 
    • Darning needle

    Terms are written in US crochet terms throughout. Not sure what they are? Here’s a handy blog post explaining US and UK crochet terms.

    It’s so handy to know how to make a crochet circle. They’re not just great for granny square designs but you can also make circles big enough to be place mats, bags or cushion covers. Have fun learning how to make a crochet circle that stays flat!

    When you’re done with the tutorial, I’ve included some fun crochet kits that you can try. They will not only help you to practice the crochet circle, but they will help you learn how to make other useful crochet shapes for home decor and toys!

    Now for the tutorial with step by step photos. Here’s how I make a circle in crochet.

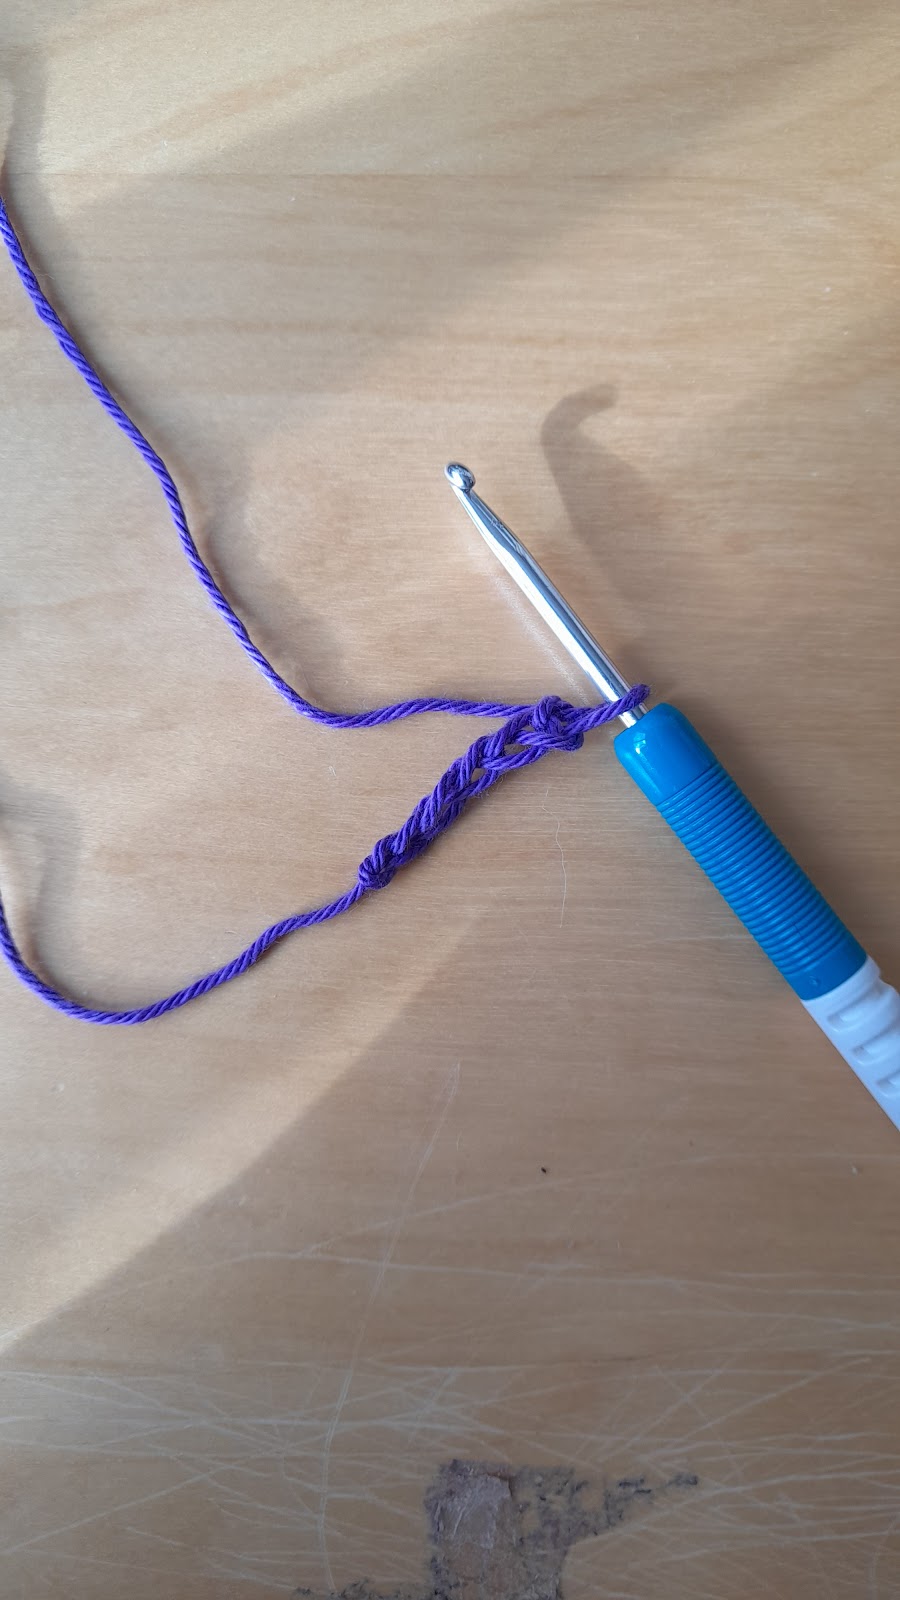
    Step 1: Make a slipknot and make a chain of 6 sts. 

    A crochet hook with a chain of 6 chains.

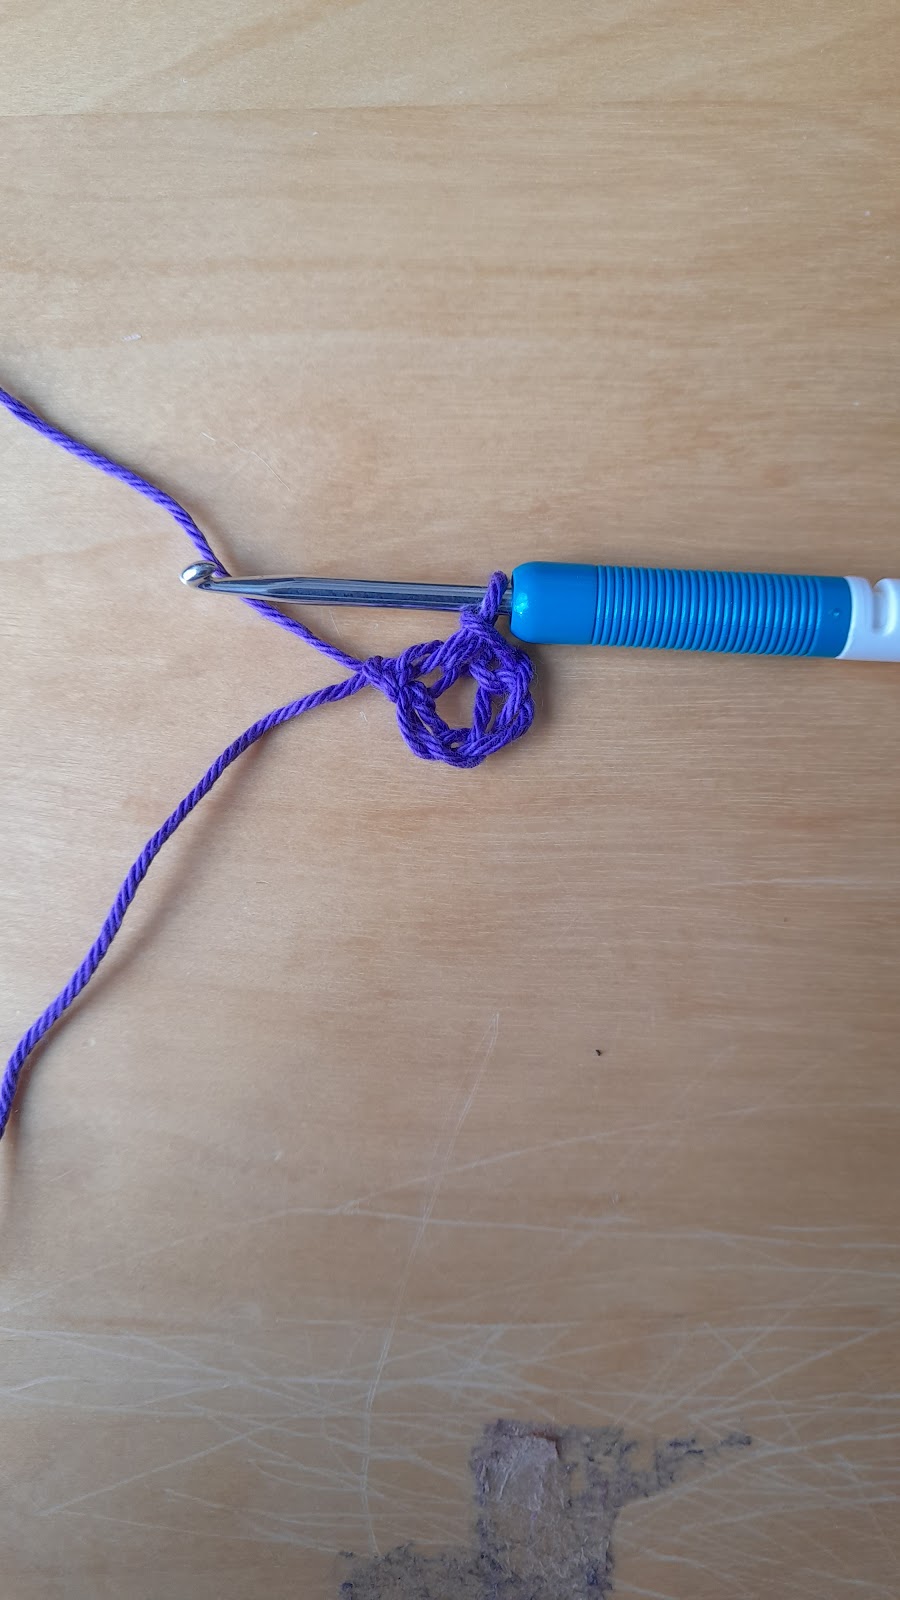
    Step 2: Slip stitch with the 1st chain (not the slipknot) to create a ring. 

    Step 4: Chain 3 (counts as 1st double crochet stitch) 

    Step 5: Make another double crochet into the centre of the ring. 

    Step 6: Make 10 more double crochet stitches into the centre of the ring. (12 sts in total).

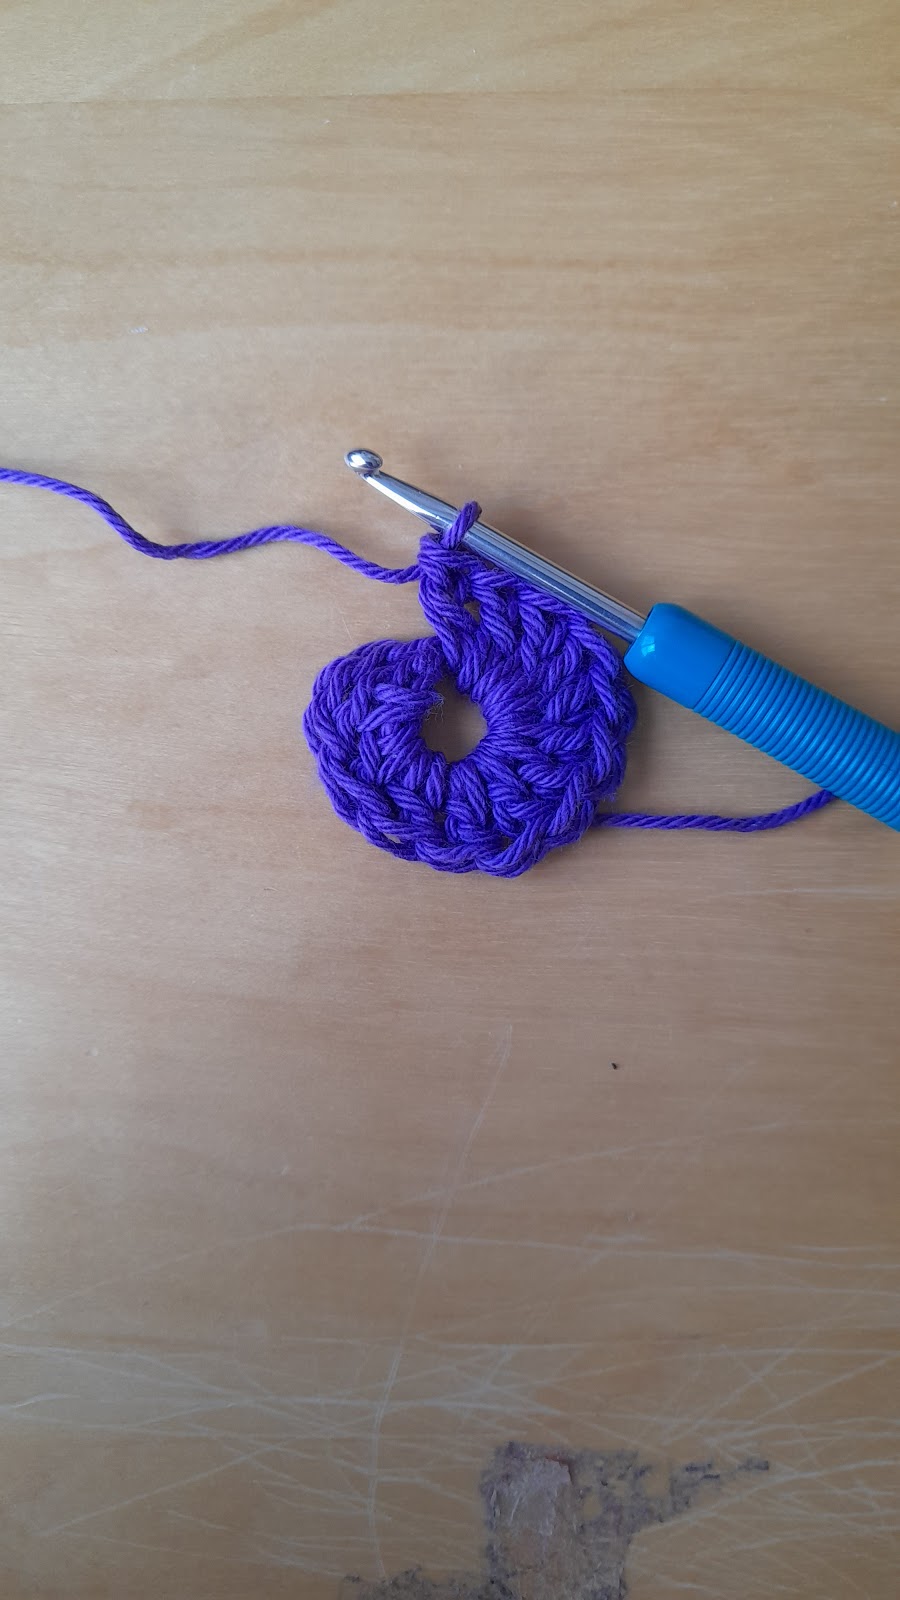
    Step 7: Slip stitch to join the top of the chain 3 to the last dc. First round complete. (12 sts)

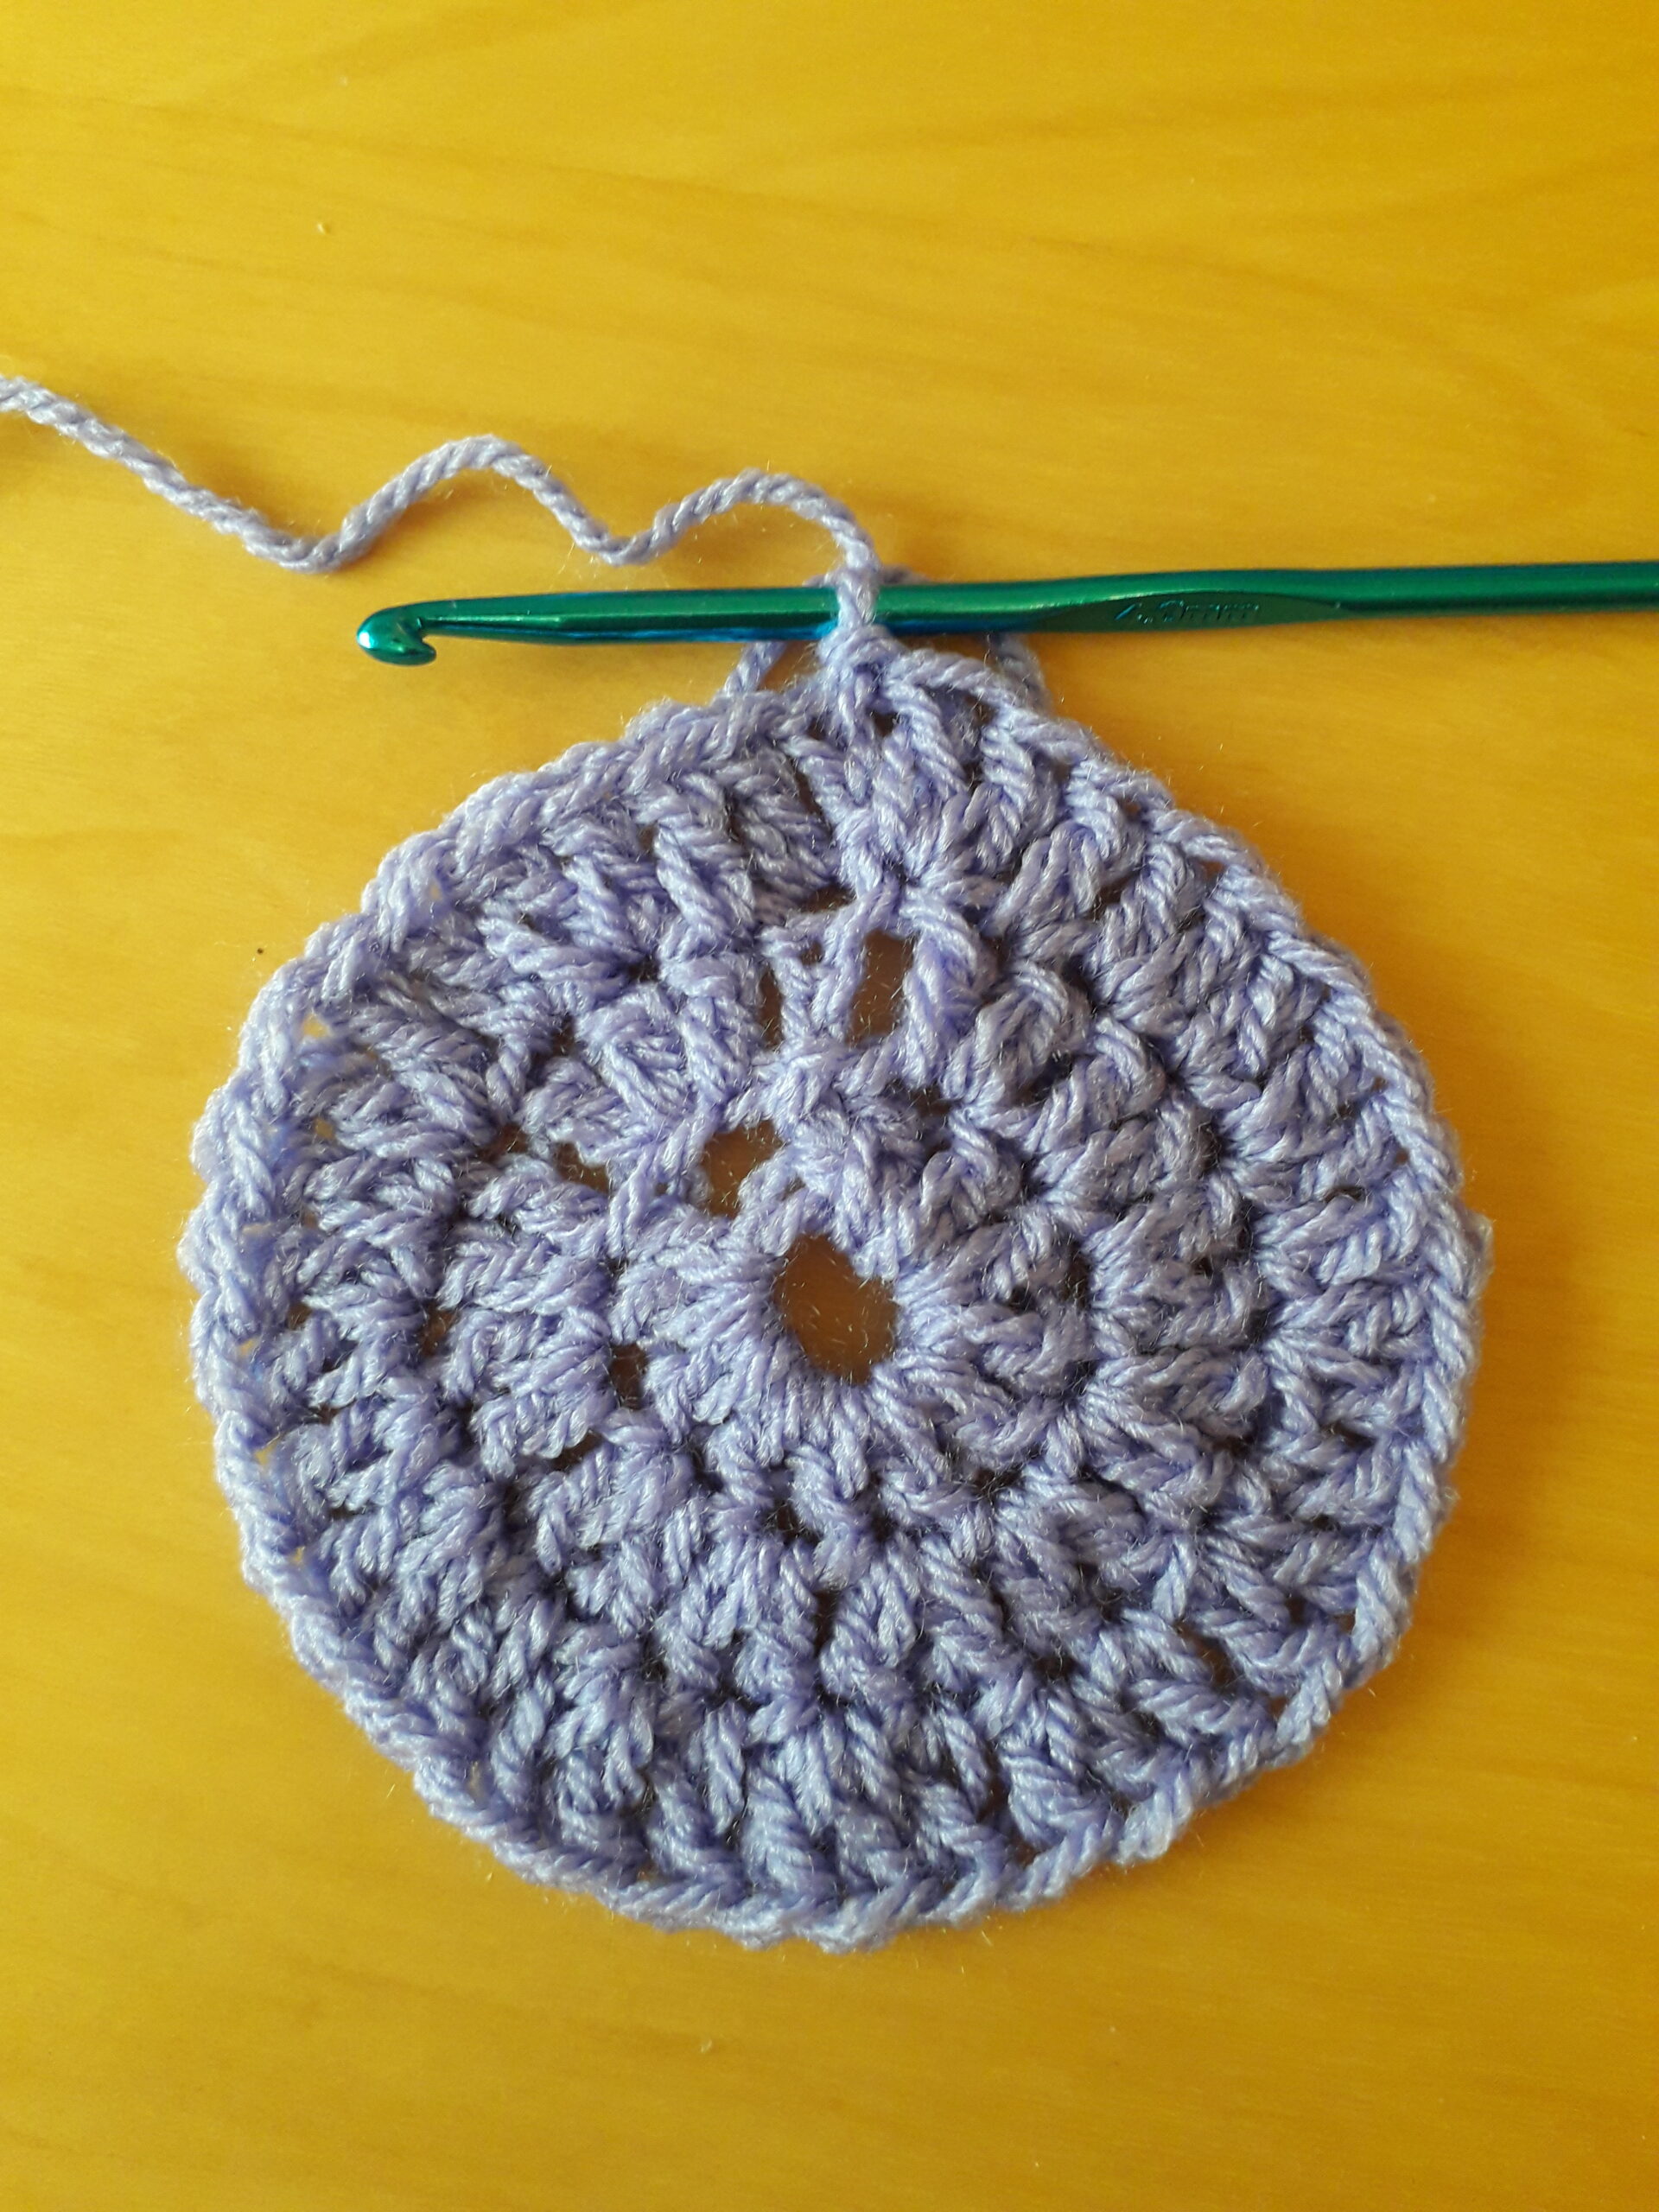
    A crochet circle in the first round.

    Next round: 

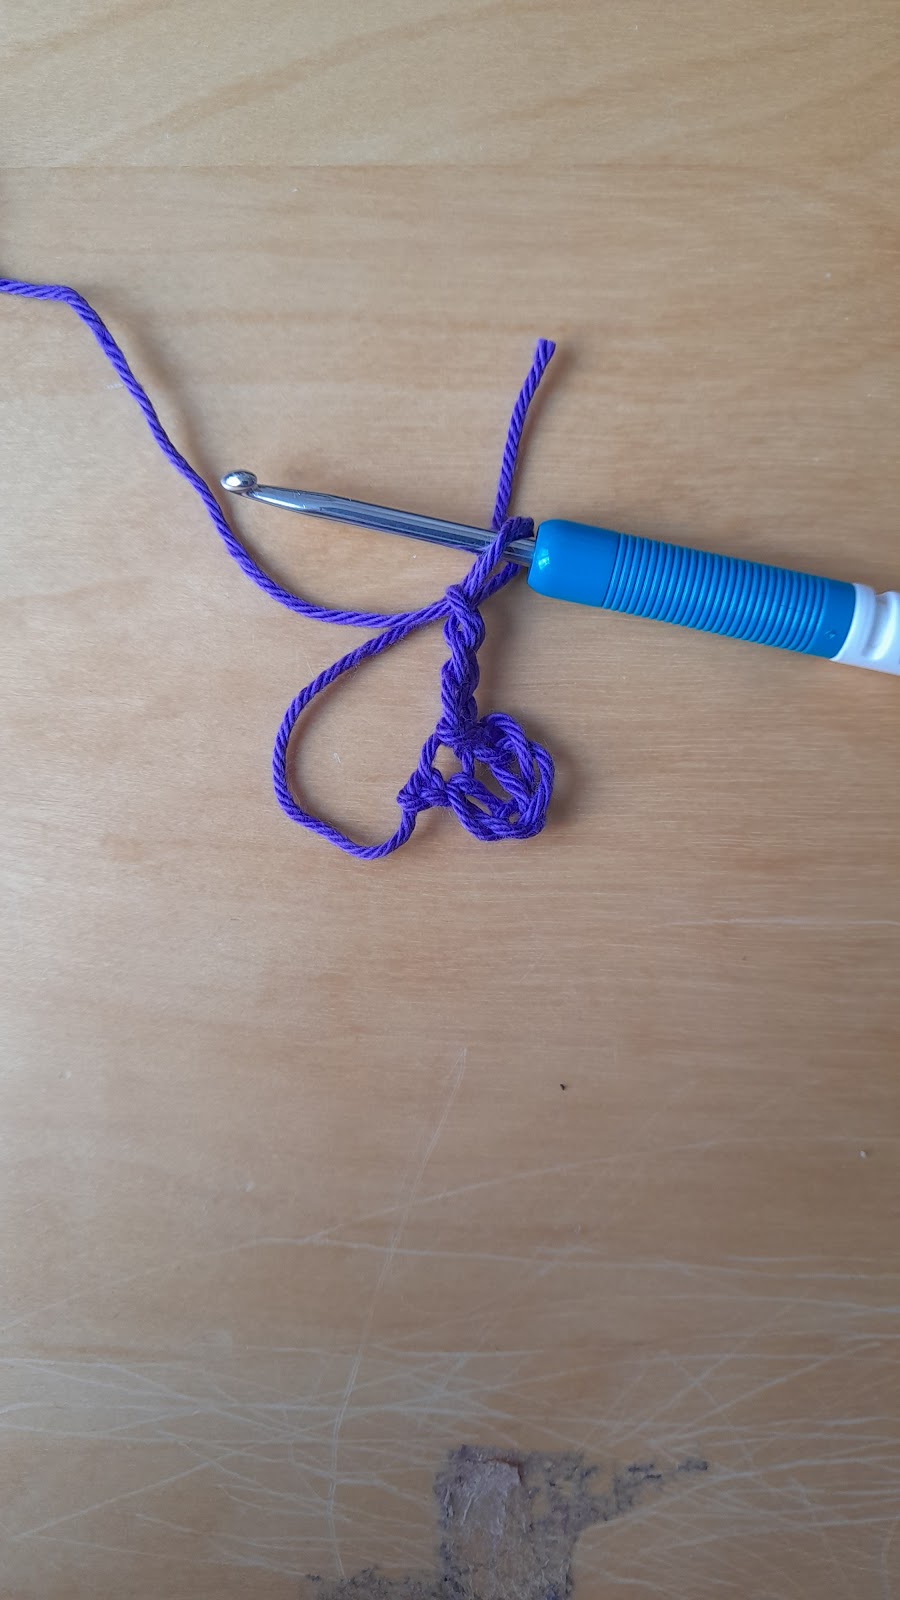
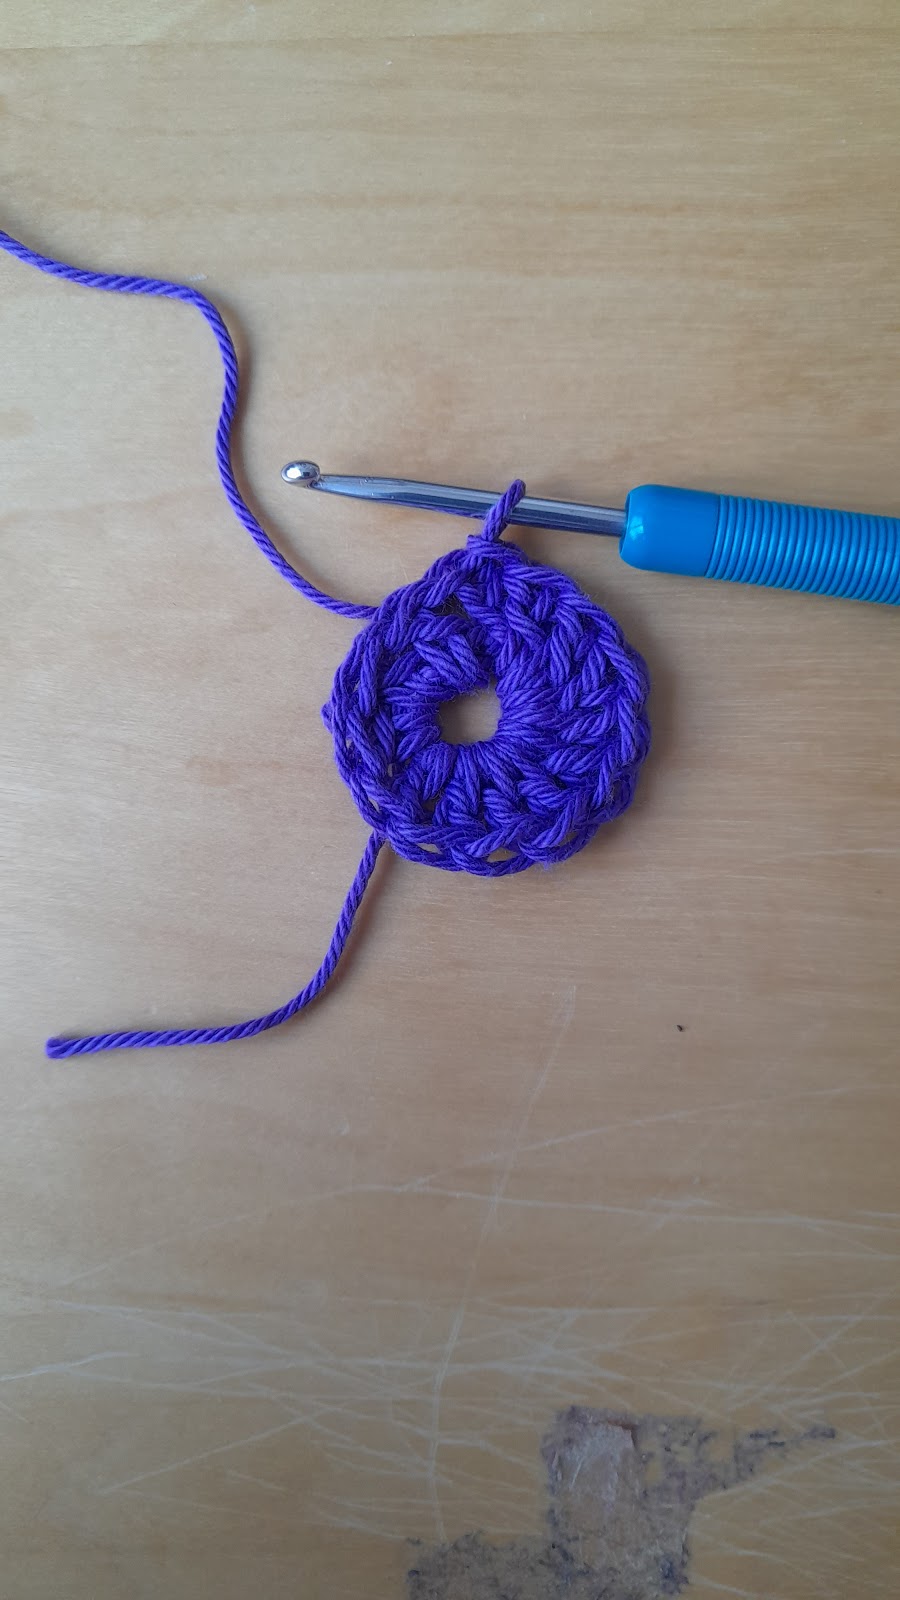
    A ch3 after the first round of crochet. Crochet a flat circle. This is a demonstration photo.

    Step 1: Chain 3 (counts as 1st double crochet) 

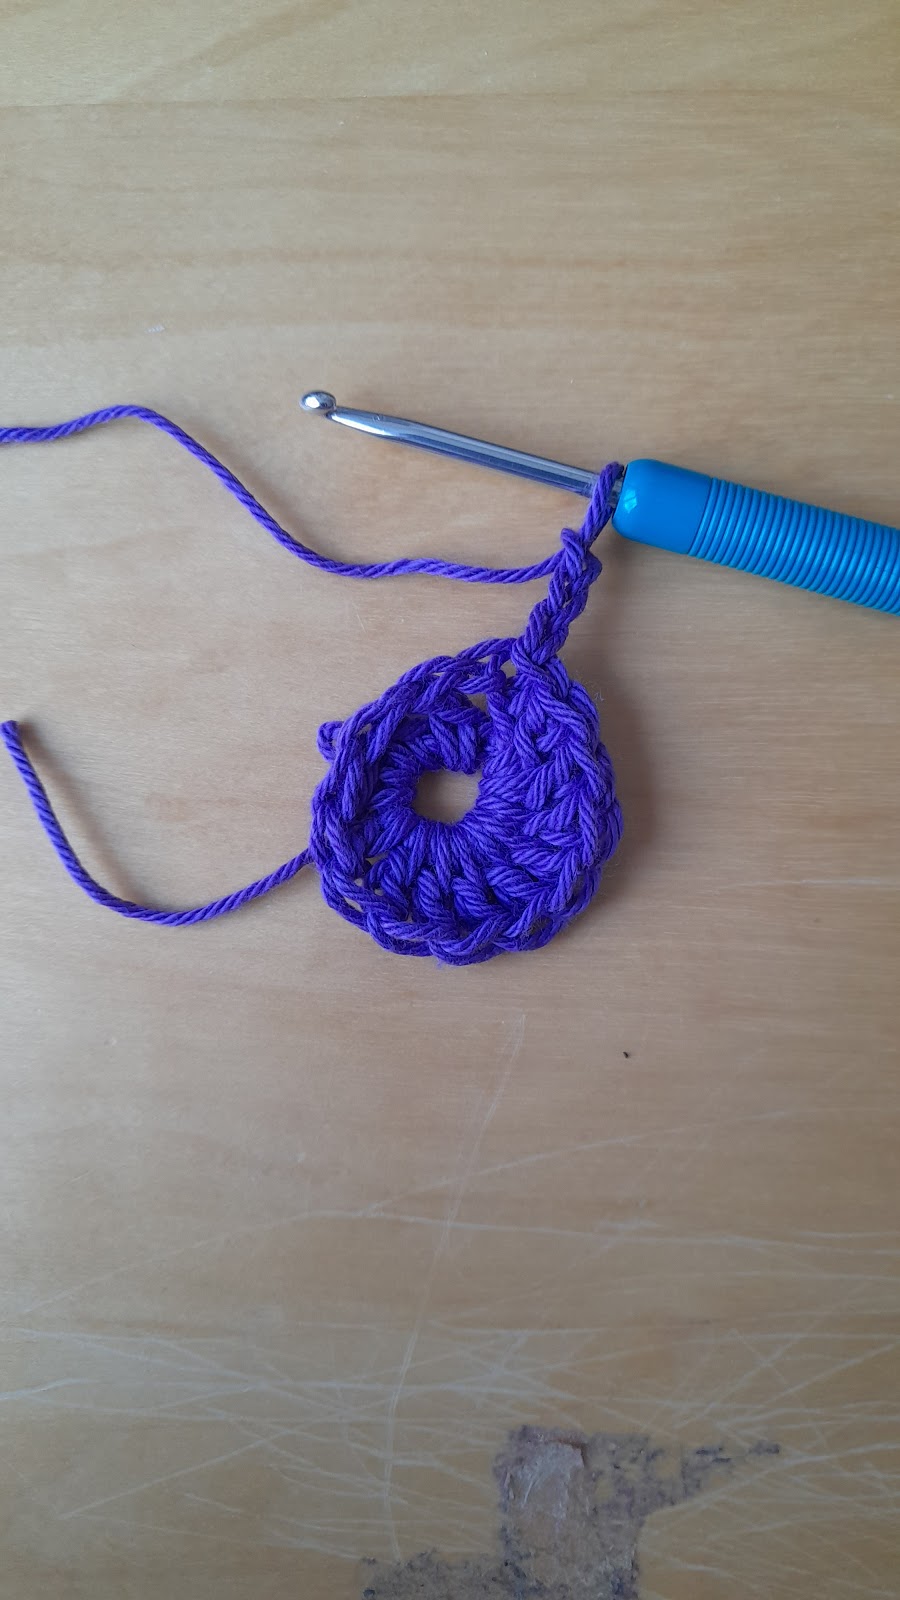
    Step 2: Make a double crochet stitch into the base of the chain 3. (1st increase done)

    The second stitch of the second crochet round when making a flat circle.

    Step 3: Make 2 double crochet stitches into the next stitch.

    Four stitches made for the second round of the crochet circle. Crochet circle tutorial in the round.

    Step 4: Make 2 double crochet stitches in every stitch around. (24 sts) 

    Step 5: Slip stitch with first chain 3 to close the round. 

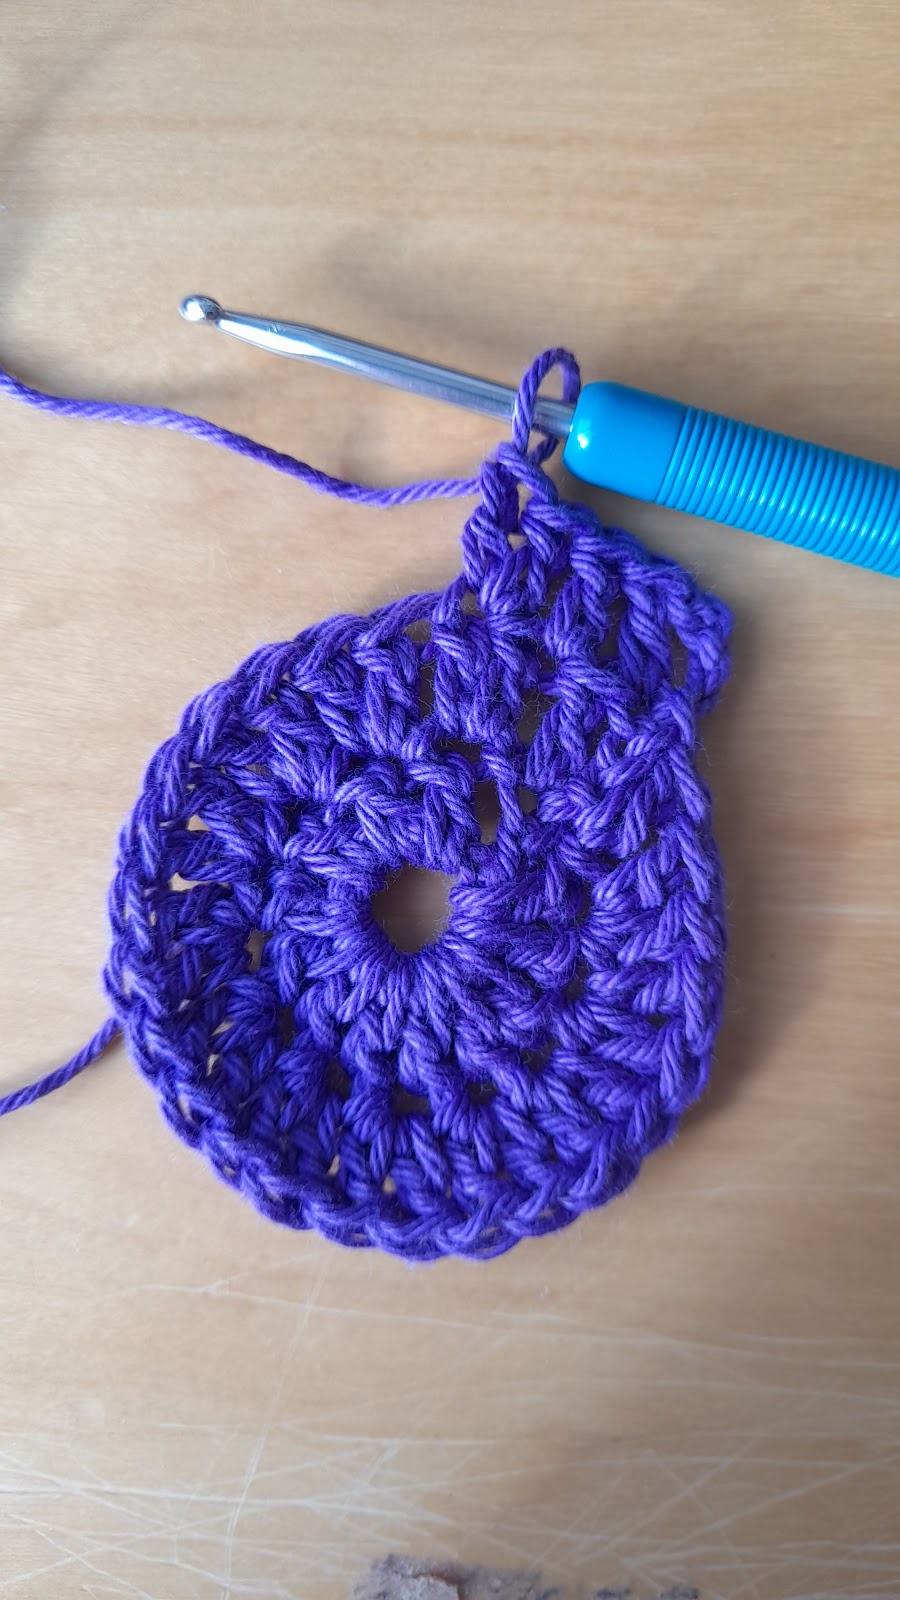
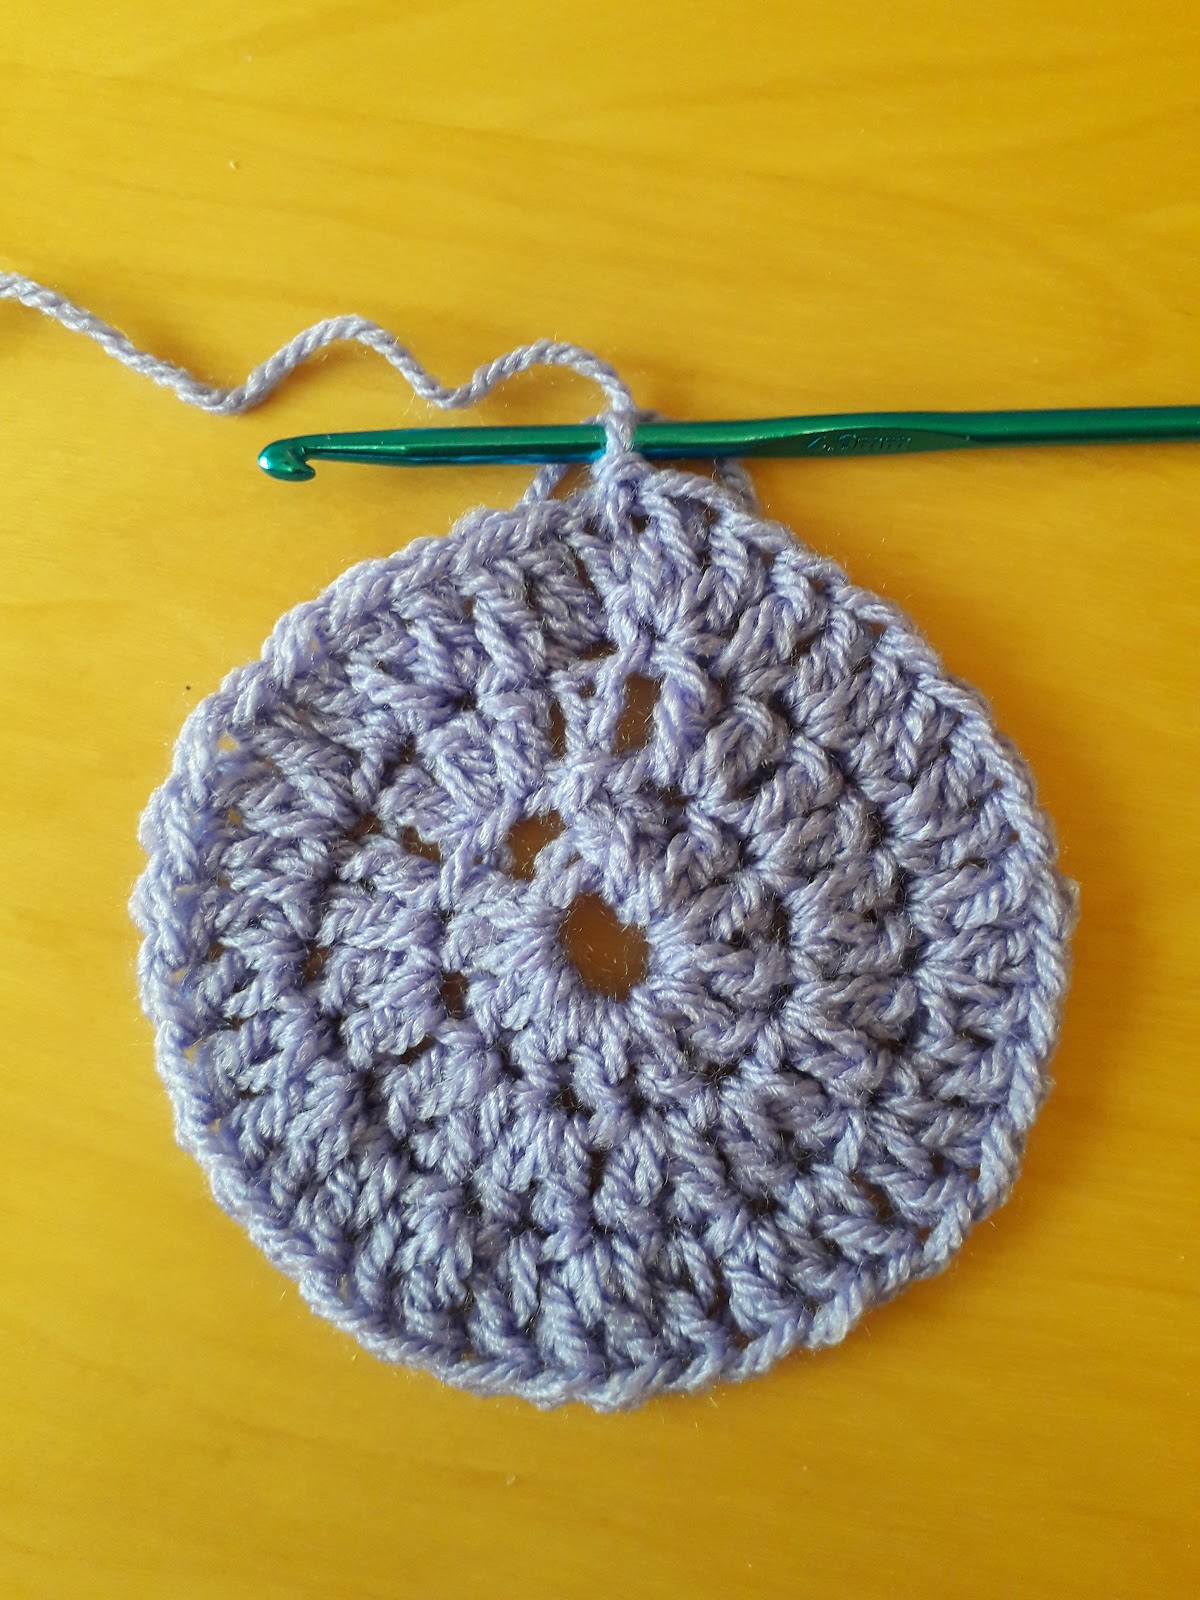
    Two rounds done of a flat crochet circle. Crochet tutorial for beginners.

    Next round and all subsequent rounds: 

    Every round needs to increase by 12 stitches in order to retain shape and lie flat. 

    Round 3: 

    Start the round in the same way as the previous round but this time, make an increase every other stitch not every stitch. (36 sts)

    Round 4: Start the round in the same way as the previous round but this time, make an increase every 3rd stitch. That means there’s an increase in every 4th stitch. 

    Round 5 and all other rounds: Increase every 4th, 5th and 6th stitch per round. Make sure that the amount of stitches per round has increased by no more or less than 12 stitches

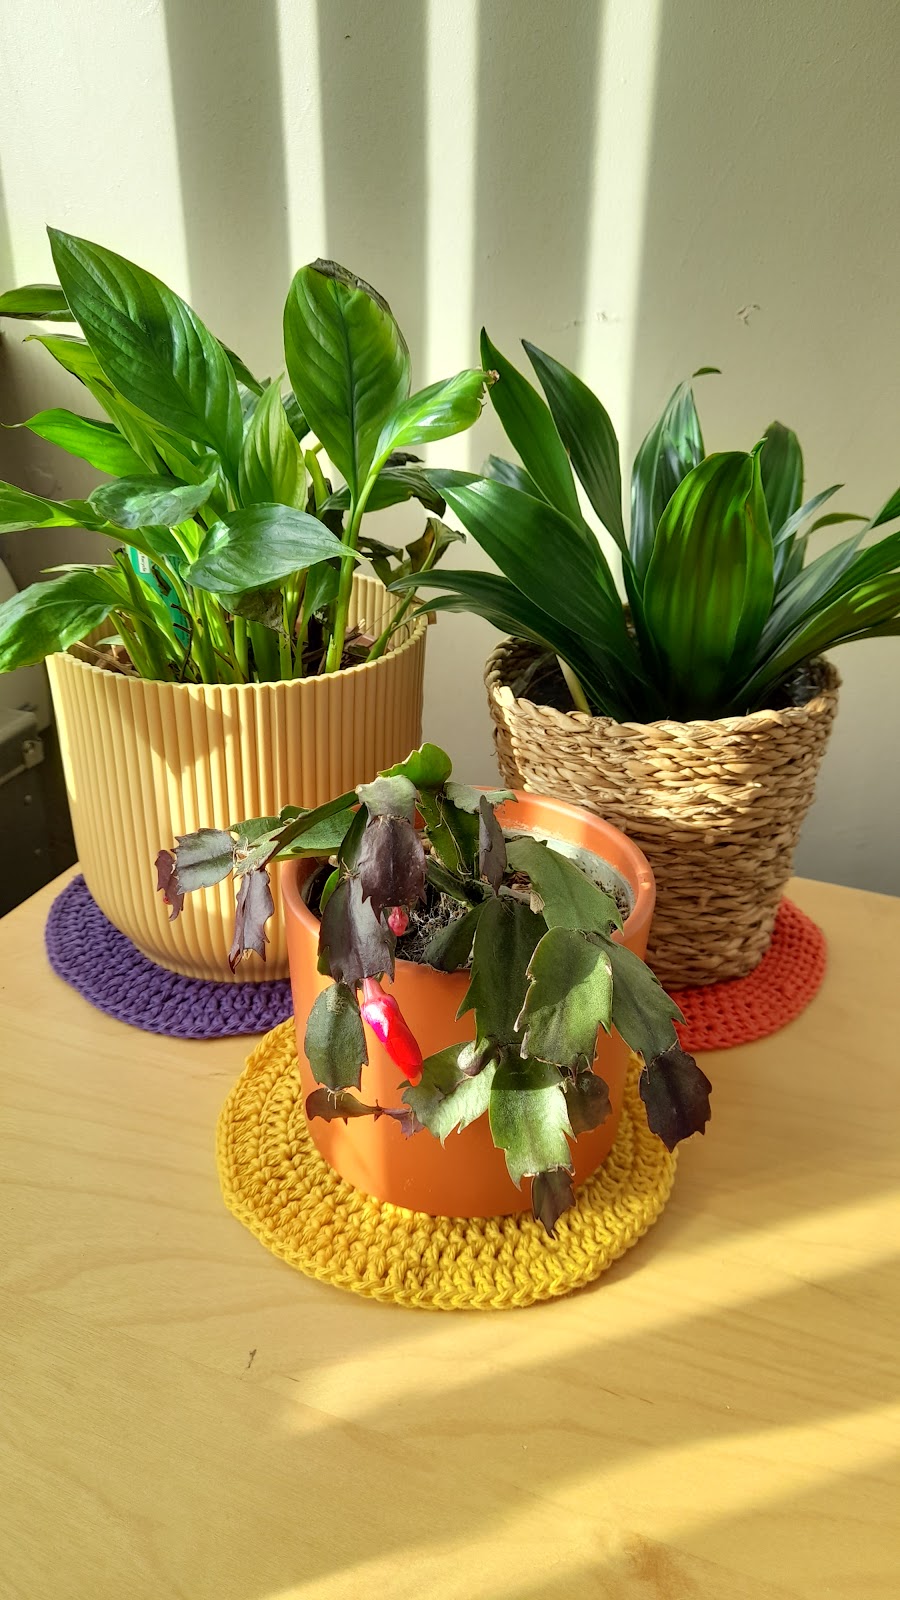
    Why not use your finished circle as a cute mat for plants or a placemat? 

    Crochet circles don’t always sit flat the first time around. here are some possible issues that will arise and how you can fix them:

    Circle starting to resemble an Elizabethan ruff?

    You have too many increases. Check to see whether you have made the appropriate amount of increases. If there are too many, start the round again.

    Circle starting to turn in like a bowl?

    You haven’t made enough increases. 

    Neither of the above solutions working?

    Change yarn and/or hook. It could be a tension issue. Always go up or down by 0.5mm until you reach your desired flatness.

    Email info@germandercottagecrafts.co.uk or visit my Youtube channel for further pattern help. 

    Patterns featuring crochet circles to inspire you:

    Please note, there are affiliate links here. This means that if you choose to purchase, I do receive a small commission at no further cost to you.

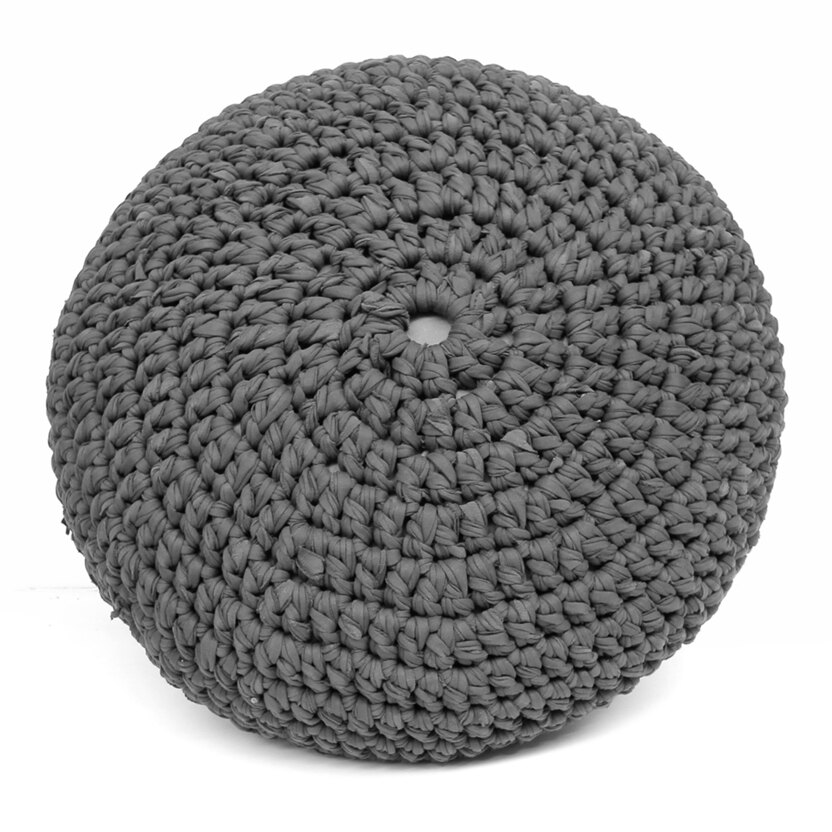
    Hoooked DIY Crochet Zpagetti Pouf Kit. Practice your crochet in-the-round with this quick and comfy Zpagettii pouf. They’ve been around for a while but we’re still loving the look of a knitted  and crochet poufs. Its soft textural shape of Zpagetti t-shirt yarns is both simple and complicated. With this DIY complete kit you can make your own affordable pouf. We have included a pair of jumbo knitting needles and also a crochet hook and both patterns so you can pick your favourite craft technique. This Hoooked knit & crochet set is also great as a creative DIY gift for a special someone. With this complete Hoooked kit you can cover a pouf with a cross section of 65-70 centimeters and a height of 30-40 centimeters.

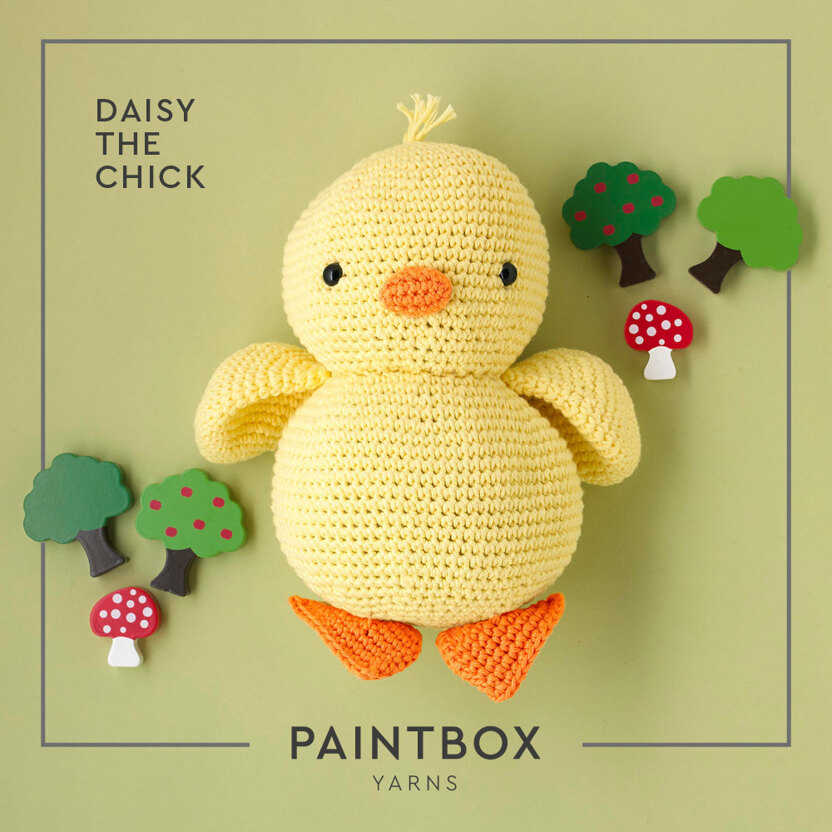
    Paintbox yarns cotton Aran Daisy The Chick Crochet Kit. Practice your amigurumi skills with this adorable crochet chick kit. If you know how to crochet a circle, you can make cute little stuffed items like this!

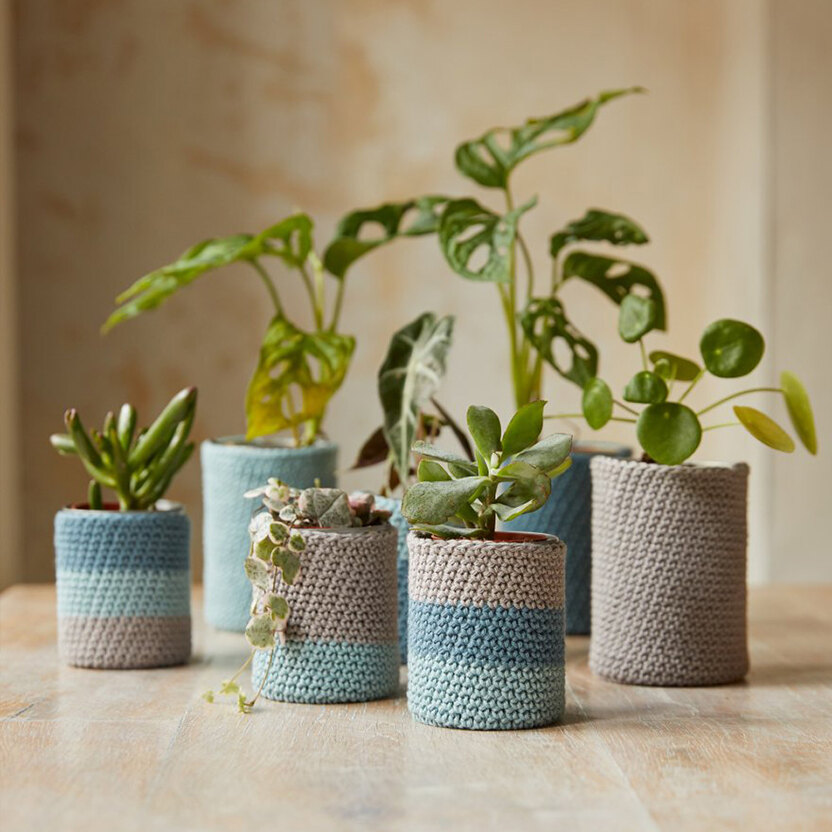
    DMC Mindful Making The Peaceful Plant Pot Holders Crochet Kit. This kit will help you crochet a flat circle and also learn how to make it curl up on purpose to create the cylindrical shape perfect for pots, vases and bowls! Give your desk a mindful makeover with these gorgeous crochet plant pot holders.

  • There are many ways to knit socks.

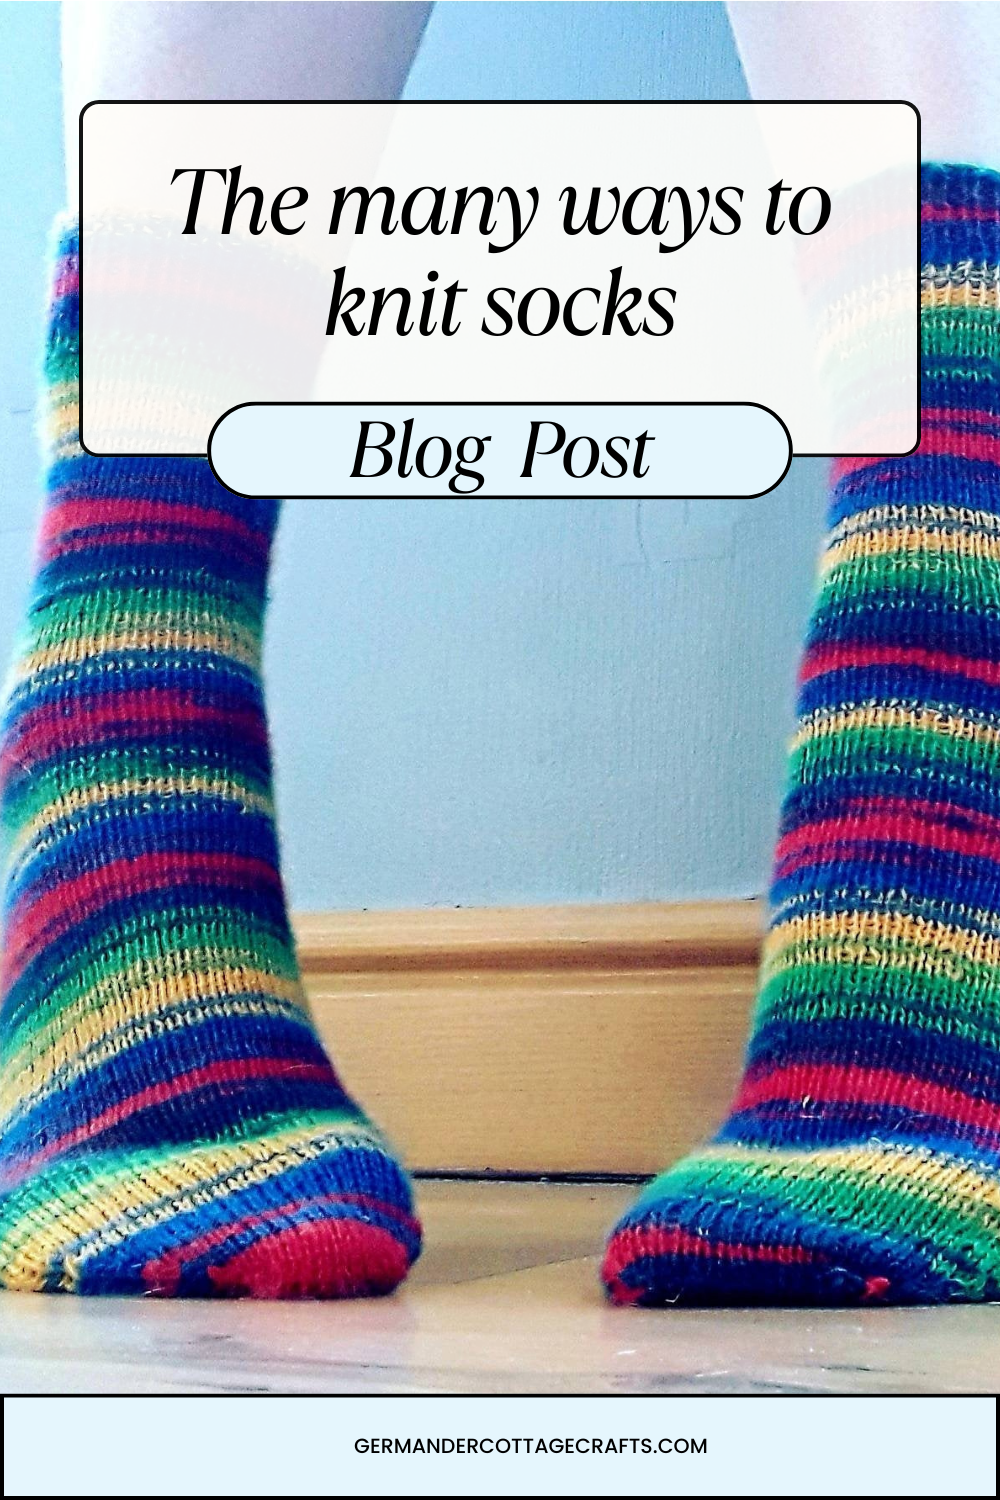
    There are many ways to knit socks.

    Are you sitting down? I’m going to talk you through the many ways to knit socks. 

    Last year I received a refund request from a customer. They weren’t happy with their sock knitting kit and wanted a refund on the needles. The customer’s words were something like “there’s circular needles in here. No good for knitting socks!” 

    Let’s ignore the fact that the contents of the kit will have been clearly listed before purchase and that I am a knitwear designer and hopefully know a thing or two about knitting socks. Let’s focus on the “no good for knitting socks!” How do you know? Have you tried? 

    After talking the customer round (excuse the pun) they were willing to give the circulars a try. I introduced them to the method of magic loop knitting. They had never heard of this before. If you knit, every day is a school day. There are many, many ways to do something that achieves the same results as something else. Magic loop is just one method. 

    This article may contain affiliate links, meaning that if you choose to shop through any of the links, I do earn a small commission.

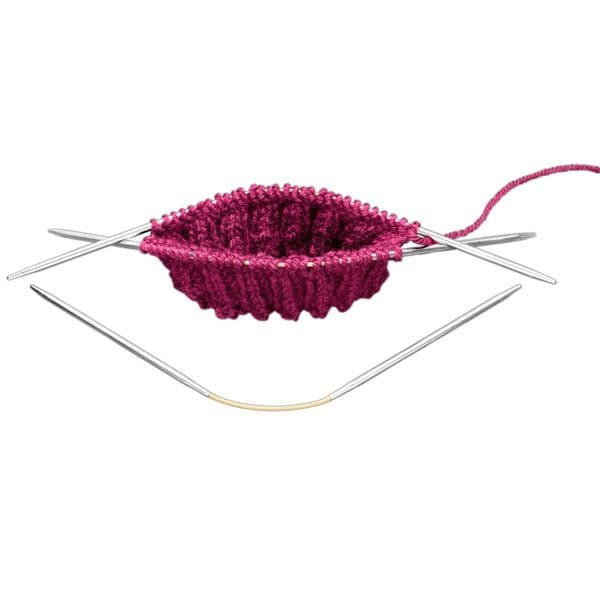
    Long circular needles (magic loop)

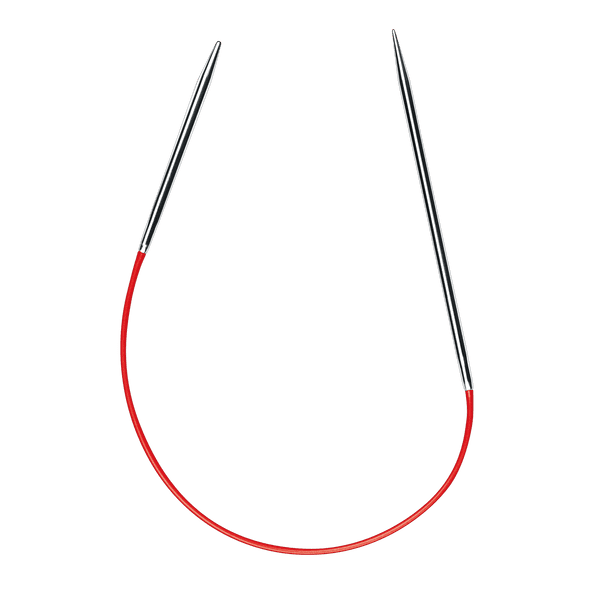
    Long circular needles aren’t just for hats and garments. You can use them for knitting flat as they are lighter and more compact than traditional straight knitting needles. What knitters do to make socks with long circulars is to choose circulars with a very long cable. I usually recommend 80cm or 100cm for socks. This cable is then pulled through to provide a loop on either side of the work. 

    In these photos I’m using Addi lace circulars with an 80cm cable.

    how to knit on magic loop

    I seem to find that if I was to join in the round at cast on (by pulling the cord through the halfway point of the stitches) I end up with a tangled mess and twisted stitches. This can be avoided entirely by knitting the first round in one flat row. When you have established the first row, simply pull the cord through the halfway point of stitches and carry on knitting. You will be left with the smallest of gaps at the top of the cuff but you can easily seam it closed at the end.

    Louise Tilbrook has a really handy tutorial for magic loop here

    Knitting on short circular needles 

    There are also short circulars. They’re brilliant for knitting the legs and the feet but you will need to switch to other circulars or DPNs for toe shaping. That’s not a preference thing- it’s just not physically possible to shape toes on 9 inch circulars.

    addi sockwonder short circular needles

    What I will say about the 9in circulars is that they create a tighter knit in my opinion. You definitely need to review your tension compared to when you use other methods. 

    Louise Tilbrook has a tutorial on knitting with tiny needles here. It can be hard to get to grips with them at first but if you can, it’s worth it. 

    Knitting with niche needles 

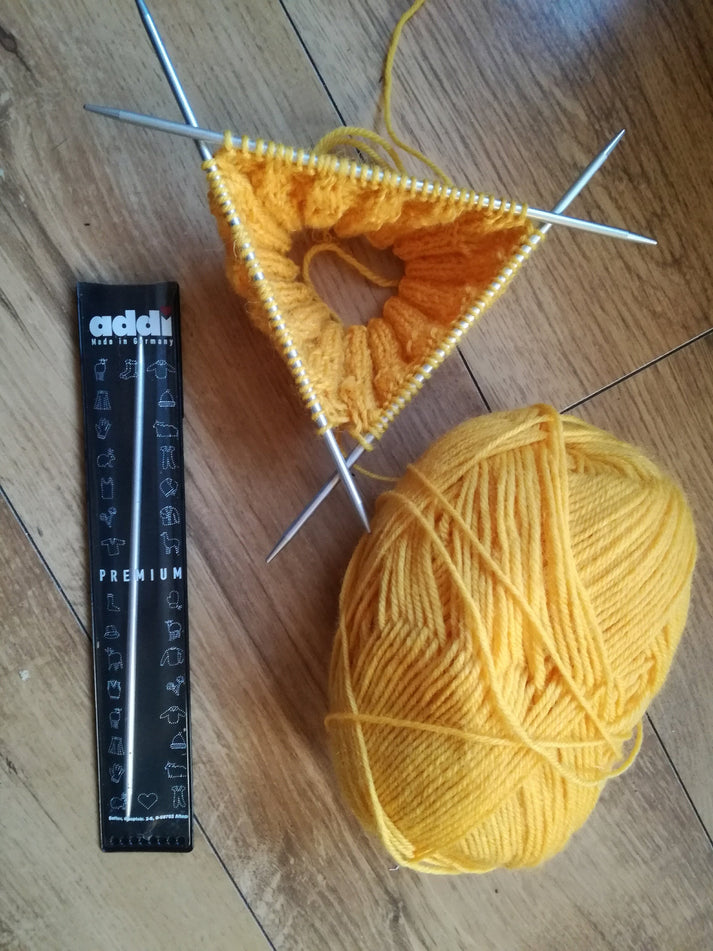
    There are also these funky little things called CraSyTrio. I think they’re awesome because they have the flexibility of the circular needle but a similar setup to double pointed needles.

    Double pointed needles

    Your experience with these will vary from “knitting ninja” to “fighting with a hedgehog” but if you persevere, I think you’ll be all right. I was wary of double pointed needles for a long time. I feared the complicated set up and when I started out, I would get myself into a tangle or lose my patience when one of the needles kept slipping off. 

    You may want to consider starting your DPN journey with something bigger like a sleeve or a hat. This will help you to practice and there’s more chance of you noticing dropped stitches with thicker yarn. 

    DPN hack: Cast on all of your stitches on one slightly larger needle. Using your smaller DPN needles, knit the set amount of divided stitches onto each needle. You will then have all stitches accounted for without having dropped your DPNs during cast on. Some patterns even tell you how many stitches to have on each needle e.g. there may be more stitches on the 3rd needle as that is the heel needle.

    If you need help choosing DPNs to knit with I have a blog post here.

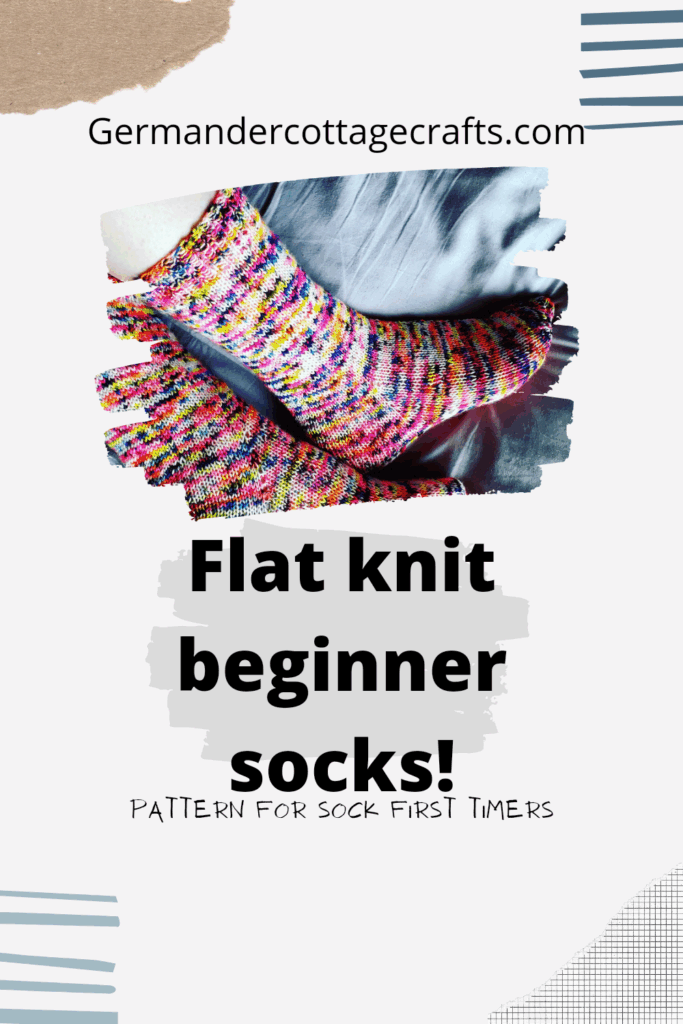
     You can knit socks flat

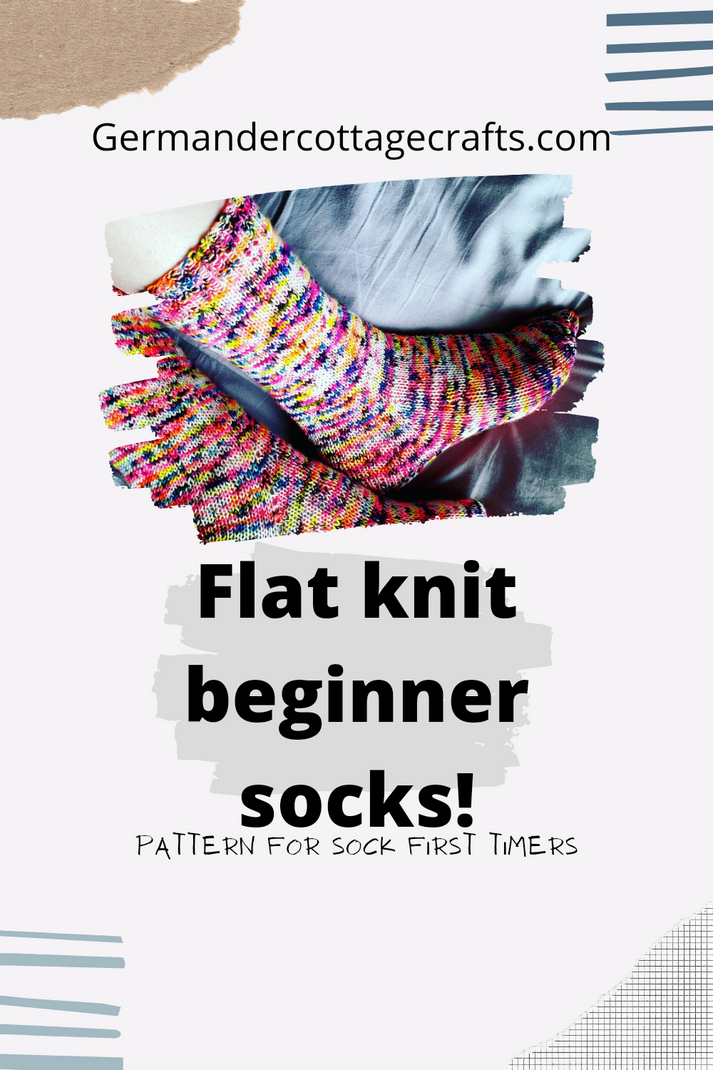
    Even though knitting socks in the round is incredibly popular, there will always be knitters who prefer knitting them flat. I believe that these knitters are often left behind when it comes to sock design. Luckily, you can get a good range of flat knit socks thanks to the internet. I have a pattern for flat knit socks here that avoids all the requirements for stitch holders and multiple seams. Just sew up one seam at the end and you’re done.

    I hope you can find the time to explore all methods or practice a favourite. 

    Hanna 

    Sock knitting patterns to try!

    Easy flat knit, two needle socks.

    The Andalusian Stitch Socks

    Simple cuff-down beginner socks.

  • How to graft the toe of your sock. Kitchener stitch tutorial.

    How to graft the toe of your sock. Kitchener stitch tutorial.

    Here’s a quick, step by step photo tutorial showing you how to graft the toe of your socks. This is a really handy technique for sock knitting and once you get used to the direction of the darning needle, you’ll be ready to cast on your next pair of socks!

    Did you know?

    This method is also known as Kitchener stitch but knitters nowadays prefer to call it grafting. You can find out why here

    Grafting, step by step.

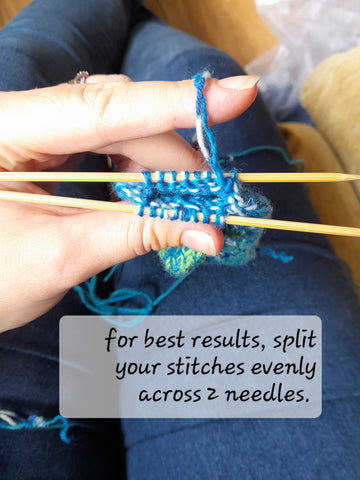
    To start, you have to end your toe knitting with an even number of stitches and they have to be divided between two needles. You can use any needles for this part but they have to sit parallel. Make sure that the two wrong sides of your work are facing. 

    Kitchener stitch tutorial for sock knitters. For best results, split your stitches evenly across 2 needles. Free sock knitting tutorial showing you how to graft your sock toes. How to knit socks cuff down. How to knit socks in the round.

    To set up, you first need to have your darning needle to hand with your yarn tail threaded through it. 

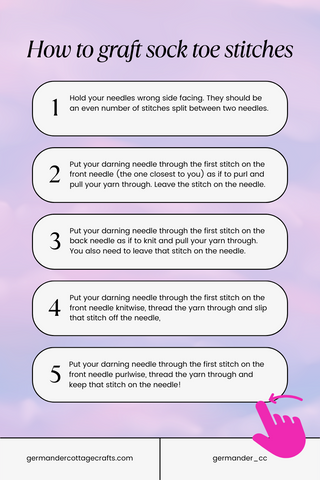
    1. Put your darning needle through the first stitch on the front needle (the one closest to you) as if to purl and pull your yarn through. Leave the stitch on the needle. 

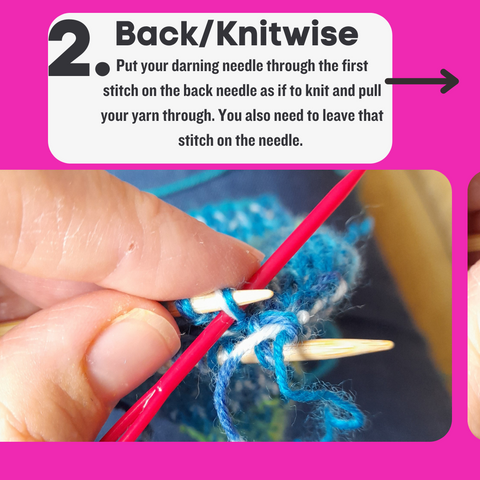
    2. Put your darning needle through the first stitch on the back needle as if to knit and pull your yarn through. You also need to leave that stitch on the needle. 

    How to do the kitchener stitch knitting tutorial. Kitchener stitch sock toe. How to graft the toe of your knitted sock. Learn to knit socks and graft the toe. How to seamlessly close the toe of your sock. Image shows grafting stitches with a darning needles.

    The next 4 parts of this will be repeated to the end and they are as follows:  

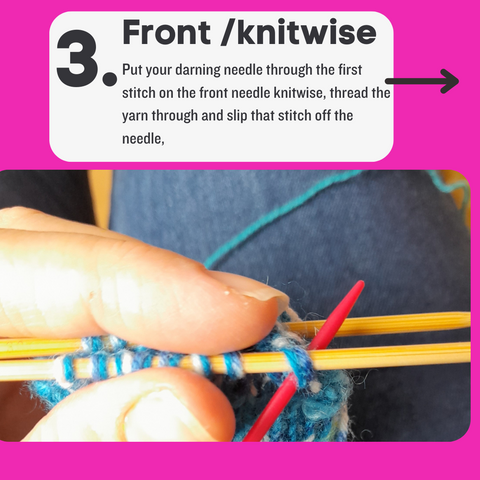
    3. Put your darning needle through the first stitch on the front needle knitwise, thread the yarn through and slip that stitch off the needle.

    Put your darning needle through the first stitch on the front needle knitwise, thread the yarn through and slip that stitch off the needle. Grafting tutorial for knitting beginners.

     4. Put your darning needle through the first stitch on the front needle purlwise, thread the yarn through and keep that stitch on the needle.

    How to graft the toe of your sock. Kitchener stitch tutorial. Put your darning needle through the first stitch on the front needle purlwise, thread the yarn through and leave thatt stitch on the needle.

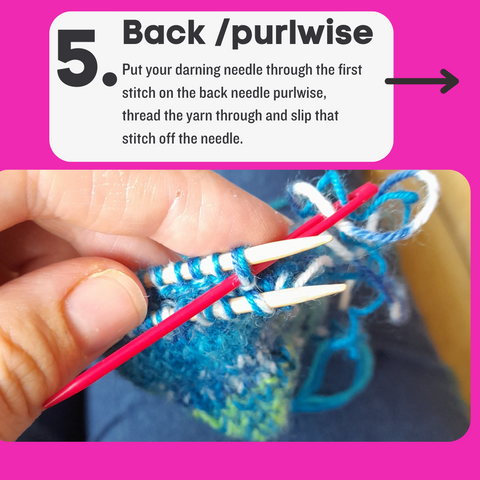
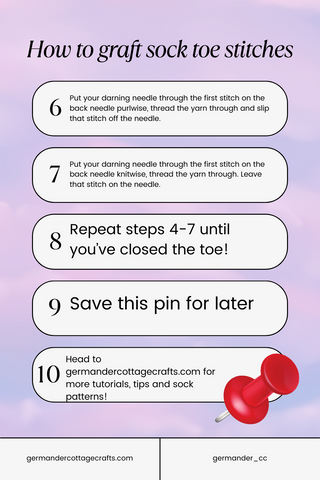
    5. Put your darning needle through the first stitch on the back needle purlwise, thread the yarn through and slip that stitch off the needle.

    Kitchener stitch knitting tutorial. Learn how to seamlessly close your sock toes and graft the stitches together.

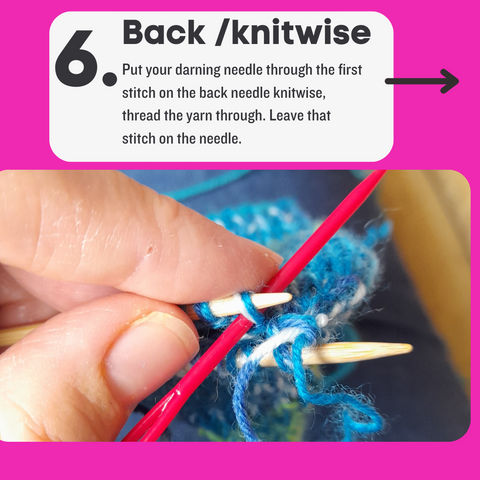
    6. Put your darning needle through the first stitch on the back needle knitwise, thread the yarn through. Leave that stitch on the needle. 

    Kitchener stitch tutorial step by step.

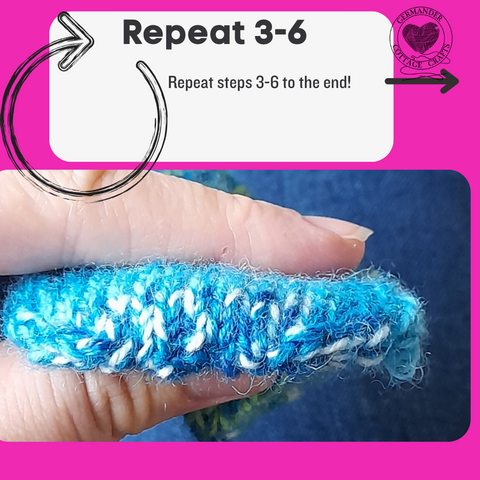
    Now repeat the last 4 steps (3-6) until you’ve closed your toe. Weave in ends and wear with pride! 

    Graft your sock toes seamlessly with this step by step photo tutorial.

    Video demonstrating the grafted toe.

    Do you still need help with grafting? Here’s a handy video from my youtube channel demonstrating how to graft the toe of a sock. The instructions are at the end of this video.

    Tip: Why not try making a series of mini socks to practise your grafting technique? They make a fun decoration for advent, too.

    I’ve put the instructions together here for you too for a Pinterest pin. Pin it for safe keeping! 

    How to do Kitchener stitch. Grafting sock toes together easy tutorial.
    How to graft sock toes closed. kitchener stitch tutorial

    Sock knitting patterns to try:

    Easy 2 needle flat knit socks patternSimple two needle flat knit sock pattern.

    Flock socks knitting pattern. Cuff down sock knitting pattern.

    The Andalusian socks. Free textured sock knitting pattern.

    Other learning resources for knitters

    • Learn how to make a head warmer (headband) with garter stitch and worsted weight yarn. This tutorial shows you how to knit a garter stitch headband in several sizes. Beginners can complete this tutorial, either using the written instructions or the accompanying video. Visit the blog post here.
    • Learn how to knit a flat knit sock. Did you know that you don’t have to knit your socks with circular needles? You can also knit them flat on two straight needles. This is my best selling sock knitting pattern that I also added as a free pattern on the blog. Click here to read it.
    • Yarn weight and why it matters. This article explores the significance of tension, gauge and why you should always test it before starting out on a knitting project. Yarn thicknesses and needles don’t always match, so I show you what to watch out for and how to get it right every time. Read the post here.
  • Andalusian stitch socks. Free sock knitting pattern for a pair of simple, rib textured socks.

    Andalusian stitch socks. Free sock knitting pattern for a pair of simple, rib textured socks.

    The Andalusian stitch is one of my favourite stitches. It’s elegant, detailed and this is without having to do anything particularly complicated. This is a simple knit and purl stitch, and even someone trying socks for the first time could do this pattern. This sock pattern comes in three sizes and covers most adult foot sizes. Please make sure you measure around your foot before proceeding. Socks have negative ease, meaning they may seem small but that’s because they need to stretch to stay in place!

    Here’s a quick description of what the andalusian stitch actually is:

    Rounds 1-3: K all sts. 

    Round 4: *P1, K1; repeat  from * to end. 

    This is the Andalusian stitch pattern. 

    The Andalusian stitch socks are a simple, detailed sock design that are perfect for intermediate knitters looking to experiment with more textured detail.

    This pattern is available for free with ads, or, if preferred, you can get a handy PDF from Ko fi or Ravelry.

    This article does contain affiliate links, meaning that if you decide to purchase via the links, I earn a small commission.

    These are adult socks worked in the round from the cuff down. The textured Andalusian stitch pattern requires only knit and purl stitches to create a broken rib effect. I used a semi solid colour to emphasise the texture of both the sock and the heel. The heel is shaped using increases and decreases, and the toe is grafted together using the kitchener method. 

    For this sock pattern, I used High Twist Sock by Little Grey Girl Yarns (75% Superwash Merino & 25% Nylon) – 425m/465yd per 100g/3.5oz. Sample shown in the Avenell colorway, and it costs around £20. As this was a hand dyed yarn, sometimes the exact match won’t be available. Here’s a list of suitable alternatives to suit your budget:

    Other yarns to use for this pattern according to budget.

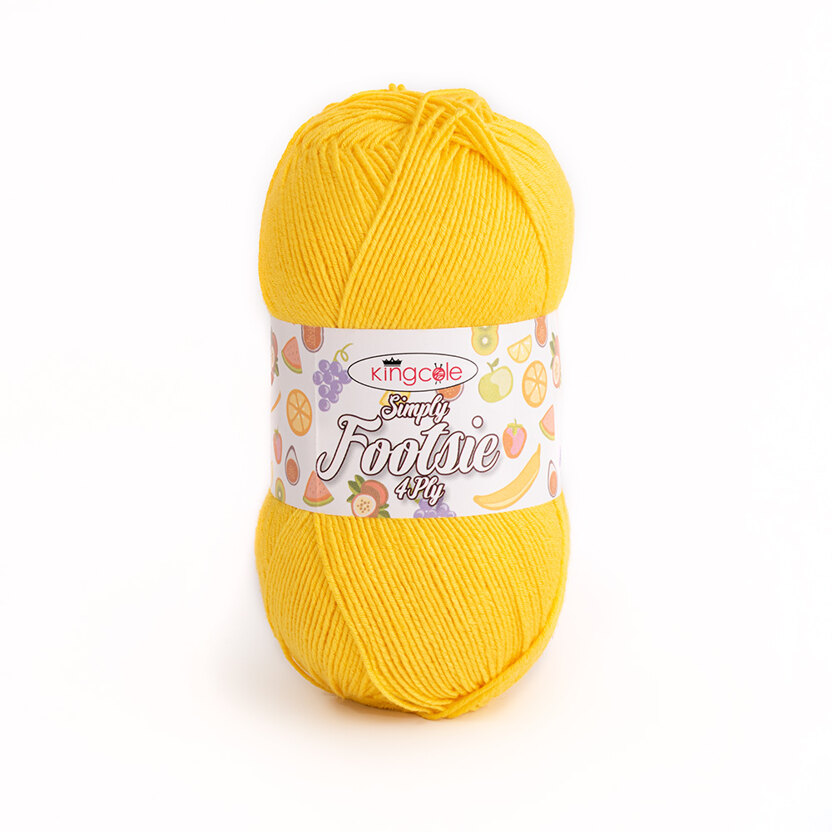
    King Cole Footsie 4ply: This 4ply sock yarn comes in a limited colour palette but it is only £5.54 ($7.40USD) per ball. You get a whopping 430m per ball, too. It’s excellent value and as it’s a solid colour, you’ll be able to see the stitches clearly! King Cole Footsie 4ply is a 100% synthetic yarn (93% acrylic, 7% other), so if you’re not fussed on wool or can’t wear it, this sock yarn is a better choice.

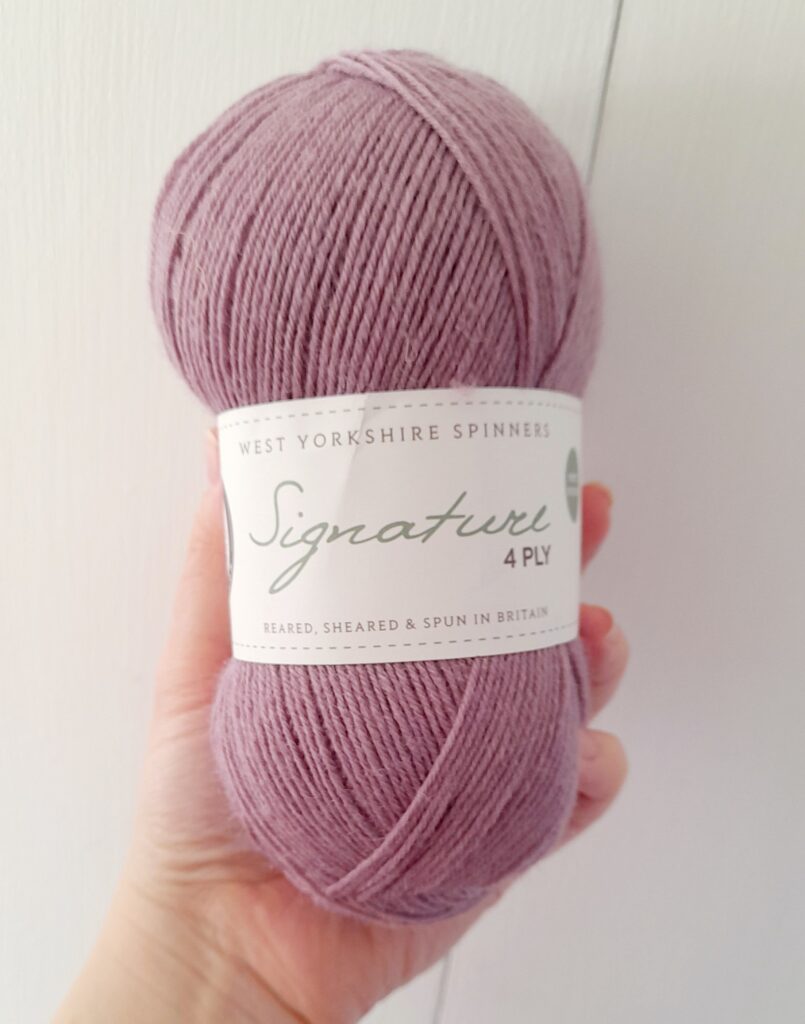
    West Yorkshire Spinners Signature 4ply: This yarn would work in a solid or self striping colourway. The yarn amount is the same and the gauge will be similar too. It’s not as ‘shiny’ as some hand dyed socks are, but the wool is still soft and incredibly comfortable. The crispness of the wool would ensure excellent stitch definition in this pattern particularly. I would recommend a colour like Poppy Seed, Pennyroyal or Fuchsia. Pennyroyal is pictured below.

    West Yorkshire Spinners Signature 4ply costs between £7.50 and £9

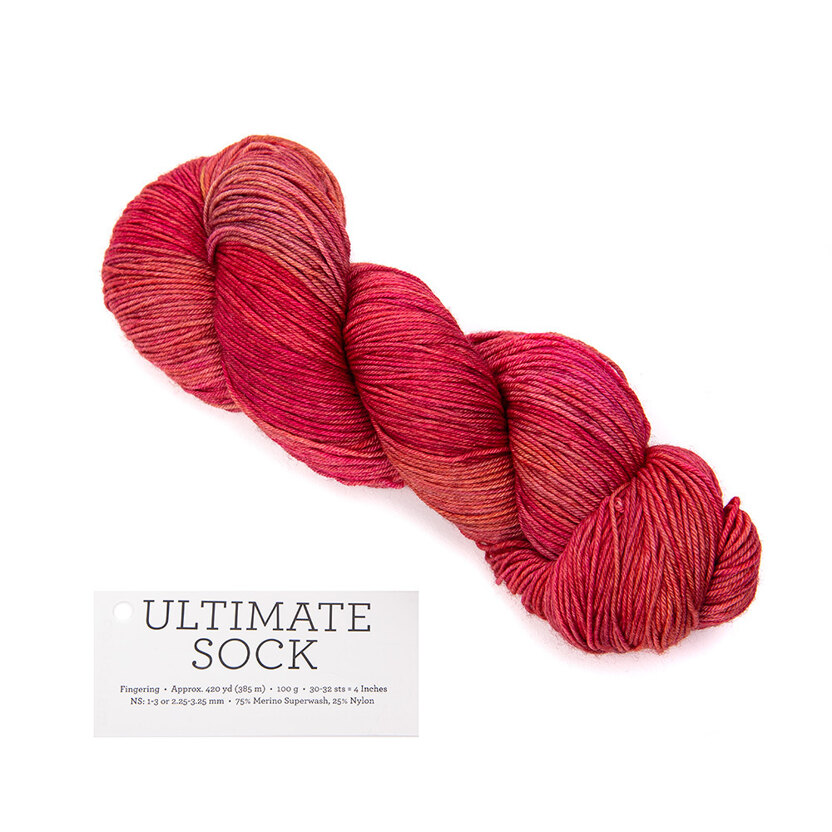
    Malabrigo Ultimate Sock: This 4ply yarn is at the more luxurious end of sock yarns. It’s 75% merino wool, so is very soft with that slight sheen. It is also hand dyed, so would look lovely with the texture of this sock pattern. It comes in a range of colours and is proced at or around £17.99, but one skein will do.

    The colour shown below is Zinnias (658).

    To make these socks, you will need to be familiar with the square heel. There’s a step by step photo tutorial here and a video below.

    How to knit the Andalusian stitch socks.

    Andalusian stitch sock knitting pattern. Socks with a simple rib detail. Easy free sock pattern. Cuff down sock knitting pattern to make. Free knit socks. beginner friendly sock knitting patterns. 4ply socks.

    Glossary

    DPN: Double pointed needles

    K: Knit

    K1, P1 rib: Knit 1 stitch, purl one stitch 

    K2tog: Knit two stitches together 

    M1L: Pick up the bar between the stitch you have just knitted and the one you are about to knit, bringing the needle from the front to the back. Knit into the back of the stitch. 

    M1R: Pick up the bar between the stitch you have just knitted and the next stitch, bringing the needle from the back to the front. Knit into the front. 

    P: Purl 

    P2tog: Purl two stitches together

    PM: Place marker

    PSSO: Pass slipped stitch over the knitted stitch. 

    RS: Right side

    SKP: Slip one, knit one, PSSO 

    SL: Slip stitch

    SM: Slip marker 

    St(s): Stitch(es)

    WS: Wrong side

    Gauge 

    35 stitches and 52 rounds = 10cm/4in using 2.5mm (US 1.5) needles

    Materials 

    • High Twist Sock by Little Grey Girl Yarns (75% Superwash Merino & 25% Nylon) – 425m/465yd per 100g/3.5oz. Sample shown in the Avenell colorway. 
    • Darning needle
    • 4 stitch markers
    • 2.5mm (US 1.5) circular (80cm/32in cable for magic loop) or DPNs or size needed for gauge.

    if you don’t have any suitable needles yet, I have a handy blog post here about DPNs, and one about circular needles to help you choose.

    Leg/foot circumference 

    Size 1: 6.5 in/16cm

    Size 2: 7.5 in/18cm

    Size 3: 8in/21cm

    The Pattern

    Cuff

    Loosely cast on 56 (64 72) sts, join to work in the round, being careful not to twist sts.

    Work in 1×1 twisted rib for 2.5cm/1in.

    Starting the leg of your andalusian stitch socks:

    PM after the first 28 (32 36) sts to establish halfway point. 

    Rounds 1-3: K all sts. 

    Round 4: *P1, K1; repeat  from * to end. 

    This is the Andalusian stitch pattern. 

    Repeat Rounds 1-4 until leg measures 18cm/7.25in from cast on. 

    Shaping your square (Dutch) sock heel.

    When working the heel, continue in the Andalusian stitch pattern for the stitches after the halfway marker. The heel and the underside of foot will be in knit stitch from now on. 

    Round 1: 

    M1R, PM (marker 2) and K 28 (32, 36) stitches, PM (marker 3) and M1L, SM (marker 1). Work Andalusian st pattern to end of round. 

    Round 2: 

    K to halfway marker, Andalusian st pattern to end of round, slipping markers as you come to them. 

    Rnd 3: 

    K to marker 2, M1R, SM, K 28 (32, 36) sts, SM and M1L, SM. Work Andalusian st pattern to end of round. 

    Repeat Rounds 2 and 3 until you have created 20 (22, 24) sts. 

    Turning the heel of your sock: 

    Working only with the first 48 (54, 60) sts continue as follows: 

    Short row 1: (RS) K to marker, SM, K 17 (20, 23) sts, SL1, K1 PSSO. This will now be referred to as SKP. Turn.

    Short row 2: (WS) P 7 (9, 11) sts, P2tog. Turn.

    Short row 3: (RS) K to 1 st before the gap which has formed, SKP. Turn. 

    Short row 4: (WS) P until 1 st before gap, P2tog. Turn.

    Repeat Rows 3 and 4 until there are 28 (32, 36) sts between the beginning of the round and the halfway marker (marker 1). This was the amount that you started with and your work should be RS facing with marker 2 on your right hand needle. 56 (64, 72) sts in total. 

    Set up in the round: 

    Rnd 1: 

    Remove marker 2. Insert needle as though making a M1R but instead of knitting, SL the twisted st on to right hand needle. K1 and PSSO. K to marker 3, remove marker 3, insert needle as though making a M1L but slip the twisted stitch onto left hand needle and K2tog. SM, K to end. 

    Foot: 

    K to halfway marker, Andalusian pattern to end of round until foot measures 2.5cm/1in less than desired length. 

    Toe

    Rnd 1: *SKP, K to 2 sts before marker, K2tog; repeat from to end. (4 sts decreased in total) 

    Rnd 2: K to end of round. 

    Repeat Rounds 1 and 2 until you have 36 (36, 40) sts in total. 

    THEN, decrease on every round until you have 20 (20, 24) sts in total. Remove marker 1. 

    Finishing

    Using kitchener method, graft the remaining sts together to close the toe. Weave in ends. 

    Thanks for using my andalusian stitch sock knitting pattern. Did you make a pair? Let me know in the comments. If you’d like, you can send me a photo of the socks and I’ll post them in the projects gallery here!

  • Cygnet Boho Spirit Yarn. Self striping yarns for knitting and crochet.

    Cygnet Boho Spirit Yarn. Self striping yarns for knitting and crochet.

    Cygnet boho spirit yarn is a yarn that I’ve used a few times in my knitwear and crochet designs. I’ll talk you through what kind of yarn it is and why it’s a great yarn to use for your next autumn/winter project.

    Is Cygnet Boho Spirit yarn double knit or worsted?

    Here I’ll explain the ins and outs of what Cygnet Boho is, where you can find it and what you can use it for.

    This post may contain affiliate links. This means that if you choose to purchase, I do earn a small commission at no extra cost to you.

    This is a deep dive into the incredibly popular Boho Spirit yarn. I’ve used it on so many designs that I’d like to think I have some expertise here. I’ve used it for crochet as well as knitting for both personal projects and designs. This yarn really took Cygnet to the forefront of the big box yarns as it was a hit with the crocheters and knitters. 

    1. What is Cygnet Boho Spirit yarn? 

    The exceptionally popular Boho Spirit was initially introduced as a limited edition range. As its introduction to the market resulted in an unprecedented level of demand (yay), it soon soon became a permanent range.

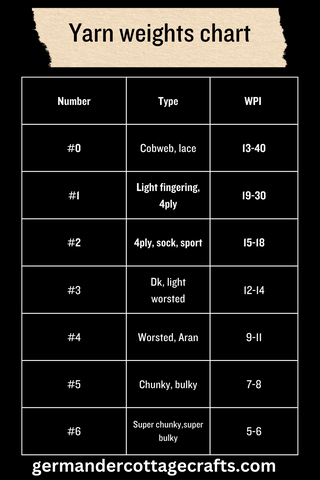
    It’s a medium weight yarn meaning “worsted”. Think of it as sitting in the middle of DK and Aran. You can see the yarn weight chart here to help you understand yarn weights: 

    Yarn weight chart. What are the yarn categories for yarn weight. Crochet for beginners.

    Love this grid? Why not Pin it for later? 

    A bit more about this popular, medium weight UK yarn. 

    Boho Spirit is a fabulously soft, variegated roving yarn. Due to the loftiness of the yarn, it is incredibly soft and versatile and works well knitted or crocheted and results in a soft garment with a beautiful subtle sheen. 

    In summary: 

    • Soft 
    • Variegated 
    • Lofty 
    • Versatile 
    • Subtle sheen

    This is a 100% acrylic yarn. Some acrylic yarns are very coarse. Some are very plastic-y, others are thin and squeak on your plastic needles. There are very popular acrylic yarns out there that are far too shiny (Looking at you, Caron simply soft). This hits different. It’s soft, it’s sturdy but as it has that roving quality about it, it might be difficult to unpick or unravel your project. The stitches kind of meld together once they’ve been made. That’s a real problem if you’re not the type of person who swatches. 

    If you do swatch, choose the right size tools and pay attention to your knitting or crochet project then this really is worth trying. I would absolutely not recommend it for the following as it has a fluffy halo: 

    • Toys.
    • Baby items. 
    • Pet bedding. 

    The loose, fluffy fibres are absolutely not safe for babies or anything that could be put in a child or pets mouth. This is why I would not recommend Cygnet boho spirit for those things. 

    It is however, perfect for garments, bags, blankets and accessories such as hats and scarves. 

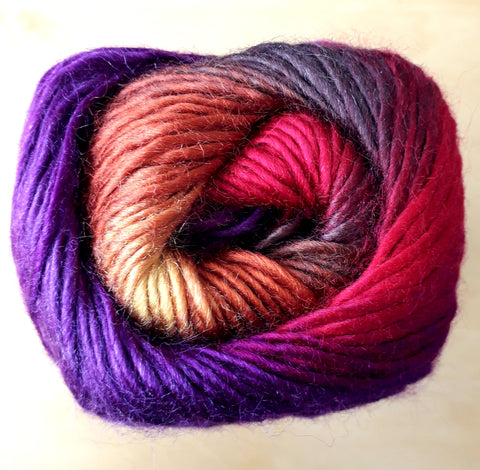
    Pictured: Cygnet boho spirit in Fantasy. 

    2. What weight is Cygnet Boho Spirit? 

    Although Cygnet Boho Spirit has been previously labelled as DK, it is actually thicker than standard DK and counts as a medium weight yarn. Cygnet themselves have recategorised Cygnet Boho Spirit as Worsted/Aran weight on their website. If you look at the ball band, the hook/needle size and gauge is actually better suited to worsted than it is to DK. You may also notice that ”DK’ has been knocked off the title. 

    I would always recommend swatching no matter what the label says. Cygnet boho spirit behaves happily with a 5mm crochet hook for me but I have loose crochet tension so please do experiment! It’s not a yarn that is prone to becoming quite stiff and dense so you really can get some excellent drape on larger needles and hooks. 

    3. What is roving yarn? 

    Usually, a roving is a long and narrow bundle of fibre. Rovings are produced during the process of making spun yarn from wool fleece, raw cotton, or other fibres. Their main use is as fibre prepared for spinning, but they may also be used for specialised kinds of knitting or other textile arts.

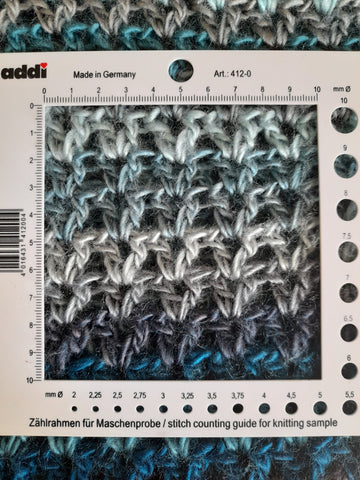
    Cygnet Boho is more of a roving-like yarn than roving itself, as it doesn’t easily come apart when you are working with it. It has been spun and is single ply. There is enough twist in it to knit up and crochet beautifully. See here for stitch definition when used in v stitch crochet: 

    Cygnet boho spirit yarn sapphire. Great yarns for crochet beginners.

    It is important to know that it holds up well in crochet, as crochet involves a lot of handling of both the yarn and the fabric. 

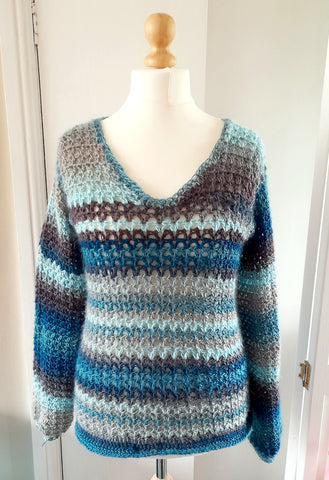
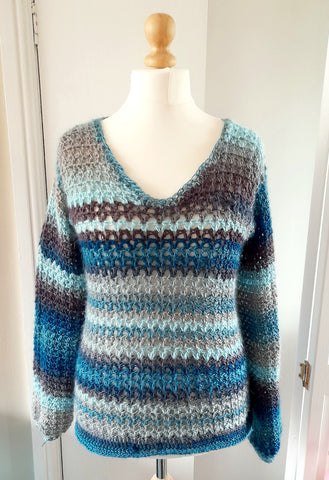
    Free crochet sweater patterns for women. The Breeze v stitch jumper pattern using Cygnet Boho Spirit Yarn.

    What can I make with Cygnet Boho Spirit yarn? 

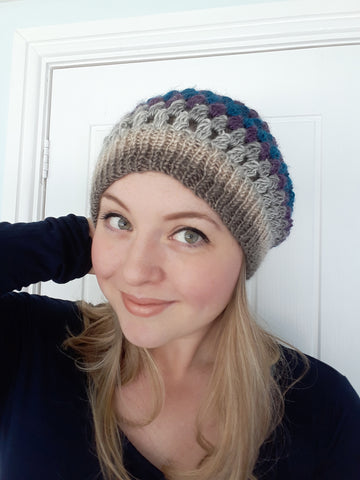
    Here are some of our patterns using Cygnet boho spirit yarn. First is the jewel hat, available in two versions: a crochet hat or a knit/crochet hybrid. Below is the hybrid version, but you can browse both hat patterns by clicking here

    The Jewel crochet beanie pattern. Cygnet boho spirit yarn.

    Jewel hat in colourway Chic. 

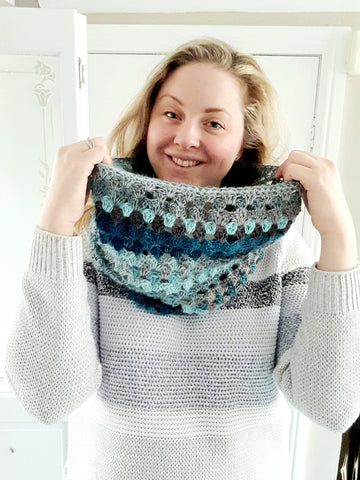
    There is also the Song of the sea snood which is a crochet snood. It’s fun and quick to work up when facing any blizzard! You can see the pattern here. 

    Cygnet boho spirit yarn and patterns. Easy crochet pattern medium weight yarn

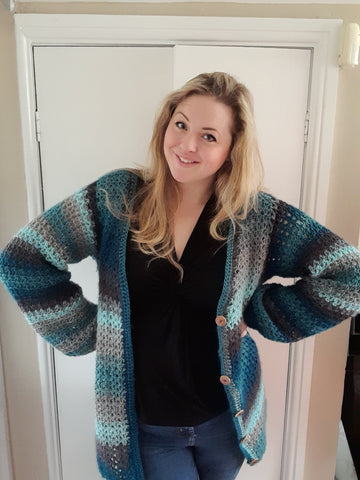
    The Breeze crochet cardigan pattern using Cygnet boho spirit yarn in Sapphire. 

    The photographed sample shows the colourway Sapphire, which I chose for the Breeze cardigan design. Read more about it here. The Breeze cardigan is available in 7 sizes from 32″ to 56″ and calls for fewer than 7 balls for the entire cardigan! I chose Cygnet Boho Spirit yarn for this design as it is really soft and hangs beautifully on garments.

    Breeze crochet V stitch cardigan for women. Patterns that use Cygnet Boho Spirit yarn.

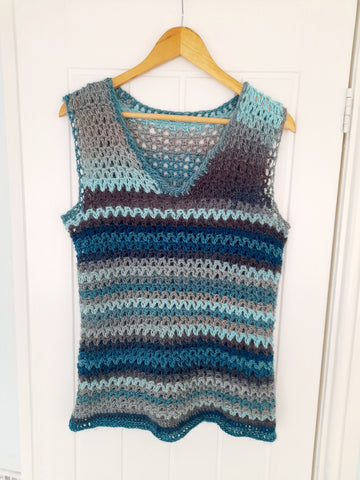
    The Breeze crochet top is available as a vest or as a long sleeve pullover. It is also available in 7 sizes from a 32″ to 56″.

    Cygnet Boho Tank top pattern women
    V neck crochet sweater pattern for women

    You can find Cygnet Boho Spirit yarn at Woolbox.com. 

  • Simple cuff-down sock knitting pattern. Sock knitting for beginners.

    Simple cuff-down sock knitting pattern. Sock knitting for beginners.

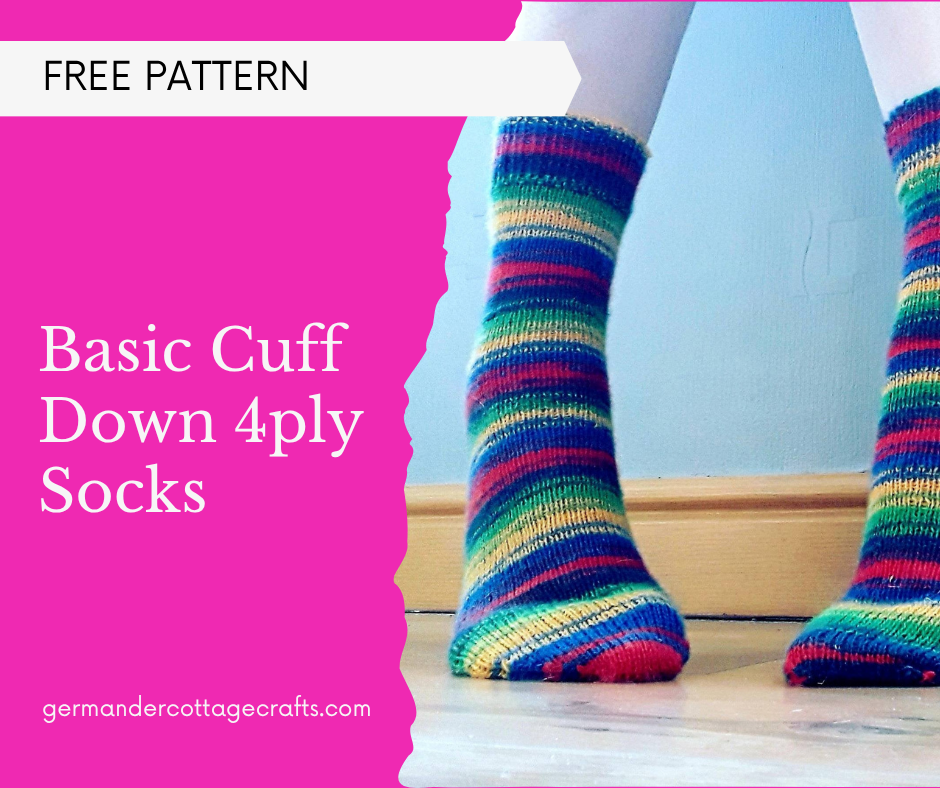
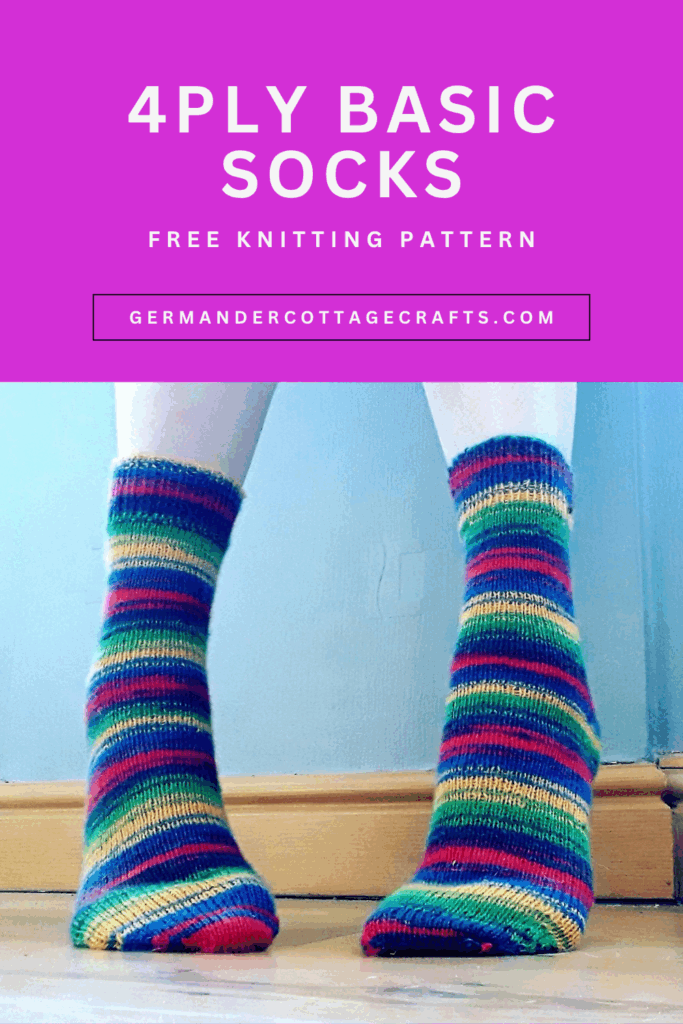
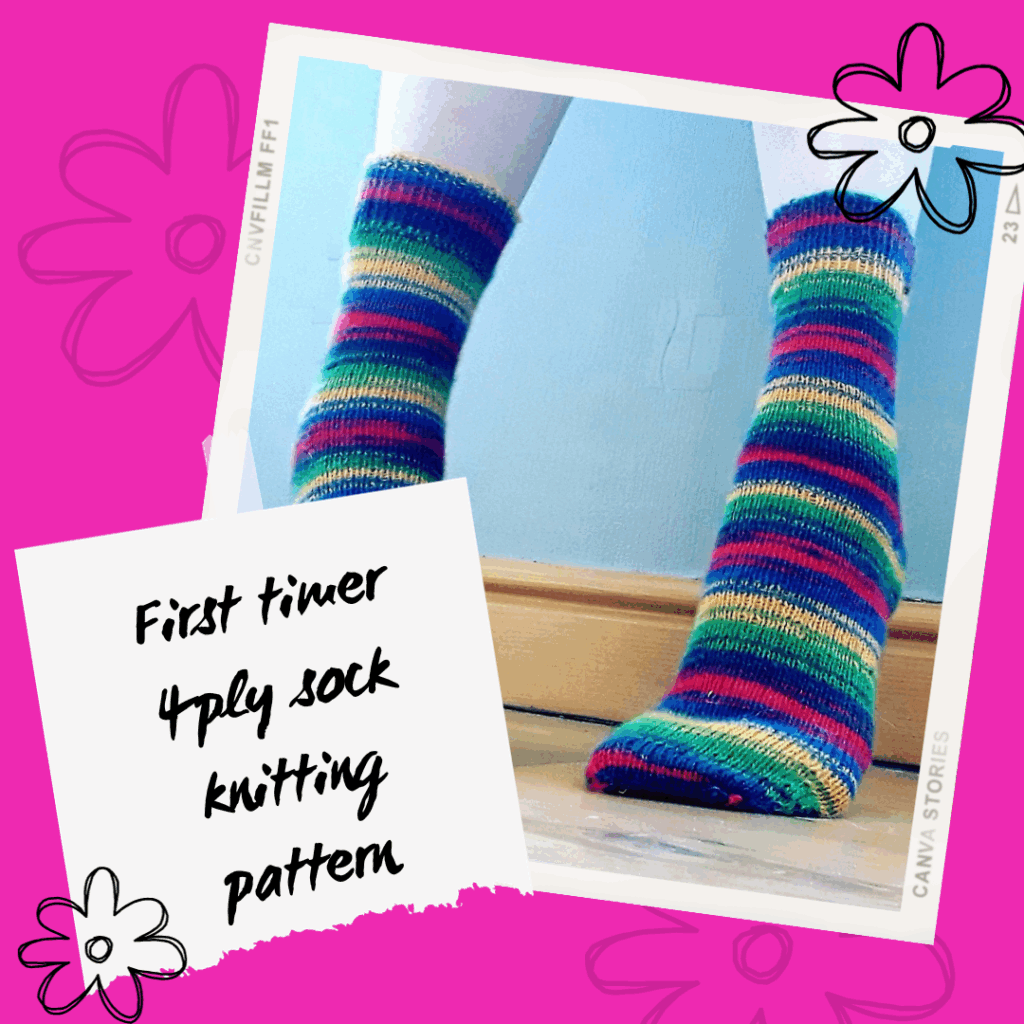
    This is a free sock knitting pattern for simple, cuff down socks with a square heel and shaped toe. This sock knitting pattern was designed by Hanna Gough in 2020, and it remains one of the most popular patterns for knitting socks with 4ply yarn.  

    If you’d prefer an ad-free PDF of this pattern, you can find one here.

    This sock pattern is perfect for beginners who want to knit their first pair of socks in the round. You will need to be able to:

    • Knit in the round.
    • Decrease and increase stitches.
    • Graft sock toes.

    If you’re not yet feeling confident with knitting in the round I do have a flat knit sock pattern here. Everyone can enjoy knitting socks!

    This is one of my best-known sock knitting patterns, and is perfect for those of you who know how to knit, but want to try knitting socks in the round. Knit your first pair of socks with this simple Basic 4ply Socks pattern and photo tutorial. I also have some helpful videos on youtube to help you understand the major points in the pattern such as casting on, shaping the heel and turning the heel.

    Scroll down to find my simple, cuff down beginner sock knitting pattern. It’s free to read, but if you’d prefer a handy PDF, there’s one here.

    This article contains some affiliate links. This means that if you choose to buy anything I have recommended here, I do earn a small commission.

    For this sock knitting pattern, I recommend needles such as addi aluminium DPNs , Knitpro or addi circular needles for knitting in the round.

    Easy sock knitting pattern for beginners. Simple cuff down socks. The image is of a pair of striped socks. This image supports the instructions as they are a finished pair of socks. The socks are knit using west yorkshire spinners signature 4ply yarn. The socks are beginner friendly.

    How to use this sock knitting pattern.

    Read through the pattern first, and then look at the glossary. When you’ve had a read through the pattern and understand what you will need and what skills are required, begin. Consult the pattern as often as you need to and take your time! Your socks will take as long as they take. Just enjoy the process.

    You will need: 

    100g of 4ply sock yarn (400m per 100g) such as WYS signature 4ply (main photo is Bright Side)

     Darning needle

    4 Stitch markers

    2.5mm circular (80cm cable for magic loop) or DPNs or size needed for gauge.

    Gauge: 

    35 sts / 10cm (4”)

    A note on construction

    You can knit these socks using DPNs or circulars. I have written the pattern with circulars in mind. If you need a bit more help when it comes to choosing needles, and want to know how to knit with double pointed needles, I have a helpful post here. If you want to know how to knit with magic loop, I have post here.

    Leg/foot circumference: 

    Size 1: 7 in/17cm

    Size 2: 8 in/20cm

    Size 3: 9 in/23cm

    Cuff

    Loosely cast on 56 (64 72) sts, join to work in the round.

    Work in 1×1 twisted rib for 2 in/5cm

    Leg

    Place a marker after the first 28 (32 36) sts to establish halfway point. K all rounds until piece measures  7.25” 18cm from cast on. 

    Heel

    Rnd 1: 

    M1R, PM (marker 2) and knit 28 (32, 36) stitches, PM (marker 3) and M1L. SM (marker 1). K to end of round. 

    Rnd 2: 

    K all stitches in round slipping markers as you come to them. 

    Rnd 3: 

    K to marker 2 , M1R, SM, K 28 (32, 36) sts, SM and M1L. SM. K 28 (32, 36) sts to end of round. 

    Repeat rounds 2 and 3 until you have created 20 (22, 24) stitches. 

    Turn heel: 

    Working only with the first 48 (54, 60) sts cont as follows: 

    Short row 1: (RS) K to marker, SM, K 17 (20, 23) sts, S1, K1 PSSO. This will now be referred to as SKP. Turn the work around.

    Short row 2: (WS) P 7 (9, 11) sts, P2tog. Turn.

    Short row 3: (RS) K to 1 stitch before the gap which has formed. SKP. Turn. 

    Short row 4: (WS) P until 1 stitch before gap. P2tog. Turn.

    Repeat rows 3 and 4 until there are 28 (32,36) sts between the beginning of the round and the halfway marker (marker 1). This was the amount that you started with and your work should be right side facing with marker 2 on your right hand needle. 56 (64, 72) sts in total. 

    Set up in the round: 

    Rnd 1: 

    Remove marker 2. Insert needle as though making a M1R but instead of knitting, slip the twisted stitch on to right hand needle. K1 and PSSO. K to marker 3, remove marker 3, insert needle as though making a M1L but slip the twisted stitch onto left hand needle and K2tog. SM,  K to end. 

    Foot: 

    K all rounds until foot measures 1 in/2.5cm less than desired length. 

    Toe

    Rnd 1: *SKP, K 26 (28, 34) ( K2tog* Repeat* until end of round.  (4 sts decreased in total) 

    Rnd 2:: K to end of round.  

    Rnd 3: *SKP, K to 2 sts before marker, K2tog* repeat to end. 

    Repeat round 1 and 2 until you have 36 (36, 40) sts in total. 

    THEN, decrease on every round until you have 20 (20, 24) sts in total. Remove marker 1. 

    Finishing: 

    Using kitchener method, graft the remaining stitches together to close the toe. Weave in ends. 

    Glossary: 

    K1 P1 twisted rib: Knit through the back loop, purl as normal. 

    BOR: Beginning of round. 

    PM: Place Marker

    SM: Slip marker. 

    M1R: Pick up the bar between the stitch you have just knitted and the next stitch, bringing the needle from the back to the front. Knit into the front. 

    M1L: Pick up the bar between the stitch you have just knitted and the one you are about to knit bringing the needle from the front to the back. Knit into the back of the stitch. 

    SL: Slip stitch

    PSSO: Pass slipped stitch over the knitted stitch. 

    P2tog: Purl two stitches together. 

    SKP: Slip one, knit one, PSSO. 

    K2tog: Knit two stitches together. 

    Other sock knitting patterns to try.

    Andalusian stitch socks.

    The Flock socks.

    Thank you for reading this sock knitting pattern. If you’ve made a pair, why not share a photo in the comments? Let others know what yarn you used and start the discussion! Sock knitting brings lots of people together and can be really handy when you want a quick, satisfying project but don’t have a lot of time.

    Simple cuff own sock knitting pattern free. Free sock pattern
  • Sock knitting with two straight needles. Can you knit socks flat?

    Wondering how to knit socks on straight needles? Try this two needle flat sock pattern. You can have all the glamour of 4ply socks without the worry of extra needles.  

    This article about knitting socks on straight needles contains affiliate links, meaning that if you do choose to buy, I will receive a small commission at no cost to you.

    Despite there being thousands of socks knit in the round. there is still strong demand for the flat knit sock pattern. This method is perfect for those of us who prefer knitting with two straight needles but want to try socks. 

    When I proposed the idea of designing one last spring, it was met with some scepticism. Why would anyone want to knit flat when you can knit with socks in the round? Where will the seam go? Will it be comfortable? It will be too much hassle with a toe seam, a heel seam or a side seam. 
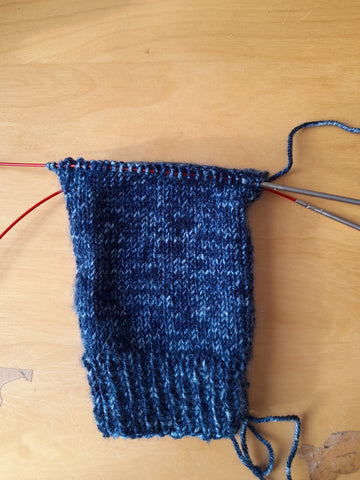
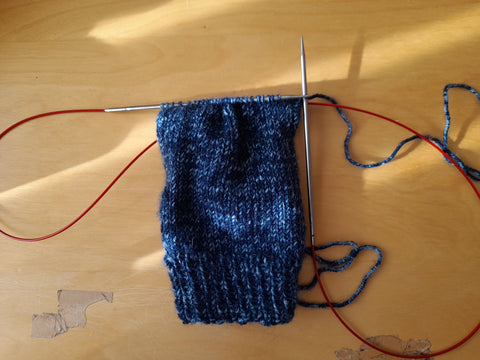
    I managed to solve all of these potential issues. It is now my bestseller. There is good reason for it; not everybody wants to knit in the round. As a designer, I have always believed that design should solve problems as well as appeal to needs. If you prefer two sticks to four sticks, that’s absolutely fine. In fact, I am so happy with offering choice that I am working on my first two needle sock knitting ebook this year. 

    Flat knit sock knitting pattern

    Every now and then I see enquiries pop up in Facebook knitting groups along the lines of ‘where can I find a 2 needle sock pattern?’. 

    Here! You can find one here!.

    What’s so special about my best selling flat knit sock pattern? A few things! 

    • They are made using 4ply sock yarn.
    • They are cuff down.
    • They are worked flat the whole way- even the heel.
    • There is no heel seam to put on a stitch holder.
    • There is no toe seam to put on a stitch holder.
    • There is no side seam either.
    Two needle sock knitting pattern. Easy beginner socks with 4ply yarn. Beginner socks. Easy socks to learn to make socks.

    What? How does this even work? 

    You knit from the cuff to the heel, increase for the heel, work some short rows (don’t be scared, it’s easier than it seems), knit to the toe, do some more decreases, and seam up the front. 

    The true difficulty depends on your seaming skills to be honest. If you choose a solid colour, you can hide the seam easier than striped, but that shouldn’t matter. It’s a sock. It will be worn under trousers and shoes. Also, in my experience people don’t tend to inspect my knitwear. 

    Need help choosing sock yarns?

    Here I’ll recommend my favourite sock knitting yarns and tell you a bit about them:

    West Yorkshire Spinners Signature 4ply Sock Yarn.

    It doesn’t get any better than this, sorry. West Yorkshire Spinners Signature 4ply is such a straightforward, everyday sock yarn. It’s perfect because it’s a blend of British wool and some nylon for strength. I’ve used it for most of my sock designs, and have quite a bit in my stash. Other reasons why it’s great include:

    • It comes in a 100g ball. Perfect for a pair of adult socks.
    • It comes in a huge range of colours.
    • The yarn smells deliciously sheepy (if you know, you know.)
    • It comes in self-striping as well as solid or marl.
    West Yorkshire Spinners Signature 4ply knitting yarn. Every knitting yarn for sock knitting. How to knit socks flat.

    I’ve even used WYS Signature 4ply in my sock knitting patterns. You can find my basic cuff-down sock knitting pattern by clicking the image below.

    Simple cuff down beginner socks using 4ply yarn. West Yorkshire Spinners Sigmature 4ply. Easy sock knittin gpattern for beginners. How to knit socks in the round.

  • How to knit with double pointed knitting needles. DPN tutorial.

    How to knit with double pointed knitting needles. DPN tutorial.

    In this post we will explore double pointed knitting needles. These are also known as DPN and come in sets of 4 or 5 needles. They also come in 15cm (6in), 20cm (8in) and even 30cm (12in) and 40cm (15in) for larger projects such as adult sweaters!

    DPNs are really useful when it comes to knitting things in the round. They are incredibly handy when knitting something small like the finger of a glove, or a baby sleeve.

    Knitting with double pointed knitting needles can look really complicated, but once you realise you’re only ever knitting with two needles at a time you will be able to knit in the round easily with these handy sets of needles.

    In this article, we will be looking at:

    • How to cast on with double pointed knitting needles (video or step by step photo tutorial)
    • What kind of needles you will need for your project.
    • How to choose your next set of double pointed knitting needles.

    Find out more about double pointed knitting needles below.

    Disclosure: This post may contain affiliate links. This means that if you choose to shop via any of the links, I will receive a small commission at no extra cost to you.

    Here’s how to cast on and knit with double pointed knitting needles.

    Ever wanted to try double pointed needles but were put off by how complicated they look? Maybe after seeing how to cast on and knit with them, you might see past the entangled hedgehog and feel more confident about giving them a try. 

    Here’s a video showing you how to knit with double pointed needles. There is also a step by step photo tutorial on this page. 

    What are double pointed needles used for? 

    You can use DPNs (double pointed needles) to knit absolutely anything in the round. You can use short ones such as 10cm and 15cm to knit socks and mittens, then there’s 20cm needles for hats and cowls. There are also 40cm double pointed needles to knit garments on. They’re very versatile and knitters have been using them for at least a century. That’s a long enougn lifespan to justify their usefulness, don’t you think? 

    Addi aluminium double pointed knitting needles. The best knitting needles for knitting in the round. DPNs how to knit with them.

    Double pointed needles come in a range of materials and textures too. Wood needles are probably the lightest, with aluminium, plastic and steel not far behind. You can try the different materials out and see what’s right for you. Wood needles have a bit more flex so can therefore be more forgiving for a loose-tensioned hand. The steel needles may be more slippery and less useful for you but you won’t know until you try them as they can have excellent precision on lace knitting and picking up stitches. 

    This blog post is all about getting you started with double pointed needles. Take your time, be patient and have a go! 

    Casting on with double pointed needles: 

    To cast on, cast on like you would with a traditional, straight needle. A problem for many beginners is casting on too tightly and this can cause your stitches to twist, so here’s what I do: 

    Cast on over two needles. How to knit with souble pointed needles. DPN step by step tutorial for beginners. Knitting tutorials for DPN.

    Cast on across two needles held together. This forces some space between the stitches and allows you to easily get the next needle into the stitches. If your cast on method doesn’t work with this two needle technique, just cast on with one larger, straight needle.

    For the sake of this tutorial, let’s call them needle 1, 2 and 3 with an active needle. 

    Where to buy the best double pointed knitting needles. DPN tutorial for beginners. Addi needles. Bamboo double pointed knitting needles.

    In this example here I have a 4mm straight needle to cast on with and I’m using 3mm double pointed needles for the rest of the project. This needle with no stitches on it will be needle 1. 

    How to knit with DPN. Double pointed needles for beginners.

    When you have cast on the desired amount of stitches, use just one of the spare needles to start knitting. Let’s say that in this example it is a sock that we are knitting, we would be doing rib stitches (K1, P1). 

    Decide how many needles you want to use to knit your project.

    Double pointed needles come in sets of 4 or 5. Most knitters will use 3 or 4 needles to hold stitches and 1 needle as the active needle. 

    Knitting tutorials for beginners.

    In this example, I’m knitting stitches using the active needle. This will become needle 1. I’ve called it the ‘active’ needle and as you knit in the round, there should always be one free or ‘active’ needle for picking up the stitches.

    Now I’m knitting another batch of stitches onto the active needle. This will be needle 2. 

    When you’ve decided how many stitches you need to have on each of the needles, just keep knitting across them with the active needle. The active needle will change every time you finish a set of stitches. In the photo above, I’m knitting the second set of stitches with my active needle. 

    If you’ve cast on over two needles, you can remove one of them when knitting the last set of stitches as you’ll need a new active needle to create needle 3. 

    When you’ve knit across all of the cast on stitches, it is time to join to work in the round. All you have to do is bring the first needle back to your right hand. It should have the tail end with it. I’ve knit across needle 1, 2 and 3 and have an active needle (4th needle). You can do this easily by flipping the entire project over. 

    To join, knit the first stitch of needle 3 with the active needle. 

    This will cause them to join in the round. You just keep knitting across the needles until you get to the desired length. 

    If you’re knitting something larger like a hat or even a garment, you may want to use 4 needles plus the active needle.  

    How do I stop the needles slipping off? 

    If you are starting out and don’t feel confident keeping control of the needles, this can be due to loose tension/things getting caught, 

    To ensure the needles don’t point vertically and slip out of your stitches, you can try any of these things: 

    • Knit over a desk so that the needles stay mostly horizontal.
    • Knit over a cushion on your lap. This will stop the needles from dropping anywhere.
    • Make sure your sleeves aren’t long and getting in the way. Roll them up or wear short sleeves when you’re using your DPNs for the first few times.
    • Try not to hold the needles up to your face to see stitches. This can cause them to slip off. Make sure you have good lighting and can see the project well.
    • Use needle stoppers. These are usually rubber shapes such as cones or balls that stop stitches slipping off the needles. Whilst they are very practical for needle storage and holding projects when you’re not using them, they might be a bit of a hassle if you have to remove them every time you knit onto the next needle.

    As your tension improves, your needles should stay on the stitches. 

    Using double pointed needles shouldn’t be scary

    At the end of the day, you are only ever knitting with two needles at any one time. Don’t let other knitters put you off using double pointed needles. There are often well meaning but unhelpful suggestions to “just use magic loop” or “buy these types instead” but I think it’s important that you try things out before deciding what is and isn’t for you. For all you know, you could love using double pointed needles. 

    Which DPNs are right for me?

    There are many types of knitting needles due to personal preference. Some knitters prefer lightweight, wood needles while others prefer metals like steel and aluminium. Generally, plastic and aluminium are at the cheaper end of the range available, but they’re great to have if you’re just learning! Take a look at these types below to see what you would prefer when it comes to knitting with double pointed needles.

    Lykke Driftwood Double Pointed Knitting Needles (6in)

    Many knitters swear by LYKKE needles and it’s simple to understand why: they’re lightweight and available in natural materials. These driftwood needles are 16 Sizes (2mm – 9mm).

    Lykke is the Norwegian word for happiness, which is certainly what you’ll be feeling by using their range of knitting and crochet accessories.

    As global demand is increasing for our products, this community of skilled workers is growing too, expanding our output capacity. High quality materials and thoughtful design details produce the most beautiful and durable products. The craftsmanship is really something to admire! All knitting needles and crochet hooks are handcrafted and assembled in Nepal by Nepalese craftspeople.

    These needles are renowned for their reputation of being strong and flexible with a smoothness that won’t snag! Buy now and add something special to your craft bag.

    Addi bamboo double pointed knitting needles.

    These little needles are so smooth and lightweight. I used them in some of the images above, as well as the video. This is because I was knitting something really small (a mini sock) and didn’t want long, heavy needles getting stuck on the desk as I worked. The addi bamboo double pointed knitting needles are small as well as light, so they’re really handy for on-the-go knitting or working with something tiny, like a toy!

    What I particularly like about these needles is how smooth they are. They’re waxed, so they don’t splinter easily and the yarn glides down the shaft just as it would with a metal needle. I would suggest using bamboo knitting needles for acrylic yarns as the plastic on plastic you get with Pony needles for example can be quite squeaky! Not ideal if you’re sensitive to that kind of thing.

    They’re also getting my vote because they come in 6 handy sizes. Start really small with 2mm and work your way up to 4mm. They’re absolutely perfect for tiny things like toys, socks and gloves.

    Addi grey aluminium double pointed knitting needles

    These double pointed needles are my absolute favourite, ever. They’re a great size for socks and mitts as well as sleeves. I swear these needles make me knit faster! They’re so simple and in the years I’ve owned addi aluminium needles, none have bent. I’ve had my longer straight needles kink, and my thinner knitpro needles bend, but not these. My addi’s have been loyal to me and are fantastic for knitting sleeves for my kids’ stuff as well as for my own. I think the 20cm length are perfect for sleeves and hats as once you’ve separated the stitches, they don’t go riding off the edge easily.

    They’re smooth, coated metal so there’s no snagging or pulling on your stitches. I wouldn’t recommend them if your hands are sensitive to the cold (the bamboo or driftwood needles are better suited in this department) but they’re great and they’re still my favourite. As with most needles, they come in several sizes so they’ll suit a variety of projects. They come as a set of 5 so you can always leave that extra one in the bag if you’re not knitting a big hat or an adult sleeve. I have these in sizes 3.5-5.5mm because I find them so handy. You can shop Lovecrafts range of addi double pointed knitting needles here.

    Other double pointed knitting needles to consider:

    Personally, I love anything by addi. They’re always such fun designs and so very useful. Being German, they scream practicality and functionality, but there’s also some cuteness there. I just love these needles. You can see Lovecrafts’ range of DPNs available here.

    Thank you for reading!

  • How to block a hat. Step by step blocking tutorial for hats.

    How to block a hat. Step by step blocking tutorial for hats.

    Here’s a quick run down of how and why you would block a knit or crochet hat. 

    Why block a hat? 

    • To achieve desired fit e.g slouch or beret.
    • To open out any lace detail.
    • To relax the yarn.
    • To straighten any ruched stitches.
    • To even out the overall balance of the stitches.
    • To fix any mistakes with tension.

    What is blocking? 

    Blocking is washing and shaping your knit or crochet pieces to the desired shape or size. Taking the time to block your natural fibres especially enables easier seaming as you can match the edges up clearly. It also helps with drape or fit of a garment. If you have used a cable stitch or a moss stitch in a natural or really light yarn, blocking can even it out so that you can see the full detail. 

    Why block a hat? You have a head!

    It may seem excessive to block a hat when you have a head but it can really give the project a smooth, professional finish and it doesn’t need any specialist equipment!

    I’ve blocked this particular hat because the slipped stitches caused the fabric to rumple. I wanted to straighten it out so that you can see the effect of the stitches. The crown is also a feature so I wanted to make sure it lies flat. 

    Here’s how I block a hat: 

    1. Place the finished hat in some warm water. You could use wool soaking solution to add some fragrance or conditioning if you wanted to but I’ve gone without here.

    How to block a hat

    2. Let it absorb all of the water. 

    Blocking process in knitting

    3. Take it out and give it a good squeeze. Do not wring or you’ll end up stretching it into oblivion and ruining all of your hard work. 

    4. Lay it on a towel and roll it up, squeezing any further excess moisture out of it. 

    5. Grab something rounded, like a bowl, a ball or a balloon. I’ve blown up a balloon and inflated it to around the same size as my head. You can always inflate it a little smaller as it will stretch to fit your head anyway. Just work with what you have! 

    6. Make sure that the hat is secured. Here, I’ve rested the narrow part of the balloon in a vase. This could just be an upturned bowl too. 

    7. Leave the hat to dry naturally. 

    When the hat is dry, it will be a slouchier fit than it was before blocking. This is what I want. I can also see the slipped stitches clearly now. 

    I hope you found this tutorial helpful!- Hanna 

  • Titania crochet shawl pattern. Free crochet shawl pattern.

    Titania crochet shawl pattern. Free crochet shawl pattern.

    The Titania shawl crochet pattern is an elegant, lace wrap using 4ply yarn and V stitch to create that airy, lace fabric and elegant drape. This is a free crochet shawl pattern but if you would prefer a PDF with no ads, you can get one from Ravelry or Ko-Fi.

    This article contains affiliate links. If you choose to purchase from the links, I do receive a small commission.

    This is a simple rectangular wrap and is a great project if you have a couple of skeins of a silky yarn. You can find the full pattern below.

    How to make this elegant wrap:

    Welcome autumn with this new crochet rectangular wrap: The Titania crochet shawl. 

    Titania crochet shawl. Long rectangular crochet lace wrap. Free crochet shawl pattern. Crochet shawl pattern free. Easy women crochet scarf.

    Titania crochet shawl pattern

    ©Germander Cottage Crafts

    Pictured: The Titania Crochet Shawl draped over a mannequin’s shoulders. 

    It is a rectangular crochet shawl named after the Queen of the Fairies in Shakespeare’s A Midsummer Night’s Dream. Titania is a graceful, delicate rectangular wrap with the strength and structure to hold up through cooler months. From the Greek meaning “Great One”, Titania is possibly the loveliest crochet piece I feel I have ever designed. 

    What is the difficulty level for this shawl pattern? 

    This is an adventurous beginner pattern, meaning that if you know how to make a chain, make a double crochet stitch (UK treble) and know how to work into the chain space, you can make this shawl.

    If you don’t know how to do those things, here are some helpful posts:

    How big is this shawl? 

    It measures a whopping 19.5in (49.5cm) wide and 80in (204cm) long when blocked. This really will wrap around you. If you know someone who is 6’4, it is the same height as them! 

    What yarn did I use to make the Titania shawl? 

    As with a lot of my designs, the yarn came before the shawl. Sometimes it just tells me what it wants to be. You know how it is with yarn! It has powers. 

    I used a Silk / Bluefaced Leicester blend as both fibres are known for their sheen, strength and drape. This shawl hangs in a way that reminds me of water and its movement. The v stitches create a flower-like shape and run symmetrically either side of the central panel, like a reflection on still water. Feel every bit ethereal when you wear this piece. My shawl was made using The Definitely on purpose Unicorn by Black Stag yarn and fibre. It’s a bluefaced leicster and silk blend 4ply yarn. There;s a 55% Bluefaced Leictester and 45% silk in every skein, so this really is ‘special’ yarn. You can read more about it here.

     Pictured: A close up of The Definitely On Purpose Unicorn. 

    Definitely on purpose unicorn hand dyed silk bloend yarn used for the Titania shawl.

    If you can’t get this yarn, I can recommend some here that will work just as well for the silkiness and the drape:

    Valley Yarns Charlemont: This is 60% Merino Wool 20% Silk 20% Polyamide, 401m (439yds)/100g (3.53oz), 4 Ply and will do the job just as well as the yarn I used for my crochet shawl. It is £16.49 a skein and comes in a range of colours. It is pictured here in Mulberry.

    King Cole Giza Cotton 4ply: This is actually a really lovely, silky cotton yarn with good drape. It doesn’t pill as much as merino based yarns do, so it’s not only a great budget yarn but it’s a good yarn to work with. It’s 100% Cotton, 160m (175yds)/50g (1.76oz), 4 Ply. You will need approximately 5-6 balls of this, but at £3.09 a ball, it’s a great affordable choice, coming in at half the price of the Valley Yarns option.

    Cascade Yarns 220 Fingering: This is another great choice if you’re wanting to use a natural fibre. This is 100% wool and you get 250m (275yd) per 50g skein. You’d therefore need 4 skeins of this to make the shawl. It’s £4.99 a skein, putting it in the mid-range of yarn prices mentioned here.

    An adventurous beginner can create this beautiful shawl as it requires the double crochet stitch and the half double crochet stitch.

    With only a two stitch pattern repeat, this shawl should be nice and repetitive for you to work on. As it works into the chain spaces rather than the chains, it is also speedy compared with crocheting row by row into every stitch. 

    Crochet lace shawl. The Titania crochet lave wrap across shoulders.

    Pictured: The Titania shawl photographed from the back when worn horizontally across the shoulders. 

    Other yarn ideas for the Titania crochet shawl pattern.  

    Let’s have a look at the different yarns that dome of my testers have used already to make this shawl. Below are samples made by my crochet testers. 

    This shawl sample was made by Suzanne (Sluvs2knit on Ravelry) and uses Alize Diva Ombre Batik 7370 which is a 4ply gradient cake yarn. I think it’s worked up beautifully and shows off the shawl’s qualities. 

    A lace shawl hanging from a window. The Titania lace shawl. Alize Diva Ombre batik.

    If you’re looking for something warmer, you could try Eden Cottage Yarns Tempo 4ply as Elsa has used here. This colourway is called Woodland and you can read more about it here.  This is a gorgeous colour and fibre for autumn! I think hand dyed looks exceptional here too. 

    Close up of Tempo 4ply in woodland. Rectangular lace shawl

    Pictured: A close up of the Titania shawl using Tempo 4ply. 

    Titania crochet lace shawl pattern pdf. Easy crochet shawls to make.
    The Titania crochet lace wrap

    I hope you enjoyed seeing the samples from my testers. I certainly did! Which is your favourite? 

    See below for the full crochet shawl pattern.

    Titania 

    Named after the Queen of the Fairies in Shakespeare’s A Midsummer Night’s Dream, Titania is a graceful, delicate rectangular wrap with the strength and structure to hold up through cooler months. From the Greek meaning “Great One”, Titania is possibly the loveliest crochet piece I feel I have ever designed. I chose a Silk / Bluefaced Leicester blend as both fibres are known for their sheen, strength and drape. This shawl hangs in a way that reminds me of water and its movement. The v stitches create a flower-like shape and run symmetrically either side of the central panel, like a reflection on still water. Feel every bit ethereal when you wear this piece.

    An adventurous beginner can create this beautiful shawl as it requires the double crochet stitch and the half double crochet stitch.

    This pattern uses US crochet terms. Please use my handy US/UK crochet terms guide if you’re unsure of anything.

    Glossary 

    ChMake a chain. 
    Ch spChain space. 
    DcDouble crochet. Yarn over, insert hook, yarn over and pull through 2 loops on hook, yarn over and pull through another 2 loops on hook. 
    HdcHalf double crochet. Yarn over, insert hook, yarn over and pull through 3 loops on hook. 
    Sk Skip the next stitch(es).
    St(s)Stitch(es).
    V stMake a double crochet stitch, chain 1 and make another double crochet stitch into the same chain or chain space. 
    Dbl v stMake 2 double crochet stitches into the chain space, chain 1 and make 2 more double crochet stitches into the same space. 

    Materials: 

    • Black Stag Yarns The definitely on purpose Unicorn – BFL/Silk Fibre: 55% Superwash Blue Faced Leicester, 45% Silk; 4 ply, 438 yards / 400m per 3.5 oz / 100g skein. 3 skeins. 
    • G-7 (4.5mm) crochet hook or size needed to obtain gauge. 

    Gauge 

    4.5 dbl v sts and 9 rows to 4 in / 10cm gauge square using G-7 (4.5mm) hook. 

    Finished measurements when blocked

    19.5in (49.5cm) wide and 80in (204cm) long. 

    Notes: 

    Always ch 2 before starting a hdc row, and ch 3 when starting a v stitch row. Every row ends with an individual Dc st to help the shawl maintain a rectangular shape. 

    All terms are given in US terminology. 

    The shawl is worked horizontally beginning with the hdc centre panel. After one side of the pattern is worked, we work into the base of the centre stitches on the other side of the work. This creates the symmetrical effect.

    Instructions 

    Starting with centre panel, ch 244 (2 chs count as turning ch)

    Turn.  

    (Alternatively, work a hdc chainless foundation row of 242 sts.) 

    Starting with the 4th ch from hook, work 242 hdc. Ch 2 (counts as first st) turn. 

    Work four more hdc rows in the same way (242 sts and 5 rows in total). On the final row, do not ch 2. 

    Row 1: Ch 3 (counts as edge Dc), turn, Sk 2, v st in next ch, *Sk 2, v st in next ch; repeat from * to last 3 chs. Sk 2 and Dc in last ch. Ch 3, turn. 

    Row 2: Dbl v st into every v st ch sp. Work one Dc into last st. Ch 3, turn. 

    Row 3: V st into every ch sp along, ending with a Dc in last st. Ch 3, turn.

    Row 4: As Row 2. 

    Repeat Rows 3-4 eight more times. 

    Finish with one more v st row. Fasten off. 

    Turn piece around and rejoin yarn to the first hdc st of the first row. Ch 3. 

    Working into the base of the first hdc row:

    Row 1: V st in 7th ch from hook (ch 3 counts as edge Dc), *sk 2, v st in next ch; repeat from * to last 3 chs. Sk 2 and Dc in last ch. Ch 3, turn. 

    Row 2: Dbl v st into every v st ch sp. Work one Dc into last st. Ch 3, turn. 

    Row 3: V st into every ch sp along, ending with a Dc in last st. Ch 3, turn. 

    Row 4: As Row 2. 

    Repeat Rows 3-4 eight more times. 

    Finish with one more v st row. Fasten off. 

    Finishing 

    Weave in ends and pin out to measurements shown.