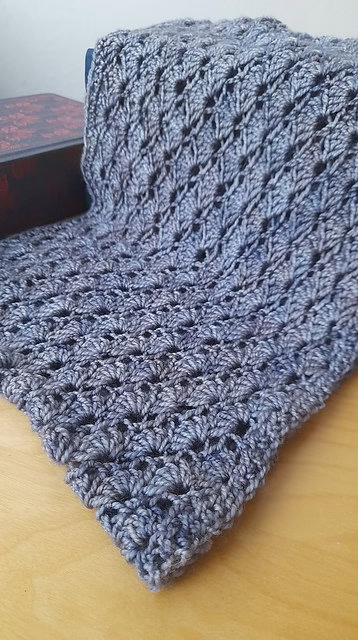
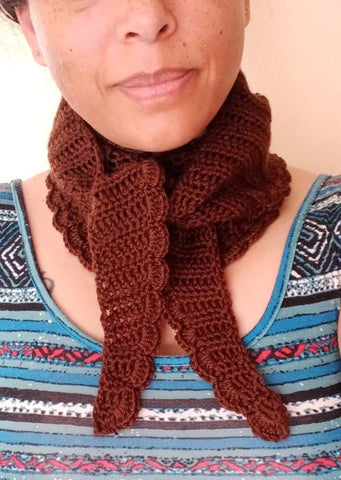
This crochet cowl design was inspired by the piece “Le Onde” (The Wave) written by Einaudi. The combination of shell stitches and the colour ‘pebble beach’ works beautifully to create the effect of waves. Enjoy this cowl for its drape and warmth and celebrate the beauty of crochet.
You can either use the free pattern with ads here, or you can get an ad-free PDF from Ravelry or Ko Fi:
75g/3 oz of 4ply yarn such as Fyberspates Vivacious 4ply in Pebble Beach (365m/399yd per 100g/3.5oz skein).
3.75mm/US 5 crochet hook or size needed to obtain gauge.
Measurements:
Finished piece measures 34 cm/13in wide and 22cm/9in long when blocked and laid flat. 22 shell rounds.
Gauge: Blocked measurements are 3 shells and 10 rows per 10cm/4in using a 3.75mm/US5 crochet hook.
Pattern uses US crochet terms throughout.
Glossary
Ch
Chain
Dc
Double Crochet (Treble UK)
Hdc
Half double crochet (Half treble UK)
Sc
Single Crochet (Double crochet UK)
Sl
Slip stitch
Shell stitch:
First round: Sc into second chain from hook, skip next 2 ch and Dc 5 times into the next Ch. Sk 2 Ch. Make a Sc into the next Ch. Repeat to end for 1st row. End with a single Sc.
Second and every following round:
Ch 3 (counts as 1st Dc), Dc 4 more times into Sc of previous round (5 dc in total). Ch 1, Sc into the top of the next shell (the middle dc of the 5 Dcs) *Ch 1 and DC 5 times in next sc. Ch 1 and sc in top middle of next shell.* Repeat* to end with a Sl into the top of the first Sc or Sc of the round.
Notes: If you start the next round on the first dc of a shell, Sl across the top of the shell until you reach the 3rd Dc of the shell. Ch 2 to make an sc and start the pattern for the next round from there.
Instructions
Make a Hdc Foundation chain of 102 sts. Alternatively, Ch 104 (2 ch count as 1st Hdc) and join to work in the round, taking care not to twist stitches.
Round 1: Hdc in 4th chain from hook (chain counts as 1st stitch) Hdc in every chain across. Sl into last st to complete round.
Round 2: Hdc in every st.
Cowl shown using 5, 50g mini skeins of 4ply instead. This is Manos silk blend.
Start shells:
Round 1: Follow instructions for 1st round of shell stitch above to set up. 17 shells.
Follow shell stitch pattern instructions for 22 rounds.
Next 2 rounds: Dc in every Sc and Sc in every Dc to end (102 sts). Sl. Fasten off.
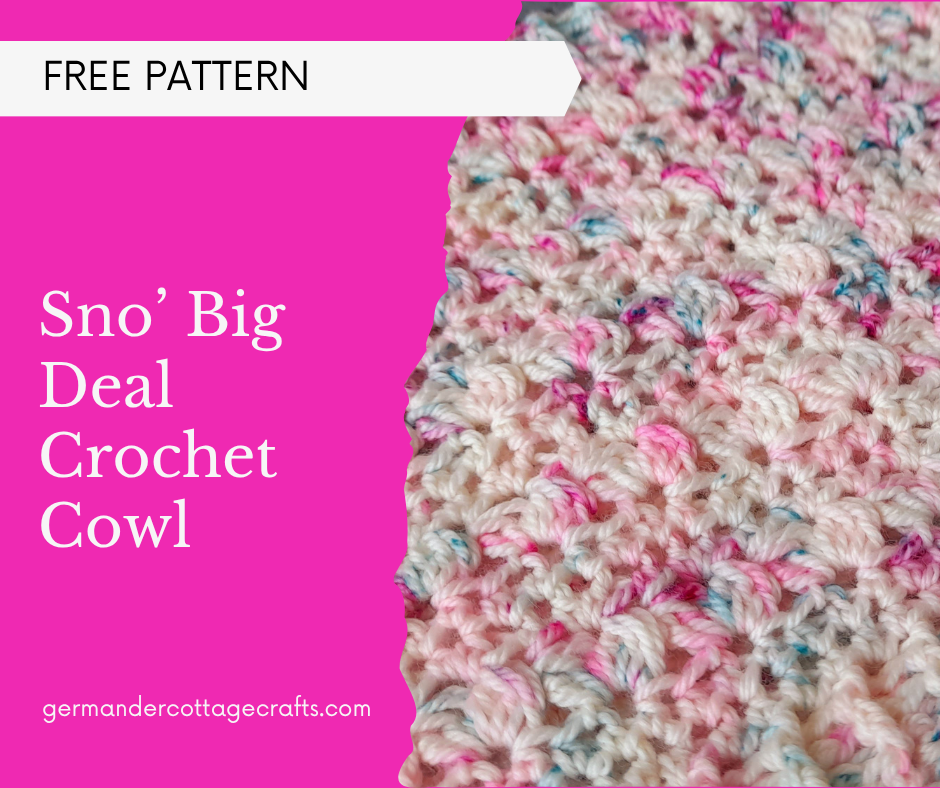
The Sno’ big deal crochet cowl was born in the middle of an unexpected UK blizzard. The v bobble clusters remind me of the blossoms that are trying their hardest to come out despite a thick, powdery blanket of snow everywhere.
With this deep, squishy, textured cowl, you will be prepared for all unexpected cold weather snaps, wherever you are!
Measurements: Piece measures 23cm/9in deep and 32cm/12.5in in circumference, after blocking.
This is a free pattern with ads. if you would prefer the convenience of a downloadable PDF, you can get one on my Ravelry store or Ko Fi shop:
85g/3oz of Little Grey Girl High Twist DK (80% Superwash Merino, 20% Nylon; 243m/266yd per 100g/3.5oz) in colourway Alwyne.
5.5mm/US 9 crochet hook, or size needed to obtain gauge
Darning needle for weaving in
Gauge:
4 v bobbles and 9 rows = 10cm/4in with 5.5mm/US9 hook
Please swatch to meet gauge as I have quite loose tension. You may need to go up a hook size if there are fewer stitches, or go down a hook size if there are more stitches than stated.
Special stitch(es):
Hdc rib:
Work alternating front post and back post half double crochet.
Bobble stitch:
Step 1: Yarn over, insert hook, yarn over and pull through, yarn over and pull through 2 loops. Leave remaining 2 loops on hook.
Step 2: Yarn over, insert hook, yarn over and pull through, yarn over and pull through 2 loops. Leave remaining 3 loops on hook.
Step 3: Yarn over, insert hook, yarn over and pull through, yarn over and pull through 2 loops on hook. Yarn over and pull through all 4 remaining loops on hook.
V bobble: Work one bobble stitch, chain 1 and then work another bobble stitch in the same chain as the first one you made. This creates a V shape.
Helpful videos:
Hdc rib:
Hdc stitch:
Foundation crochet chain:
Glossary:
Ch: Chain. This either means yarn over and pull through a loop or it refers to the chain at the top of the previous stitch.
Ch sp: Chain space which is the gap formed by missing stitches.
Back post Hdc: Yarn over, insert hook from back to front to back around post of corresponding stitch below, yarn over and pull up loop, yarn over and draw through all 3 loops on hook.
Front post Hdc: yarn over, insert the hook from front to back to front around the post of the stitch below, yarn over and pull up a loop, then yarn over and pull through 3 loops.
Hdc: Half double crochet (UK half treble)
Hdc rib: Hdc in the front post of the first stitch, back post hdc in the second. Repeat to end.
Sk: Skip stitches
Sl: Slip stitch. Insert hook, yarn over and pull through.
St(s): Stitch(es)
Yo: Yarn over. Wrap yarn around hook before inserting into a chain, stitch or chain space.
Pattern uses US terms throughout.
Cowl:
Setup: Either chain 78+2 and work 1 row of Hdc (2ch count as 1st st) or make a foundation half double crochet chain of 78 sts.
Sl first and last hdc to join in the round.
All following rounds will end with a sl to join round.
Rounds 2-4: Hdc rib.
Round 5 and 6: Hdc all sts. Sl to join round.
Round 7: Ch 2, yo, insert hook into base of ch2, yo, pull through, yo, pull through 2 loops, yo, insert hook, yo, pull through, yo, pull through 2 loops. Yo, pull through all remaining loops on hook. Ch 1, bobble in same ch. 1st V bobble made. *Sk 2 ch, V bobble in next ch; repeat from * to end. 25 v bobbles total.
Round 8: Ch 2 (counts as 1st hdc), *2 Hdc in ch sp of V bobble, 1 hdc in next ch; repeat from * to end.
Round 9: Hdc to end (78 sts).
Repeat Rounds 7-9 four more times. 21 rounds total.
Hdc rib for 4 rounds. 25 rounds total.
Fasten off, seaming up gap from joining chain. Weave in ends and block to measurements.
Beth K runs her knitwear pattern brand Things Beth Makes. Her patterns are deceptively simple and Beth inspires me all the time with her energy and enthusiasm for knitting. There’s no one I would have thought better to give beginners some tips when it comes to starting their knitting journey!
If you’re just starting out or you have learned the basic stitches and want to move on with knitting patterns, Beth shares her most helpful advice for beginners.
Between Shower SocksDK Goldbrick socks by Beth K.
Guest Post By Beth K
Hi! I’m Beth, the knitter, designer and teacher behind things.beth.makes. I learned to knit from my Grammy when I was about 5 years old and I have been making ever since. I always made adjustments and modifications to patterns as I went, as I never seemed to fit into the standard sizing offered. When 2020 hit and I had nowhere to go, I started digging deeper into my knitting creativity and started publishing patterns. At the end of 2020, I published my first pattern – the Comforted by Cables pillow cover. And I just kept going after that!
These are my favorite tips, tricks, and patterns for beginning knitters. Hopefully, there’s a little bit of something for everyone here.
Lombard socks by Beth K
Never let anyone tell you what you should and shouldn’t be able to knit as a beginner. Want to knit a colorwork sweater? Go for it. Start with socks? Do it. Only comfortable knitting garter stitch scarves? Amazing. Have at it. What I’m trying to say is that there is no right or wrong path to knitting growth and success. It all lies in the knitter’s mind and how adventurous they want to be. Will starting with a colorwork sweater rather than a garter stitch scarf have more bumps and missteps along the way? Absolutely it will. But if that’s who you are and what you want to knit, that’s the path you should choose. Anybody who tells you otherwise will only hold you back.
Each designer has their own style and their own way of explaining the stitches and flow of their patterns. Find the designers whose styles work best for you and stick with them. Don’t feel bad if the pattern everybody is knitting doesn’t click for you. That doesn’t say anything about your abilities or your smarts. Some designers just aren’t going to be for you, and that’s ok.
Don’t be afraid to try knitting socks. I waited 30 years to knit a pair of socks and now I can’t stop. I’m obsessed with them. So much so that they dominate my design time. Two patterns that are perfect for the beginning sock knitter who doesn’t want to bite off too much are the DK Goldbrick and the Goldbrick Lite (fingering weight version). These are simple stockinette, cuff-down socks knit with a heel flap and gusset. The original patterns are great if you want to stick with a single color and stockinette, but they also include a step up with instructions to modify the pattern for a striped ankle sock version.
Once you’ve learned to knit simple, stand-alone cables, don’t hesitate to move on to complex cables. Complex cables are just a series of simple cables that have been combined over multiple rows. If you can break these cables down into individual parts, you can knit any cable. The Ferrian shawl is a great way to learn about these building blocks. You’ll work stand-alone cables to create diamond shapes, but you’ll also work intertwining cables to connect the diamonds. Neither are terribly complex, but you’ll be learning to read both the cable instructions and your fabric to understand how to combine cable stitches.
And this last tip is the soapbox I will die on: anybody telling you Continental knitting is better than English knitting is just a snob. Plain and simple. Learn to knit using as many techniques as possible so you have the right tool for any pattern you want to knit. For example, if you can hold your yarn in your right and left hand, you can knit two-handed for stranded colorwork. Once I realized that little trick, I started knitting colorwork all the time because it simplified the entire process for me. If you’d like to give stranded colorwork a try, my Oshen Rising cowl is a great place to start. It is knit in the round with a looser-than-normal tension to begin with, and, most importantly, short floats.
Oshen Rising CowlBeth K wearing The Ferrien Shawl
The most important thing beginner knitters should know:
There are no failures in knitting. If you can think of mistakes as an opportunity to learn, you’ll never hide another project in the closet (ok, maybe not never, but a lot less frequently!)
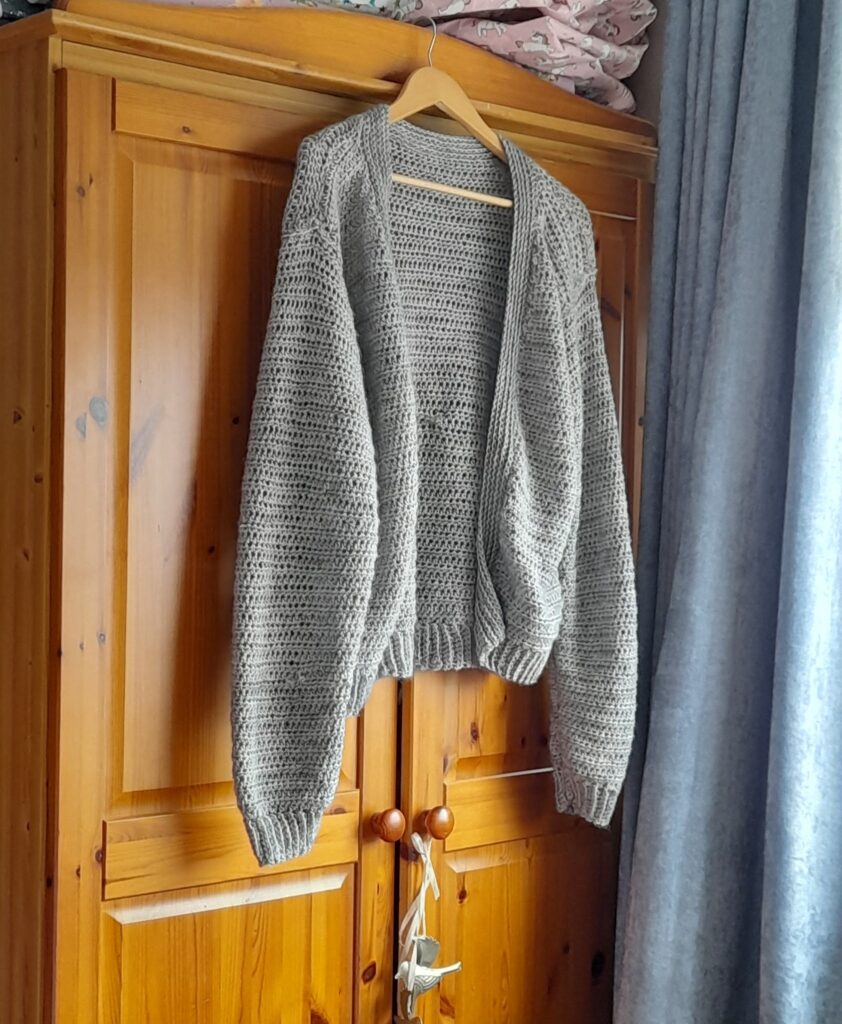
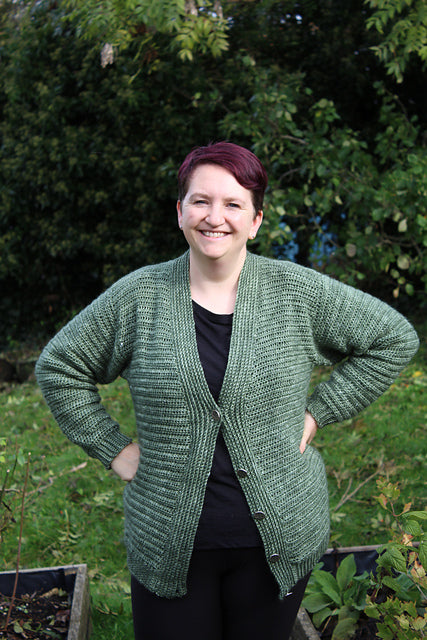
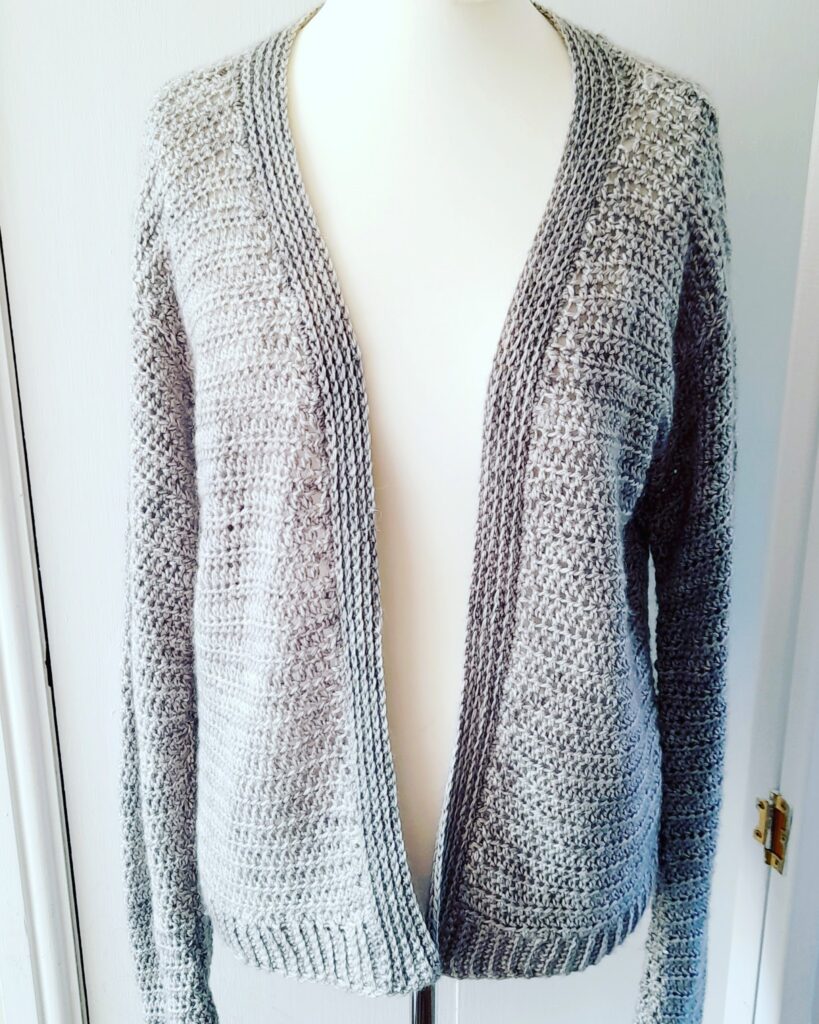
Free crochet pattern: The Beyond Cardigan is available to make in several sizes.
I designed this cardigan to be the first garment for a crocheter looking to expand their skills. The name “Beyond” signifies the journey beyond the swatch, the blanket, or the baby item. This garment is for you to expand your skills in crochet and achieve a sophisticated look without stressing over unfamiliar charts.
This cardigan is made up of 5 pieces that are seamed together at the end. The neckband and button bands are then worked.
The cardigan has 6cm/2.25-13cm/5.25in positive ease, a gentle set-in sleeve, and a relaxed v-neck collar. You can either make it as an open front cardigan, or allocate buttons for a more fitted look. There are instructions for both options!
Only two stitches are used throughout to create different textures. With nothing but half double crochet to worry about for most of this cardigan, you can focus on stitch counts and measurements.
I wanted this cardigan to be an all-year-round style. Whether you use wool, acrylic, linen, or cotton, this cardigan is sure to be a wardrobe staple.
I used a merino/linen blend as I wanted the cardigan to be wearable for cooler spring and summer days right through to autumn. It’s an essential layering piece and should be a feature in every slow fashion wardrobe.
if you would prefer an ad-free PDF of this pattern, you can get one from my Ko-Fi shop here.
14 hdc sts and 10 rows = 10cm/4in using 5mm (US H) hook
Please take time to swatch for gauge. If there are fewer stitches in your swatch than suggested, go up by 0.5mm increments until you achieve gauge. If there are more stitches than shown above, increase your hook size by 0.5mm increments until you achieve gauge..
Glossary
Pattern uses US terms throughout.
Ch: Chain. This either means yarn over and pull through a loop or it refers to the chain at the top of the previous stitch.
Hdc: Half double crochet (UK half treble). Yarn over, insert hook, yarn over and pull through all 3 loops on hook.
Sc: Single crochet (UK double). Insert hook, yarn over and pull through. Yarn over and pull through 2 loops on hook.
Sk: Skip stitches
St(s): Stitch(es)
Materials
Keld Aran by Eden Cottage Yarns (90% superwash merino/10% linen). 180m/196yd per 100g/3.5oz. Sample shows yarn in Steel colourway. Meterage/yardage on page 3 chart gives estimates based on recommended yarn. Depending on your chosen yarn, you may need more or less than this.
5mm (US H) crochet hook or sizes needed to meet gauge.
5 removable stitch markers for buttonholes (optional)
Darning needle for seaming and weaving in ends
5 2.5cm/1in buttons (optional)
Victoria of Eden Cottage Yarns wearing a green Beyond crochet cardigan.
Notes
Ribbing:
The bottom waistband and the button bands are made with single crochet rib. This is a technique that involves making a single crochet stitch only in the back loop of every previous stitch. Normally, the hook goes under both loops but for creating texture, but you need to only insert into the back loop.
Turning Chains:
Ch1 does not count as a stitch. Ch2 does count as a stitch.
Size chart
This cardigan is designed to have 6cm/2.25-13cm/5.25in positive ease at the bust.
Bust size
Finished bust
Back to armhole
Armhole
Total back
Actual length
Yarn required
81cm/32in
98cm/37.25in
33cm/13in
21cm/8in
54cm/21in
57cm/22in
481g/866m/943yd
86cm/34in
103cm/39in
34cm/13.5in
21cm/8in
55cm/21.5in
58cm/23in
526g/947m/1031yd
91cm/36in
107cm/40.5in
35cm/13.75in
22cm/8.25in
57cm/22in
60cm/23in
556g/1001m/1090yd
97cm/38in
111cm/42.25in
36cm/14in
22cm/8.25in
58cm/23in
61cm/24in
582g/1048m/1141yd
102cm/40in
116cm/44in
37cm/14.25in
23cm/8.75in
60cm/23.5in
63cm/24.75in
624g/1123m/1223yd
107cm/42in
120cm/45.75in
38cm/14.5in
23cm/8.75in
61cm/24in
64cm/25in
650g/1170m/1279yd
112cm/44in
124cm/47.5in
39cm/15in
24cm/9in
63cm/24.75in
66cm/26in
700g/1260m/1372yd
117cm/46in
129cm/49.25in
40cm/15.25in
24cm/9in
64cm/25in
67cm/26.25in
737g/1327m/1445yd
122cm/48in
133cm/51in
41cm/15.5in
25cm/9.25in
66cm/26in
69cm/27in
784g/1411m/1537yd
127cm/50in
137cm/52.5in
42cm/15.75in
25cm/9.25in
67cm/26.25in
72cm/28in
833g/1499m/1633yd
132cm/52in
142cm/54.25in
43cm/16in
26cm/9.75in
69cm/27in
75cm/29in
865g/1557m/1695yd
The Pattern
Back
Ch 10. Insert into 2nd ch from hook. 9 scs. Ch1, turn.
Starting in the 2nd ch from hook, sc in back loop of every st to end. 9 sts.
Work 47 (55/59/63/67/71/75/79/83/87/91) more rows. 48 (56/60/64/68/72/76/80/84/88/92) rows total.
Without binding off, ch2 and make 68 (70/72/74/76/78/80/82/84/86/88) hdc evenly along top of waistband. Ch2, turn.
Sk 4 (4/4/6/6/6/6/6/6/6/6) sts and rejoin yarn. Ch2 and hdc to 4 (4/4/6/6/6/6/6/6/6/6) sts before end. Turn. 60 (62/64/62/64/66/68/70/72/74/76) sts total.
Work 20 (20/21/21/22/22/23/23/24/25/25) more rows or work until piece measures 57 (58/59/60/61/62/63/64/65/66/67)cm/ 22(23/23/23.5/24/24.5/25/25/25.5/26/26)in, ending on a wrong side.
Left front
Ch 10. Insert into 2nd ch from hook. 9 scs. Ch1, turn.
Starting in the 2nd ch from hook, sc in back loop of every st to end. 9 sts.
Work 23 (25/27/29/31/33/35/37/39/41/43) more rows.
24 (26/28/30/32/34/36/38/40/42/44) rows total.
Without fastening off, ch2 and make 30 (32/34/36/38/40/42/44/46/48/50) hdc sts across top of waistband. Ch2, turn.
Hdc to 1 st before last st, Ch2, turn. 1 st decreased.
Hdc to end. Ch2, turn.
Repeat these 2 rows until there are 14 (14/15/15/16/16/16/18/18/20/20) sts remaining.
Hdc until piece measures 57 (58/59/60/61/62/63/64/65/66/67)cm/ 22 (23/23/23.5/24/24.5/25/25/25.5/26/26)in. Fasten off.
Right front.
Work as for left front until **
Rejoin yarn and hdc to last 4 (4/4/6/6/6/6/6/6/6/6) sts. Ch2, turn, leaving remaining sts unworked.
Hdc to 1 st before last st, ch2, turn. 1 st decreased.
Hdc to end. Ch2, turn.
Repeat Rows 2 and 3 until there are 14 (14/15/15/16/16/16/18/18/20/20) sts remaining.
Hdc until piece measures 57 (58/59/60/61/62/63/64/65/66/67)cm/ 22(23/23/23.5/24/24.5/25/25/25.5/26/26)in. Fasten off.
Sleeves (make 2)
Ch 10. Insert into 2nd ch from hook. 9 scs. Ch1, turn.
Starting in the 2nd ch from hook, sc in back loop of every st to end. 9 sts.
Work 23 (25/27/29/31/33/35/37/39/41/43) more rows. 24 (26/28/30/32/34/36/38/40/42/44) rows total.
Without fastening off, Ch2 and make 34 (34/36/36/38/38/38/40/40/40/40) hdc sts across top of cuff. Ch2, turn.
Hdc in every st. Ch2, turn.
Hdc in base of ch2. Hdc to last st. 2 hdc in last st. Ch2, turn. 2 sts increased.
Increase every 4th row until there are 58 (58/60/60/62/62/64/66/66/66/68) sts.
Hdc every row until sleeve measures 57 (58/59/60/61/62/63/64/65/66/67)cm/22 (23/23/23.5/24/24.5/25/25/25.5/26/26)in total. Fasten off.
Making up:
Join shoulder seams and side seams first.
Seam sleeves and then attach to armholes.
Edging and neckband.
Starting from bottom right corner, join yarn and sc into every sc in side of waistband, sc into side of every st to shoulder seam, sc in every st around back neck and down from shoulder seam to left waistband. Sc in last 9 sc sts of left waistband. Ch1, turn,
Starting with 2nd ch from hook, sc in back loop of every st to end. Ch1, turn.
Repeat Row 2 once more.
If making buttonholes, see buttonhole instructions below. If not, repeat Row 2 twice.
Buttonholes:
Using 5 removable stitch markers, mark 5 evenly spaced button holes up left button band. Work sc rib as normal to end.
Ch1, turn, sc in 2nd ch from hook and sc in back loop of every st to first buttonhole marker. *Ch2, sk 2 sc to make buttonhole. Sc to next buttonhole marker; repeat from * to last marker, then work sc rib to end.
Ch1, turn, sc rib in back loop of every sc and into ch2 of every buttonhole. Work sc rib to end.
Starting with 2nd ch from hook, sc in back loop of every st to end.
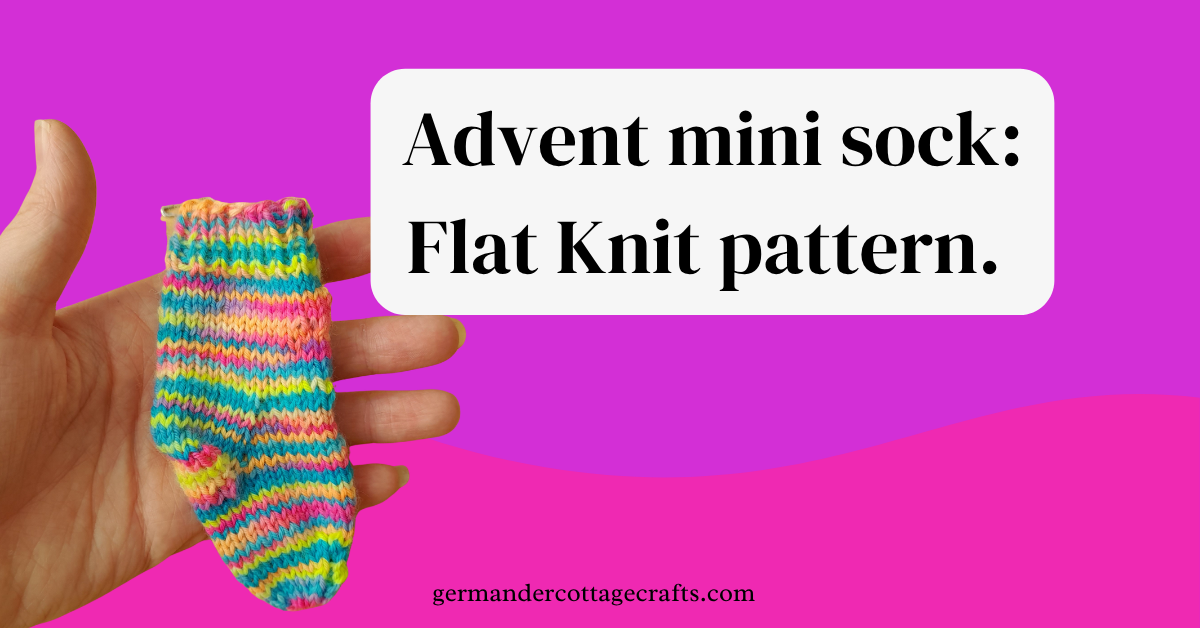
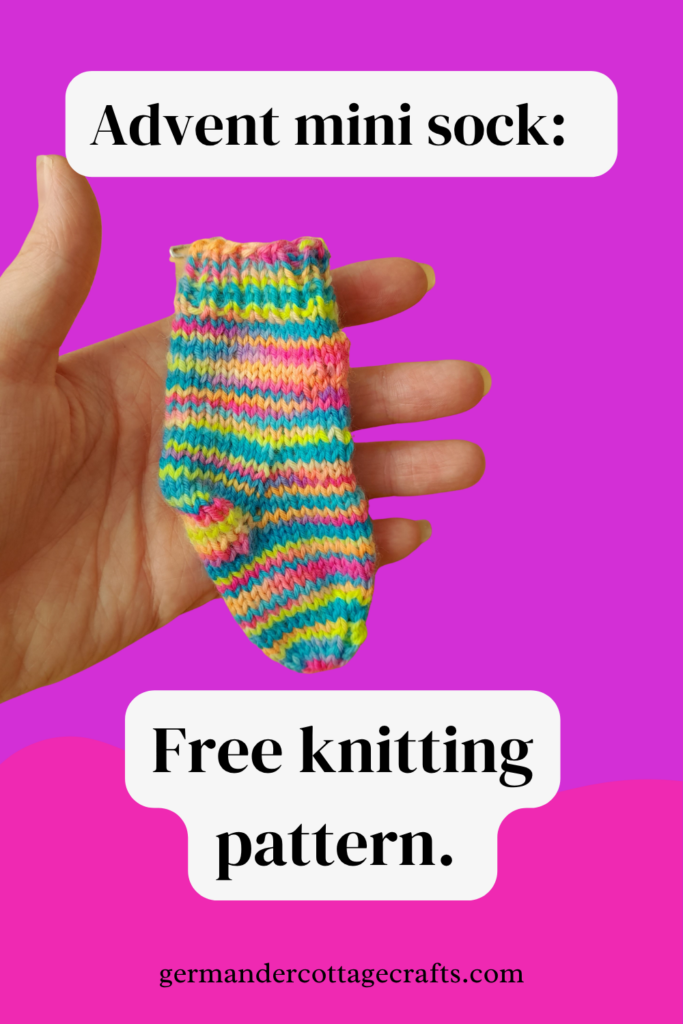
This is the flat knit version of the advent mini sock! This is a simple, quick and easy pattern for beginners looking to understand how knitted socks are constructed.
The advent flat knit mini sock is great for decorative advent socks, baby socks or just some good knitting practice! Below is the free knitting pattern, but if you’d like an ad-free PDF download instead, you can get one from my ko-fi shop here.
About this knitting pattern.
This is the flat knit version and requires only 2 straight needles as opposed to a set of circulars or DPNs. You may want to use this pattern as a gateway into sock knitting as it covers the fundamentals of socks without the worry of knitting in the round.
Knitted from the cuff down in DK yarn, these socks promise a quick project. The gusset heel is worked without the need to pick up stitches, and the sock is finished by seaming up the front and closing the toe with a drawstring finish,
You will need
30g DK yarn (or hold 2 strands of leftover 4ply/fingering yarn)
2.75mm needles, or size needed to obtain correct tension.
3mm needles, or size needed to obtain correct tension
4 stitch markers for heel shaping
Darning needle
You can also see these bonus videos to help you with this sock knitting pattern.
In this video here, I talk you through the entire step-by-step flat knit sock process for the advent mini sock. Please also refer to the written pattern below for extra clarity!
Tip for beginners: please read through the pattern first before making it, as some parts might seem tricky on the first read.
Tension
24 sts and 32 rows to 10cm/4 inches in knit stitch.
Glossary
K
Knit
K2tog
Knit two stitches together (1 stitch decreased)
M1L
Pick up the bar between the stitch you have just knit and the next stitch, bringing the needle from the front to the back. Knit into the back of this stitch (1 new stitch created).
M1R
Pick up the bar between the stitch you have just knitted and the next stitch, bringing the needle from the back to the front. Knit into the front of this stitch. It should seem a bit tight when you’re trying to get your needle in. (1 new stitch created)
P
Purl stitch
P2tog
Purl two stitches together (1 stitch decreased)
PM
Place marker
PSSO
Pass the slipped stitch over the knitted stitch
SKP
Slip one, knit one and pass the slipped stitch over the knitted stitch (1 stitch decreased)
SM
Slip marker
St(s)
Stitch(es)
Pattern
Cuff and leg
With smaller needles, loosely cast on 32 sts
Set-up row: [K1, P1] to end of row.
Continue in [K1, P1] rib pattern until cuff measures 2.5 cm / 1 in.
Switch to larger needles.
Row 1: Knit all sts.
Row 2: Purl all sts.
Repeat last 2 rows until the leg measures 5cm / 2in from cast-on edge.
Round 3: Knit to marker 1, SM1, Knit to M2, M1R, SM2, Knit to marker 3, SM3, M1L Knit to M4, SM4 Knit to end of round. (2 sts increased)
Repeat rows 2 and 3 another 2 times, until 8 new stitches have been created.
You now have 24 sts for the heel, 16 sts for the instep and 40 sts in total.
Decreasing for the heel
Row 1: Knit to marker 1, SM1, Knit to M2, SM2, Knit 11, SKP, turn, leaving the remaining stitches unworked.
Row 2: Purl 7, P2tog. Turn.
Row 3: Knit to 1 stitch before gap, SKP. Turn.
Row 4: Purl to 1 stitch before gap, P2tog. Turn.
Repeat rows 3 and 4 another 2 times.
You have decreased back to the original stitch count: 16 sts for both the heel and the instep, and 32 sts in total. You should be right side facing, with marker 1 on your right-hand needle.
‘Fixing gaps’: Knit to the next marker, remove it and slip a stitch from the left hand needle to the right hand needle. Insert left hand needle into gap as if to make a M1R and bring the slipped stitch back to the left hand needle. Knit them both together. Knit to end removing markers as you come to them. On the purl row, remove the marker and do the same as you did to close the gap: slip a stitch from the left needle to the right needle, pick up the bar as though making a make one right, then bring the slipped stitch back to the left hand needle and P2tog. Purl to end.
Row 3 (RS): Knit to 2 sts before marker, SSK, SM, K2tog, Knit to 2 sts before marker, SSK, SM, K2tog, Knit to end. (4 sts decreased)
Row 4 (WS):Purl all sts.
Repeat rows 3 and 4 until you have 16 sts in total.
Then repeat row 1 one more time, until you have 12 sts in total.
Cut yarn leaving 12.5cm/6in of yarn for threading.
Finishing
Cut a long tail of yarn and, with a darning needle, thread tail through remaining sts and pull tight to close. Then, using mattress stitch, seam up the front of the sock. Weave in yarn ends.
Did you enjoy this pattern? Here are some more sock patterns to build your confidence:
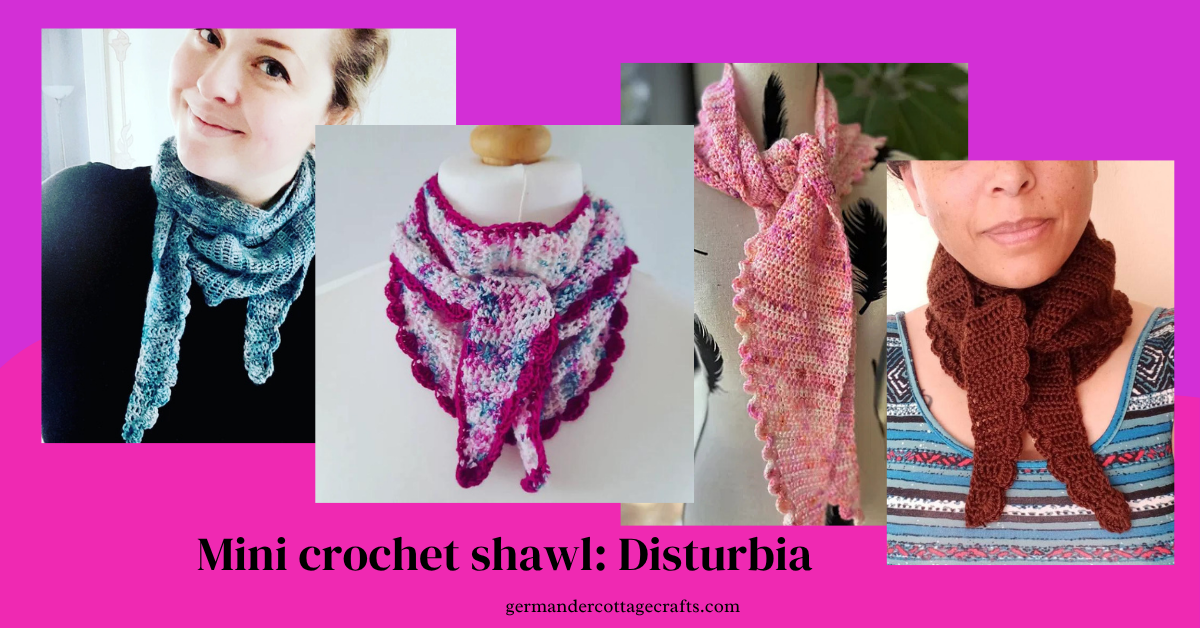
The Disturbia yarn and the featured shawl patterns have been a hit during the launch of the Knit365 collaboration. Here’s more about the Disturbia crochet design and the things I’ve learned along the way.
Firstly, I was absolutely honoured to have been asked to collaborate on this project. When I found out that Louise Tilbrook would be the featured knitwear designer, I lost my mind. I have admired Louise’s work for a very long time and could not believe that I would be working alongside her! It was amazing. I was also very excited to work with Martyn and Gemma on a shawl design that would feature a very special yarn. To say that I was flattered was an understatement. It was the highlight of my design career so far.
As well as this being a fantastic opportunity, it came with some challenges.
Designing a one skein shawl for crochet is a massive challenge.
It’s a well known fact among the bitstitchual that crochet eats up a lot more yarn than knitting does. Crochet uses around 25% more yarn than knitting, even in a similar stitch. There are several reasons for this:
Crochet stitches are taller than knitting stitches.
Crochet fabric is a thicker texture than knit fabric.
To create a crochet stitch, there is more than one motion involved. For example, the single crochet (UK double) involves wrapping the yarn around the hook and pulling through other loops. This all adds layers to the stitch. With knitting, it’s just insert needle, yarn over and pull through. It’s a flat stitch.
This made designing a one skein crochet shawl a huge challenge. I was tasked with designing a shawl that required only 430m of yarn, was accessible to those who are not as confident with crochet and one that would be long enough for someone to wear. Sounds straightforward, right?
It wasn’t. I was so worried about designing ‘the shit one’ as opposed to the knit one as you can get quite a lot of shawl from 100g of yarn if you’re knitting it. That being said, I am so pleased with how it actually turned out! I worked closely with Louise Tilbrook as we needed to create two designs that looked related but had their own unique elements. Louise was kind enough to let crochet lead when it came to us discussing shapes and lengths, as crochet had less flex than knitting in this instance. Even though the lovely Gemma of Little Grey Girl would have sent me an extra skein in a heartbeat, I wanted to stick to the more accessible, affordable option as we didn’t want anyone to feel left out of the KAL/CAL.
Would I have done anything differently?
I probably could have got a lot more meterage out of a lace or mesh style shawl but it would have frightened the already hesitant makers off, I feel. It had to be something that was beginner friendly, so we have this ‘skinny scarf’ style shawl that can wrap a few times! As a knitwear and crochet designer, it’s always hard selling crochet patterns. There is a real lack of confidence out there when it comes to crochet among knitters and even the most basic pattern can look confusing. I’ve created something really simple and rewarding with those makers in mind.
On reflection, I wouldn’t have done anything differently. Not everyone likes the crochet one (or crochet in general lol) or could do the crochet one but that was always going to be the case! The whole point of this KAL/CAL collaboration is so that there is something for everyone and we can all get involved, so I think I did the job that was asked of me.
Would I do a collaboration like this again?
Absolutely. Working with Martyn, Gemma and Louise was lots of fun. Not only was it refreshing to get to work with other creatives but it really rejuvenated me work wise. Having an online business and being the only person running it can be so lonely at times. You can lose your focus and motivation to design new things or come up with new ideas, so collaborating and working to someone else’s design brief was a lot of fun. I feel more confident than I did and I’m ready to smash some more designs out this year.
End result?
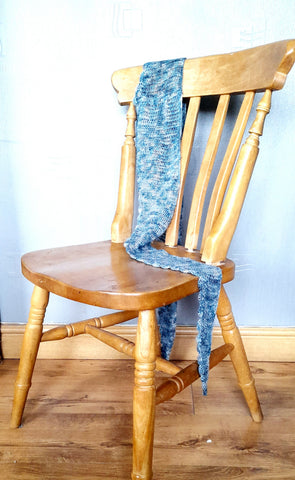
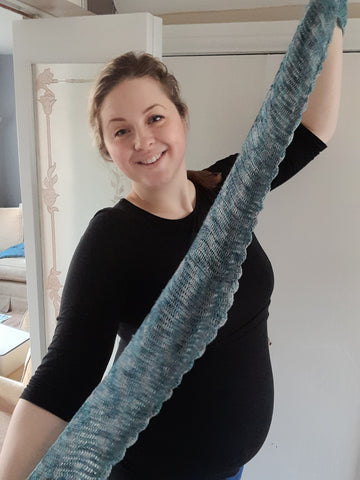
The two shawls are exactly as Louise and I wanted them to be. They are a similar shape but have our own unique twist on them.
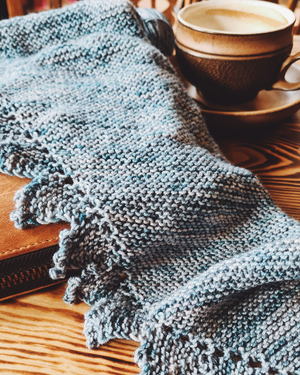
Louise’s has a lovely shark tooth style edging that is knitted as you go.
Mine has a crochet shell edging that can be added at the end!
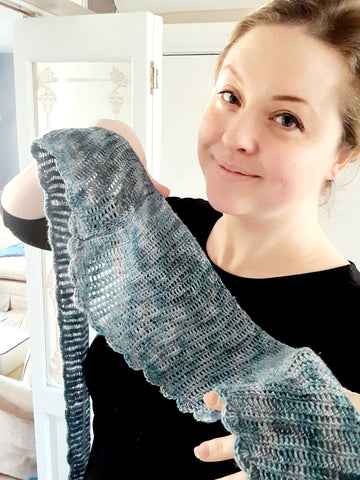
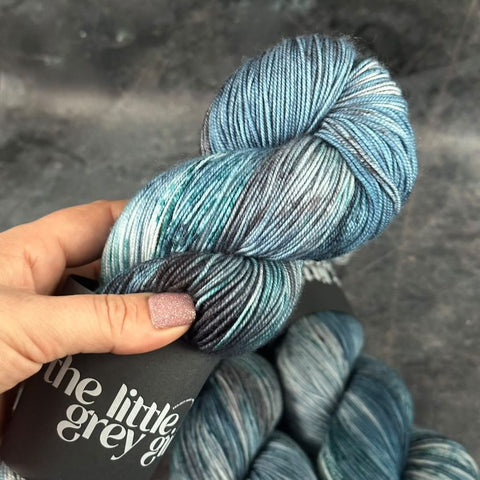
Here’s a close up below of the lovely yarn too. You can read more about it in the link to The Little Grey Girl yarn at the bottom of this page!
Where can we find out more about the KAL/CAL?
The KAL/CAL starts in March. The best way to make sure you don’t miss anything is by subscribing to Martyn’s Youtube channel here. I will be on hand to help with any crochet related questions via the live streams or via my Youtube channel tutorials and I will be knitting Louise’s knit version too!
Here are all of my free sock patterns for you to work on. Whether you are using DK weight yarn or something lighter, there is something here for everyone. If you’re new to knitting socks, be sure to check out the flat knit sock pattern for beginners!
Beginner sock knitting patterns.
These patterns have been marked safe for beginners! Knit them flat or in the round with step by step instructions and photos. If you love the idea of using pretty hand-dyed yarns, socks are the perfect thing to knit.
The easy two needle socks pattern is my most visited free knitting pattern, and you’ll see why. I make sock knitting easy to break down and understand. Start with flat, and you’ll develop the confidence to progress to knitting socks in the round!
This is the free pattern for the DK boot socks. If you have some DK weight yarn to hand and you’re short on time or need a quick, satisfying project, try this pattern! These socks are so fast and satisfying that they make excellent last minute gifts.
This is the first sock pattern I ever published! It’s a simple design for a pair of 4ply (fingering weight) socks knit from the cuff down. In this pattern I show you how to construct a basic sock with a ribbed cuff, square heel and grafted toe.
Knit the stunning flock socks with a fancy skein of yarn. I used Oakworth 4ply from Eden Cottage yarns. These socks are textured, so choose a material that is crisp and will stand out. I used 100% wool for mine.
Hanna Gough is a knitwear and crochet designer from Liverpool, UK. On this blog you’ll find free knitting and crochet patterns as well as tutorials and useful articles! If you’re looking to learn how to knit or crochet, find everything you need here.
This is a free sock knitting pattern for a pair of DK socks.
Knit these really simple cuff-down bed socks with DK yarn and your chosen method of knitting in the round.
In this pattern, I’ve used circular knitting needles to create a magic loop, but you could also try knitting with DPNs and two pairs of circular needles.
What’s more, this DK sock knitting pattern includes a square heel (also referred to as the Dutch heel) and it is an efficient, short row heel that doesn’t involve any picking up of stitches.
Find the handy tutorial below if you’d like to see how the short row heel is made.
If you’d prefer this pattern without ads you can find the basic DK sock knitting pattern PDF on Ravelry or Ko-Fi.
Here’s what you’ll need to knit these simple DK boot socks:
100g (150g, 200g) of DK yarn such as Stylecraft Batik [80% acrylic, 20% wool, 130m per 50g]. I used Indigo.
3mm needle or size needed to obtain correct gauge. 80cm-long circular for magic loop, DPNs or two sets of circular needles.
4 stitch markers
Darning needle
Glossary for this knitting pattern.
K: Knit
K2tog: Knit two stitches together. (1 stitch decreased)
M1L: Pick up the bar between the stitch you have just knitted and the next stitch, bringing the needle from the front to the back. Knit into the back. (1 stitch increased)
M1R: Pick up the bar between the stitch you have just knitted and the next stitch, bringing the needle from the back to the front. Knit into the front. (1 stitch increased)
P: Purl
P2tog: Purl two stitches together. (1 stitch decreased)
PM: Place marker
PSSO: Pass slipped stitch over
Rnd(s): Round(s)
RS: Right side of work
SKP: Slip one knitwise, knit one, pass slipped stitch over the knitted stitch. (1 stitch decreased)
SL: Slip stitch purlwise
SM: Slip marker
St(s): Stitch(es)
TBL: Through the back loops
WS: Wrong side of work
Always check the tension (gauge) of your yarn and stitches to ensure that the fit is correct.
Gauge:
24 sts and 36 rows to 10cm/4 inches in stocking stitch
Finished leg/foot circumference of your DK socks:
Size 1: 17cm/6.75 inches
Size 2: 20cm/8 inches
Size 3: 23.5cm/9.25 inches
Cuff
Loosely cast on 40 (48, 56) sts.
You can use either of these two videos below to knit using DPNs or knit your socks with circular needles for magic loop.
Set-up row: [K1tbl, P1] to end of row, join to work in the round.
Depending on your needles, you may want to place markers to indicate the start and centre of the round. The first half stitches are the heel, the second half the instep. Slip markers as you come to them.
Continue in 1×1 twisted rib for 5cm/2”.
Leg
K all rounds until leg measures 18.5cm/7.25” from cast-on edge.
Heel
Rnd 1: M1R, PM (marker 1), SL1, K 18 (22, 26), SL1, PM (marker 2), M1L, K to end of round. (2 sts increased)
Rnd 2: K all stitches in round.
Rnd 3: K to marker 1, M1R, SM, SL1, K 18 (22, 26), SL1, SM (marker 2), M1L, K to end of round. (2 sts increased)
Repeat rounds 2 and 3 another 5 (6, 8) times until you have created 14 (16, 20) sts.
Turn heel:
Working only with the first 34 (40, 48) sts continue as follows:
Short row 1: (RS) K to marker 1, SM, K 12 (15, 17), SKP. Turn work to WS.
Short row 2: (WS) P 5 (7, 7), P2tog. Turn.
Short row 3: (RS) K to 1 stitch before the gap which has formed. SKP. Turn.
Short row 4: (WS) P to 1 stitch before gap. P2tog. Turn.
If you need more help with turning this sock heel, here’s a video:
Repeat rows 3 and 4 another 5 (6, 8) times until there are 20 (24, 28) heel sts remaining. This was the amount that you started with and your work should be right side facing with marker 1 on your right-hand needle. 40 (48, 56) sts in total.
Set upin the round:
Rnd 1:
Remove marker 1. Insert needle as though making a M1R and slip the bar onto the right-hand needle, K1 and PSSO. K to marker 2, remove marker, insert needle as though making a M1L but slip the twisted stitch onto the left-hand needle and K2tog. K to end.
Foot
K all rounds until foot measures 2.5 (2.5, 3)cm/1 (1, 1.25)” less than desired length.
BOR marker and halfway marker are referred to below.
Toe
Rnd1: [SKP, K to 2 sts before marker K2tog] twice. (4 sts decreased)
Rnd 2: K to end of round.
Repeat rounds 1 and 2 another 3 (2, 3) times until you have 24 (36, 40) sts in total.
THEN, repeat round 1 another 2 (4, 4) times until you have 16 (20, 24) sts in total.
Finishing:
Using grafted toe method, graft the heel stitches to the instep stitches to close the toe. Graft the gap in the cuff closed. Weave in ends.
Help: If you’re not sure how to graft your sock toes closed, here’s a free grafting tutorial.
If you enjoyed this free DK sock knitting pattern, please share it on social media, save it as a project on Ravelry or save this pin below for safe keeping!
If you’re just starting out with socks, you may find them mystifying. It doesn’t have to be that way! This mini sock knitting pattern helps you learn how a sock is made in a quick, simple way. This sock is knit from the cuff down and features an efficient square heel and a rounded toe.
In this mini sock knitting pattern, we’ll cover:
Casting on in the round.
Knitting in the round.
Shaping the heel of a sock.
Turning the heel of a sock.
Knitting the foot of a sock.
Decreasing stitches
Seaming up a sock toe.
This is a great beginner pattern for knitters wanting to make socks.
You can knit as many of these as you like before venturing on to adult sized socks. Use up any leftovers you have, as the pattern only calls for 30g. Experiment with different colourways and stitch patterns as you grow more confident. Scroll down for the full pattern.
This is a free knitting pattern for a mini sock. This is a great pattern to use when learning to knit socks as you can study the shaping and knitting techniques without the commitment of a larger project. This pattern was originally published as part of the Advent Sock-Along KAL in 2023.
If you would prefer to access an ad-free PDF sock knitting pattern, you can find one on Ravelry or in my Ko-Fi shop on a pay-what-you-want basis.
There is also a Youtube video you can watch to help you with the stages below.
Below is the sock knitting tutorial with step by step instructions.
Knitted from the cuff down in DK yarn, these socks promise a quick project. The gusset heel is worked without the need to pick up stitches, and the sock is finished by grafting the toe stitches together using the kitchener method.
You will need
30g DK yarn (or hold 2 strands of leftover 4ply/fingering yarn)
3mm needles, or size needed to obtain correct tension
(80cm-long circular for magic loop, DPNs, or two short circulars)
Two stitch markers for heel shaping
Two stitch markers for the round (optional)
Darning needle
Tension
24 sts and 32 rounds to 10cm/4 inches in knit stitch.
Now, I always say to swatch but if no one will be wearing these, tension may not matter at this time. If you do care about how big the sock will be and whether you will be able to fit your favourite advent treats in it (ferrero rocher nom nom), then by all means, please go ahead and swatch!
Glossary
K
Knit
K2tog
Knit two stitches together (1 stitch decreased)
M1L
Pick up the bar between the stitch you have just knit and the next stitch, bringing the needle from the front to the back. Knit into the back of this stitch (1 new stitch created).
M1R
Pick up the bar between the stitch you have just knitted and the next stitch, bringing the needle from the back to the front. Knit into the front of this stitch. It should seem a bit tight when you’re trying to get your needle in. (1 new stitch created)
P
Purl stitch
P2tog
Purl two stitches together (1 stitch decreased)
PM
Place marker
PSSO
Pass the slipped stitch over the knitted stitch
SKP
Slip one, knit one and pass the slipped stitch over the knitted stitch (1 stitch decreased)
SM
Slip marker
St(s)
Stitch(es)
Cuff and leg
This is where a cuff-down sock knitting pattern starts. try your best to cast on loosely, as you will need the cuff to stretch. However, you won’t be wearing this sock (probably) so don’t panic if your tension is quite tight right now.
Set-up row: [K1, P1] to end of row, join to work in the round.
Depending on your needles, you may want to place markers to indicate the start and centre of the round. The first half stitches are the heel, the second half the instep. Slip the markers when you come to them.
Continue in [K1, P1] rib pattern until cuff measures 2.5 cm / 1 in.
Knit all rounds until the leg measures 5cm / 2in from cast-on edge.
2. Increasing for heel:
Now we’re going to increase stitches for the heel. If you’re not familiar with M1L and M1R, I have a video tutorial below that you can use for reference. Take your time in this section, as you need to focus on your stitch count.
Round 1: M1R, PM (marker 1), K16, PM (marker 2), M1L, Knit to end of round. (2 sts increased)
Round 2: Knit all sts.
Round 3: Knit to marker 1, M1R, SM, Knit to marker 2, SM, M1L, Knit to end of round. (2 sts increased)
Repeat rounds 2 and 3 another 2 times, until 8 new stitches have been created.
You now have 24 sts for the heel, 16 sts for the instep and 40 sts in total.
3. Decreasing for the heel
Row 1: Knit to marker 1, SM, K11, SKP, turn, leaving the remaining stitches unworked.
Row 2: P7, P2tog. Turn.
Row 3: Knit to 1 stitch before gap, SKP. Turn.
Row 4: Purl to 1 stitch before gap, P2tog. Turn.
Repeat rows 3 and 4 another 2 times.
You have decreased back to the original stitch count: 16 sts for both the heel and the instep, and 32 sts in total. You should be right side facing, with marker 1 on your right-hand needle.
‘Fixing gaps’ round: Remove marker 1, insert needle into gap as if to make a M1R and slip the bar onto the right-hand needle, K1, PSSO, Knit to marker 2, remove marker, insert needle into gap as if to make a M1L and slip the twisted bar onto the right-hand needle, K1, PSSO, Knit to end of round.
4. Foot
Knit all sts until you reach 2.5cm/1 inch before desired length.
Repeat rounds 1 and 2 another 2 times, until you have 20 sts in total.
Then repeat round 1 two more times, until you have 12 sts in total.
Finishing
Using a darning needle and kitchener method, graft the heel stitches to the instep stitches to close the toe. Use the long tail from the cast-on to graft the gap in the cuff closed. Weave in all ends.
If you’re trying to think of what kind of nice, luxury gift you can give to a crocheter who seems to have everything, look no further than this range of stylish tool bags and holders.
I’ll talk you through five of our favourite luxury crochet hook tool bags and organisers.
I’ve hand-picked tool bags and pouches with more than 4 stars in their reviews!
This crochet hook storage pouch can be personalised. What’s even better is that this one is made by a small business in the UK. Shop small this Christmas with something special. Here’s what you get with this pouch:
Measures Approx 21cm x 13cm x 6cm
Includes Two Internal Zipped Compartments
Exclusive Maisie Moo Gifts Design
Personalised with your choice of name, making it extra special for the recipient of the gift.
What the reviews say: Reviewers day that it fits all of their crochet hooks as well as scissors, stitch markers, measuring tapes and small, on-the-go crochet projects.
You can get the Maisie Moo personalised crochet hook case on amazon.
This crochet hook case will store everything a crocheter can throw at it in the tools and notions department. Easily fit crochet hooks, measuring tapes, stitch markers, knitting needles, stitch counters and more in this handy, portable storage pouch. This is a lovely gift to give to a crocheter as it has a pretty, floral design on the outer cover, too.
Here’s more information on this crochet tool storage pouch:
Easily store a range of crochet hooks in the elastic loops.
Zip pockets for smaller tools and stitch markers.
Top flaps to stop hooks falling out when in transit.
A stylish rope-tie to close the case.
Dimensions are 53cm long when opened out. 21 cm tall.
Choice of design (cats alternative pictured below).
You can get your Teamoy crochet hook storage pouch here.
Please note that this post contains affiliate links meaning that if you decide to purchase from those links, I earn a small commission at no cost to you.
This bag is beautiful, boasting functionality and a stylish, minimalist design. As you can see, not only is there room for crochet hooks but also knitting needles (and Tunisian crochet hooks) as well as an outer pocket for stitch markers, row counters and other useful accessories. In the inside compartment, you can store yarns or a current project. This storage bag makes travelling with your knitting and crochet simple.
Here are more specifications for this yarn storage bag:
High Quality – Becko yarn storage bag is crafted out of premium printed linen fabric, lightweight yet durable. Printed olive leaves just add to an elegant look.
Large Capacity – Our yarn bag measures 15.6 × 7 × 11.7in, capacious enough to hold all items and kits for knitting. The main compartment not only provides spacious enough for your unfinished needlework, but also has two slots to store your phone, wallet and other items in need.
Orderly Storage – The smaller zipped pocket on the front is for organizing and storing knitting needles, crochet hooks, and other tools and accessories needed. Holds knitting needles of up to 13.6 inches and guarantees fast access to the tools and accessories you need.
Considerate Design – A slip pocket on the back is for storing yarn balls in use and spare ones. Three grommets are for conveniently threading yarn through from the yarn balls being used to the main compartment, which effectively prevents yarn threads from tangling. The lower part of the back pocket is a transparent window and offers you a clear view to the colors and sizes of the yarn balls inside.
Portable & Practical – Our knitting bag comes with a comfy handle and a detachable shoulder strap for being effortlessly carried as a shoulder bag or a cross-body bag. It goes very well along with every fashion styles and also serves as a stylish shopping bag. Definitely an ideal gift for knitting fans.
If you’d like to get this bag for someone you love, you can find it here.
Although this case has been advertised as a circular knitting needle storage pouch, it is also incredibly useful for crochet. In each of the pockets, you can easily fit at least a crochet hook. It also has a wider pouch at the side for hooks, stitch markers, measuring tapes and other accessories.
This case is also excellent for other crafts such as embroidery and crochet. There are three other pouches inside as well as a larger zipped pouch to secure other accessories. It also folds up beautifully.
Here are some more specifications from Muud:
Made from genuine leather
Height: 31 cm, width: 38 cm, length: 8 cm
Care instructions: Muud Care & Clean
This beautiful Stockholm leather case by Muud makes it possible to carefully store and organise your knitting needles and all sorts of accessories. An absolute favourite accessory for all knitting enthusiasts. The case is both luxurious and practical. The various compartments and storage spaces help you keep an overview of all your knitting needles and utensils.
The case holds up to 12 interchangeable needle tips in sizes 2.5mm – 8mm. There are three pockets for needle ropes and a large zipped compartment where additional knitting accessories such as scissors, tape measure and stitch markers. Perfect for those who value quality and good craftsmanship
Leather is a natural material, so its appearance may vary from product to product. The actual colour of the product may also vary from the visual representation on this website.
What reviews say: Reviewers say it is a beautiful and practical case for their needs. The case not only looks great, but also offers plenty of space for a whole set of needle tips and cords. The compartments are designed so that everything fits in well and nothing accidentally slips out. Crafters love to use it, especially when they’re on the go.
You can get the Muud Stockholm accessory pouch here.
5. Muud Frida Wollhaus handmade leather shoulder bag for knitting and crochet tools. £77 ($103)
This bag is beautiful and really is a luxury gift for a crocheter or knitter. This zipped shoulder bag does not look like a tool storage bag at all, making it well-suited to the commute and crafting on-the-go.
More specifications from Muud:
100% genuine leather
Width: 22 cm, height: 15 cm
Available in two colours: whisky and black
Removable and adjustable shoulder strap
Compartments with space for knitting needles and needle ropes
A practical inner pocket with zip with space for small items
Closes with a zip
Get your muud X Frida Wollhaus cross-body tool bag here.
What reviewers say: reviewers love the storage capacity and sleek, useful design.
Overall, these are our favourite crochet tool bags to give as a luxury gift to someone in your life who can’t get enough of hooks and yarn.
Why not save the pin below so you can come back to this post at a later date?