Tag: crochet sweater free
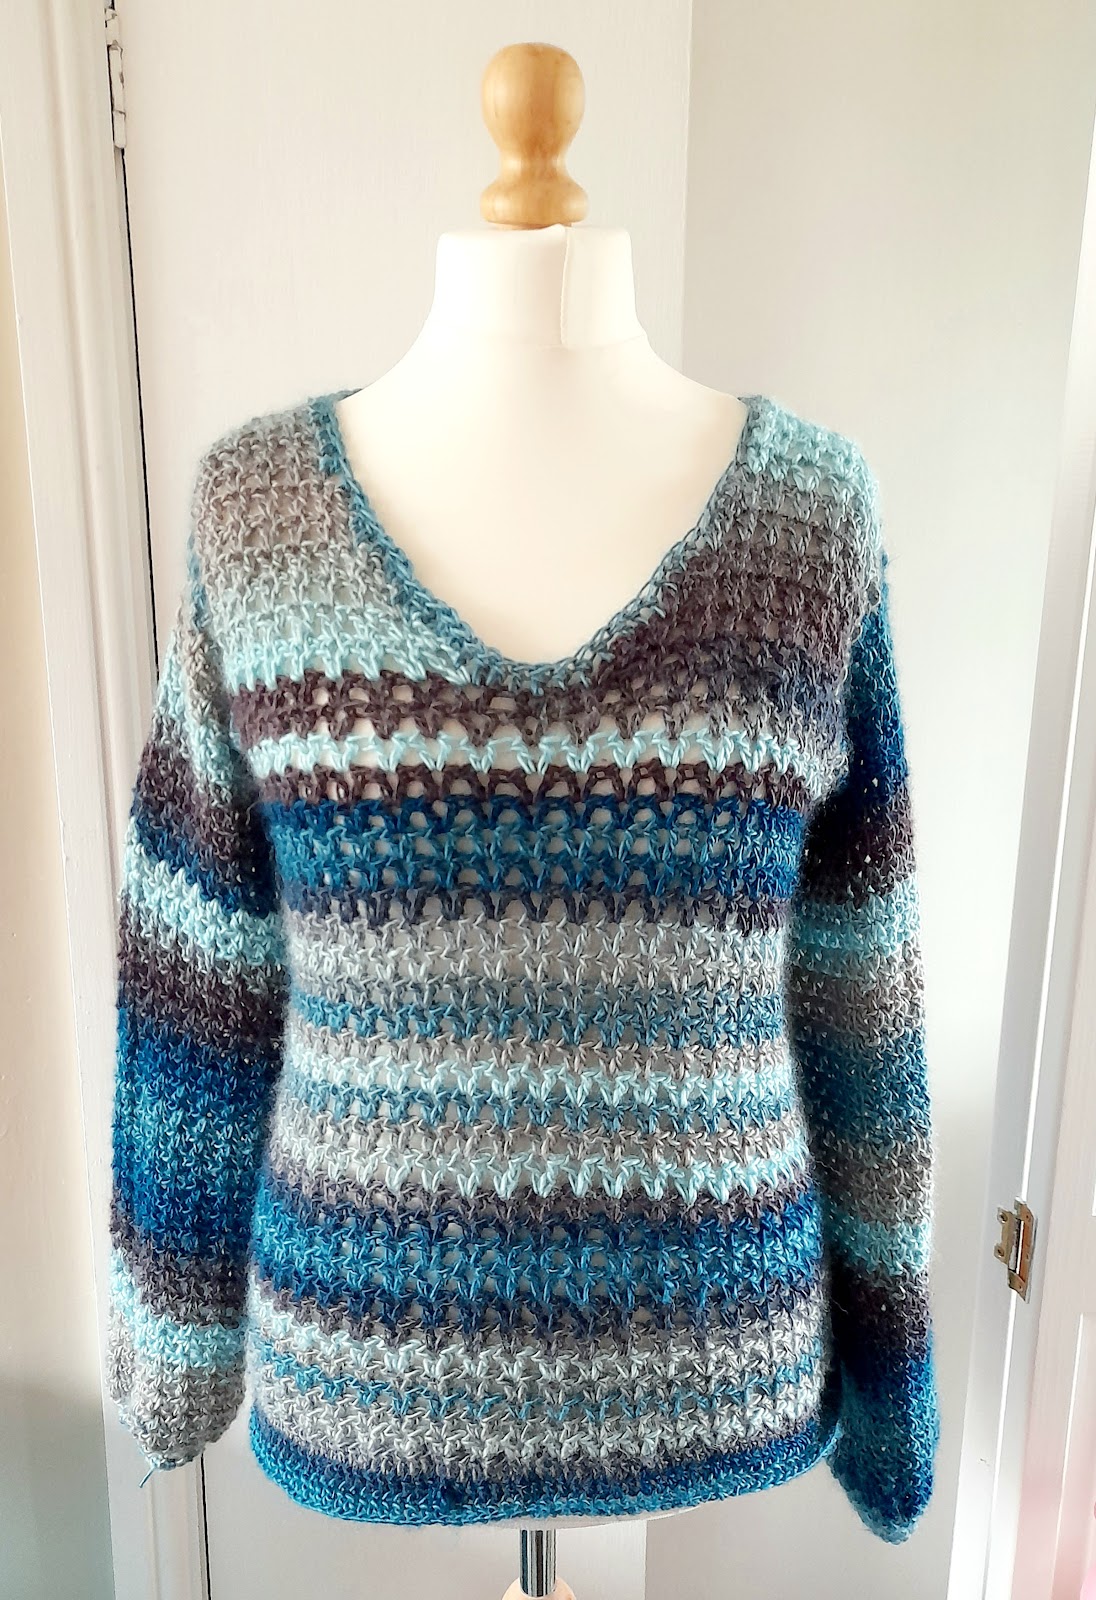
Crochet V stitch sweater: The Breeze Pullover.
Learn how to make this satisfying v stitch sweater in the round. This pattern is free with ads on this blog post. If you would prefer an ad-free download, you can get one here. This article uses affiliate links. This means that if you make a purchase from a link in this post, I receive…
Written by
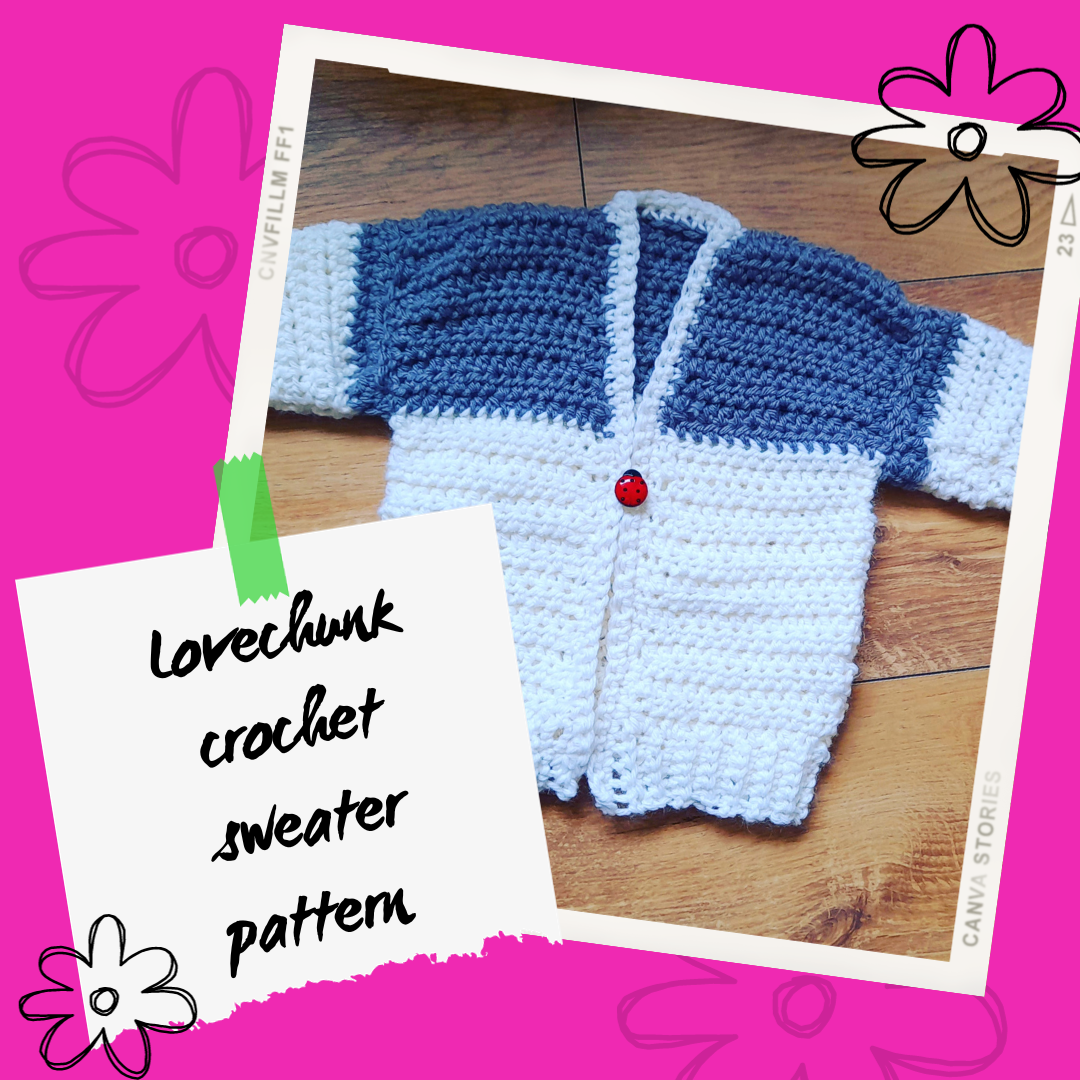
Easy baby crochet cardigan: Lovechunk sweater.
The Lovechunk sweater is a baby crochet cardigan pattern using worsted weight yarn. This ensures a quick, satisfying gift! If you’re in need of a quick, easy make to give to a new baby, try the Lovechunk baby sweater. Not only is it made using aran weight yarn for a quicker project but it is…
Written by
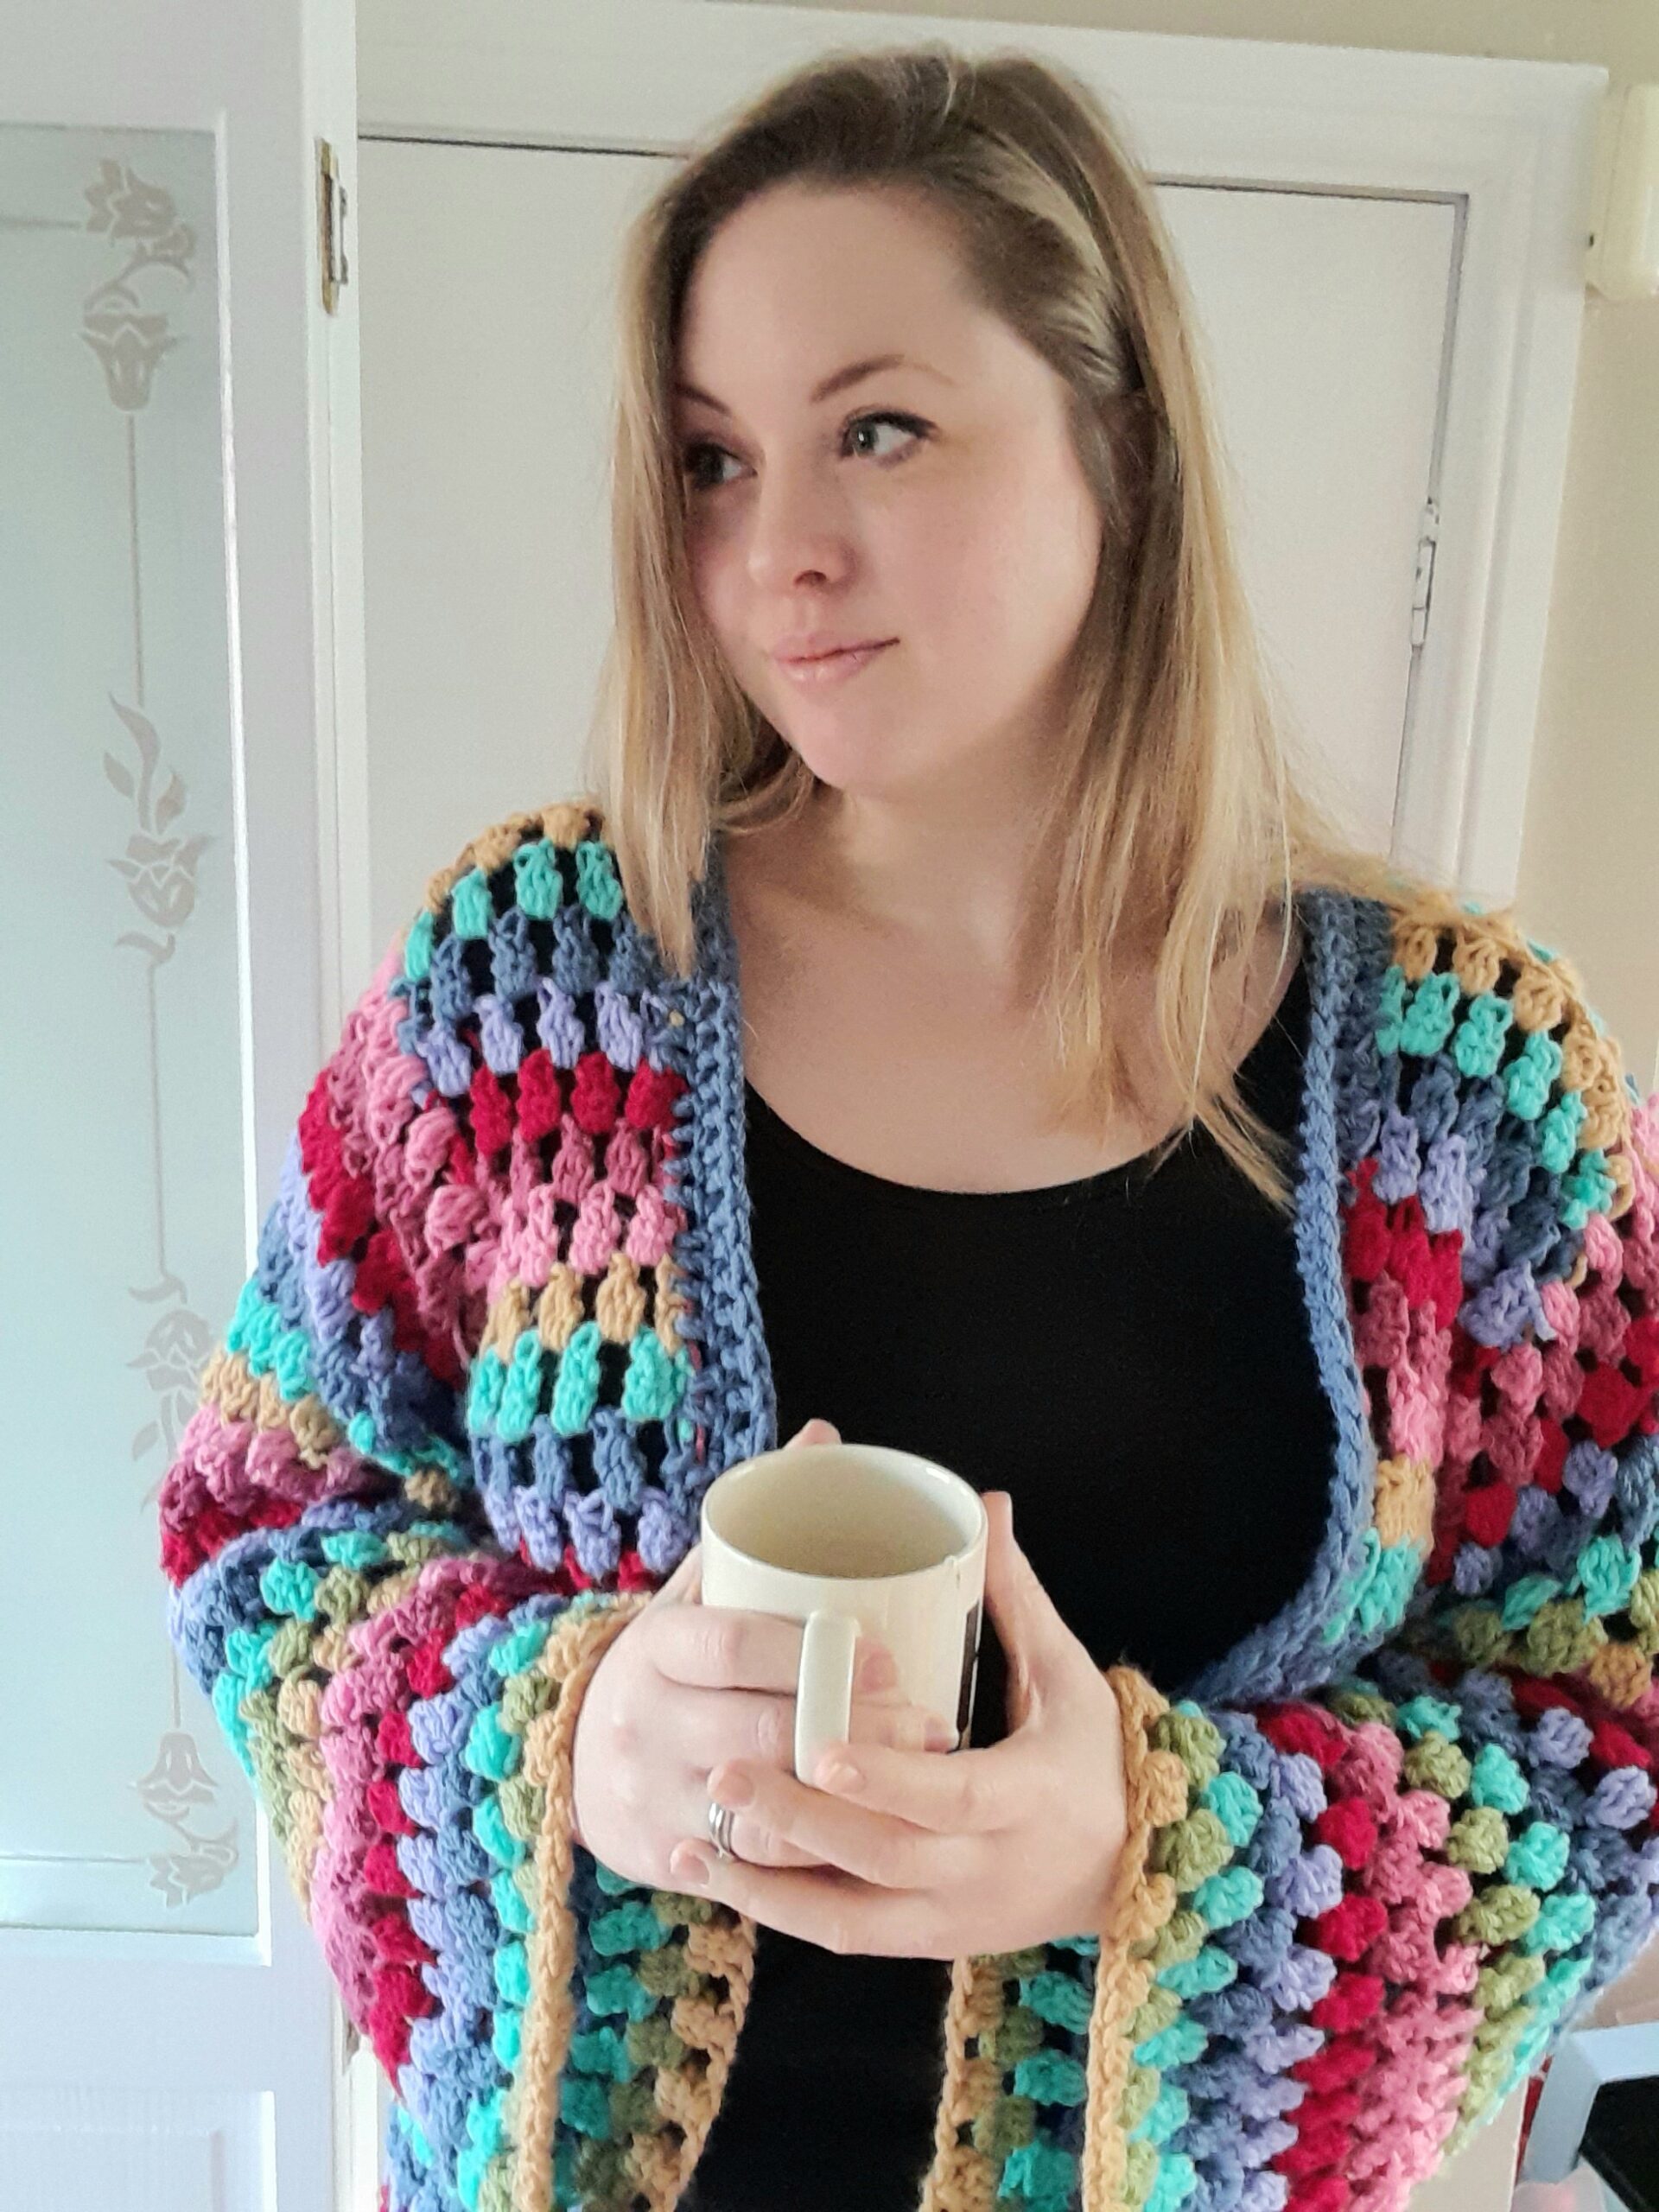
Starburst Cardigan. Chunky crochet cardigan pattern.
This is a free crochet pattern for a chunky, multi-coloured cardigan. You can either use this free version with ads, or the pattern is also available here with no ads. The main feature of this crochet cardigan pattern is the bobble stitch. This is a fun stitch that will be a breeze to make as…
Written by