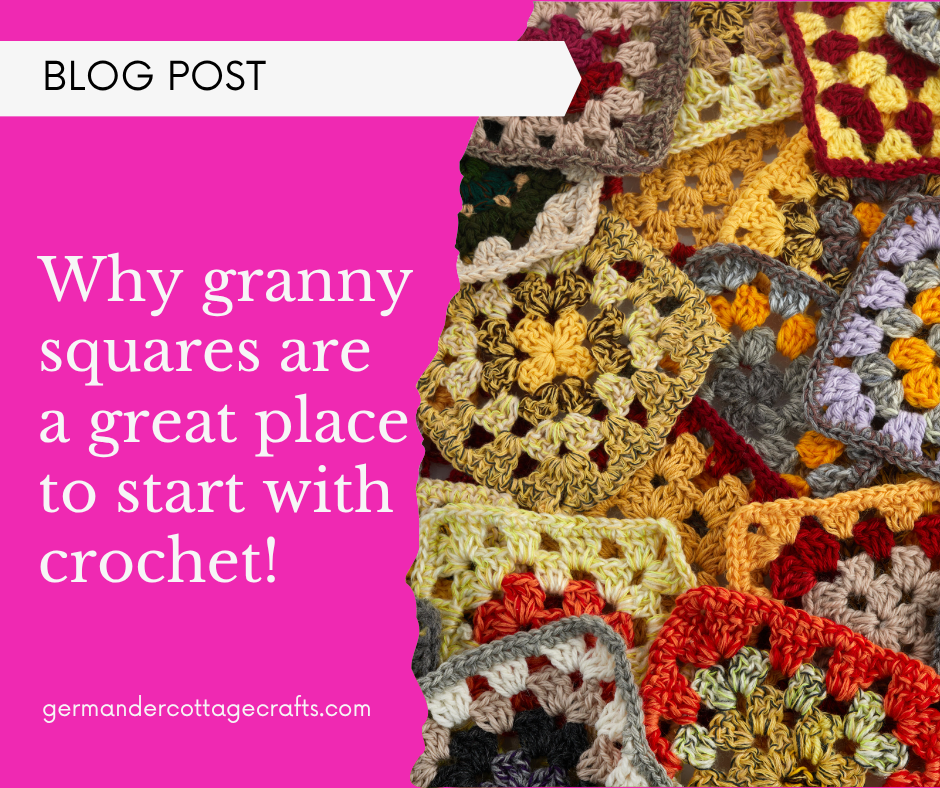
It’s a common misconception that crafters make to think that crochet is only about granny squares and anything that vaguely resembles a granny square. That’s not true. There is so much more to crochet than granny squares but it is a good place to start and I will tell you why in this post.
What else can I crochet?
First, we should talk about what other options there are for crocheters who don’t want to have a go at crochet squares. There are many things you can crochet without having to make anything square. Using any of the four basic crochet stitches, you can create garments, bags, blankets, toys, home decor and much much more.
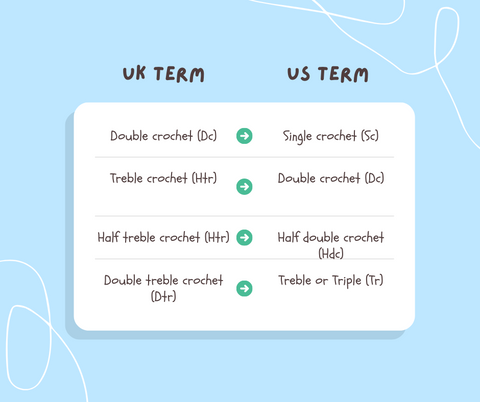
All crochet stitch patterns are made of one of the following stitches:
Single crochet (UK treble)
Half double crochet (UK half treble)
Double crochet (UK treble)
Every stitch following these stitches is just a variant or a ‘build’ on the basics. To make a triple stitch (UK triple treble) you make a double crochet twice. To make a shell or fan stitch, you need to make 5 double crochet stitches into the same chain. To make a v stitch, you make two double crochet stitches into the same chain, with one chain separating them to create the v shape.
If you do want to start with the granny square, that’s fantastic! You can learn a few things from this clever shape:
You can learn how to build in rounds.
Learn to change colours.
Learn to make corner spaces.
Learn how a chain space works.
Keep them small or make something massive!
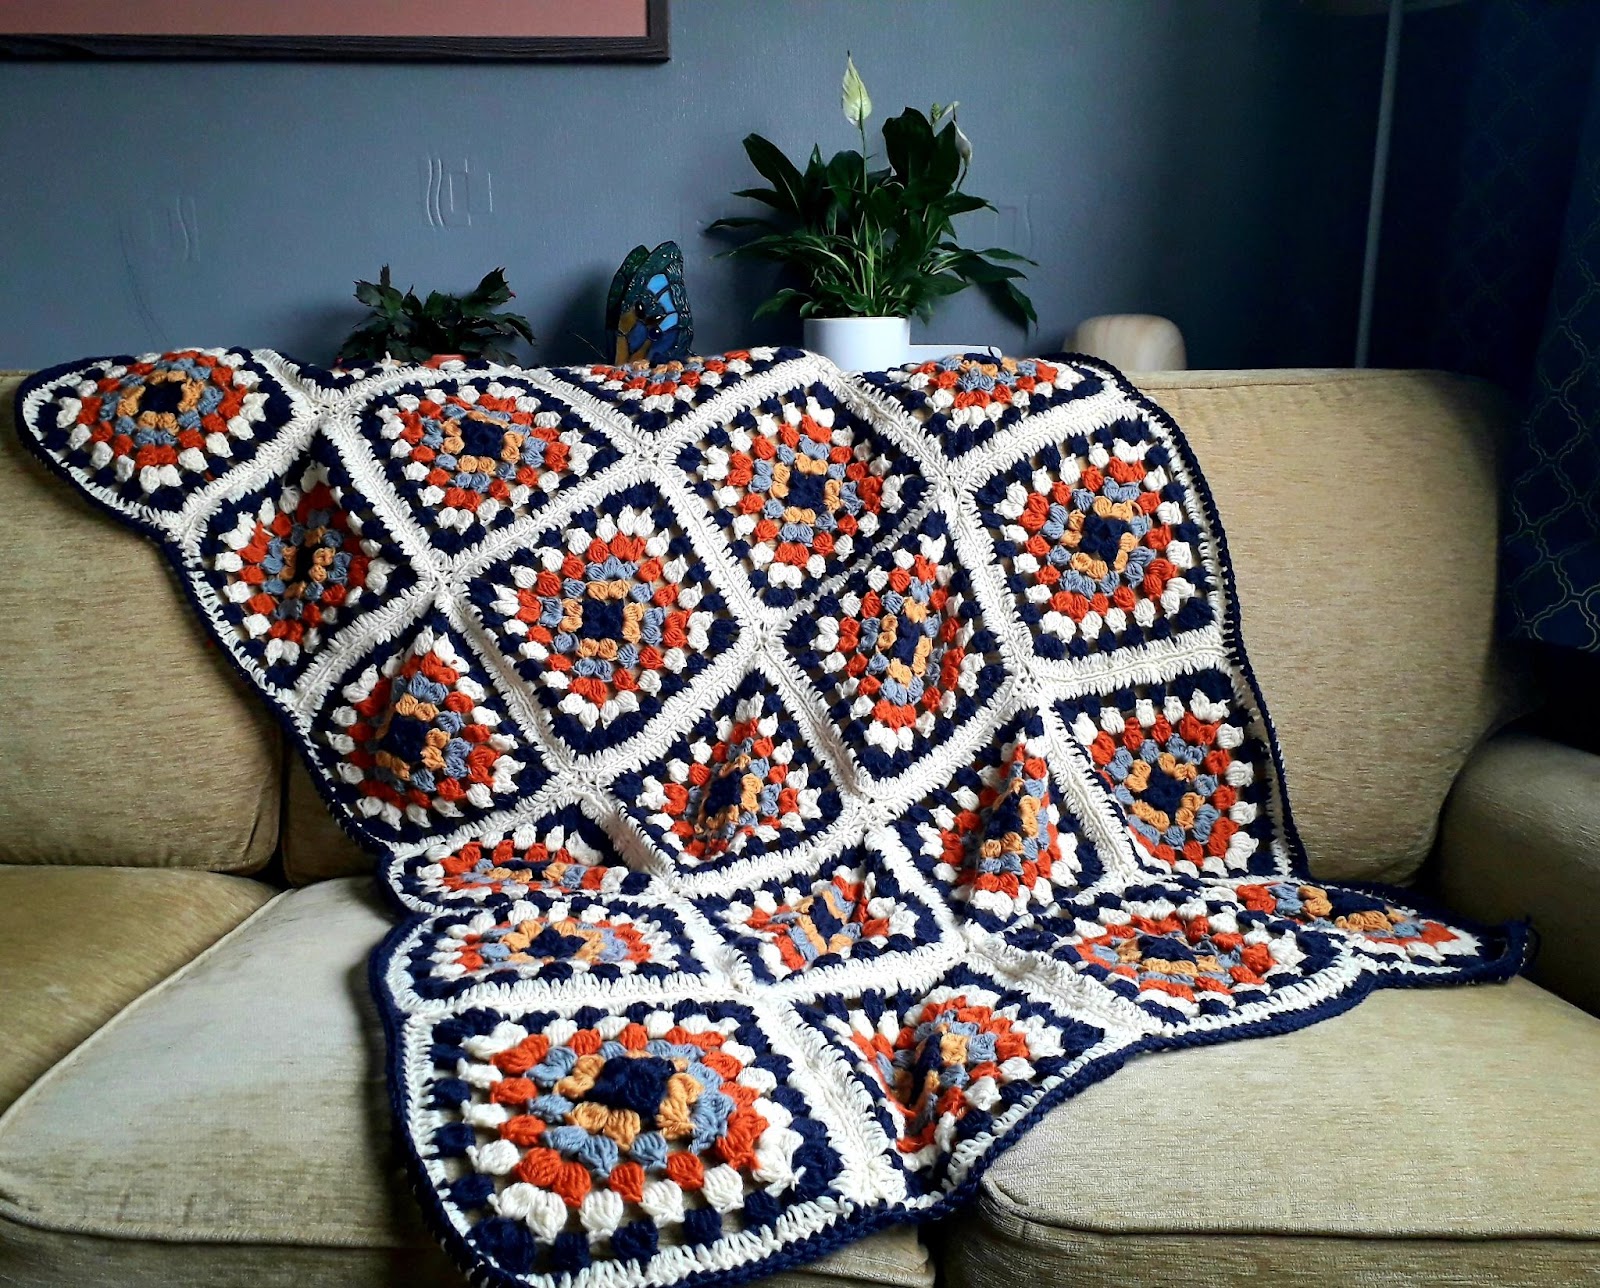
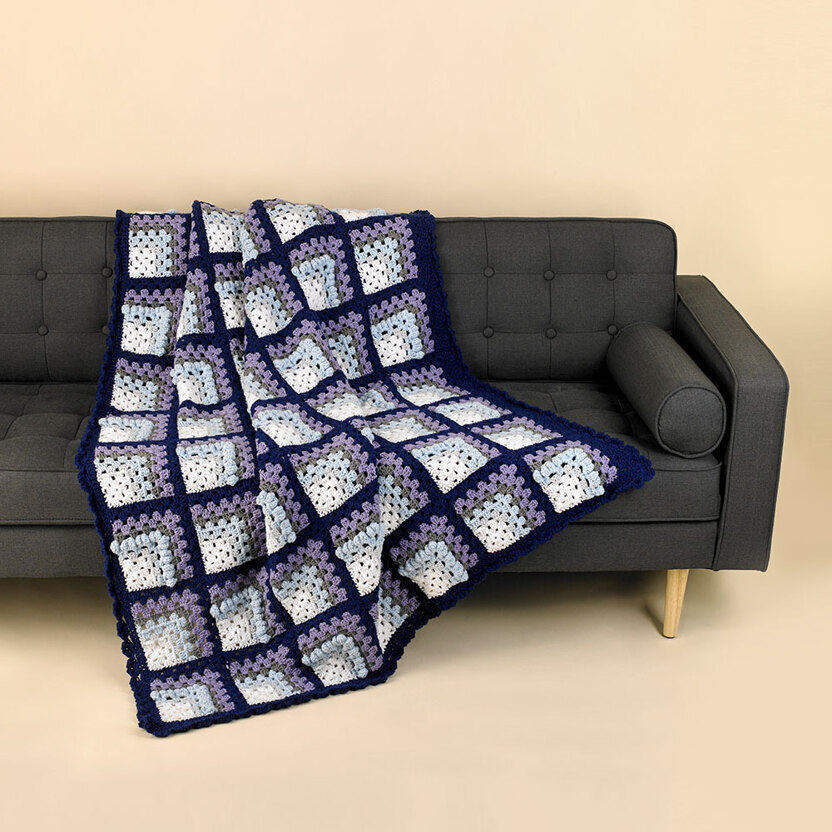
As you can see, you can learn a lot from that humble square. There’s something pretty and comforting about a granny square throw. This one is available as a free pattern here.
The humble granny square is a great place to start and here are some further posts to help you get going:
Sirdar Stories: Poetic Pastels Our Metro Square Top puts the fashionable crochet granny square front and centre. If you haven’t tried a granny square to wear yet, this is an easy crochet pattern to get you started. As well as your granny square, you’ll crochet panels of double crochet and use gradual shaping to create the flattering deep u-shaped neckline, tapered shoulders and neat fit that will make this top a summer staple. Great for beginners!
Crochet some pretty pastel granny squares, add a flattering open neckline and wide airy sleeves to make your summer essential Urban Hues Cardigan. Perfect pattern for intermediate. Use panels of granny stripes to get a neater fit and give your new favourite crop cardigan a crisp finish with a double crochet trim.
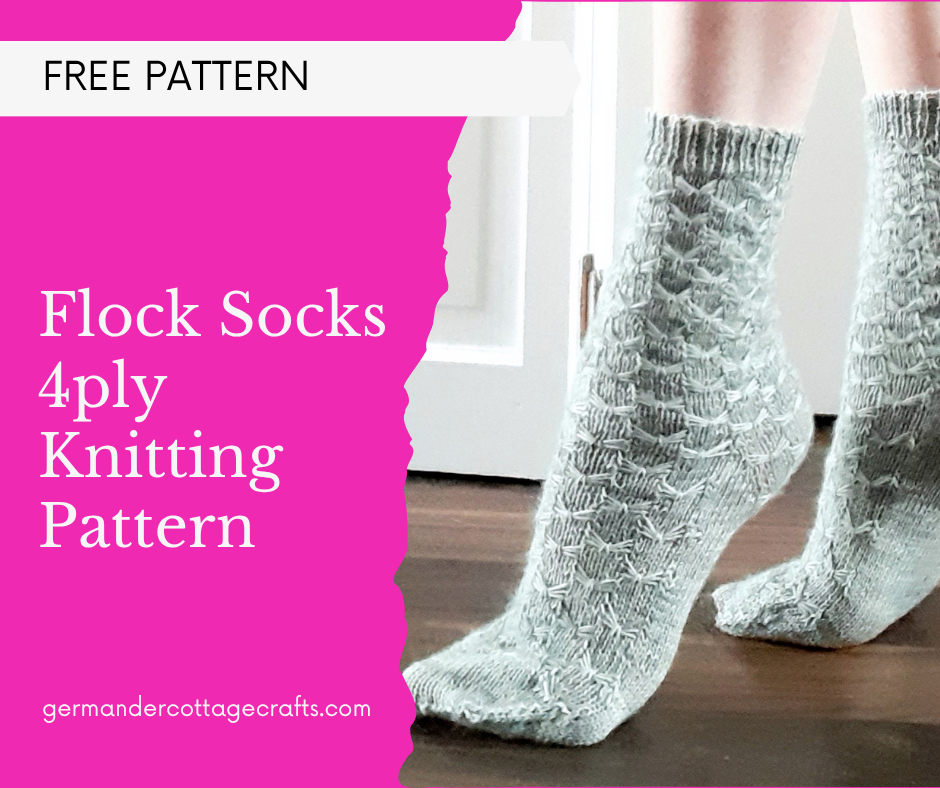
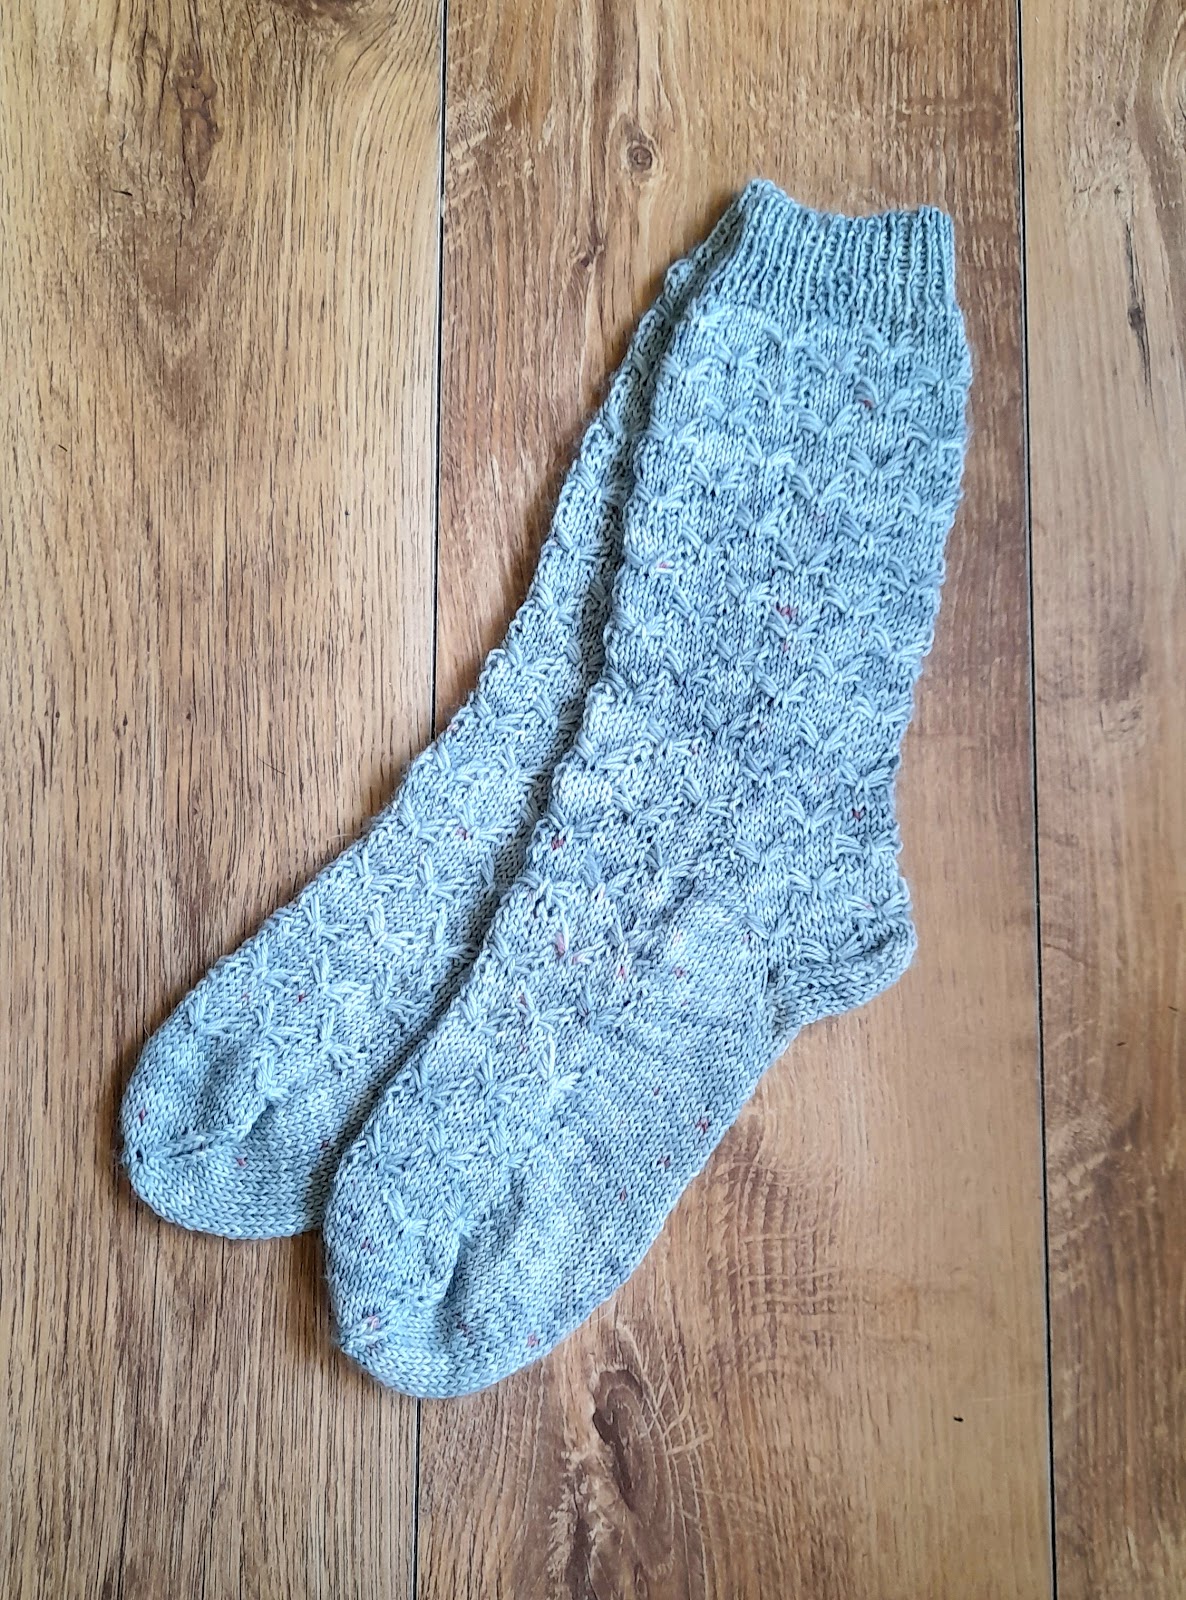
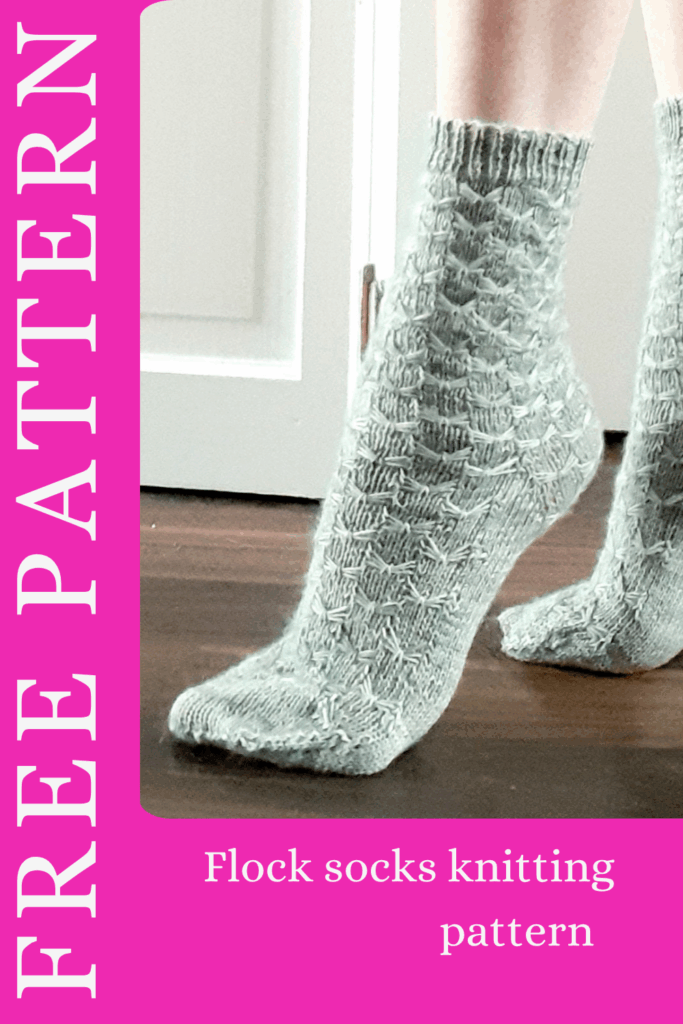
This design features a ‘flock’ of birds or butterflies: you decide! This blog post is for a free sock knitting pattern showing you how to make these cuff down socks. If you’d prefer the ad-free PDF, you can get it on Ravelry here.
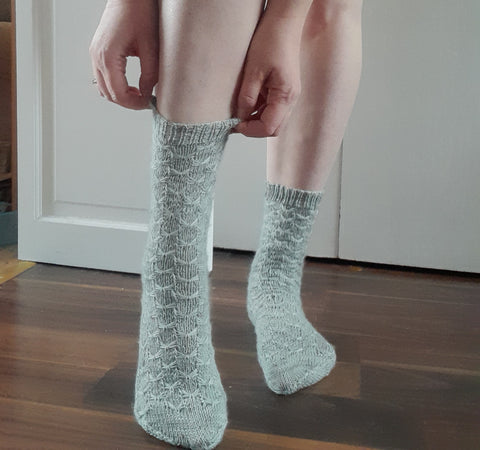
The flock socks are a fun way to make the most of texture with some simple stitch repeats. This sample is knit in a 100% hardy wool yarn but you could use a sock yarn with nylon for extra durability if you’d prefer. They are socks knit from the cuff down with a square, integrated heel, some short row shaping and a grafted toe.
The socks feature a square (Dutch heel) that is split into 3 after some increases and decreased back down to create a sturdy, rectangular shape under the heel.
You can see a quick video of how the heel is made here:
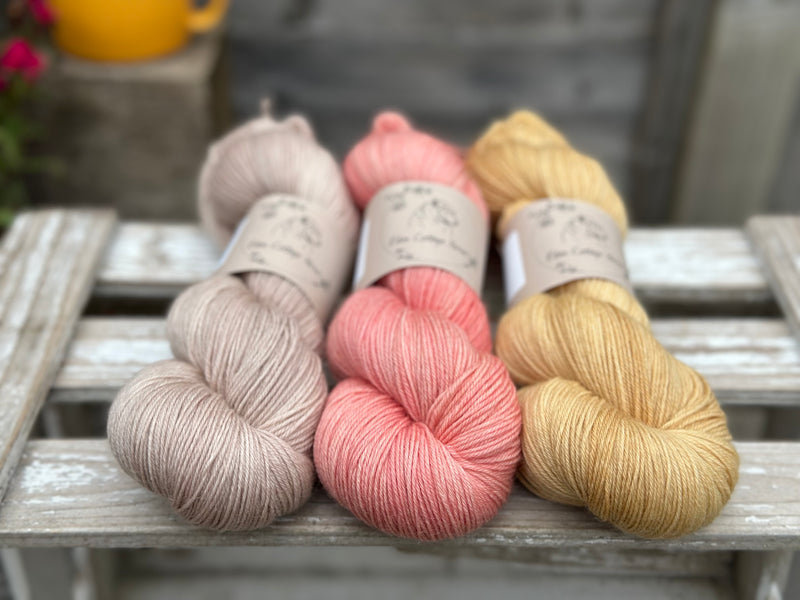
A note about the yarn:
I used Eden Cottage Yarns Oakworth 4ply. This isn’t strictly a ‘sock yarn’ but the wool is crisp and durable. I haven’t had to darn any heels or toes yet! If you like a sock made with natural, breathable fibres that will also keep your feet warm, try it! I used their special Christmas colourway (it was limited edition, so they don’t currently have it) but there are so many other beautiful shades available.
Materials required for this sock knitting pattern:
100g of 4ply sock yarn such as Oakworth 4ply, (100% Polwarth wool) by Eden Cottage Yarns (400m/436yds per 100g/3.5oz)
Darning needle
4 Stitch markers
2.5mm circular (80cm cable for magic loop) or DPNs or size needed for gauge.
Gauge: 30 sts and 35 rows in pattern per 10cm (4”)
Ktog: Knit all the strands together with one stitch.
LH: Left hand
M1L: Pick up the bar between the stitch you have just knitted and the one you are about to knit, bringing the needle from the front to the back. Knit into the back of the stitch.
M1R: Pick up the bar between the stitch you have just knitted and the next stitch, bringing the needle from the back to the front. Knit into the front.
Sl: Slip a stitch from left hand needle to right hand needle.
P: Purl
P2tog: Purl two stitches together.
PM: Place marker
PSSO: Pass slipped stitch over the knitted stitch.
RH: Right hand
RS: Right side
SKP: Slip one, knit one, PSSO.
SM: Slip marker
St(s): Stitch(es)
WS: Wrong side
How to knit the Flock Socks.
Start your Flock socks by casting on at the cuff
Loosely cast on 50 (60 70) sts, join to work in the round, being careful not to twist sts..
Work in 1×1 rib for 2.5cm/1 in.
Knit the leg
Place a marker (marker 1) after the first 25 (30, 35) sts to establish halfway point.
K all sts for 1 round.
Round 2, 4, 6: *K5, Sl 5 purlwise with yarn in front; repeat from * to end.
Round 1, 3, 5, 9, 11: K all sts.
Round 7: *K7, pick up the 3 strands and the next st from LH needle. Ktog with 3 strands. K2; repeat from * to end.
Round 8, 10, 12: *Sl 5 purlwise with yarn in front, K5; repeat from * to end.
Round 13: *K2, pick up the 3 strands and the next st from LH needle. Ktog with 3 strands. K2, K5; repeat from * to end.
These 13 rounds form the flock pattern. Repeat Rounds 1-13 until piece measures 19 (20, 21)cm/7.5 (7.75, 8.25) in from cast on, ending with a 7th or 13th round.
Shape the heel
Heel increases are worked on every K round. Heel sts (underside) stay in K st after this point, with flock pattern continuing along instep sts.
In this next section, the stitch counts on the heel needle require increasing to whole numbers for size 1 and 3.
Round 1:
Size 1: M1R, PM (marker 2), K1, M1L, K24, PM (marker 3), M1L. SM (marker 1). 3 sts increased. Work in flock pattern to end. There are now 26 sts between markers 2 and 3.
Size 2: M1R, PM (marker 2), K30, PM (marker 3), M1L. SM (marker 1). 2 sts increased. Work flock pattern to end.
Size 3: M1R, PM (marker 2), K1, M1L, K34, PM (marker 3), M1L. SM (marker 1). 3 sts increased. There are now 36 sts between markers 2 and 3. Work in flock pattern to end.
53 (62, 73) sts total.
Round 2:
K all stitches on heel needle(s), work flock pattern on instep, slipping markers as you come to them.
Round 3:
K to marker 2, M1R. SM, K to marker 3, SM, M1L, K to marker 1, SM, work flock pattern to end.
Repeat Rounds 2 and 3 until you have created 18 (20, 24) stitches on the heel needle(s). 44 (50, 60) sts on heel needle(s). 69 (80, 95) sts total.
Turn the heel of your sock:
Working only with the first 44 (50, 60) sts, continue as follows:
Short row 1: (RS) K9 (10,12) to marker, SM, K 17 (19,19) sts, S1, K1 PSSO. 1 st decreased. This will now be referred to as SKP. Turn.
Short row 2: (WS) P 8 (9, 10) sts, P2tog. 1 st decreased. Turn.
Short row 3: (RS) Sl 1 knitwise, K to 1 stitch before the gap which has formed. SKP. Turn.
Short row 4: (WS) Sl 1 purlwise, P until 1 stitch before gap. P2tog. Turn.
Size 1: On last P row, P3tog at the end. 26 sts.
Repeat Short Rows 3 and 4 until there are 26 (30, 36) sts between the beginning of the round and the halfway marker (marker 1). This was the amount that you started with and your work should be right side facing with marker 2 on your right hand needle. 51 (60, 71) sts total.
Set upin the round:
Remove marker 2. Insert needle as though making a M1R but instead of knitting, slip the twisted stitch on to RH needle. K1 and PSSO. K to marker 3, remove marker 3, insert needle as though making a M1L, but slip the twisted stitch onto LH needle and K2tog. SM, work flock pattern to end.
Size 3: Increase 1 st on sole of foot sts on next round. 72 sts total.
Knitting the foot:
Continuing in flock pattern for instep stitches, and K all sts on sole of foot, until piece measures 3.5 (5, 6)cm/1.5 (2, 2.25)in less than desired length, ending with a 7th or 13th round of flock pattern.
On last round:
Size 1: Increase 1 st after halfway marker (marker 1). There are now 26 sts between markers.
Size 3: move halfway marker (marker 1) one stitch to the left so there are 36 sts between markers.
Finishing at the toe of the sock.
Round1: *SKP, K 22 (26, 32) K2tog; repeat from * to end. (4 sts decreased in total)
Round 2: K all sts.
Round 3: *SKP, K to 2 sts before marker, K2tog; repeat from * to end.
Repeat Round 2 and 3 until you have 36 (42, 52) sts in total.
THEN, decrease on every round until you have 20 (20, 24) sts in total. Remove marker 1.
Finishing:
Using kitchener method, graft the remaining stitches together to close the toe. Weave in ends. Click here to see the step by step photo tutorial for this.
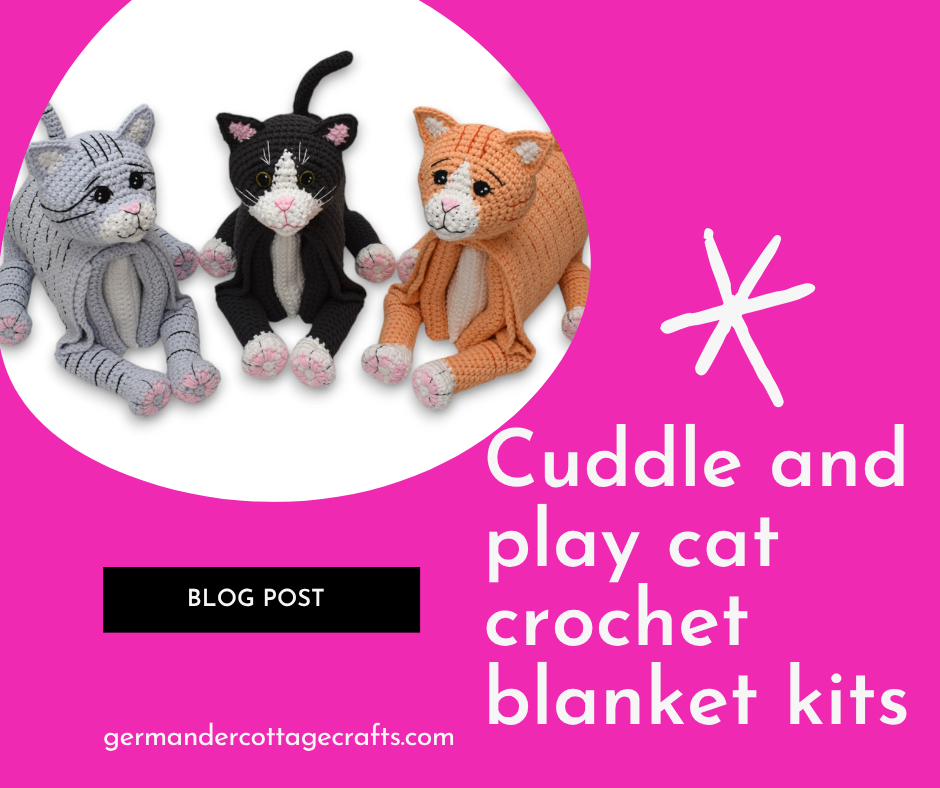
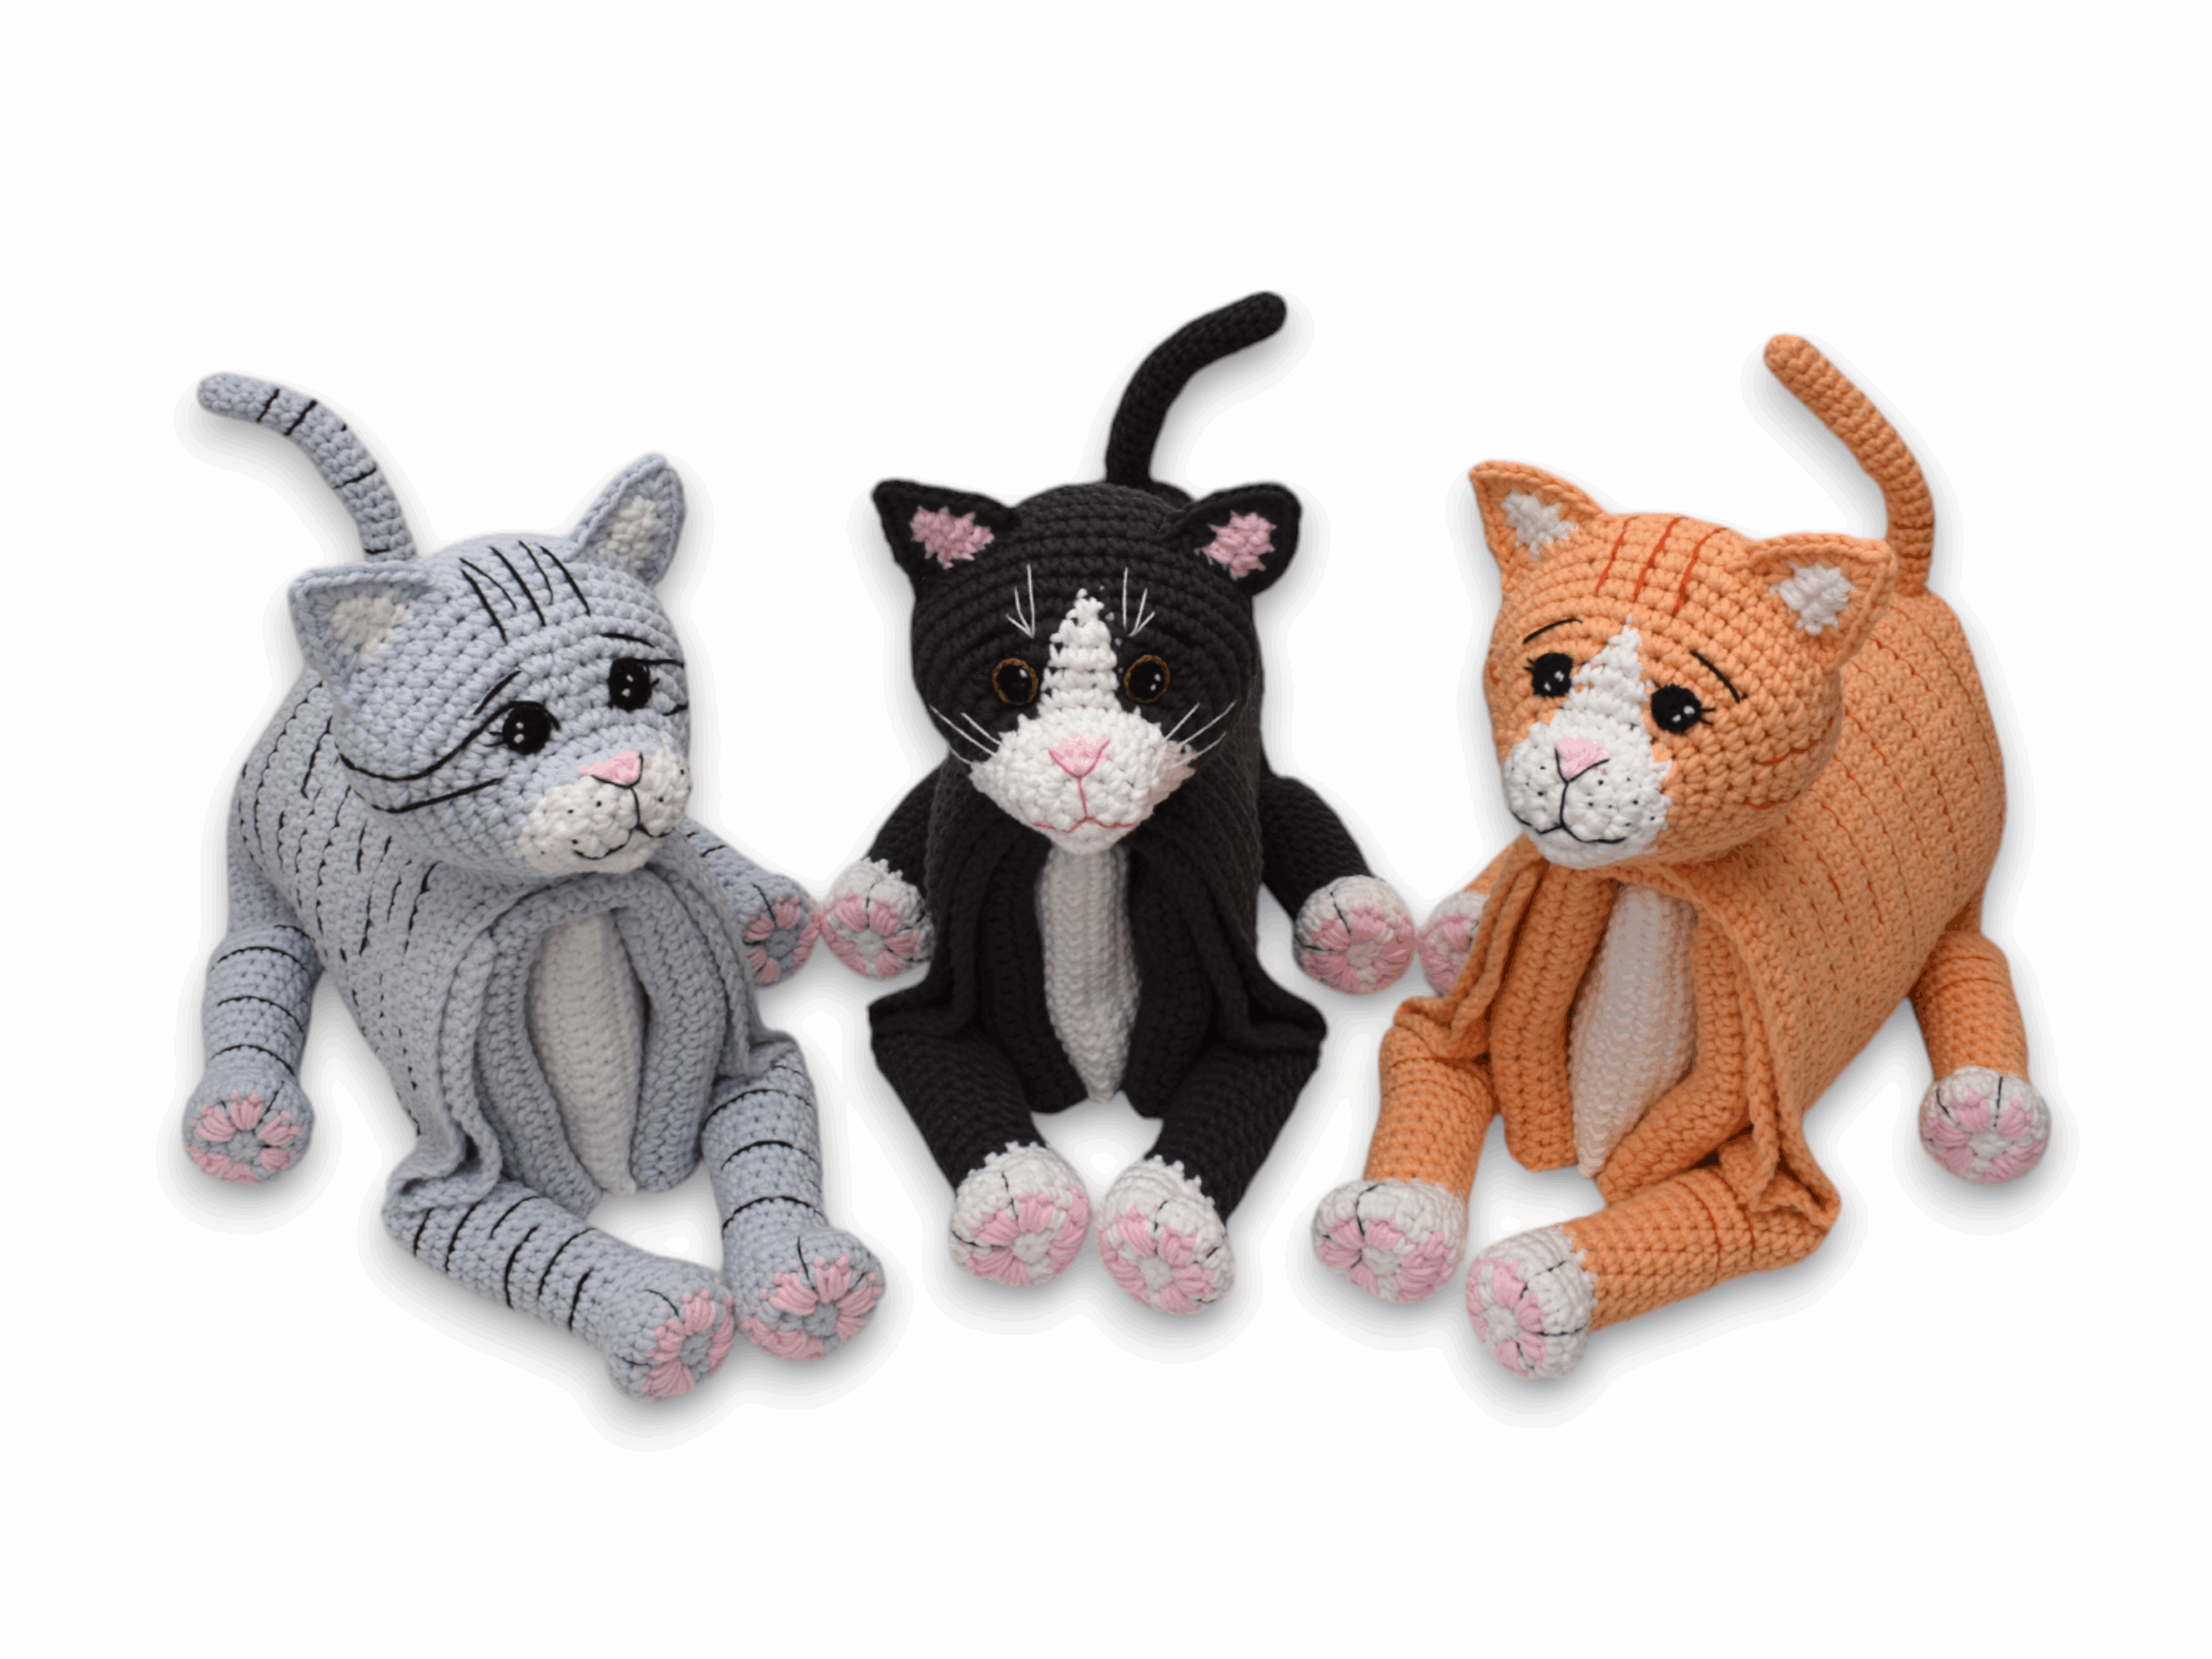
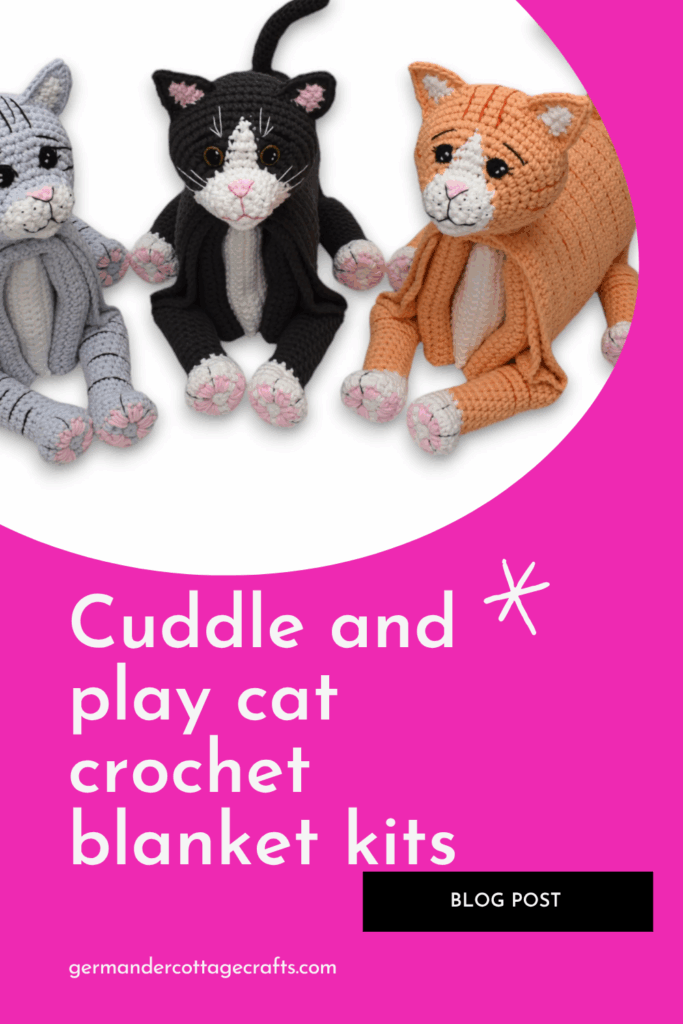
This article highlights the crochet cat blanket kit by Dreamy Wool. Crochet kits for baby gifts have everything you need for that special, handmade gift.
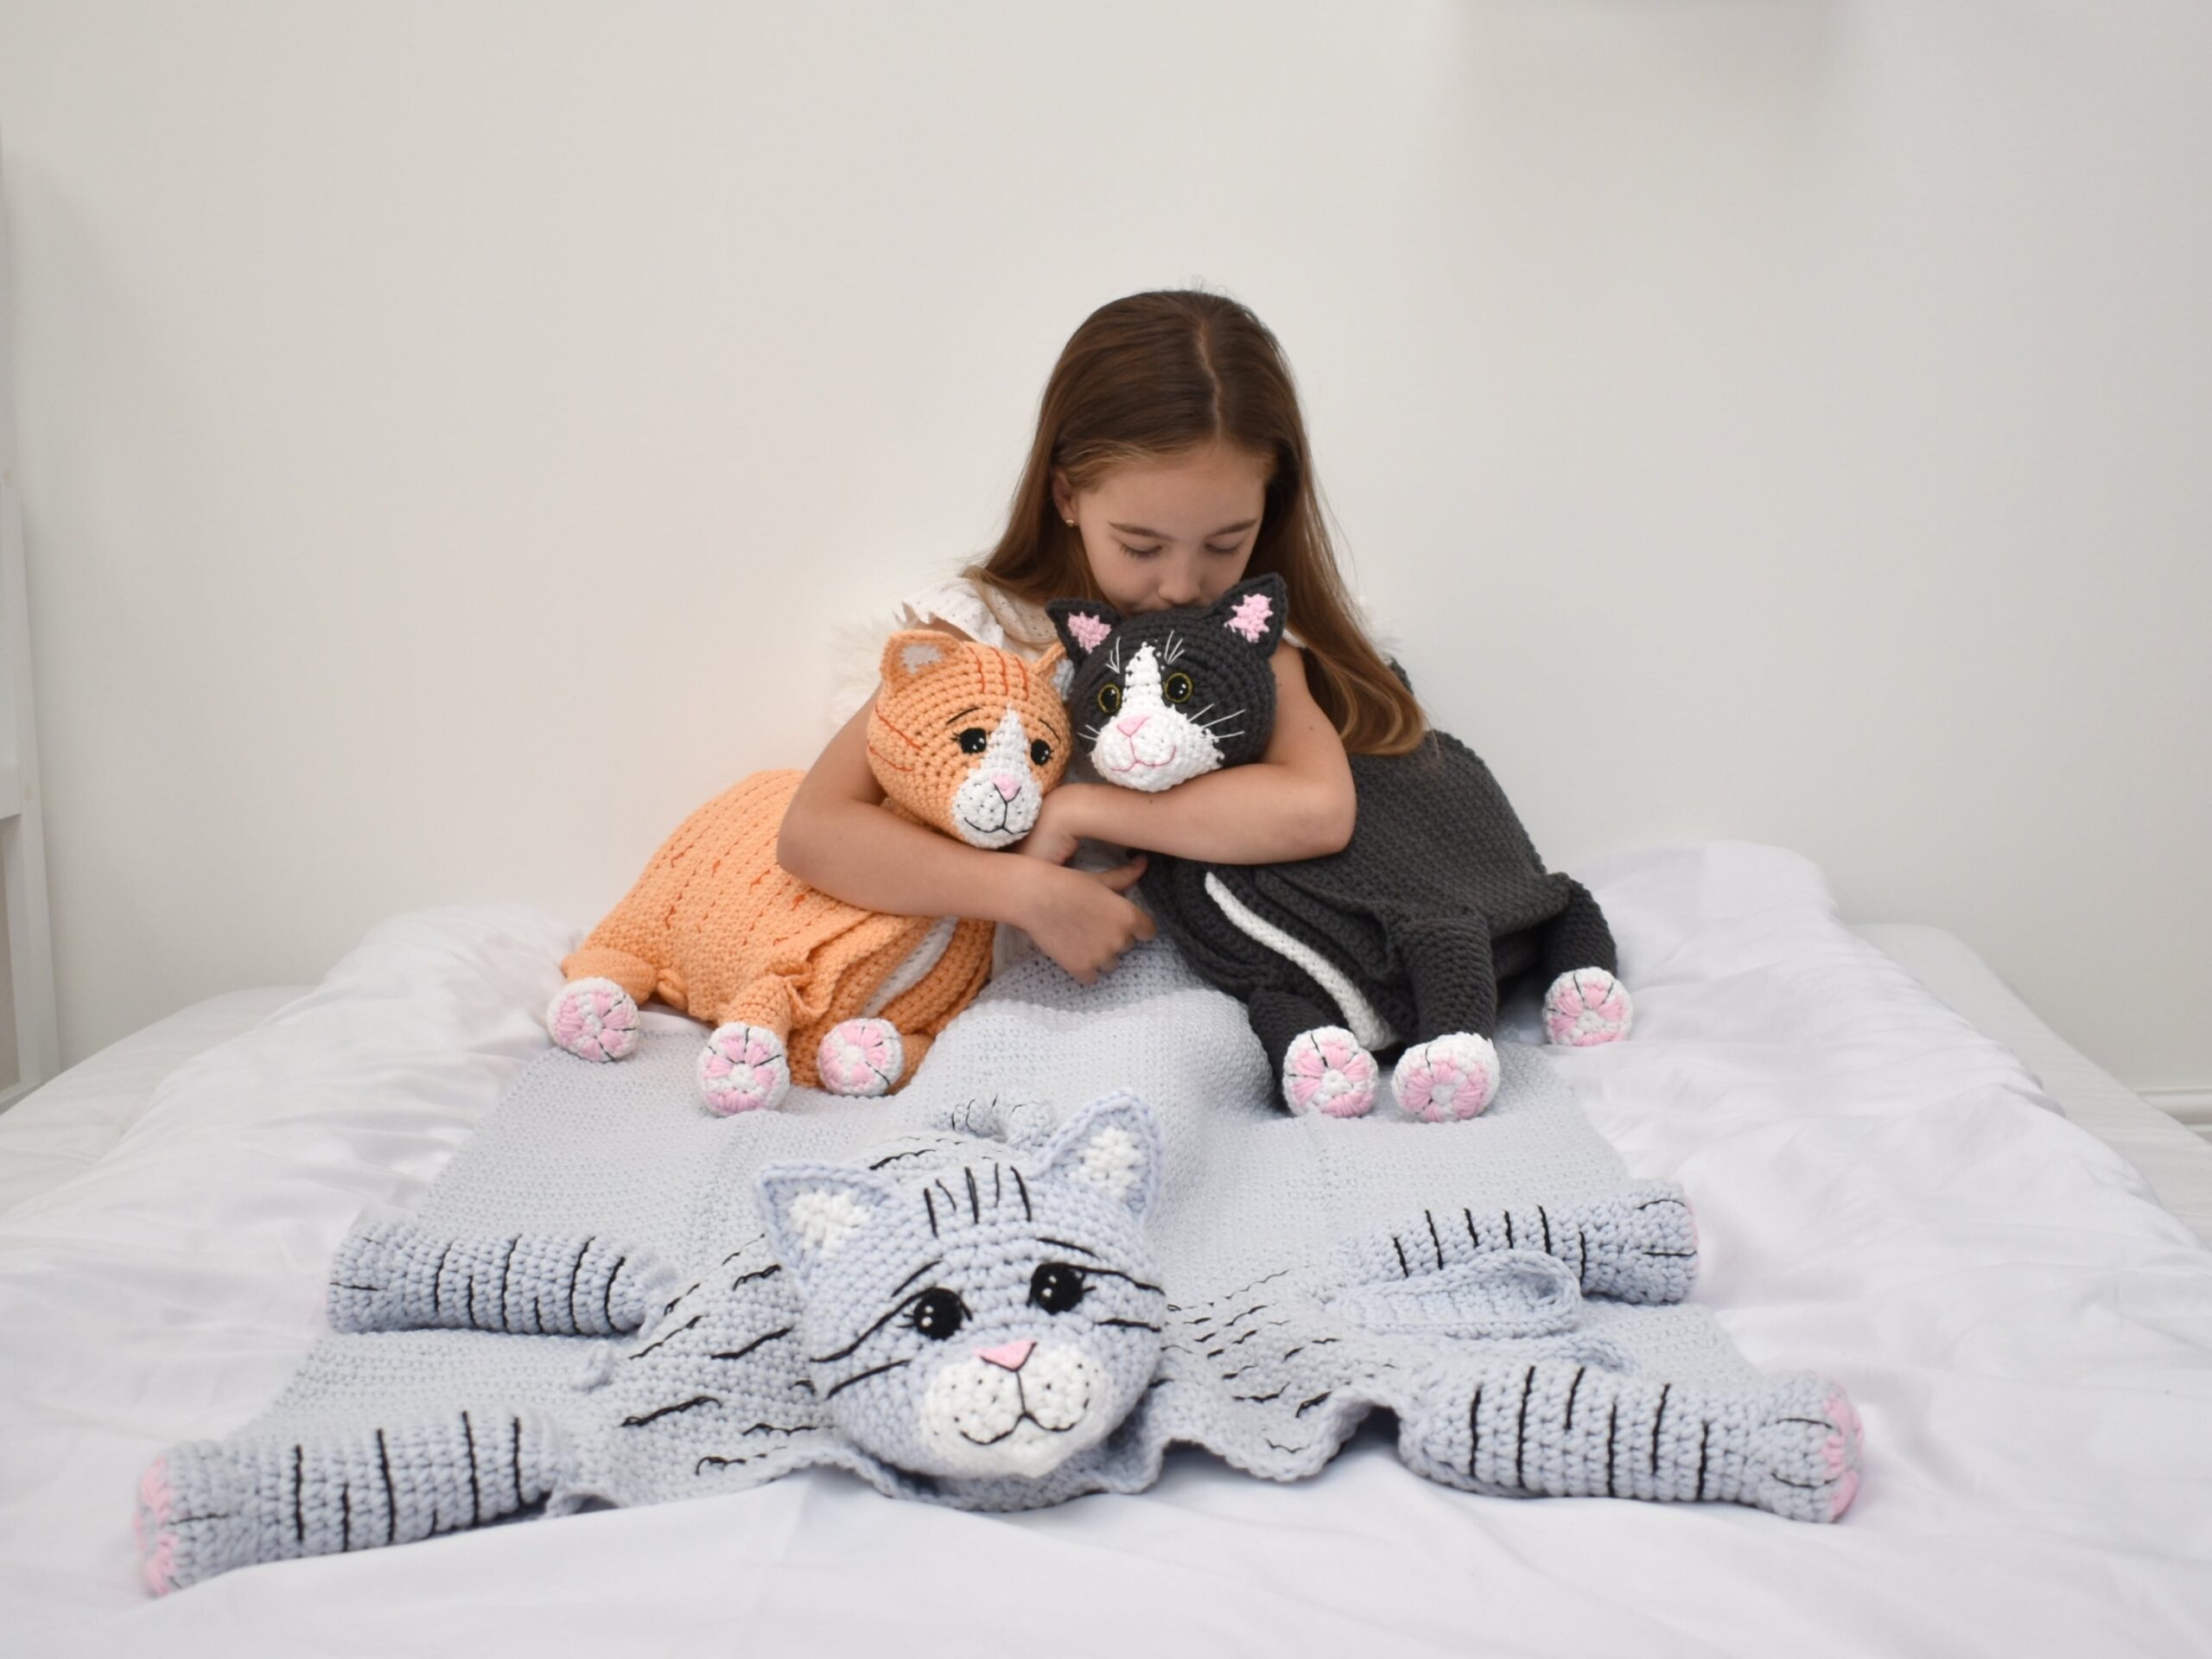
Whether you are more of an avid amigurumi creator or a blanket connoisseur, these crochet cat kits combine both of those things to give you a toy that unravels to become a blanket!
This article contains affiliate links. This means that if you choose to purchase, I earn a small commission at no cost to you.
This cat crochet kit is adorable, and it’s a popular hit with those looing for a simple crochet gift they can make themselves. Take the guesswork out of it with a Dreamy Wool crochet cat blanket kit.
Left to right: Silver sprinkles/stripes, peppercorn and marmalade/stripes.
This adorable crochet cat also comes in five colour variations:
Marmalade
Marmalade/Stripes
Silver Sprinkles/Stripes
Peppercorn
Strawberry ice cream
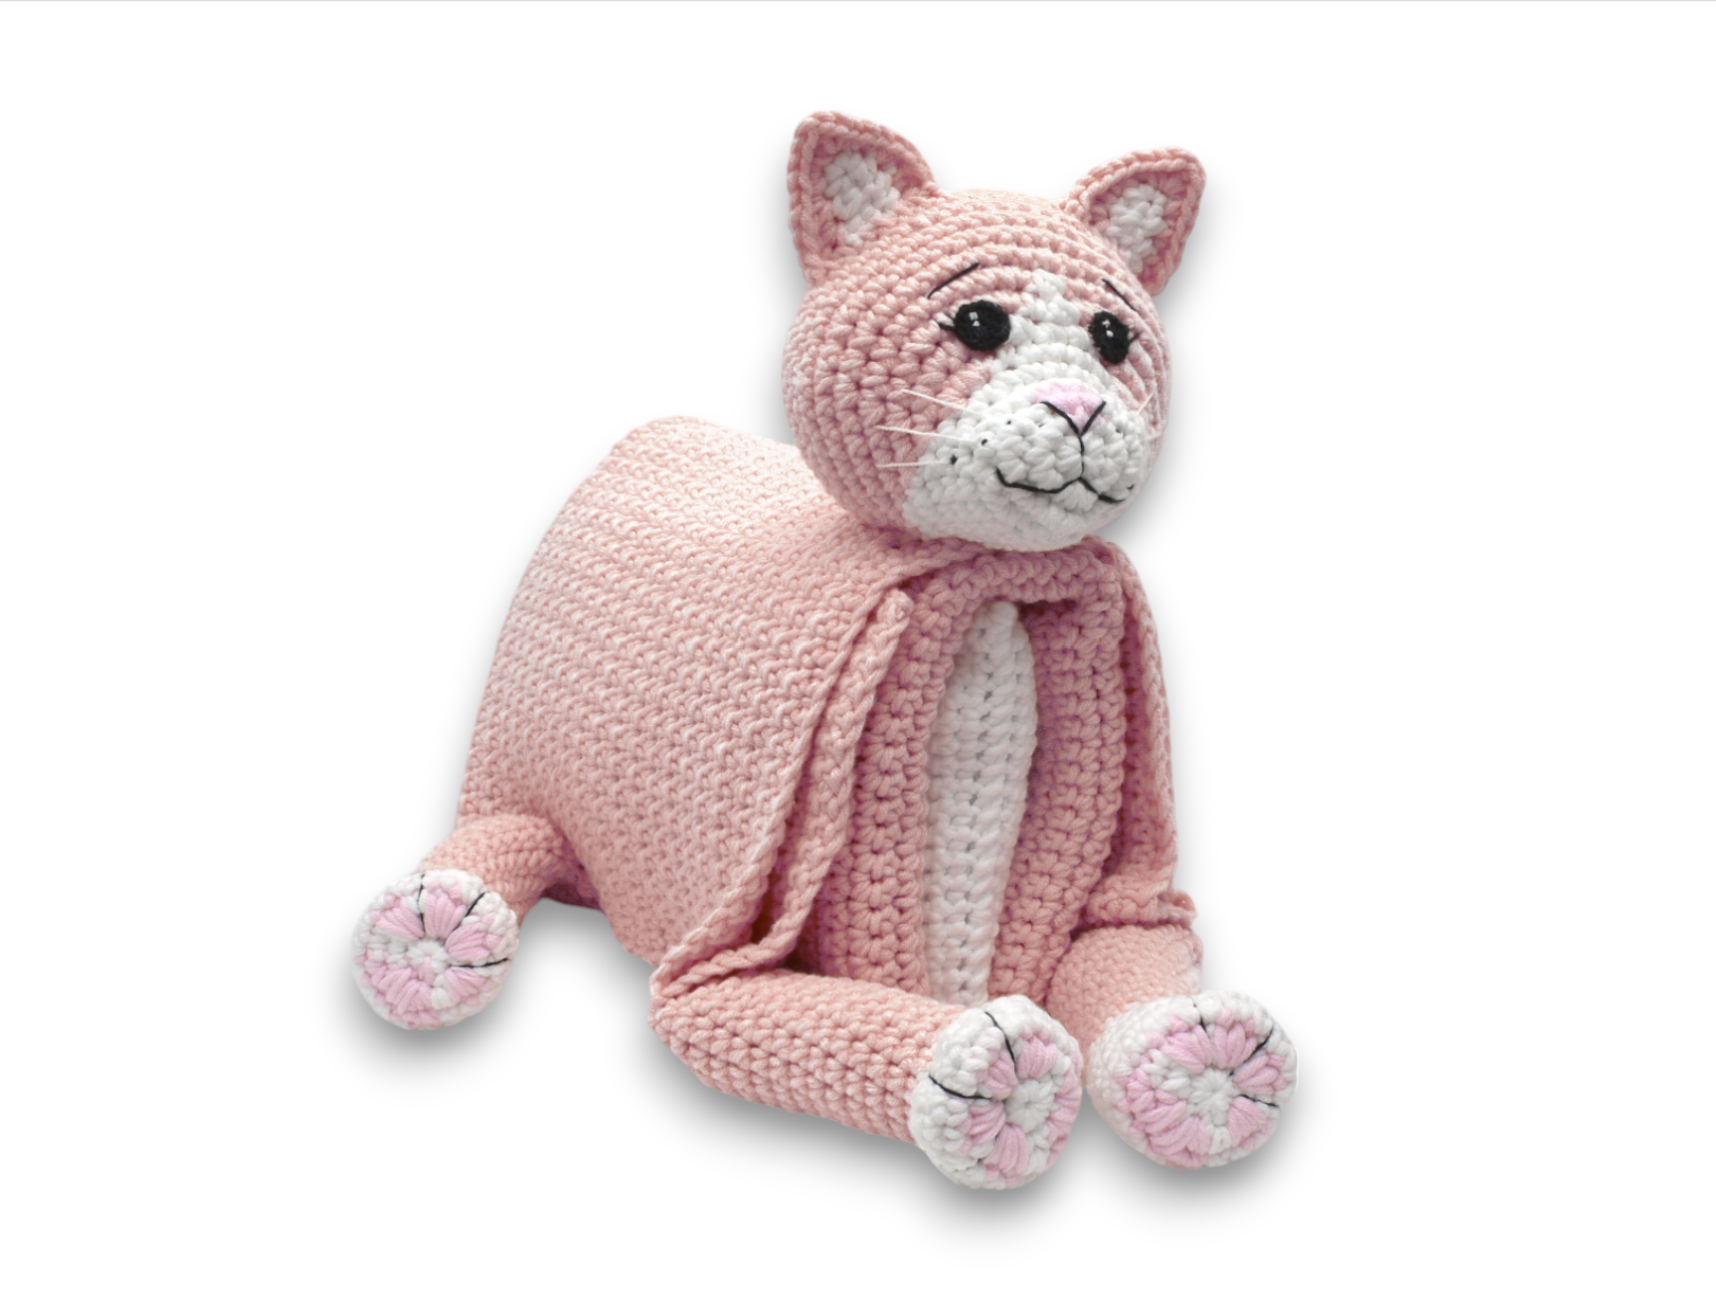
Cat kit shown in Strawberry Ice Cream
The patterns for these kits are intermediate level. They are designed by crochet designer Aneta Wawro (Crochet Arcade) and include all the materials to make the cat and blanket that you choose.
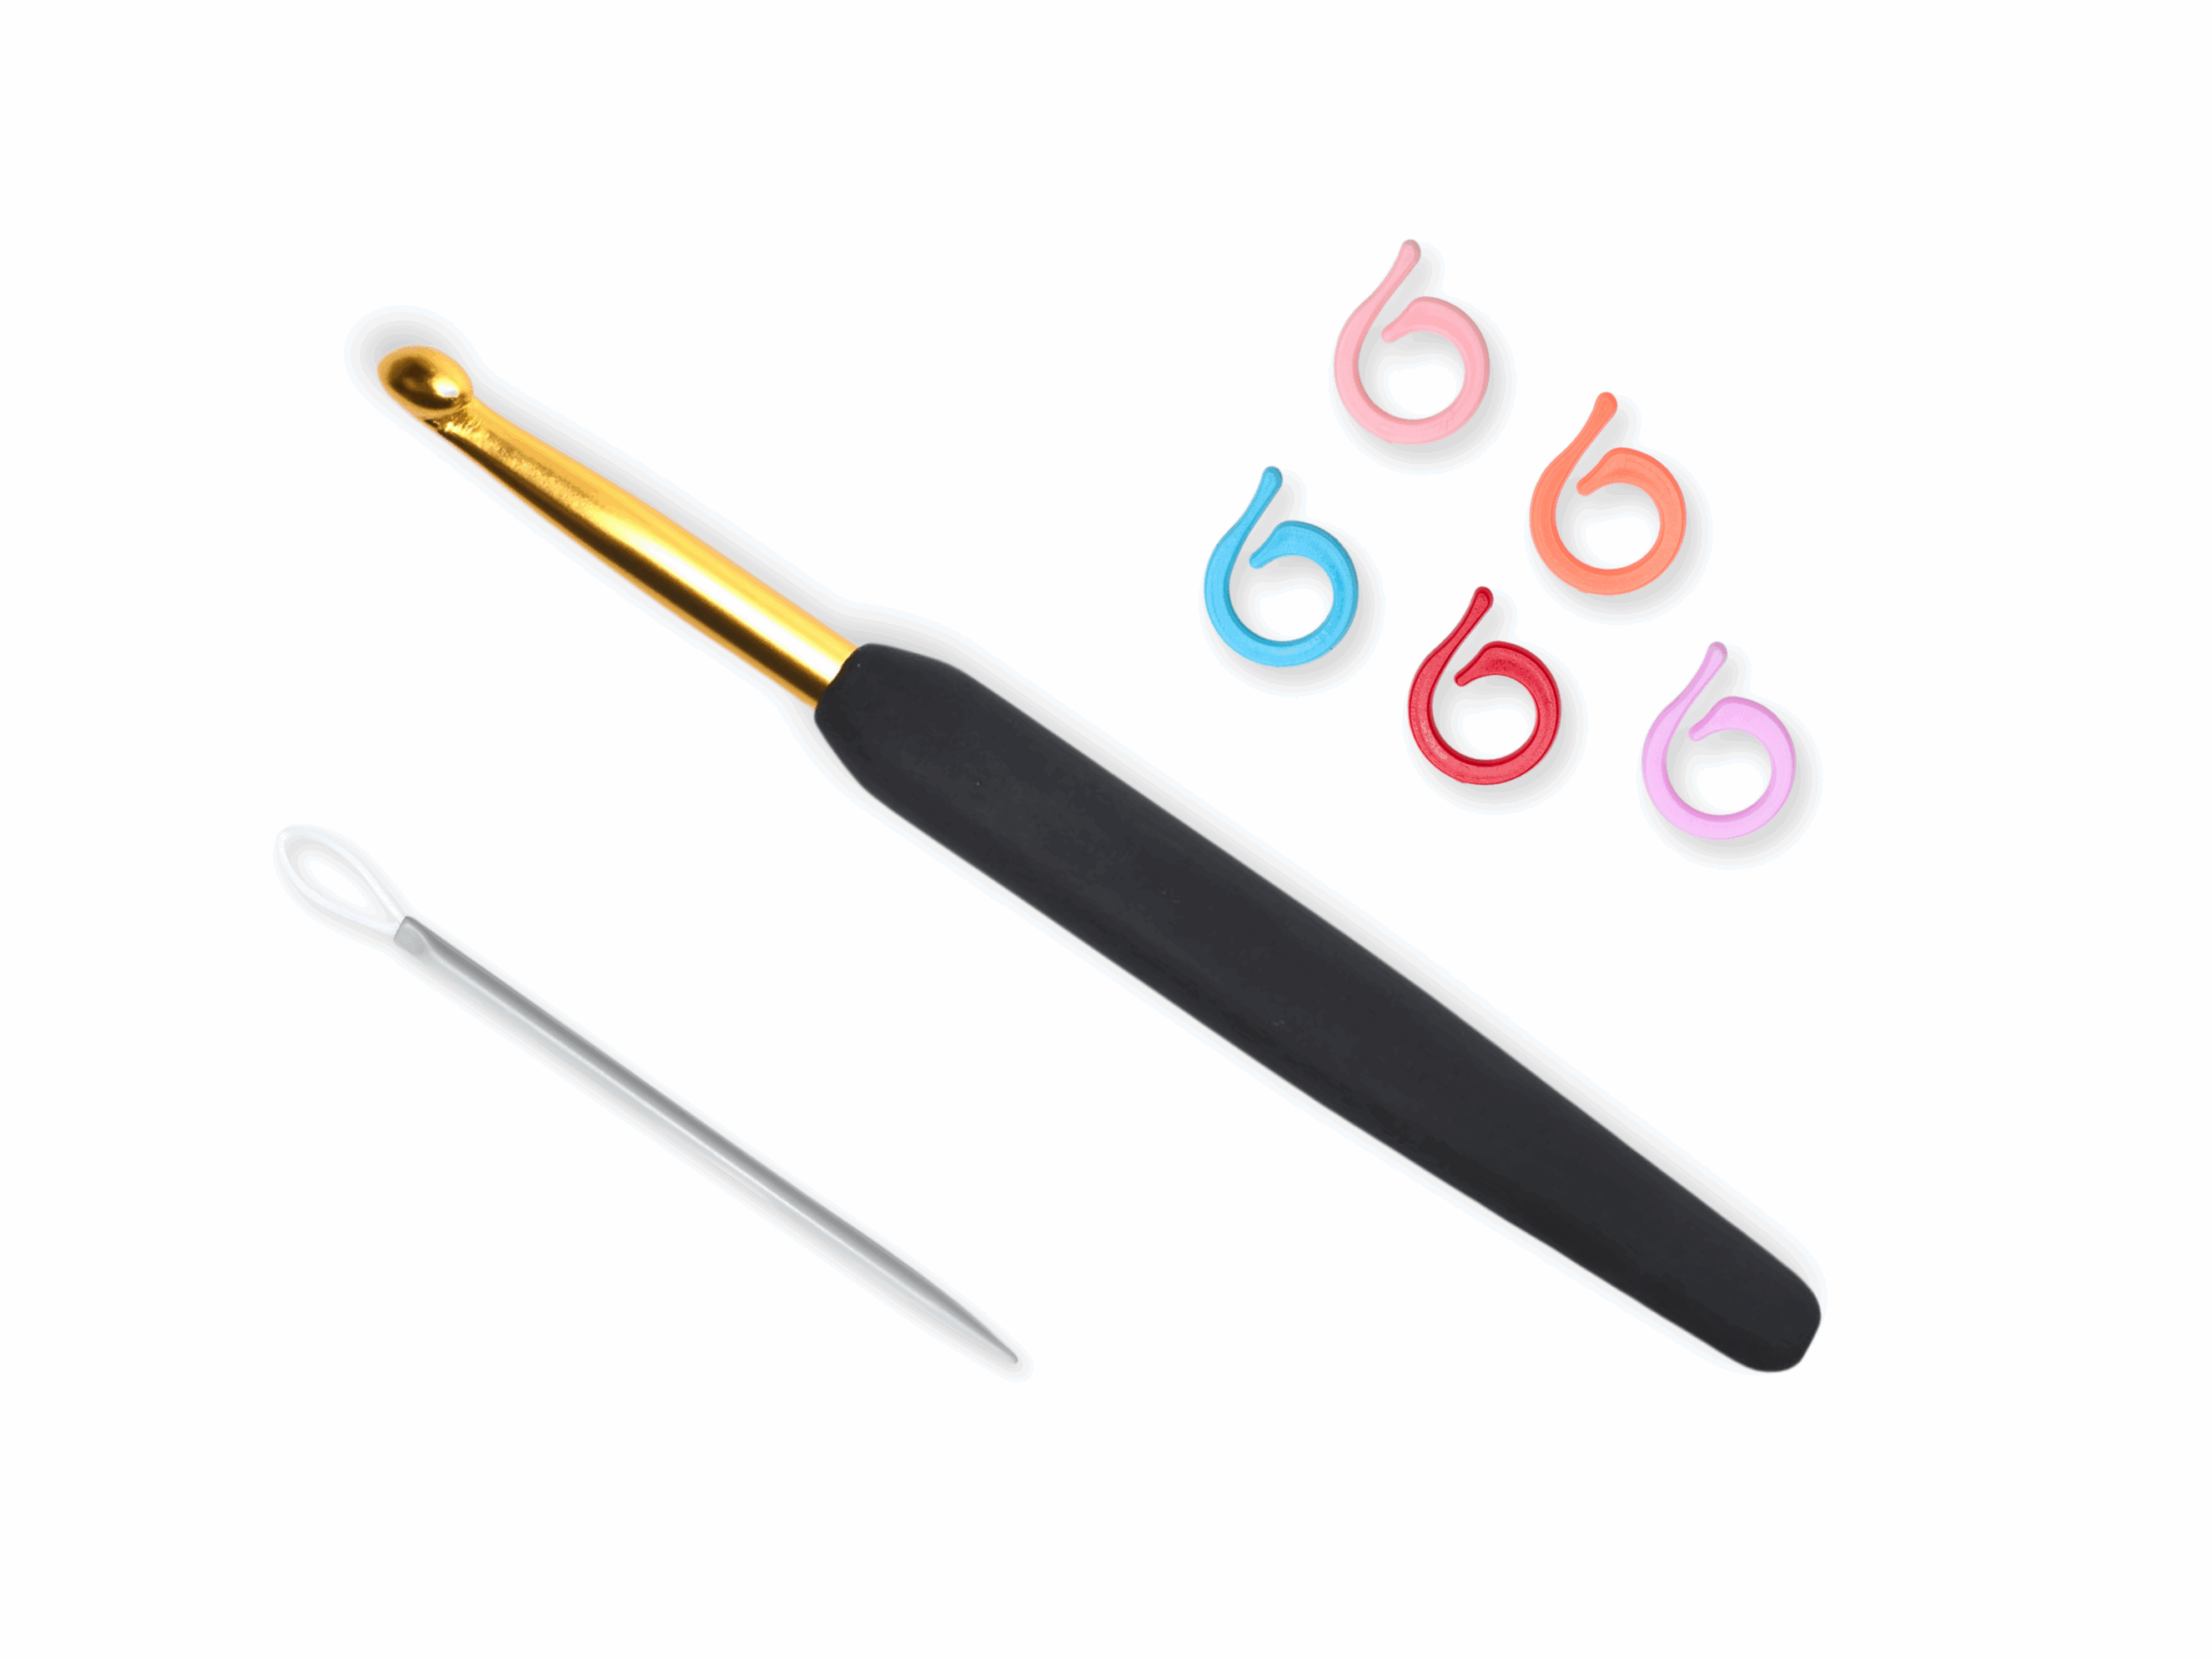
You can also get their crochet starter kit which is a crochet hook, stitch markers and a darning needle!
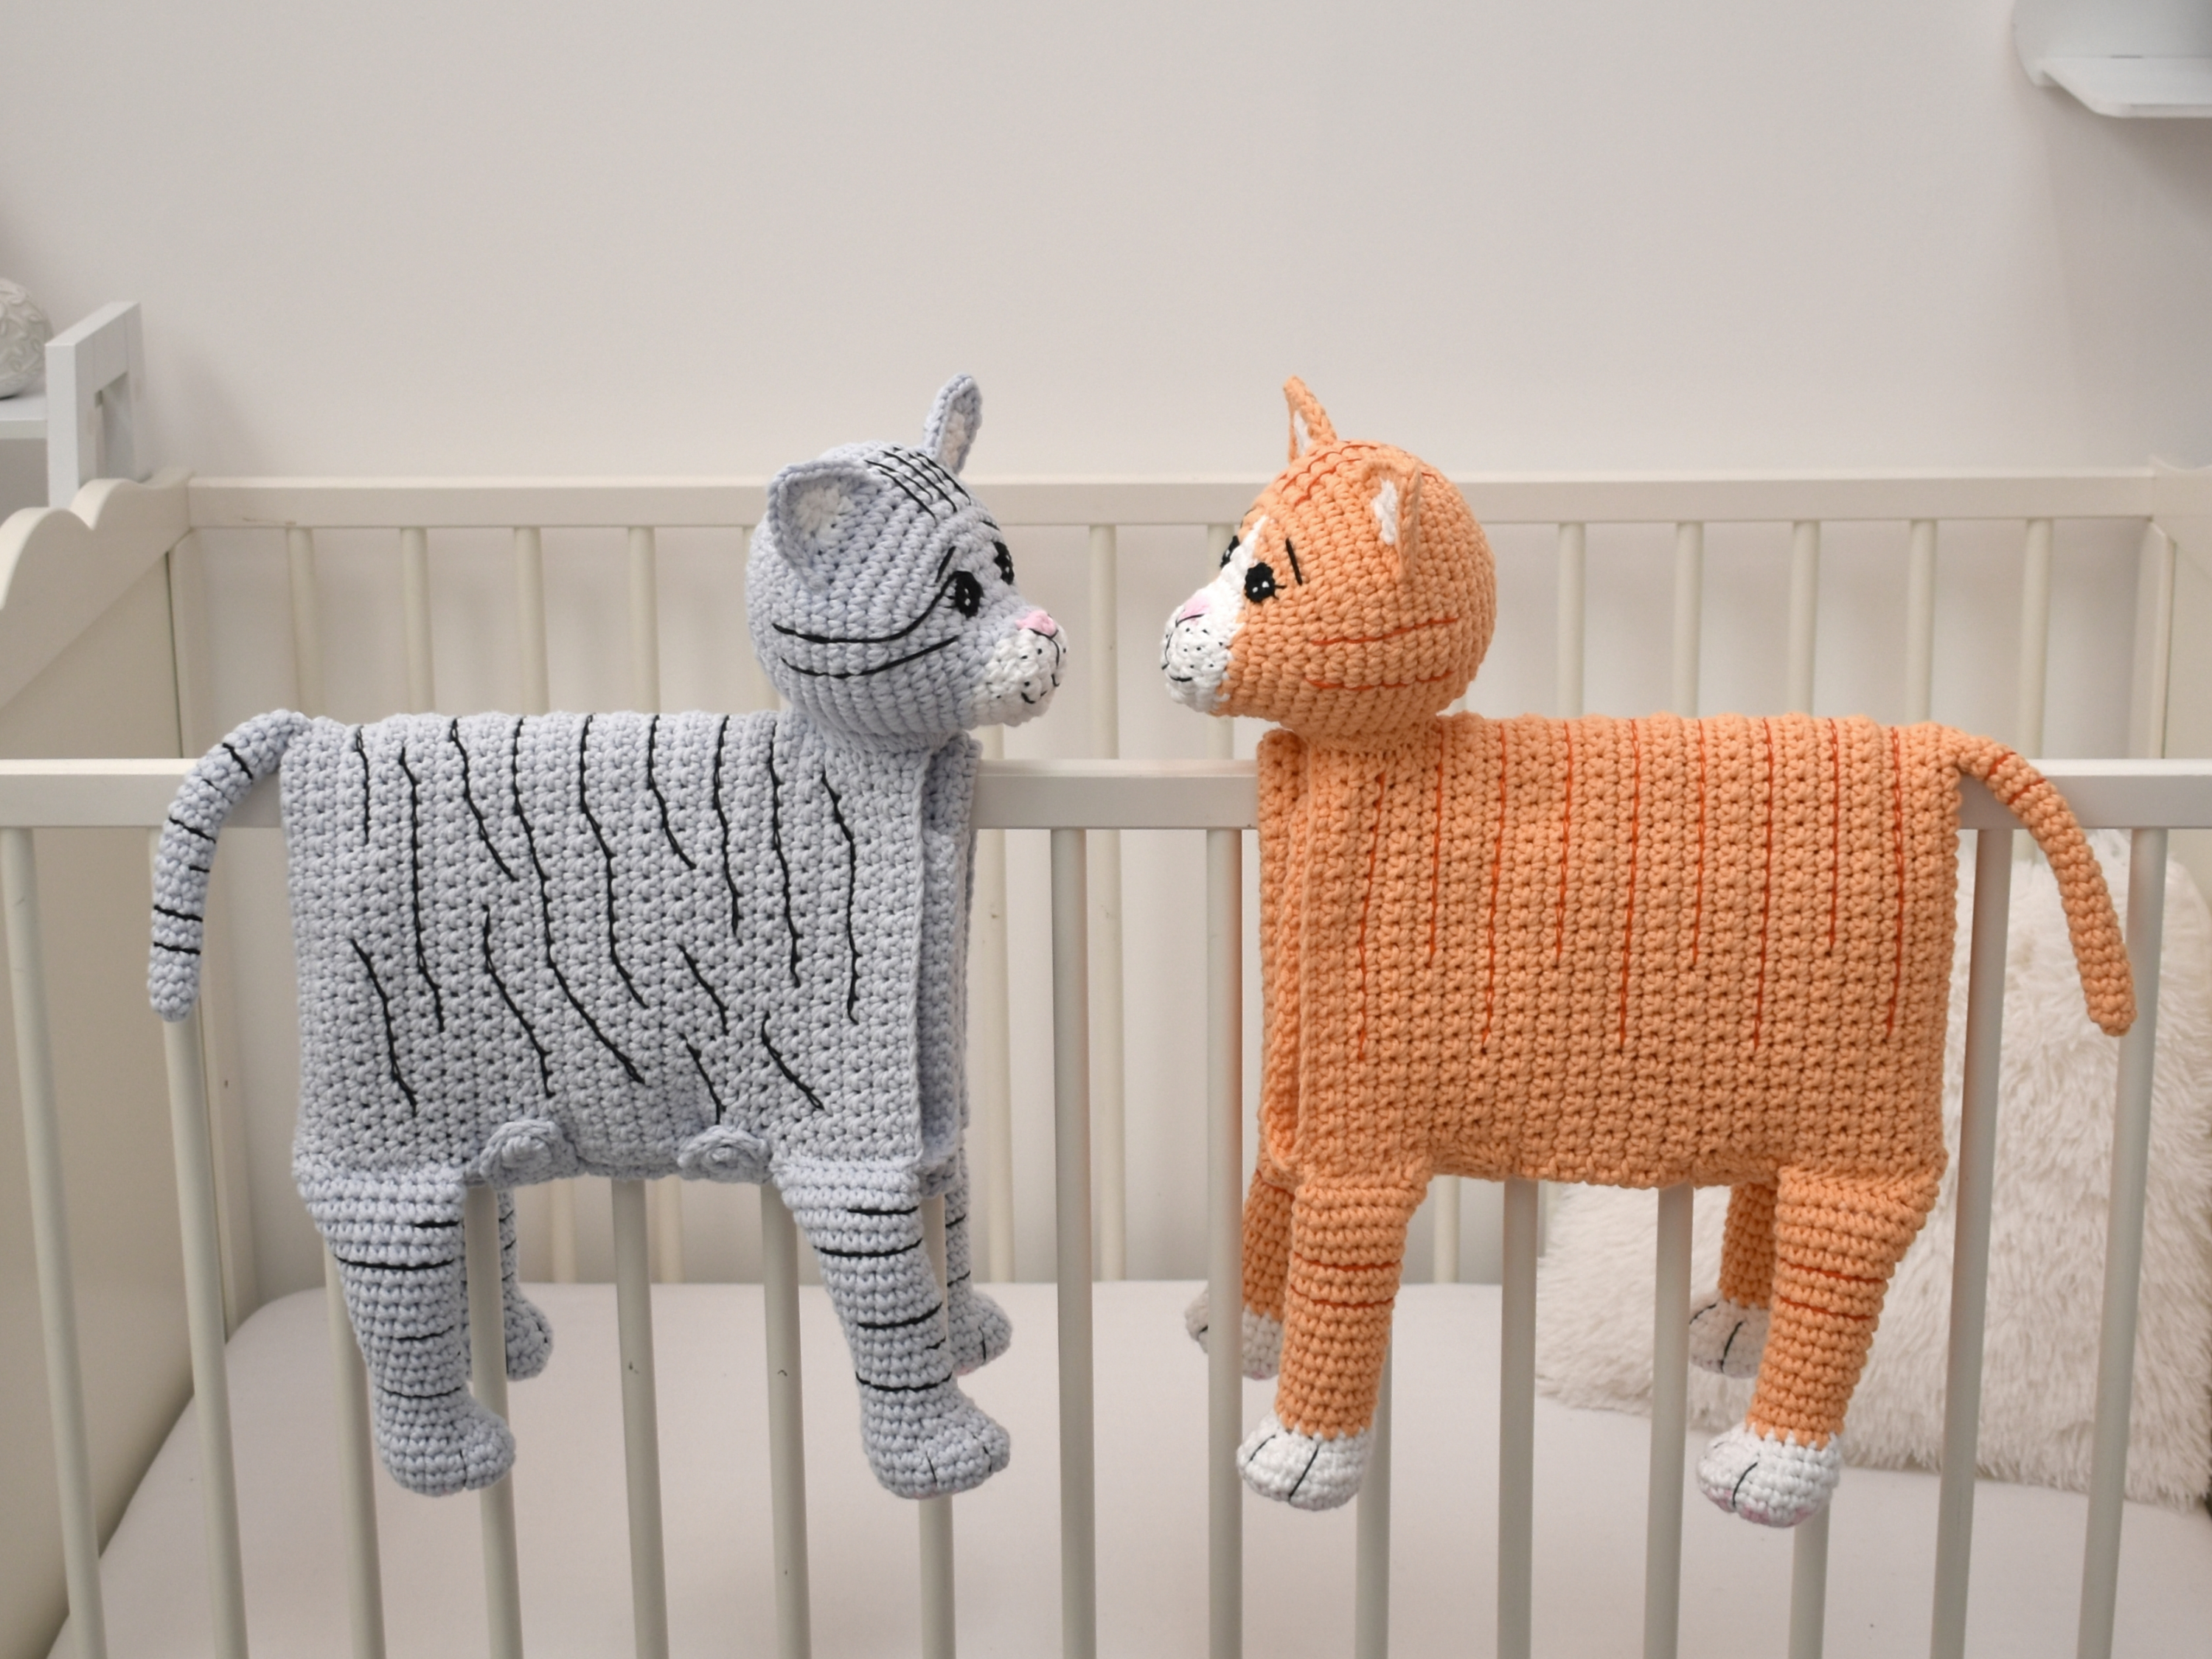
These kits make excellent gifts as a kit, or for you to make and then give to someone who loves cats. If you want to learn more about Dreamy Wool’s cuddle soft chunky yarn, you can see it here.
Overall, these adorable crochet cat blanket kits make excellent gifts for a baby shower, christening or if choosing the larger blanket…your sofa!
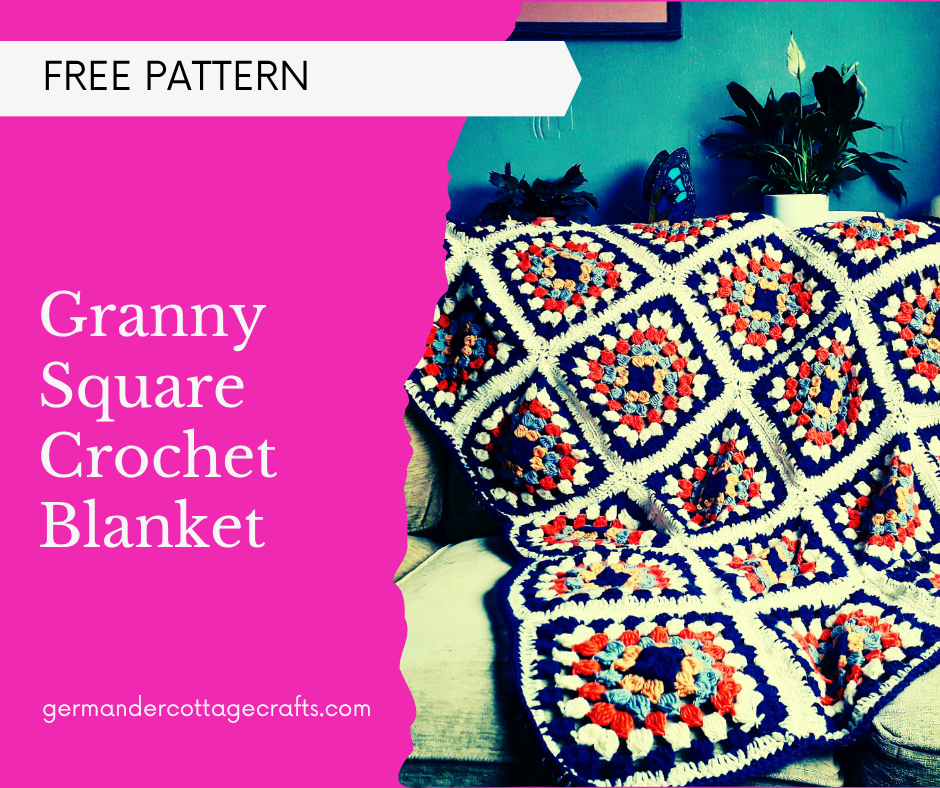
Crochet this beginner granny square blanket with a soft DK yarn for extra cosiness.
I’ve used Cygnet Pure Wool Superwash DK for my granny square blanket as it is soft, durable and feels lovely in a blanket.
In this article, I will guide you through making your first ever crochet blanket! Please note that I am a Woolbox affiliate, and if you choose to purchase the yarn via the links I have provided, I will receive a small commission at no extra cost to you.
How to crochet a basic granny square:
Although this video doesn’t show the exact same granny square as the one listed in the pattern, watching this video should help you to get the hang of it! All granny squares are the same in the general principle: start in the centre and grow each corner. It doesn’t matter what stitches you do, they’re all going the same way!
Stitches you need to know in order to make this granny square blanket.
Double crochet (UK Treble)
Abbreviations: Dc (US) Tr (UK)
The Dc is one of the most common crochet stitches you will come across. It’s speedy and tall. Your work will grow quickly.
Chain 3 and turn. Yarn over hook, insert hook, yarn over and pull through a loop. Yarn over and pull through 2 loops. Yarn over and pull through 2 loops.
When making a turning chain, always chain 3.
Start your practice by making a square of dc. Start by chaining 15. (12 ch + 3 ch for turning ch)
To fasten off: Just pull the last loop through and cut!
Beginner crochet has its hiccups. Here’s some troubleshooting:
My piece is getting narrower.
This could be a tension issue e.g. when you chain, you are pulling too tight and creating small, impenetrable loops. It could also be that you are forgetting your turning chain at the end. Another possibility is that when you turn the work around, you aren’t crocheting into the 4th chain from the hook. Always check to make sure you are starting in the 4th chain from hook.
My piece is getting wider.
The answer is usually that there are too many double crochet stitches either end. Sometimes when we turn the work around, we can miscount and put the next dc into the 3rd chain from hook, not the 4th. This then gives us an increase at the end of the work. For the first few rows, you really have to check where you are putting your hook. Count the amount of crochet stitches that you have too. Even the pros sometimes add an extra stitch without noticing!
My stitches don’t look tall enough.
Make sure that you are following the dc instructions. Yarn over before inserting the hook every time.
I can’t crochet into the chain,
This could be because your chain is too narrow. If you are pulling the yarn too tightly (common with beginners) you won’t be able to use the chain. Try loosening your grip or use a hook 1mm larger when chaining.
My piece is starting to become rounded.
You are probably putting too many dc stitches into either end, and accidentally working into the sides rather than just across the top. Stop, take a deep breath and start again. Crocheting when you are tired or distracted isn’t worth it. Trust me! I’ve done it many times.
Master granny squares with these tips:
Tips:
Crochet patterns are always written with abbreviations. Make yourself familiar with the glossary on a pattern, as it will explain what each abbreviation means.
If preferred, you can keep track of where you are by marking each row/round with a pencil.
Always check patterns to see if they are written using US crochet terms or UK crochet terms. It makes a big difference!
If you are going to substitute yarn brands, make sure that the meterage on the ball is the same or similar. Check out my article ‘The best granny square yarns’ to find the substitutes I recommend.
Glossary
Ch(ain) : Make a chain. Insert hook, yarn over and pull through loop.
Ch(ain) space
Dc: Double crochet. Yarn over hook, insert hook, yarn over and pull through 2 loops on hook. Yarn over and pull through 2 loops on hook.
Dc5tog: Yarn over as though to make a dc. Insert hook, yarn over and pull through 2 loops. Leave remaining loops on hook (2 loops), yarn over, insert hook, yarn over and pull through 2 loops. Leave remaining loops on hook (3 loops), yarn over, insert hook, yarn over and pull through 2 loops on hook leaving remaining loops on hook (4 loops) yarn over, insert hook, yrn over and pull through 2 loops, leave remaining loops on hook (5 loops) yarn over, insert hook, yarn over and pull through 2 loops on hook, leave remaining loops (6 loops) on hook. Yarn over, insert hook, yarn over and pull through all remaining 6 loops on hook.
Sl st: Insert hook into chain, yarn over and pull through. No height should have been added.
Part 2: Starting the squares
What you will need:
Your chosen yarn in order of appearance. I have started with navy blue to match the blanket sample.
1 pair of scissors to cut the yarn.
A 4mm crochet hook, or the right sized hook for your yarn.
Round 1:
With colour A, chain 4 and sl st into the 1st chain (4th chain from hook) to make a ring.
Chain 2 (counts as 1st dc). Yarn over hook. Work dc5tog into the ring.
This is your first bobble stitch cluster.
Chain 2 (you may want to chain 3 if it seems too tight) and work 5dctog into the centre of the ring.
Repeat two more times. Sl st into top of 1st dc cluster to close the round.
Round 2:
Sl st across 1st dc cluster until you get to the 1st chain space.
Using clasp weft join, or by tying colour B to the strand of colour A, yarn over and insert hook into the chain space.Make a dc 5tog.
Chain 1 and work another dc5tog into the same chain space.
Chain 2 (or 3 if it is too tight/short) and dc5tog into the next chain space. Chain 1 and work 5dctog into the same chain space.
Repeat step 4 until you have 4 corners. Each corner should have 2 bobble stitch clusters. Sl st into the top of the first cluster to close the round.
Round 3:
At this point, you will now have to work a single crochet bobble stitch between corners. Look out for it!
Using clasp weft join, or by tying colour C to the strand of colour B, yarn over and insert hook into the chain space.Make a dc 5tog. Chain 1 and work another dc5tog into the same chain space.
Chain 2 (or 3 if it is too tight/short) and dc5tog into the next chain space. This should not be a corner.
Chain 2. Make a dc 5tog. Chain 1 and work another dc5tog into the same chain space. Chain 2.
Complete the round by repeating steps 7 and 8 until you finish the last corner. Sl st to join with the 1st bobble cluster of the round.
Round 4-6:
Using clasp weft join, or by tying the next colour to the strand of the previous colour, yarn over and insert hook into the chain space.Make a dc 5tog. Chain 1 and work another dc5tog into the same chain space.
Chain 2 (or 3 if it is too tight/short) and dc5tog into the next chain space. This should not be a corner.
Repeat step 11 (Repeat once more for round 5 and twice more for row 6).
Chain 2. Make a dc 5tog. Chain 1 and work another dc5tog into the same chain space. Chain 2.
Complete the round by repeating steps 10 and 11 until you finish the last corner. Sl st to join with the 1st bobble cluster of the round.
Using the border colour, chain 3 into the first chain space of the round. Make 2 more double crochet stitches.
Dc into the top of every following bobble stitch, and dc twice into every chain space (2 dc for corner chain spaces).
Sl st with the 1st dc of the round to close the square.
Repeat all steps a total of 24 times.
Joining your granny squares:
We join the squares using slip stitch (sl st) which is a crochet technique that you have learned already when making the granny square. The only difference here is that the slip stitches will become the seam rather than the end of a round.
When you use a slip stitch join, one side of the piece (right side) will lie flat and the other will have a ridge (wrong side) this is completely normal and is to be expected. Just make sure that you join all of your squares right side to right side and we won’t have a problem!
Place your two squares right sides together. The stitches should all lie parallel.
Working with outside loops only, sl st each st across to join. Make sure that you are only picking up the outside loops as this will affect the overall look of the square.
To join:. Starting at top right of the squares held together, insert your hook into the first outer loop of the square closest to you, picking up a loop. Insert your hook into the outer loop on the square furthest from you, picking up a second loop. 2 loops on hook. Now yarn over and pull through all 2 loops on hook. 1st slip stitch done.
Repeat this to the end ensuring that you have joined all stitches to the very corner of the square.
Join 4 squares together to make each panel. You should have 6 panels in total.
Making up:
You should now have 6 panels that consist of 4 squares each.
Join panels together using slip stitch. Take the time to ensure that all panels are right sides together when you are joining. The ridge should be on the wrong side of the blanket.
The finished blanket should be 4 squares wide and 6 squares long.
Border:
Working the border is simple. You do exactly the same as you do when you apply a border to each granny square.
The only difference is that you are making a dc into the dc below, just as you did when practising dc at the beginning.
Using the border colour, join the new yarn and chain 3 (This is the first dc). Dc in every stitch to the end. Sl st to join the round.
Repeat once more,
You can make your border as thick as you want. I made mine with 2 rounds of navy blue, but I could have easily done 3 or 4.
You can now block the blanket if you wish. Just ensure that it lies or hangs flat, and pin the corners to sharpen their angles.
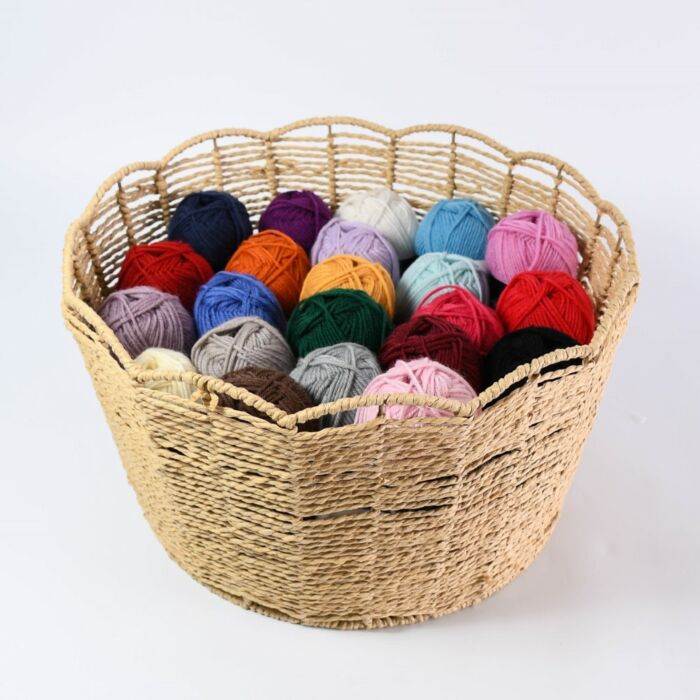
Here’s a round up of the best granny square yarn and granny square kits out there right now from UK retailers. These retailers do also provide international delivery, so do have a look if you’re reading this from somewhere else in the world!
I’m rounding up some of my favourite yarns for granny squares as well as blankets.
This article contains affiliate links. This means that if you choose to purchase from the links I have provided, I do earn a small commission at no extra cost to you.
First up: Granny square yarn? Is that a thing?
All yarn can be granny square yarn, it’s true. However, there is yarn out there more specifically tailored to your crochet needs.
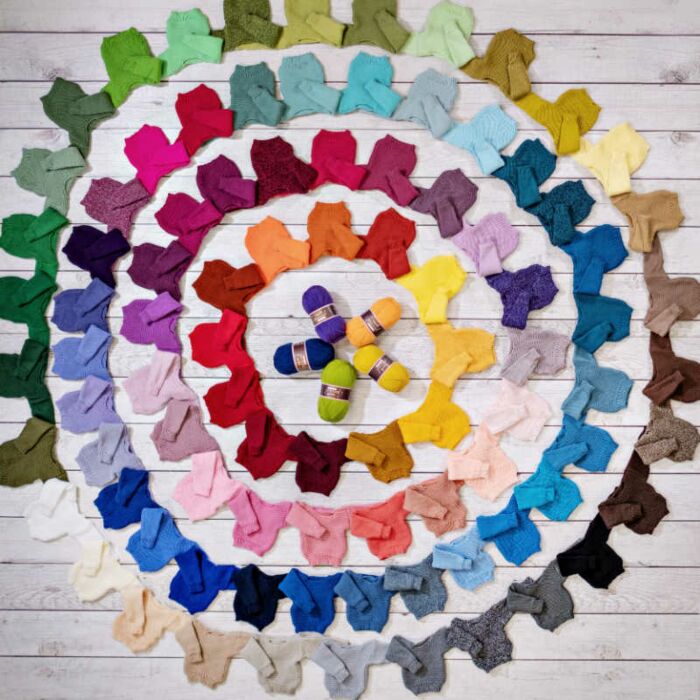
Taken quite literally, there is now a range of self-patterning yarns out there that can make the granny square colour changes so you don’t have to. Let’s have a look at them:
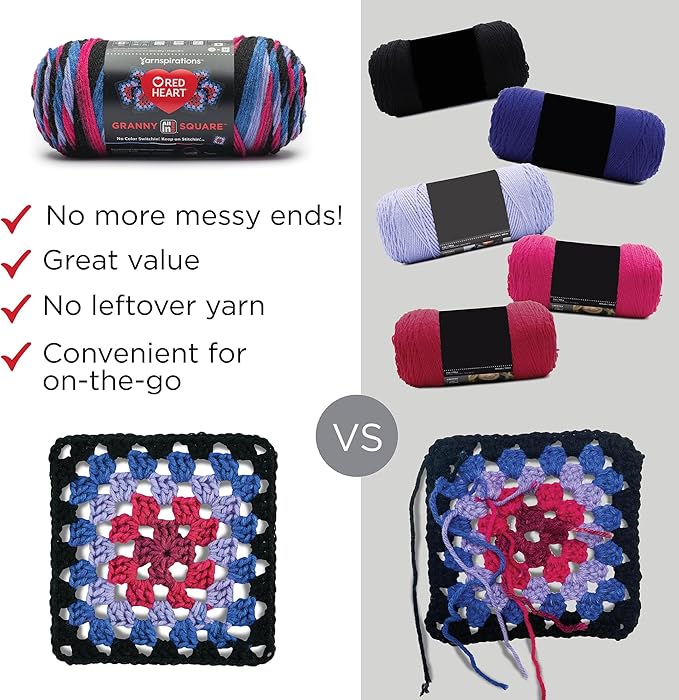
Here is a yarn that was designed just for granny squares. It is an interesting concept, but tension-allowing, you can get some granny squares out of this.
This image perfectly illustrates why this yarn is worth a punt. You don’t have the messy ends. However, you would have to match the tension exactly to get the same accurate colour change!
This yarn is available in a range of colours. This one is called Hyper Violet. It comes in a range of colours meaning no matter your preferred shades, there will be a granny square palette for you.
Key things about this granny square yarn:
It comes in a 250g ball.
It is a worsted weight/aran weight yarn, so will make a chunky granny square.
It’s made by Red Heart Yarns, who are a US brand.
This particular one that I’ve shared comes as a pack of 3, and it’s quite pricey compared to other yarns on the market.
Hanna’s verdict: don’t knock it ’til you’ve tried it, but I like the old fashioned method of joining new colours.
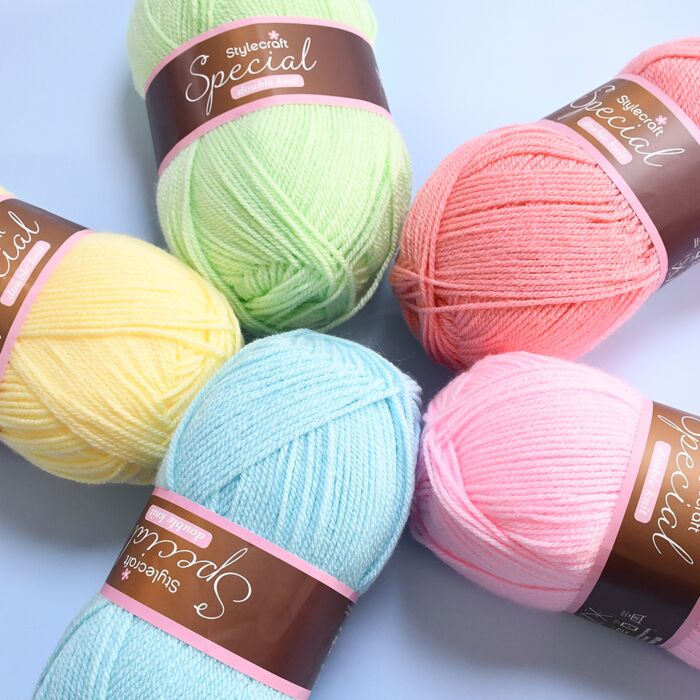
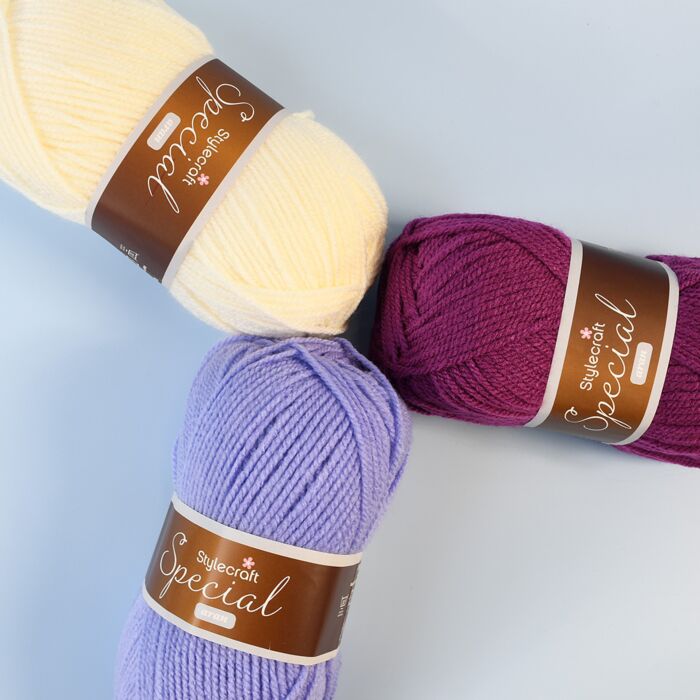
You can get this in just about every colour there is in the world. It’s a long time favourite for crochet as well as knitting. It’s an affordable, reliable yarn and it’s another 100% acrylic yarn. You may have to sew in or join the ends if you change colours, but you get so much more granny square out of each 100g ball.
Woolbox currently have Stylecraft Special DK in every colour under the sun and as well as this yarn, they also have several discounts, including ones you can claim with loyalty points.
Key things about this yarn:
Fibre Content
100% Acrylic
Washing Instructions
40 Wash
Brand
Stylecraft
Size
4mm Needles
Metres Per Ball
295m
Tension
22 stitches x 30 rows to 10cm square
Ball Weight
100g
Yarn Weight
Double Knit
Hanna’s verdict: The sky is the limit with this colour palette. I love it.
If you like your granny squares to work up quicker, you can also get Stylecraft Special in Aran. The colour palette for their aran range isn’t as vast as the DK range, but you can get every colour (just not a range of shades for each colour!)
This is a perfect granny square yarn for fuller-bodied blankets and throws. I’ve recommended acrylic here because of its machine washable qualities. If you were making a baby blanket for example, you can easily bung this in the machine and not end up shrinking it. It is therefore excellent for blankets that will end up in the hands of exhausted parents! It’s also excellent for picnic blankets and pet throws.
Key things about this yarn:
Fibre Content
100% Acrylic
Washing Instructions
Machine Wash 30, Cool Tumble Dry
Brand
Stylecraft
Metres Per Ball
196m
Tension
18 st x 24 rows
Hook/Needle size
5mm
Hanna’s verdict: This yarn is just as soft and durable as its DK cousin. I love that it’s a little bit thicker, helping me make more granny squares in front of the telly!
This is Lovecrafts’ own brand yarn and it is a worthy rival to Stylecraft special for how durable, washable and soft it is. It is also a 100% premium acrylic yarn and makes vibrant, solid granny squares for throws, cushions and more.
See below for blanket patterns featuring Paintbox Simply yarns. This is an excellent granny square yarn in an equally vibrant palette and huge range of colours.
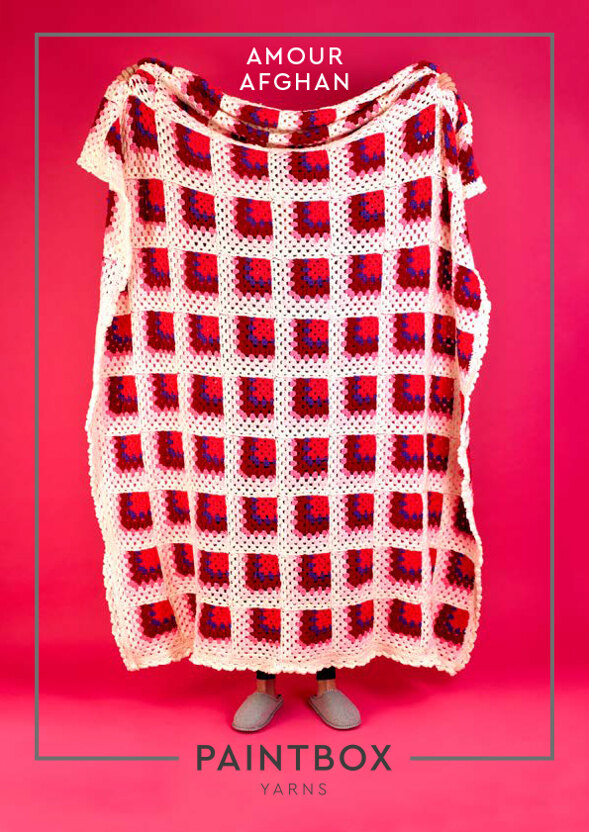
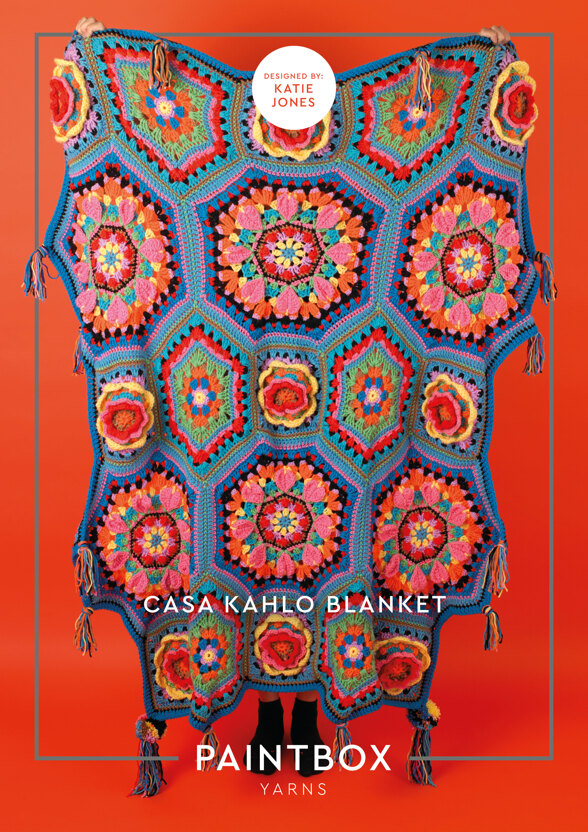
You can get the pattern and yarn for this blanket in the warm Passion Rouge or the cool Romance Blue. This kit contains absolutely all the yarn you’d need for this granny square blanket.
Crochet kit for Paintbox Yarns Simply Chunky Casa Kahlo Blanket. Bursting with folk-inspired granny patterns, Katie Jones’ Casa Kahlo Blanket is a rainbow of colour encased in blues. Granny octagons and hexagons full of bobbles, hearts, clusters and overlay flowers are brought together with coloured seaming and this heavenly blanket of colour is the perfect antidote to low spirits and chilly afternoons.
I realise that this is not technically a granny square throw but if you know how to make a granny square, you can crochet this amazing blanket!
Disclosure: This post may contain affiliate links, meaning I get a commission if you decide to make a purchase through my links, at no cost to you.
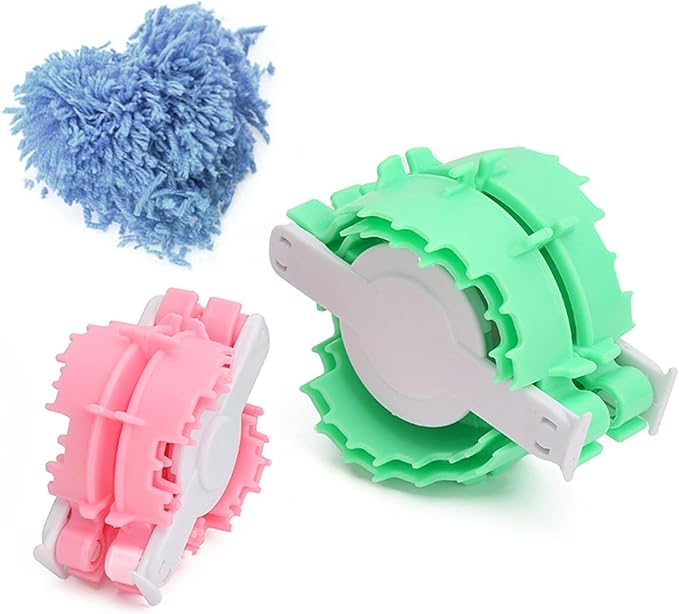
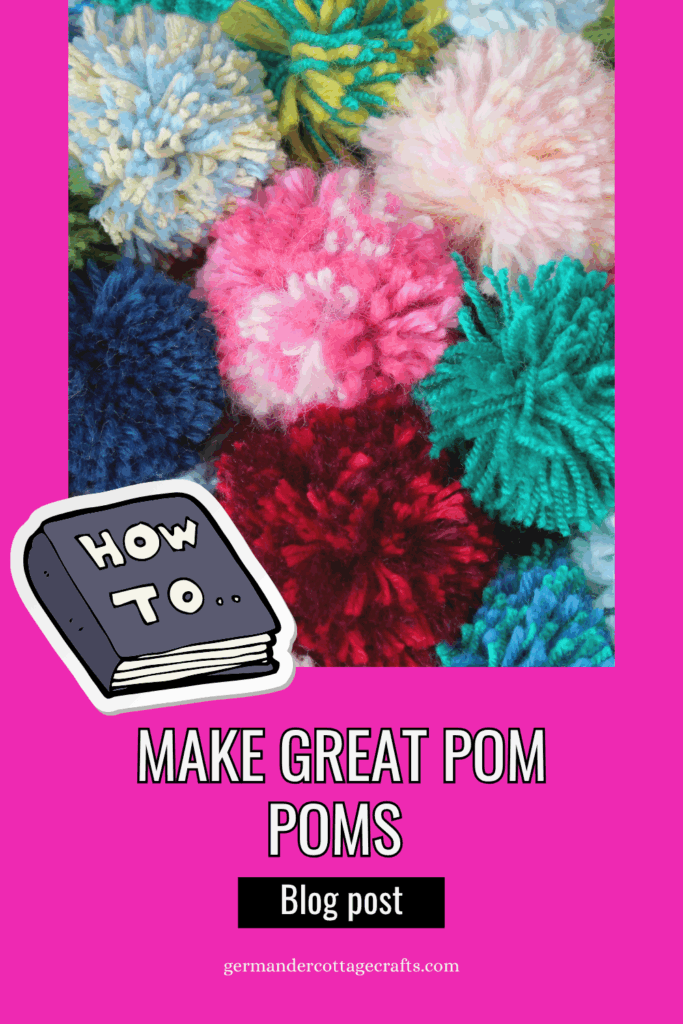
In this post I’m going to show you how I make perfectly round, full pom poms for hats and other craft projects. Pom poms can be notorious for falling apart or falling off after a few wears but I’m going to show you how I make them tightly, securely and in a way that ensures they’re full and easy to attach.
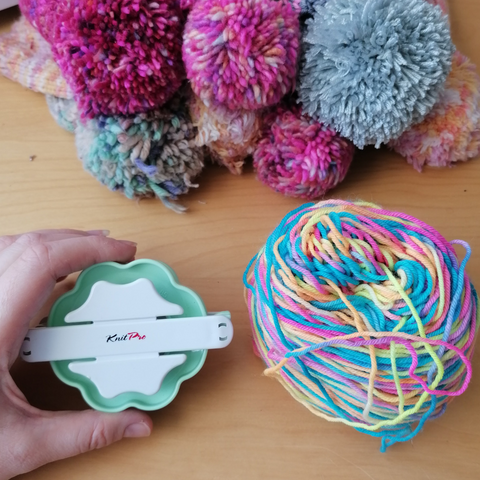
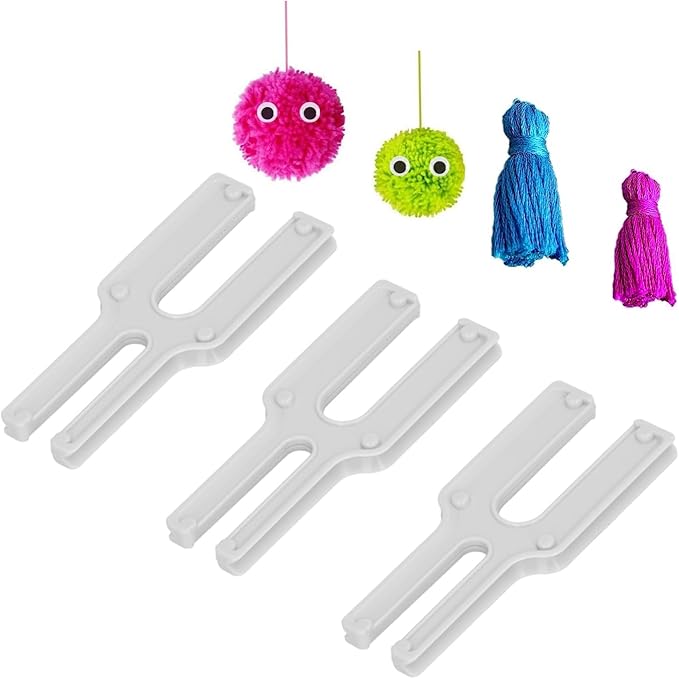
I’ll also show you the tools I recommend for making your own pom poms with a standard pom pom maker or a novelty style pom pom maker.
First, let’s talk about what you will need and why.
Do I need a good pom pom maker?
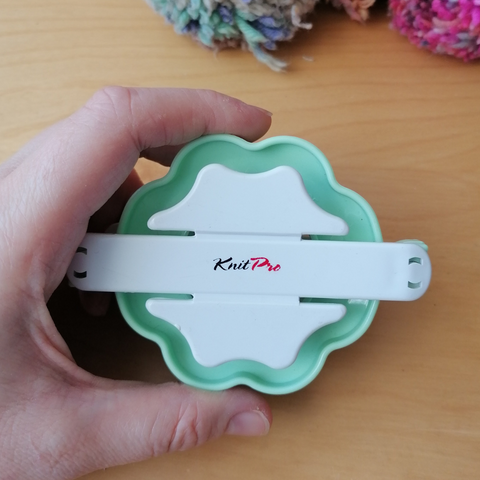
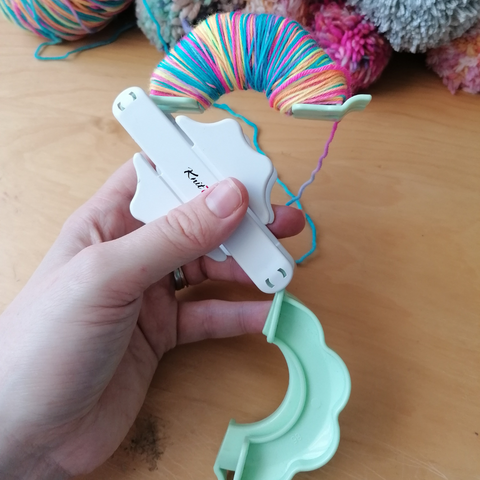
This is entirely subjective as I believe the technique is more important than the kit you use but saying that, using a great pom pom maker will help. I’m using a Knitpro pom pom maker for this tutorial. You can use two pieces of card if you would prefer but this method I have used here is the best way for me. I’ve made several pom poms over the years and I keep coming back to the pom pom maker because:
1. It’s accessible.
2. I don’t need to find new cardboard each time I want a pom pom.
3. It’s ready to use every time you need it.
Here’s my favourite pom pom maker, the Knitpro (known as knitters pride in the US) maker. Click here to shop for the pom pom makers that I used.
Pom poms are always shown as very fluffy, poofy additions to handmade hats. I’m going to show you how to make the best pom pom you can.
Here’s what you actually need to make a great pom pom:
1. A pom pom maker. You can use any maker (I’ve recommended some in this guide). Just choose something that you find easy to use.
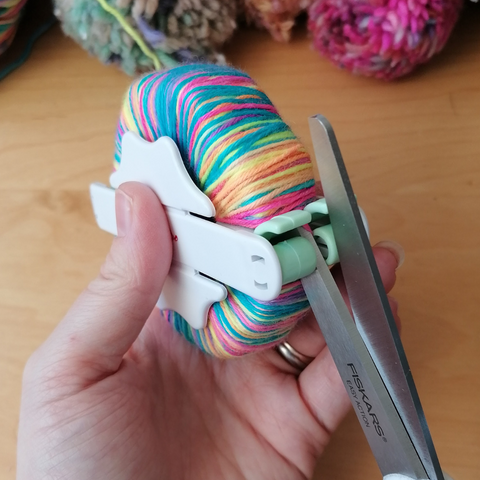
2. Sharp, sharp scissors. The best scissors for this job are fabric scissors. I used Fiskars scissors which can be found here.
3. A darning needle.
4. At least 25g of good quality yarn.
Why is yarn important?
How the yarn has been plied (how many strands were twisted to make the yarn) will matter when it comes to making pom poms. For example, a 2ply yarn (as in, plied twice, not 2ply weight) will tend to be looser with a roving texture. This doesn’t make for good pom pom yarn as it can come apart when you are pulling tightly and wrapping it around the pom pom maker.
The higher the ply, the stronger the yarn.
For this tutorial I am using 50g of 4ply yarn. It’s a merino yarn with 25% nylon and it is known as a good all rounder and is plied to ensure that it does not easily break when it meets some tension.
You need really strong yarn as you want something that can be pulled tightly without breaking. The fabric scissors will handle them when you come to cut your pom pom.
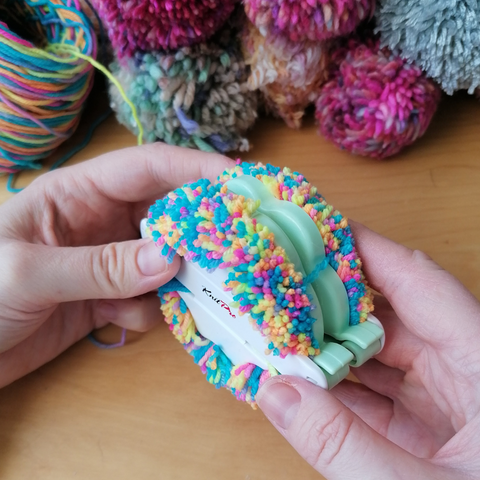
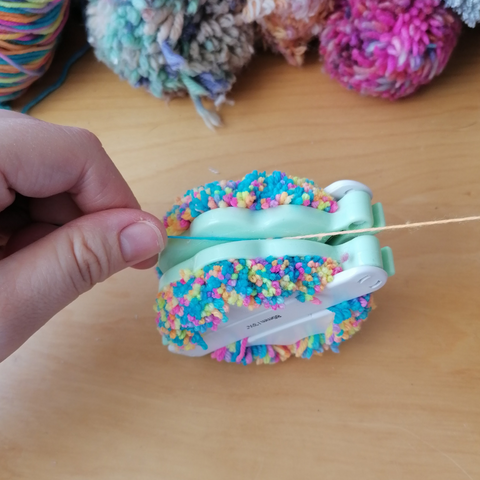
How to make a pom pom, step by step.
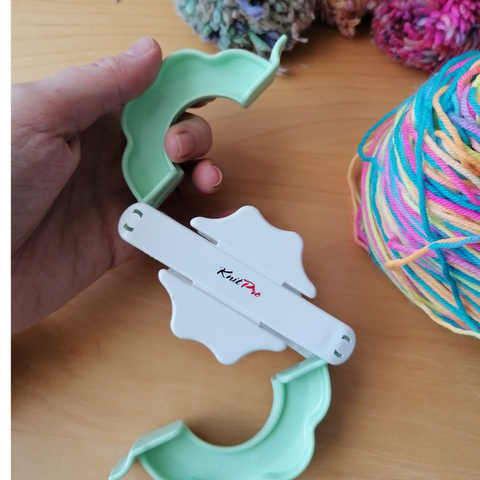
Step 1:
Set up and open up your maker. You should have received instructions for this in your package.
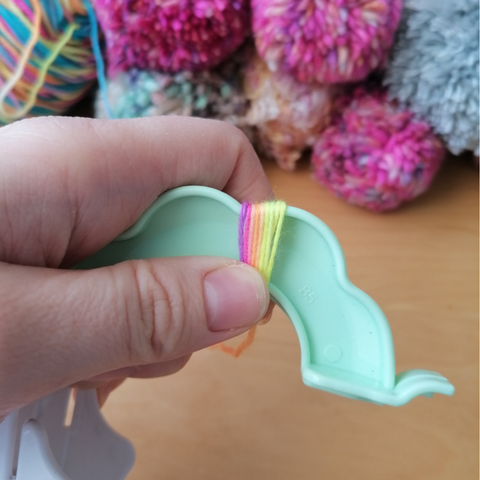
Step 2:
Using your thumb to hold the tail end of the yarn in place, start winding back and forth until the arm is covered. It can take a while, but be patient. It’ll be worth it!
Step 3:
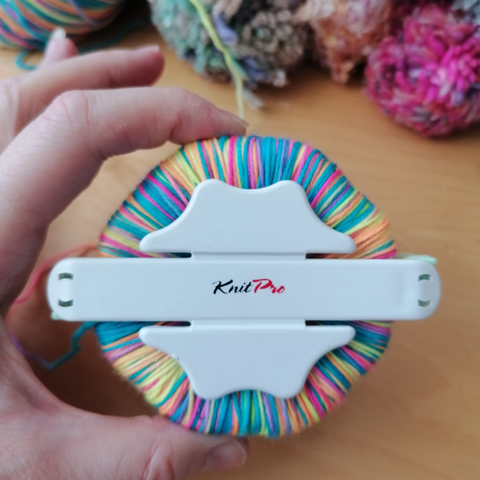
Wind the yarn until the hard edges of the maker are softened. At least 1mm of yarn thickness required. You shouldn’t be able to feel the edges of the maker when you press it between your thumb and forefinger.
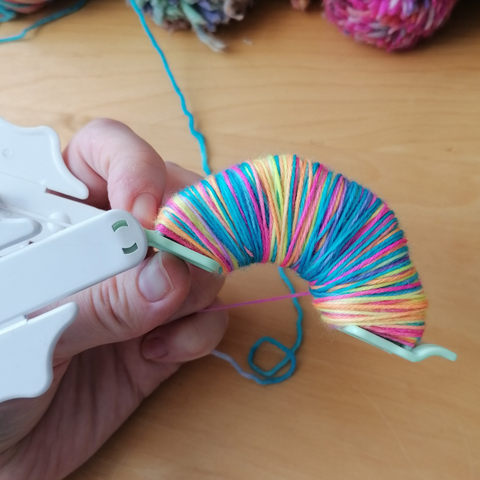
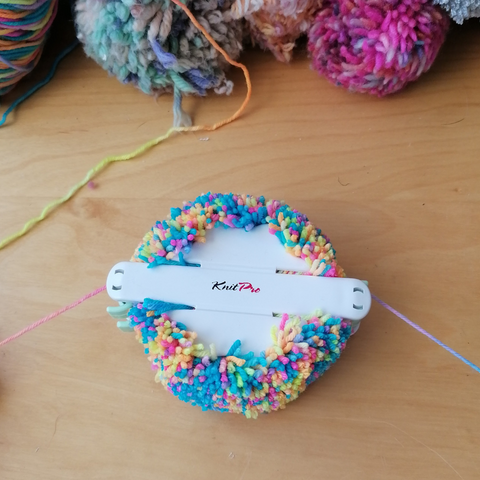
Step 4:
Open up the other pair of arms and start wrapping yarn around them.
Step 5: Cover the second pair of arms in the same way.
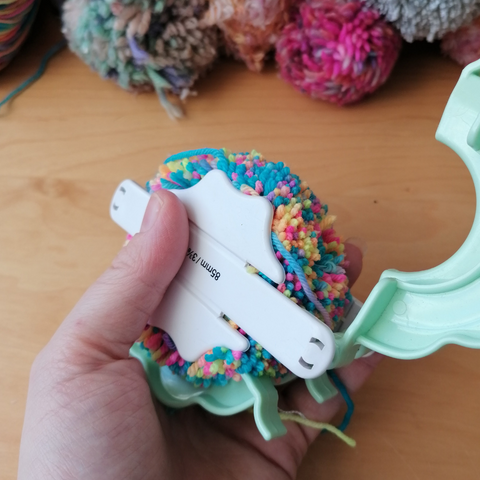
Step 6:
When you’re happy with the thickness of the yarn wrap, it’s time to cut.
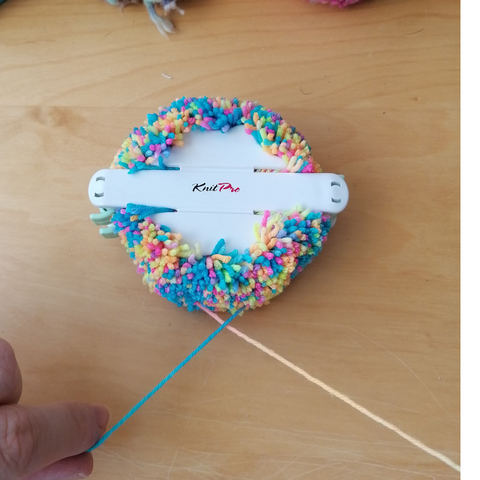
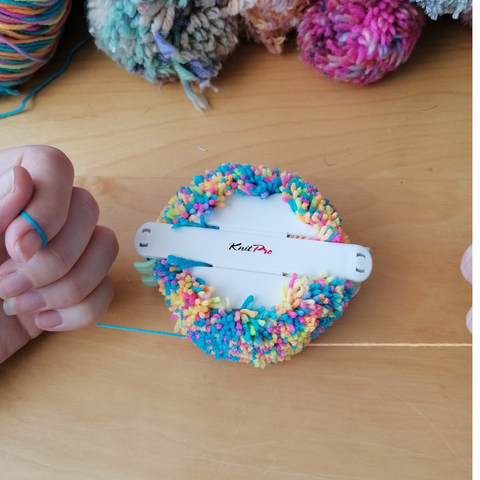
Step 7:
Take your fabric scissors and cut, making sure that your scissors are placed in the groove of the maker. Cut all edges, making sure there are no uncut threads.
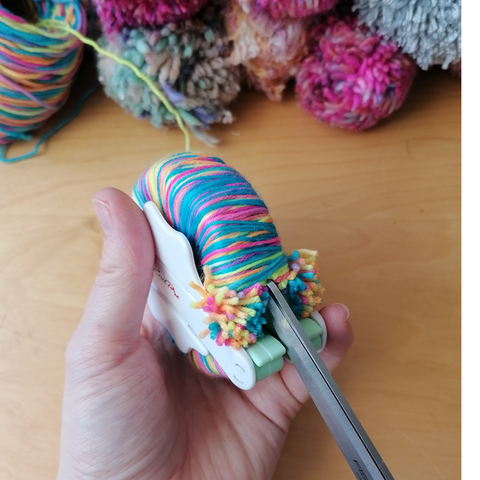
Step 8:
Cut about 30cm (12in) of yarn. Tie it around the pom pom. Come around and tie the other side too and then finish with another tie and a knot. Make sure that you have tied the pom pom as tightly as you can.
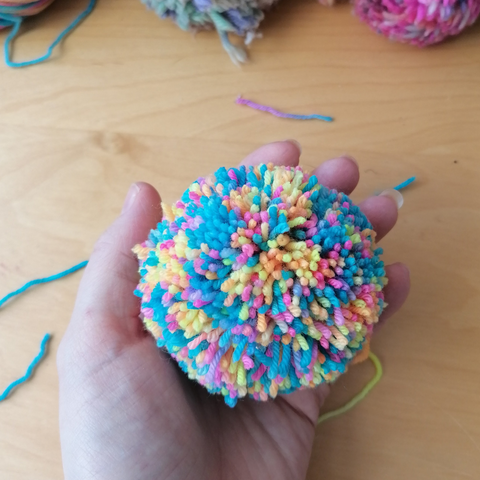
Step 9:
Release the pom pom and trim to size. Your pom pom should feel full, tightly secured and heavy.
If you want to know how to securely attach your pom pom to a hat, you can see the full video tutorial here:
Other makers to try in order to make great pom poms:
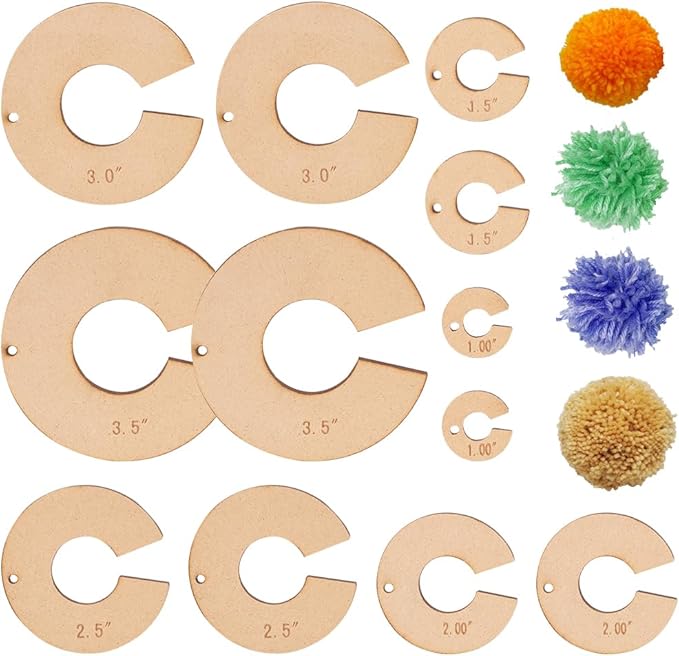
These pom pom makers are similar to the classic style that we make out of card and cardboard, but as they’re wood, they last longer! You get 12 pieces in the set so it’s great value for a lot of different pom pom sizes. What I also like about this pom pom maker set is how the pieces are flat, meaning they store flat!
This particular set is from woojfcang. These styles of maker have actually been praised for their ease of use for arthritic hands. There are no tricky parts to put together, making this pom pom maker one of the most accessible on the market.
What else I like about this style of maker is that it is a flat shape that can store really well in your craft bag. No pieces will come off or go missing, either. I have children, so I’ve lost half of my pom pom maker a few times!
This particular tool doubles as a tassel maker. It’s perfect for a range of crafts.
I not doubt for a second that with some trimming of a regular pom pom, you could shape your own hearts but having done that myself, it’s messy and if you’re not well practised in topiary or hairdressing, you can mess it up! I have a heart pom pom maker.
Bear with me on this: when you first cut and release the yarn from this pom pom maker, it will just look like a regular pom pom at first. You will see though that it is slightly uneven. You then trim it to shape without having to guess, because it comes with instructions!
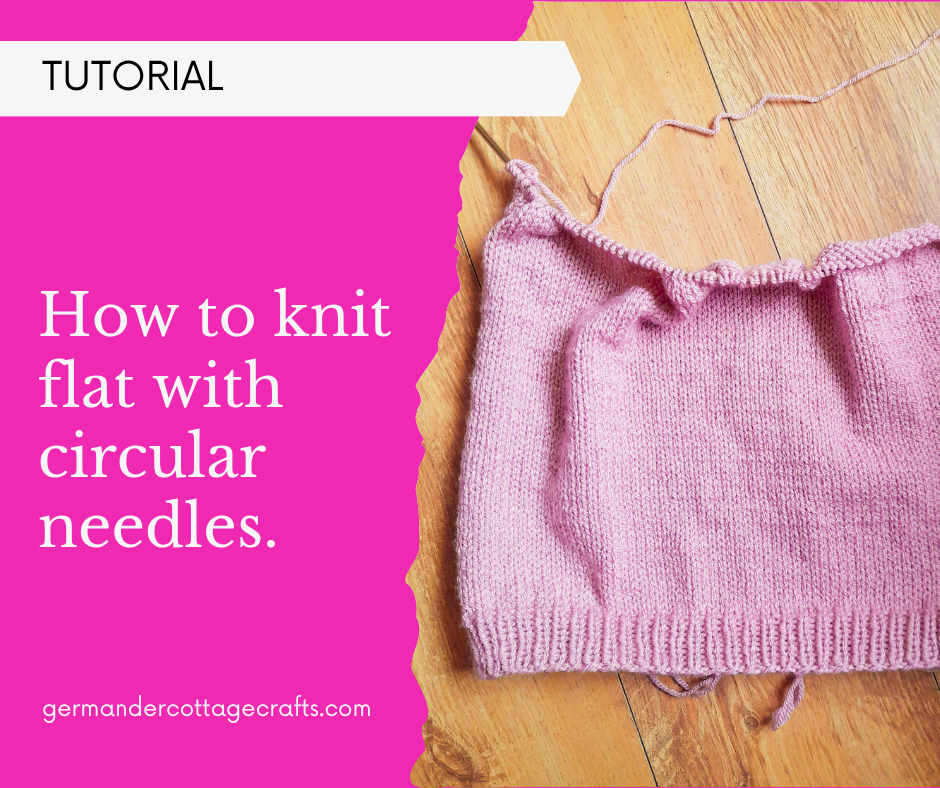
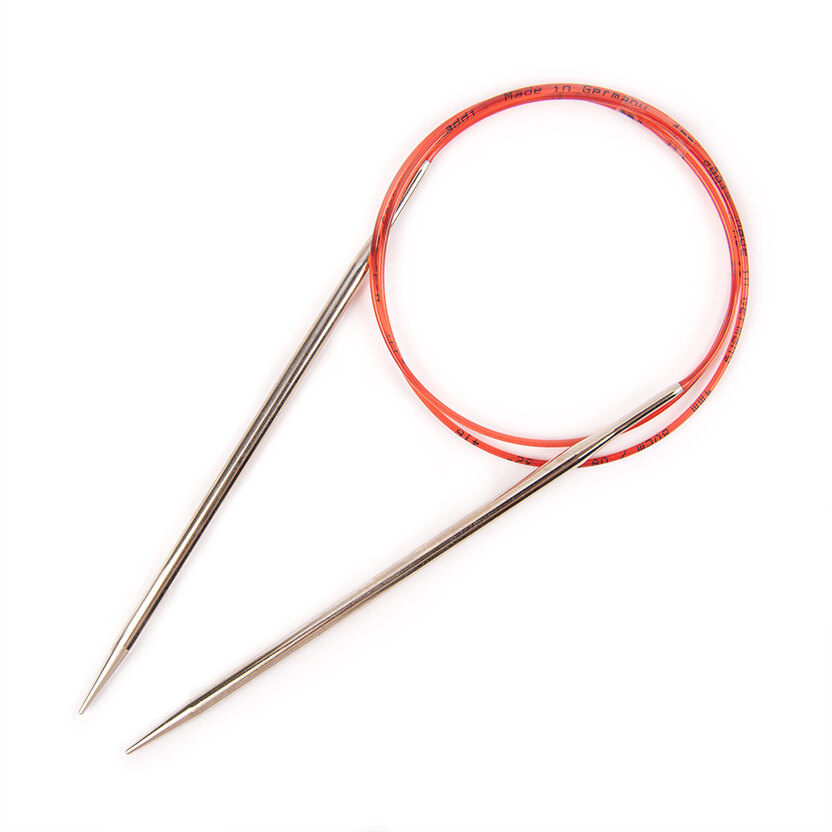
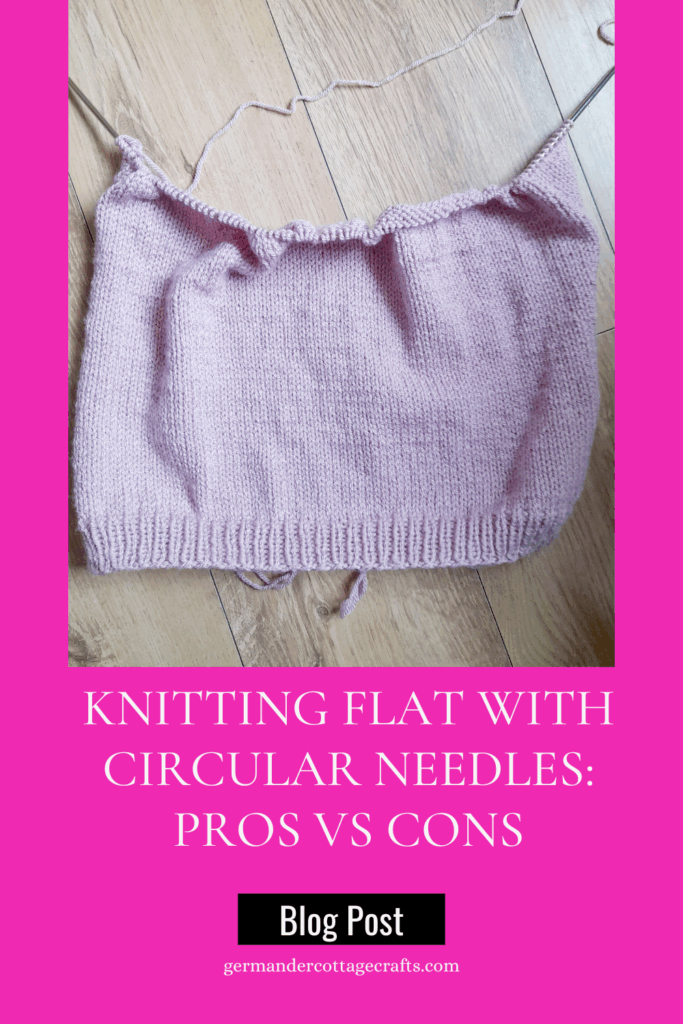
Can you knit flat with circular needles? Yes! You absolutely can.
I’ve seen this question come up several times in knitting groups. Even advanced knitters will ask, ‘can you knit flat on circular needles?’ and the answer is yes. In this blog post I’ll talk you through the pros and cons of circular needles, and how you can use them to knit anything! I will also guide you through the essential kit you need for knitting with circular needles.
This article contains some affiliate links. This means that if you choose to purchase via the links provided, I earn a small commission at no extra cost to you.
You can knit flat with circular needles, and here are a list of benefits you get from doing that:
Eases the weight on your wrists and arms.
Unless you’re an armpit knitter, you’ll probably start feeling the weight of your flat needles after a couple of hours of knitting. You can always take a break, but if you want to get back into it, using circulars can help take the pressure off. As your piece gets bigger, it can start putting pressure on your hands and wrists. Sliding the stitches onto circulars is a more efficient, lighter way to knit larger pieces.
You can knit larger things
If you have a long cord on your circular needles, you can knit anything! Knit men’s XXL sweaters; knit baby blankets right up to king size throws with circular needles. Little coats and cardigans also benefit from being knit on circulars, as you can hold the entire thing on the cord while you attach the sleeves or knit the collar. Look out for cardigans and coats that are ‘top down’ or ‘bottom up’ in their construction, and have fun knitting the whole thing on one cord without the need of several stitch holders.
Use the circular needles as stitch holders.
If you need a rest from the project you’re working on, you might find leaving it on circular needles more handy than finding a huge stitch holder. If you are using circular needles that have removable cords, it’s even easier! Unclip or unscrew the needles you’re using and knit something else with them. Your project will be safe on the cord.
Make your project more portable.
Knitting with straight needles is fine when you’re on a sofa at home, but if you’re trying to knit on public transport or on a park bench, you might benefit from knitting flat with circular needles. If you’re an English knitter like me, you’ll find that your arm action can cause your needles to catch everything around you! There’s nothing more tragic than seeing your stitches slide off the end because you got caught in a curtain and dropped the needle. I can’t guarantee that this won’t happen with circular needles, but it presents a much slimmer possibility of slip-offs.
Common misconceptions about knitting flat with circular needles.
“You can’t use circulars because you have to keep flipping your work.” No, no you don’t. You finish your row and start working back on the other needle, just like with straight knitting pins. There is no flipping involved unless you’re knitting a pancake.
“Circular needles aren’t suitable for beginner knitters.” Again, this is nonsense. It’s like with exercise: do something you enjoy and you’ll do it often. The same goes for knitting. If you learn to knit on circular needles, that’s fine. It’s perfectly doable. Circular needle tips come in every size out there, so I don’t see why a beginner couldn’t do it. Some knitters with mobility issues might actually find starting with some light aluminium circulars quite comfortable! The weight is taken out of it, and the cord can rest on your lap or on a cushion.
“Circular needles are only good for knitting in the round.” No, they’re handy for every project. Every project!
Drawbacks of knitting flat with circulars
There are only some, but you should still watch out for them:
They’re incredibly light so you could have trouble casting on.
Keep hold of them and keep an eye on them. Perhaps lay the needles on your lap or on a hard surface to make sure they don’t fall onto the floor. The casting on is the trickiest part, I find, as they’re not hard and heavy like straight needles.
Sliding on to the cable.
Stitches will slide on to the cable and this is where you need to manage your tension. If you’re casting on too tightly, those stitches won’t slide back up the needle so that you can knit with them! try and keep the stitches even and wide enough to fit onto the needles.
Dropping stitches.
As I said before, no one can guarantee that you won’t drop stitches.
Dropping stitches is sometimes really hard to avoid. I actually tend to drop a lot of stitches on straight needles as I seem to knock into them a lot or get them caught in my sleeve.
With circulars, you could drop the stitches simply because the circular cord has been weighed down too much by your work. This will then pull the needle downwards and out of the stitches! Keep an eye on it and work with your lap or a hard surface when you are starting out.
You will also drop stitches if you’re using a really smooth material to knit with. Aluminium can be very sleek, so just remember to be careful when you put you knitting down. You can also use needle stoppers or a connector, like the one that comes with addi click needles.
What to consider when choosing circular needles:
What is the project? This is an important question to ask as if it is socks, you’ll want needles that are lightweight and easy to port around.
What material do you like to use?
Bamboo and driftwood are popular for their lightness and warmth, but they’re prone to snapping if you’re not careful! For something small like a sock, you may want to try a metal needle as they can go really thin without risking breakage.
How pointy do they need to be?
If you’re knitting lace, you will want a sharper, more accurate tip on your needles.
What length do they need to be?
If you’re using magic loop for a hat, socks or gloves, you need to consider how long your cord is. Likewise, you need to consider how long the cord is if you’re wanting to simply fit the whole thing on it! Circular needles come in a range of cord lengths from around 40cm to over 150cm. The sky really is the limit.
I have always loved my addi click set. They’re just basic aluminium needle tips with a plastic cord, and they click into place! You just click and go. I think as with all interchangeable needles, they come with a risk of disconnecting mid-project. In the 12 years I’ve had these, I think they’ve only come off once, and I’m not even 100% sure that it wasn’t my fault!
Addi are a perfect introductory brand for knitters. I also use Addi lace and Addi turbo for my projects. I started out with an Addi Click set, and these days you can get them in all the material types. There is a set for every budget. My cords are a little bit kinked these days (they’re over 10 years old!) but if you can’t straighten them with hot water, you can find replacement cords easily in any of the main knitting supplies stores. What knitter won’t need a few extra cords?
Chiaogoo interchangeble needles. These were a birthday present a few years ago, and I love them. They’re sharp, strong steel and although they can sometimes unscrew themselves mid-project, this rarely happens! You get a little pin that helps you secure them nice and tight. The cords don’t kink as easily as my addi needles or knitpro needles. They have a coil inside that keeps them straight. Really handy to have. You also get a nice little ruler for gauge, as well as stitch markers, life saving cord stoppers and T pins.
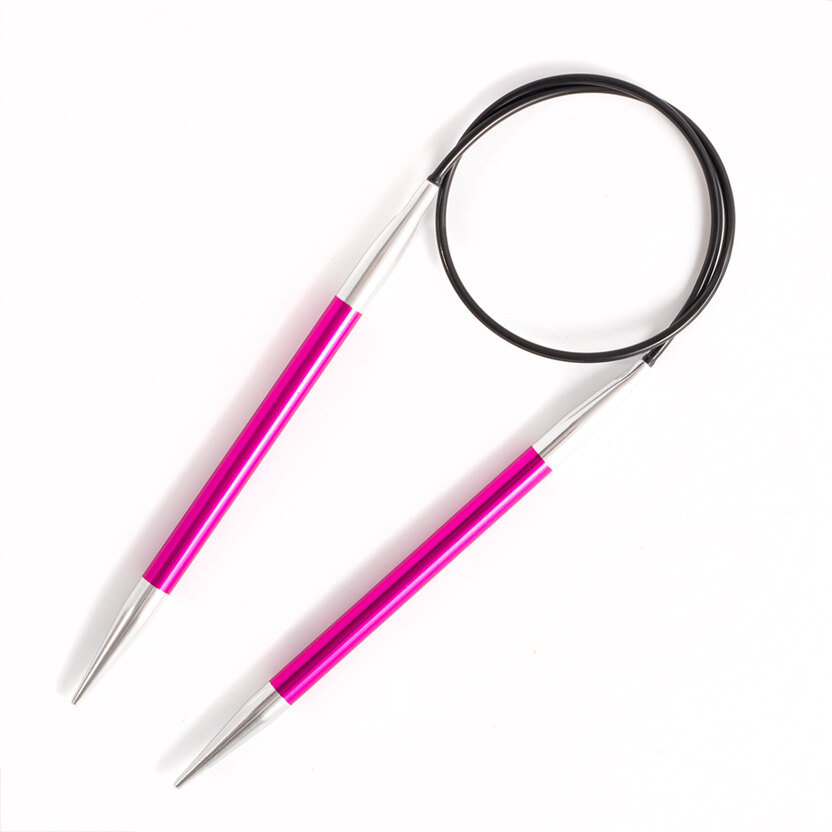
Knitpro Zing circular needles: These are so, so handy. Out of the needle types that I have, I think the Knitpro cords are the trickiest to keep straight. They can kink and knot in my knitting bag. Also, because the metal needles have a colour coating on them, they don’t help the stitches glide as easily. They have a good sharpness to the tips, so that’s great if you’re using them for a range of projects.
They come in a different colour for each size, so you really can collect them all. You can also get them in an interchangeable set:
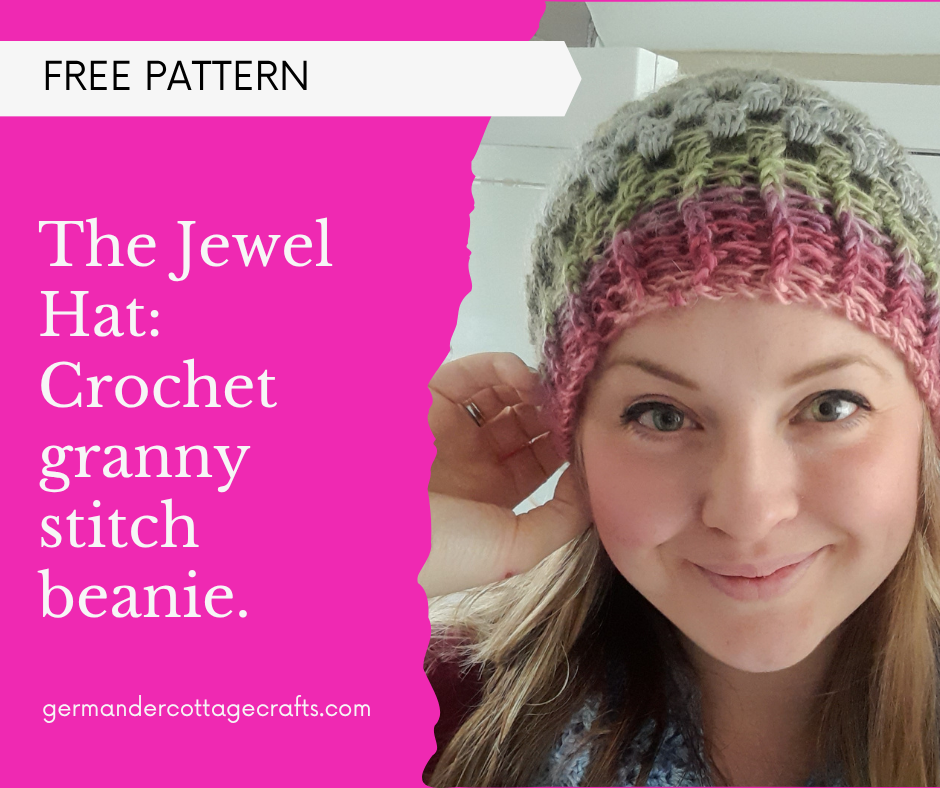
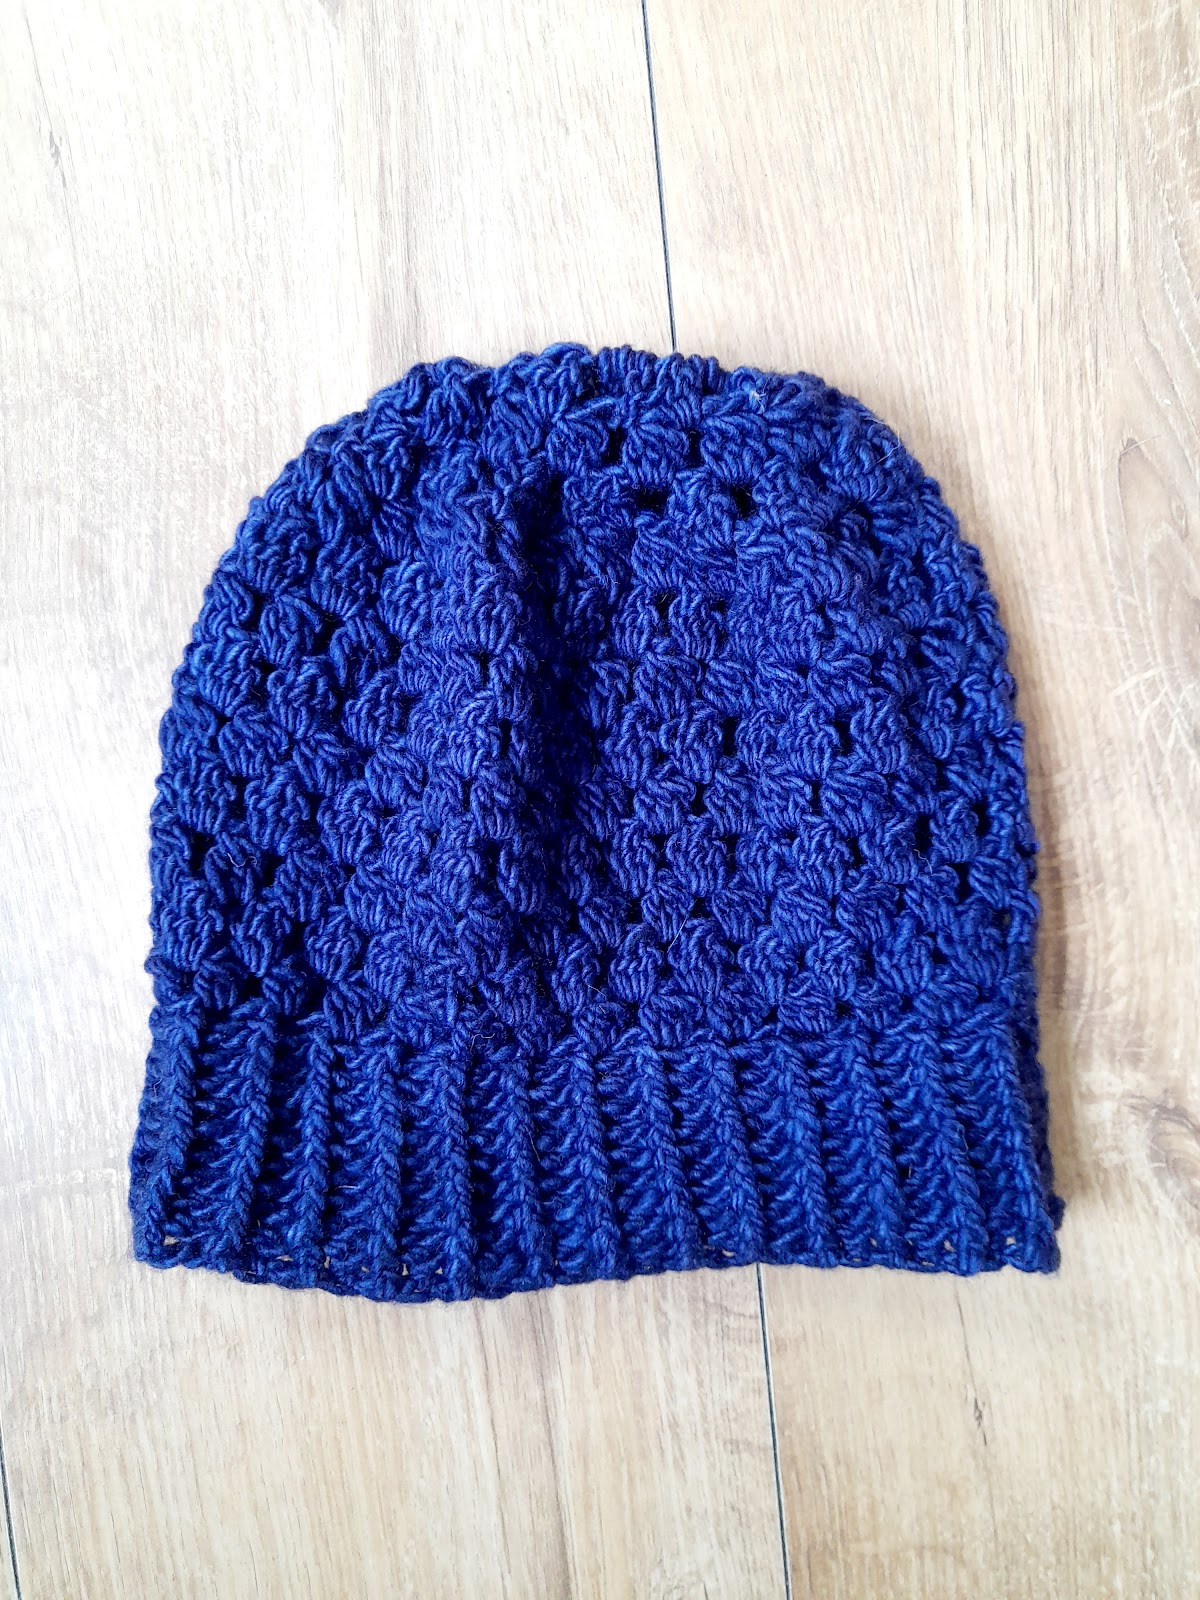
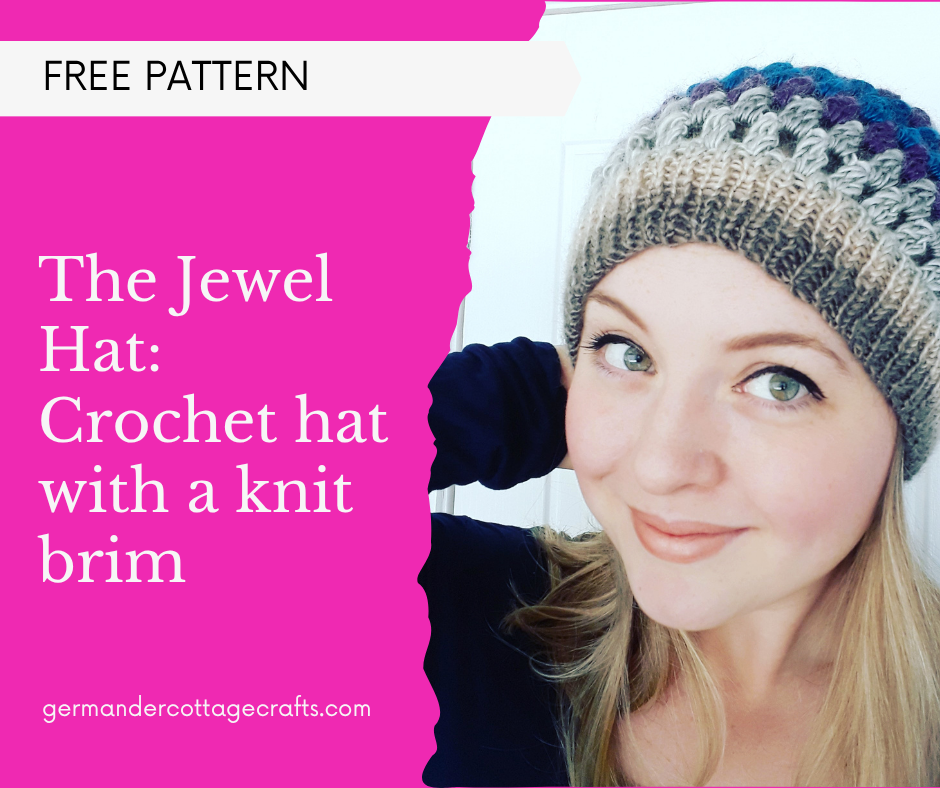
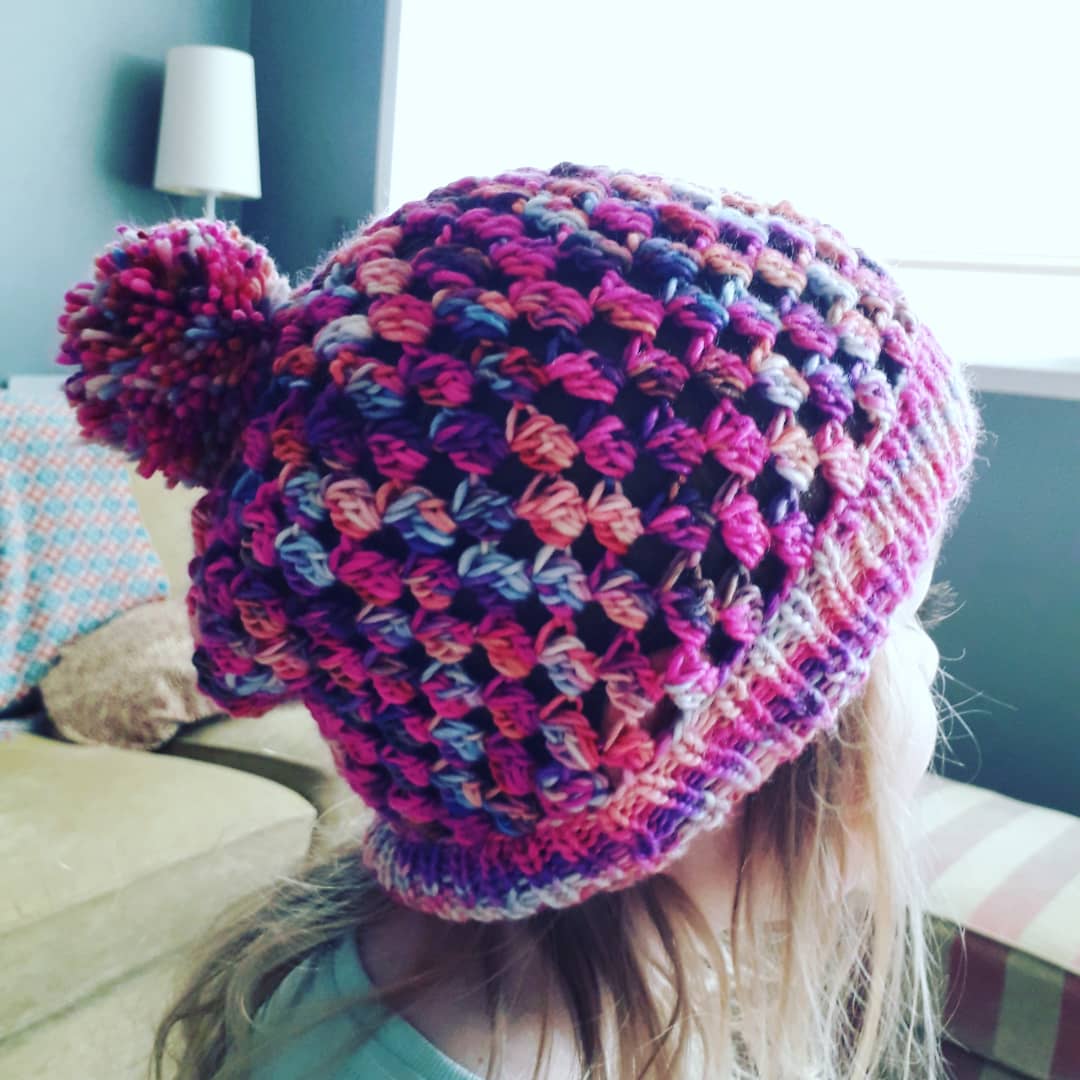
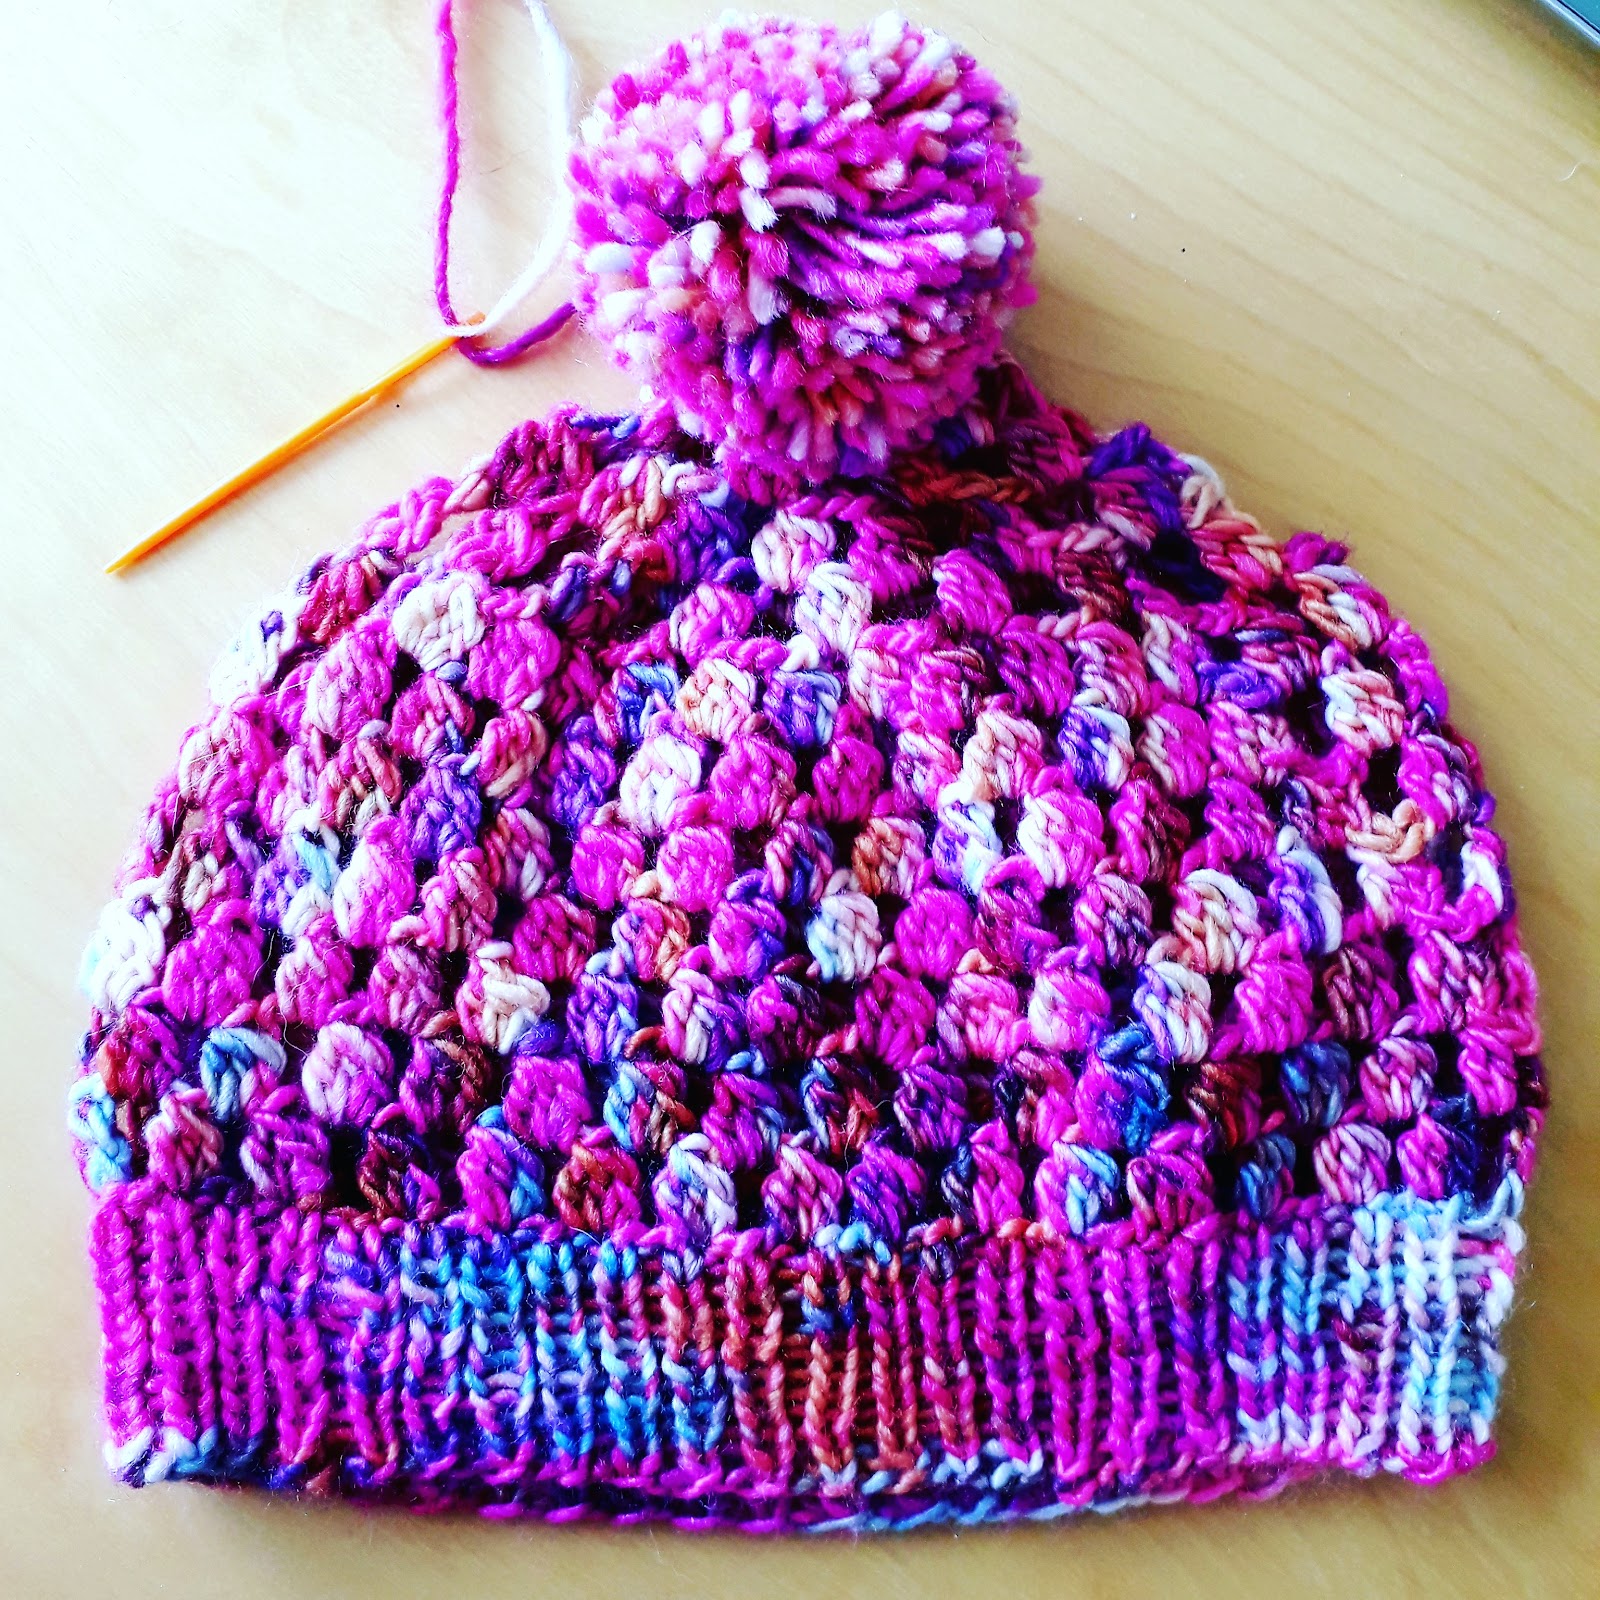
This is the little sister of the Jewel Hat, with the main difference being that the hat is 100% crochet construction. FpHdc and BpHdc create a ribbed brim and bobble stitches create clusters of jewel like shapes across the hat. Add a pom pom for extra enjoyment.
If you’d prefer an ad-free version of this pattern, the PDF is available on Ravelry.
This pattern contains affiliate links, meaning that if you do choose to buy any of the recommended supplies, I earn a small commission at no extra cost to you.
All terms are in US terms. If you don’t know your crochet terms, I have a handy guide here.
Materials
75g, (100g, 125g)/ 3oz/3.5oz/4oz of worsted weight yarn such as Malabrigo Worsted or Cygnet Boho Spirit. ( 240m/262yds/ 100g.) Measurement includes pom pom.
5mm/ I-9 crochet hook or size needed to obtain gauge.
Darning needle to weave in ends.
Pom pom maker (optional).
Gauge:
Rib: 16 Hdc sts and 24 rounds per 10cm (4in)
Body: 6 bobble stitches and 7 rounds per 10cm (4in)
To fit head size up to:
Small adult: 22 inches/ 55cm
Medium adult: 24 in/60cm
Large adult. 25 in/64cm
All crochet terms are US crochet terms unless otherwise stated.
Yarn over, insert hook from back to front to back around post of stitch below, yarn over and pull up a loop, yarn over and pull through all 3 loops on hook.
Bobble st
Yarn over, insert hook, pull through loop, yarn over and pull through 2 loops on hook, leaving 2 loops on hook unworked.. Yarn over and insert hook into same stitch, pull through loop, yarn over pull through 2 loops. 3 loops left on hook. Yarn over, insert hook into same stitch for a 3rd time, yarn over, pull through, yarn over and pull through 2 loops. 4 loops remain on hook. Yarn over and pull through all 4 loops.
Ch
Chain. Yarn over and pull up a loop.
Ch sp
The space or gap created between stitches.
Front post Hdc
Yarn over, insert hook from front to back to front around post of stitch below, yarn over and pull up a loop, yarn over and pull through all 3 loops on hook.
Hdc
Half double crochet. Yarn over, insert hook, yarn over and pull through. Yarn over and pull through all 3 loops on hook.
Hdc rib
Hdc in the front post of the first stitch, back post hdc in the second. Repeat to end.
Sl
Slip stitch
St(s)
Stitch (stitches)
Special decrease:
When decreasing for the crown, work your bobble stitch over 2 chain spaces:
Yarn over, insert hook, pull through loop, yarn over and pull through a loop, yarn over and pull through 2 loops on hook. (2 loops on hook)
Yarn over and insert hook into next ch sp, yarn over, pull up a loop, yarn over and pull through 2 loops (3 loops on hook).
Yarn over and insert hook into same ch sp this time, yarn over, pull through, yarn over and pull through 2 loops. Pull through all 4 loops on hook.
How to make your crochet beanie: Set up:
Chain 59 (63, 67) and turn.
Hdc into 4th ch from hook (counts as 1st Hdc) and Hdc in every st to end. Sl st into top of 1st Hdc to join the round. 56 (60, 64) Hdc sts in total.
Next round:
Ch 3. Work 6 (6,8) rounds in Hdc rib, using sl st to join rounds.
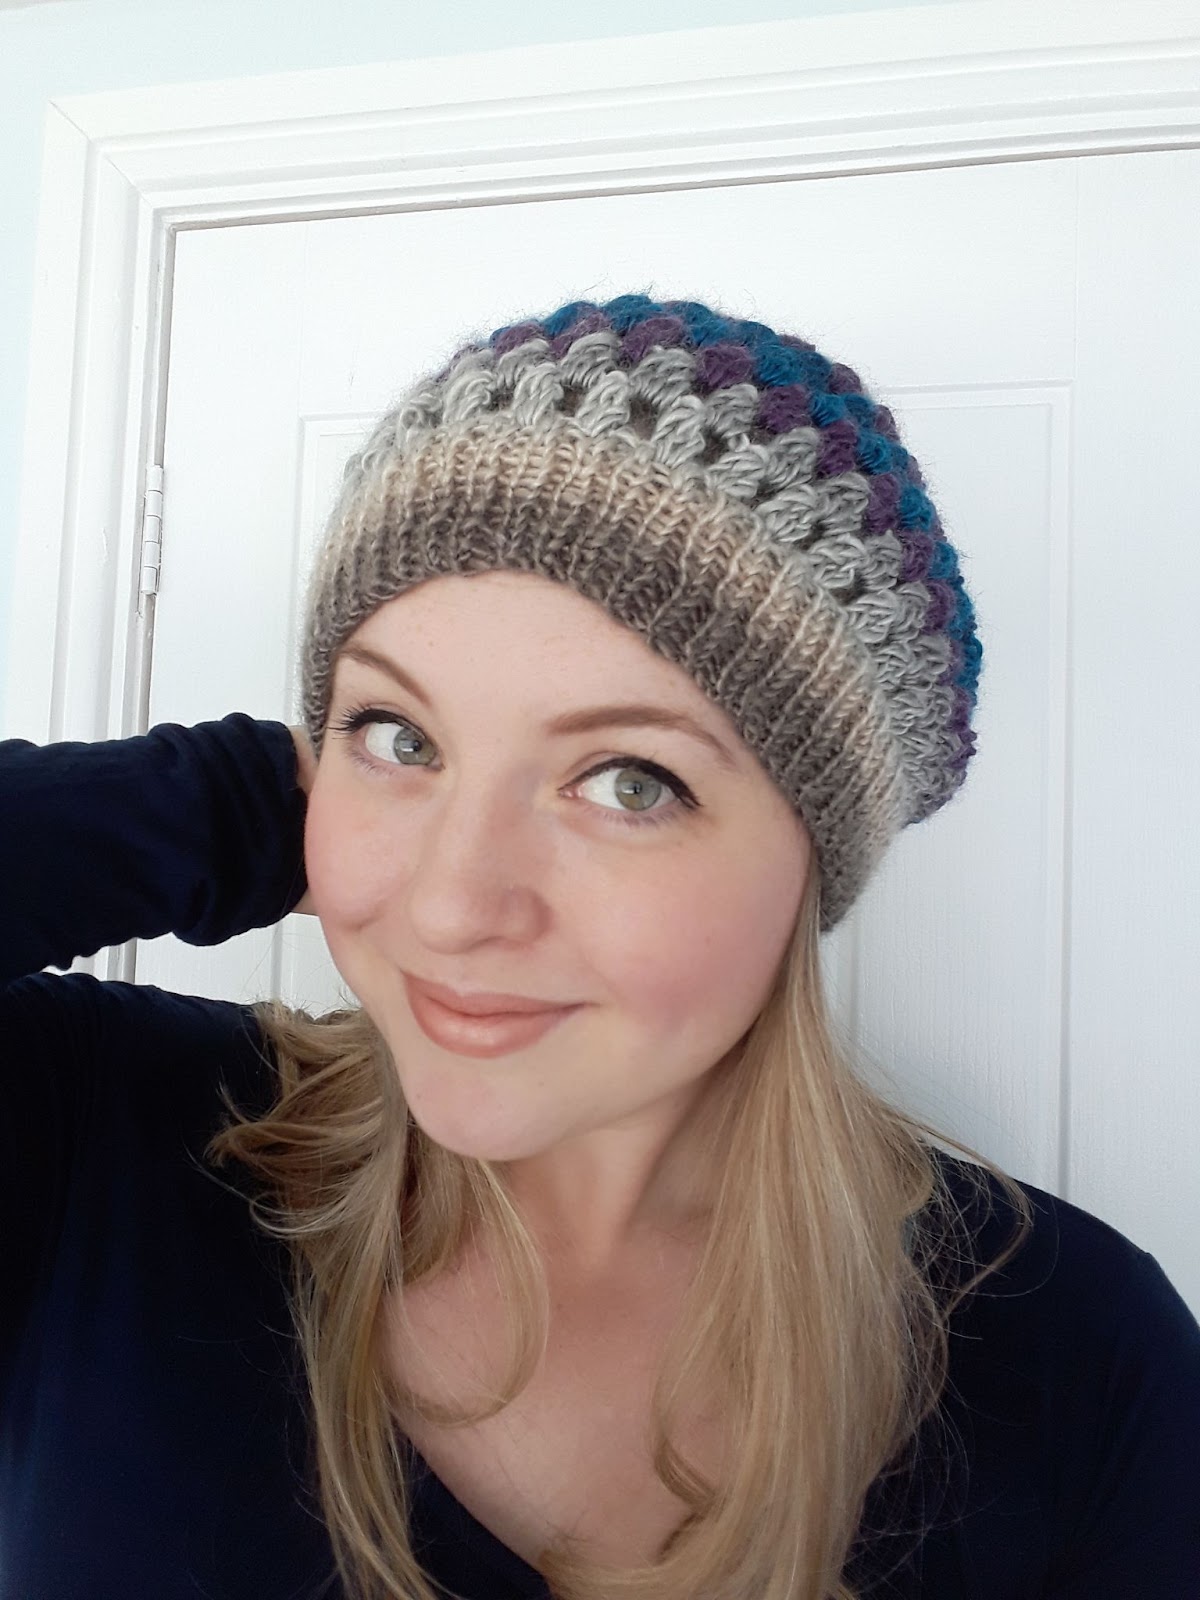
Jewel hat in largest size with Malabrigo worsted.
Round 1: Insert hook into top of last Hdc, Bobble st in same stitch (completes 1st bobble). *Chain 2, sk 1 ch, 1 Bobble in next st*. Repeat * to end. Join with first bobble using sl st. Turn.
Round 2: Ch 1 and Bobble in 1st Ch sp in ch sp. *Chain 2, sk 1 ch, 1 bobble in next st*. Repeat * to end. Join with first Bobble using sl st. Turn.
Repeat round 2 for 5 (6,7) more rounds or until hat measures 20.5cm/8in from 1st hdc round.
Crown decreases:
Decrease round 1: Work 1 Bobble over 2 ch sp. Repeat to end.
Decrease round 2: Work 1 round even. Join with sl st in 1st
Bobble.
Repeat last 2 rounds once more. Fasten off. Cut yarn leaving a long tail for sewing up.
Closing the crown.
Drawstring finish to close the crown:
With cut yarn, insert needle into top of every other chain around the hole. Pull to tighten. Fasten off. Weave in ends.
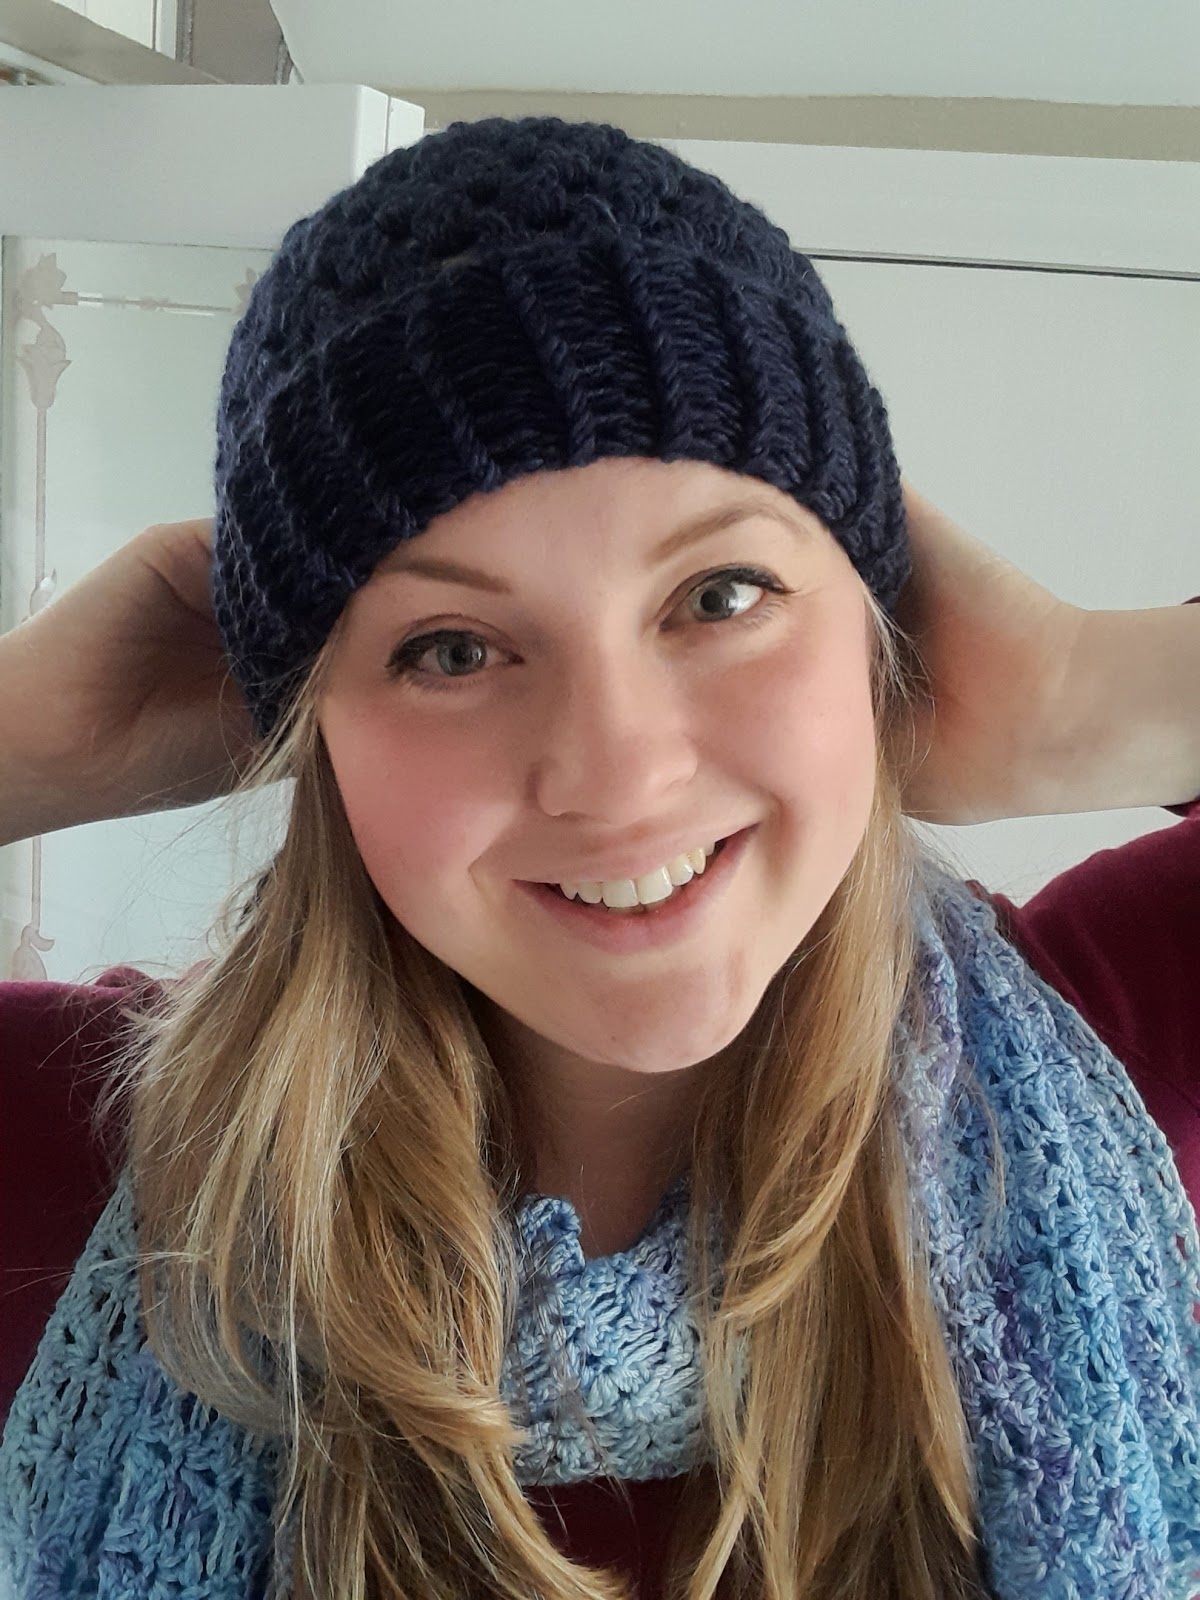
The Jewel hat is a crochet granny stitch beanie with a stretchy knit brim. If you don’t knit at all, there’s a crochet only version of this hat here. If you’d like to try this version, you can find the pattern below. If you’d prefer the ad-free PDF it is also available on Ravelry here.
This blog post contains affiliate links, meaning that any purchases made result in a small commission for me, at no cost to you.
This pattern uses US crochet terms. If you need a quick reference guide, there is one here.
Inspiration for this pattern
I love crochet just as much as I love knitting, and I thought it would be fun to combine the two in a single design. You can crochet rib to look just like knitting, but it is quite bulky, uses a lot of yarn, and it just doesn’t stretch as far as a knitted rib does. Because of this, I felt that a hat that combined knitting and crochet in this way would be really fun to make, and quick!
This hat is perfect for emergency hats, or gift knitting. You can whip one up in a couple of hours once you’ve knitted the brim. I love it. All of my kids have a Jewel hat, as do I! I hope you’ll love it too. It comes in several sizes so everyone in the family can have their own.
I used Cygnet Boho Spirit for my sample (main image) which originally used to say that it was DK on the label, but it sits somewhere in between DK and Aran.
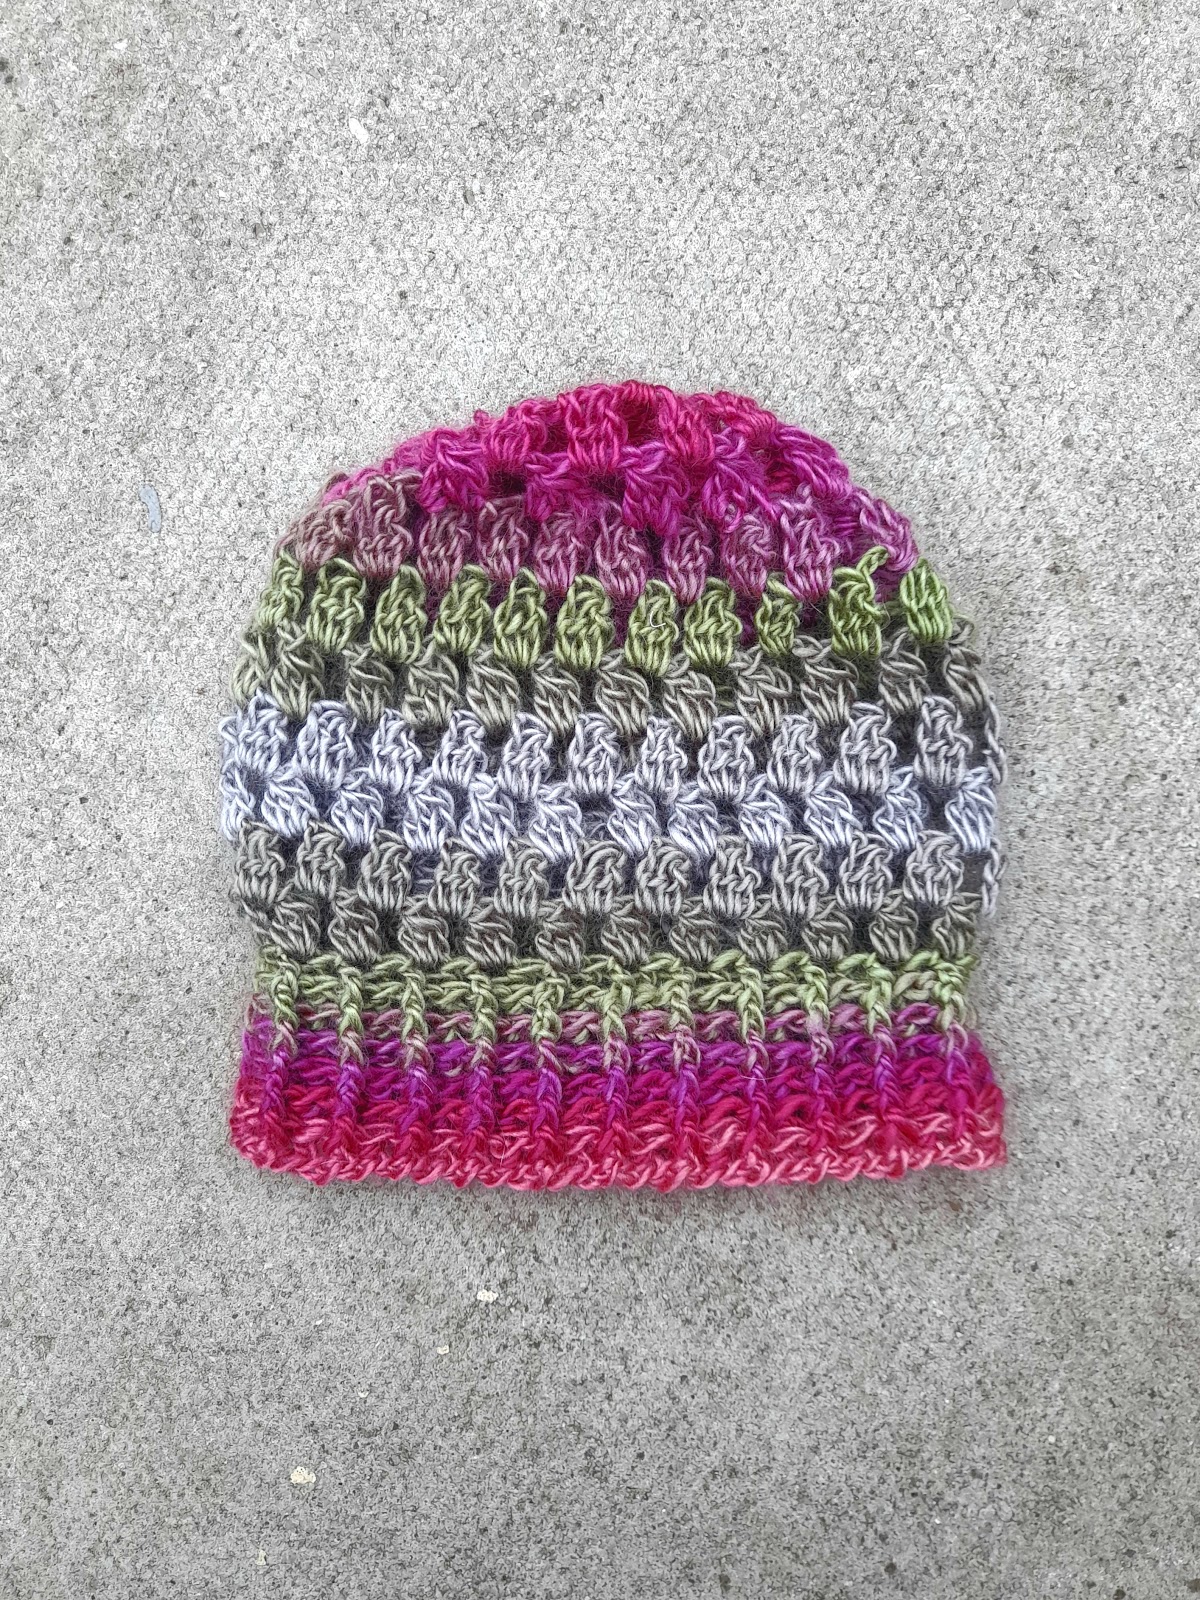
We all appreciate how cute and quick the granny stitch is, so here’s a hat that offers the best of this stitch.
A little bit about the Jewel hat: A granny stitch beanie with a knit brim.
The jewel hat is a cute, quick stash busting hat with a knitted rib brim and a crochet body. Sizes included are 12 months to adult large. The crochet stitches work wonderfully with variegated yarn and create clusters of jewel-like shapes but you can use any yarn you like.
The measurements given are for a slightly slouchy beanie. If you would prefer a more exaggerated slouch, go ahead and add to the length of the body before decreasing.
Sample shown in size 2 using Manos silk blend DK in Jamboree. This yarn seems to be discontinued, but Malabrigo has a suitable alternative here if you want a silk/merino singly ply.
Materials for your granny stitch beanie.
Worsted/light worsted weight yarn such as Cygnet Boho Spirit. Sample 1 uses Manos Del Uruguay silk blend DK in colourway Jamboree. Sample 2 uses Cygnet Boho Spirit in Chic. See table for yarn requirements.
4.5mm crochet hook or size needed to obtain gauge.
Gauge:
Knit brim: 1×1 rib 6 sts per 1in 2.5cm
Crochet body: 7 rounds and 6 stitches per 10cm/4in using 4.5mm crochet hook.
Size
To fit head
Yarn weight
Meterage/Yardage
1: 12m-3y
48cm/19in
50g/1.76oz
135m/148yd
2: 3-10years
51cm/20in
75g/2.7oz
200m/219yd
3: Small adult
53cm/21in
100g/3.5oz
270m/295yd
4: Medium adult
55cm/22in
125g/4.4oz
303m/332yd
5: Large adult
60cm/24in
150g/5.3oz
337m/368yd
All crochet terms are US crochet terms unless otherwise stated.
Glossary:
Ch 2: Make two chains.
Ch space: The ‘gap’ or space made by a chain. It is located below the chain.
DC: Double Crochet (US) known as Treble crochet in UK.
Dc cluster: Yarn over, insert hook, pull through loop, yarn over and pull through 2 loops on hook, leaving 2 loops on hook unworked.. Yarn over and insert hook into same stitch, pull through loop, yarn over pull through 2 loops. 3 loops left on hook. Yarn over, insert hook into same stitch for a 3rd time, yarn over, pull through, yarn over and pull through 2 loops. 4 loops remain on hook. Yarn over and pull through all 4 loops.
K1 P1 Rib: Knit one stitch, purl one stitch. Repeat to end.
Sl st: Insert hook into next stitch, yarn over and pull through stitch.
Instructions for your granny stitch beanie hat:
Using knitting needles, cast on 90 (96, 102, 108, 120) sts
Taking care not to twist stitches, join to work in the round and work 12 (14, 16, 16, 18) rounds in K1 P1 rib or to desired length.
Cast off in rib.
Using a 4.5mm crochet hook and the working yarn, insert hook into first stitch. Dc cluster. Chain 2 and sk 2 stitches. Repeat to end. Join with first Dc cluster using sl st.
30 (32,34,36,40) Dc clusters
Sl stitch across first Dc cluster. *Dc cluster in ch space, ch 2.*
Repeat until hat body measures 12cm/5in (14cm/5.5in, 15.5cm/6in, 16.5cm/6.5in, 17.5cm/7in) from cast on edge.
Decreases:
Start next round in same way as previous rounds. This time, instead of Dc cluster in next ch space, skip one ch space and Dc cluster in every other ch space.
Next round *Dc cluster,, ch 2* repeat * to end.
Work these last 2 rounds until 4,4,4,2,2,2 Dc clusters remain. Ch2 and sl st into nearest cluster or seam up with a darning needle to close hat. Fasten off and weave in ends.
Optional: Attach pom pom.
Top tip: Try the hat on before decreasing to see how you like the fit. Need more slouch? Work another 2 rounds.
Sample 2 photographed using Cygnet Boho Spirit in Chic.
Full video tutorial for this beanie hat pattern is here:
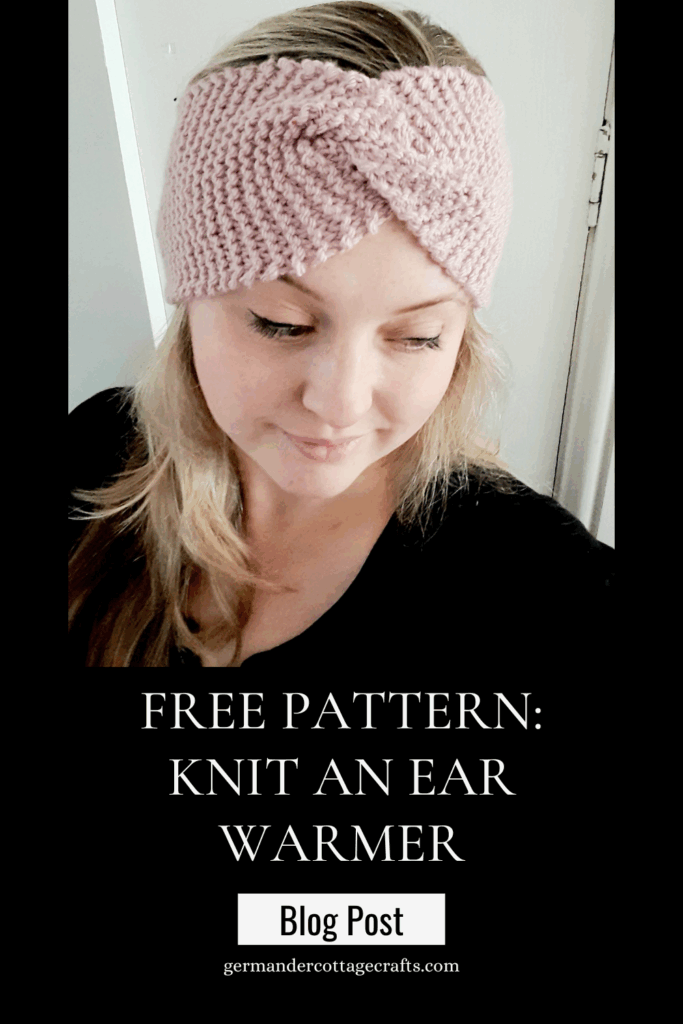
Beginner-friendly tutorial showing you how to knit an ear warmer. This really simple design is also perfect for knitters looking to get through their stash.
Need a quick gift for a friend? Knit an ear warmer!
Need to practice casting on and casting off, but you don’t want to knit something tedious like a long scarf? Knit an ear warmer!
Do you just want a quick, satisfying project? Knit an ear warmer.
You get my point. In this tutorial I will talk you through how to cast on, knit garter stitch and cast off.
What you’ll need for this project:
Aran weight yarn. I used Kiddies Supersoft Aran in Blush. You will need approx. 50g of yarn no matter which brand you choose.
5mm needles. In the tutorial, I’ve used 5mm circular needles (short, straight needles with a cord connecting them) but any needles are fine. Most beginners use straight needles.
Scissors, for cutting your yarn at the end.
How to knit an ear warmer:
This is a beginner pattern, meaning anybody who knows how to cast on and knit can make this item.
Help! I don’t know how to do these things.
Here’s a video showing you how to cast on. I use a cast on called the backwards loop method. This is the method that I was taught. If you don’t like this style of cast on, there are many others that you can try before you settle on what feels comfortable for you.
Written instructions for this cast on:
Take the tail end between your thumb and forefinger in your right hand.
With your left hand, take the working yarn between your thumb and forefinger.
Drape the yarn over the top of your next three fingers and round again so that the yarn just overlaps slightly.
Turn your hand towards you.
With your other hand (keep hold of the tail end), insert your knitting needle into the loop that is sitting across the top of your three fingers.
Pull the working yarn to tighten the loop over the needle.
Repeat to end.
Here’s how to knit the garter stitch. The garter stitch is the one we use to knit this ear warmer.
Cast on the desired amount of stitches. In this video I have cast on 18 stitches.
Insert the right hand needle into the front of the first stitch (it looks like a loop at this point) on the left hand needle.
Take the working yarn and wrap it around the back of the right hand needle and bring it down towards you so that it will sit between the left hand and right hand needle.
Insert your right hand needle back into the stitch and pull the stitch over the tip of the left hand needle onto the right hand needle.
Repeat to end.
How to cast off:
Written instructions for cast off:
Casting off is pretty straightforward as long as you bear this in mind: If your tension is too tight when you cast off, you need to use a needle that is at least 0.5mm thicker. If your tension is too loose, use a smaller needle.
Instructions:
Knit 2 stitches.
Using the left hand needle, pass the 1st stitch over the 2nd stitch on the right hand needle. 1 stitch remains on the right hand needle.
Knit 1 stitch from the left hand needle. 2 needles remain on the right hand needle.
Using the left hand needle, pass the 1st stitch over the 2nd stitch on the right hand needle. 1 stitch remains on the right hand needle.
Repeat step 3 and 4 to end.
Now that you’ve learned how to cast on, knit and cast off, here is the pattern for you to follow!
Knit an ear warmer:
Cast on 18 sts
Knit every row until piece measures 4 inches (10cm) less than your head width:
If your head measures 21 inches, Knit to 17 inches.
If your heard measures 22 inches, Knit to 18 inches.
If our head measures 23 inches, Knit to 19 inches.
Cast off.
Placing right sides together, fold the piece in half lengthways and then pinch each end so that they’re halved widthways. Slot the folded pieces together to create 4 layers and an S shape. Sew up all 4 layers together.
Cut yarn and fasten off. Turn right side out and admire your handiwork.
See the full video below to see a demonstration of the pinched twist and the finishing.